I have played a few battles with a local guy over the years, and he is a very skilled player. It is good to practice with him, and he is always respectful. Neither of us has played the old world yet, and it was good to get a game in.
Game Results and What I Learned
I lost miserably.
Sitting back and turtling isn’t a good strategy
Don’t rely on shooting
Be wary of enhancements
Units are always better on the charge
Magic matters.
The Game
Our lists are below.
| Dwarves | 2996 | Bretonia | 3000 |
| King with Shieldbearers | 316 | Duke on Hippogryf | 467 |
| Thane | 227 | Paladin | 118 |
| Engineer | 108 | Damsel | 90 |
| Dragon Slayer | 149 | Damsel | 60 |
| 21 Warriors | 255 | 20 Men at Arms | 104 |
| 18 Warriors | 225 | 20 Men at Arms | 104 |
| 9 Thunderers | 100 | 20 Men at Arms | 104 |
| 12 Thunderers | 130 | 20 Knights on Foot | 238 |
| 11 Longbeards | 166 | 6 Knights of the Realm | 165 |
| Cannon | 105 | 10 Bowmen | 70 |
| Cannon | 105 | 10 Bowmen | 70 |
| 3 Gyrocopters | 210 | 10 Bowmen | 60 |
| 12 Ironbreakers | 243 | 10 Bowmen | 60 |
| 12 Ironbreakers | 164 | 6 Knights Errant | 120 |
| 8 Slayers | 243 | 5 Yeomen | 80 |
| Flame Cannon | 125 | 5 Yeomen | 80 |
| Flame Cannon | 125 | 3 Pegasus Knights | 172 |
| 3 Pegasus Knights | 172 | ||
| 6 Questing Knights | 163 | ||
| Field Trebuchet | 100 | ||
| Field Trebuchet | 100 | ||
| 5 Grail Knights | 197 | ||
The game took us longer than it should, as it was our first time. Understanding winning and losing in combat as well as the amount of shooting and such. There were a lot of rules. I did read the rulebook, but holy shit, there were tons to remember.
We deployed it as such below, so I won’t get into too much detail. In my head, I wanted to have the warriors and ironbreakers make the frontline with small gaps for artillery and handguns. The table was just a little too wide, and the pegasi were too mobile.
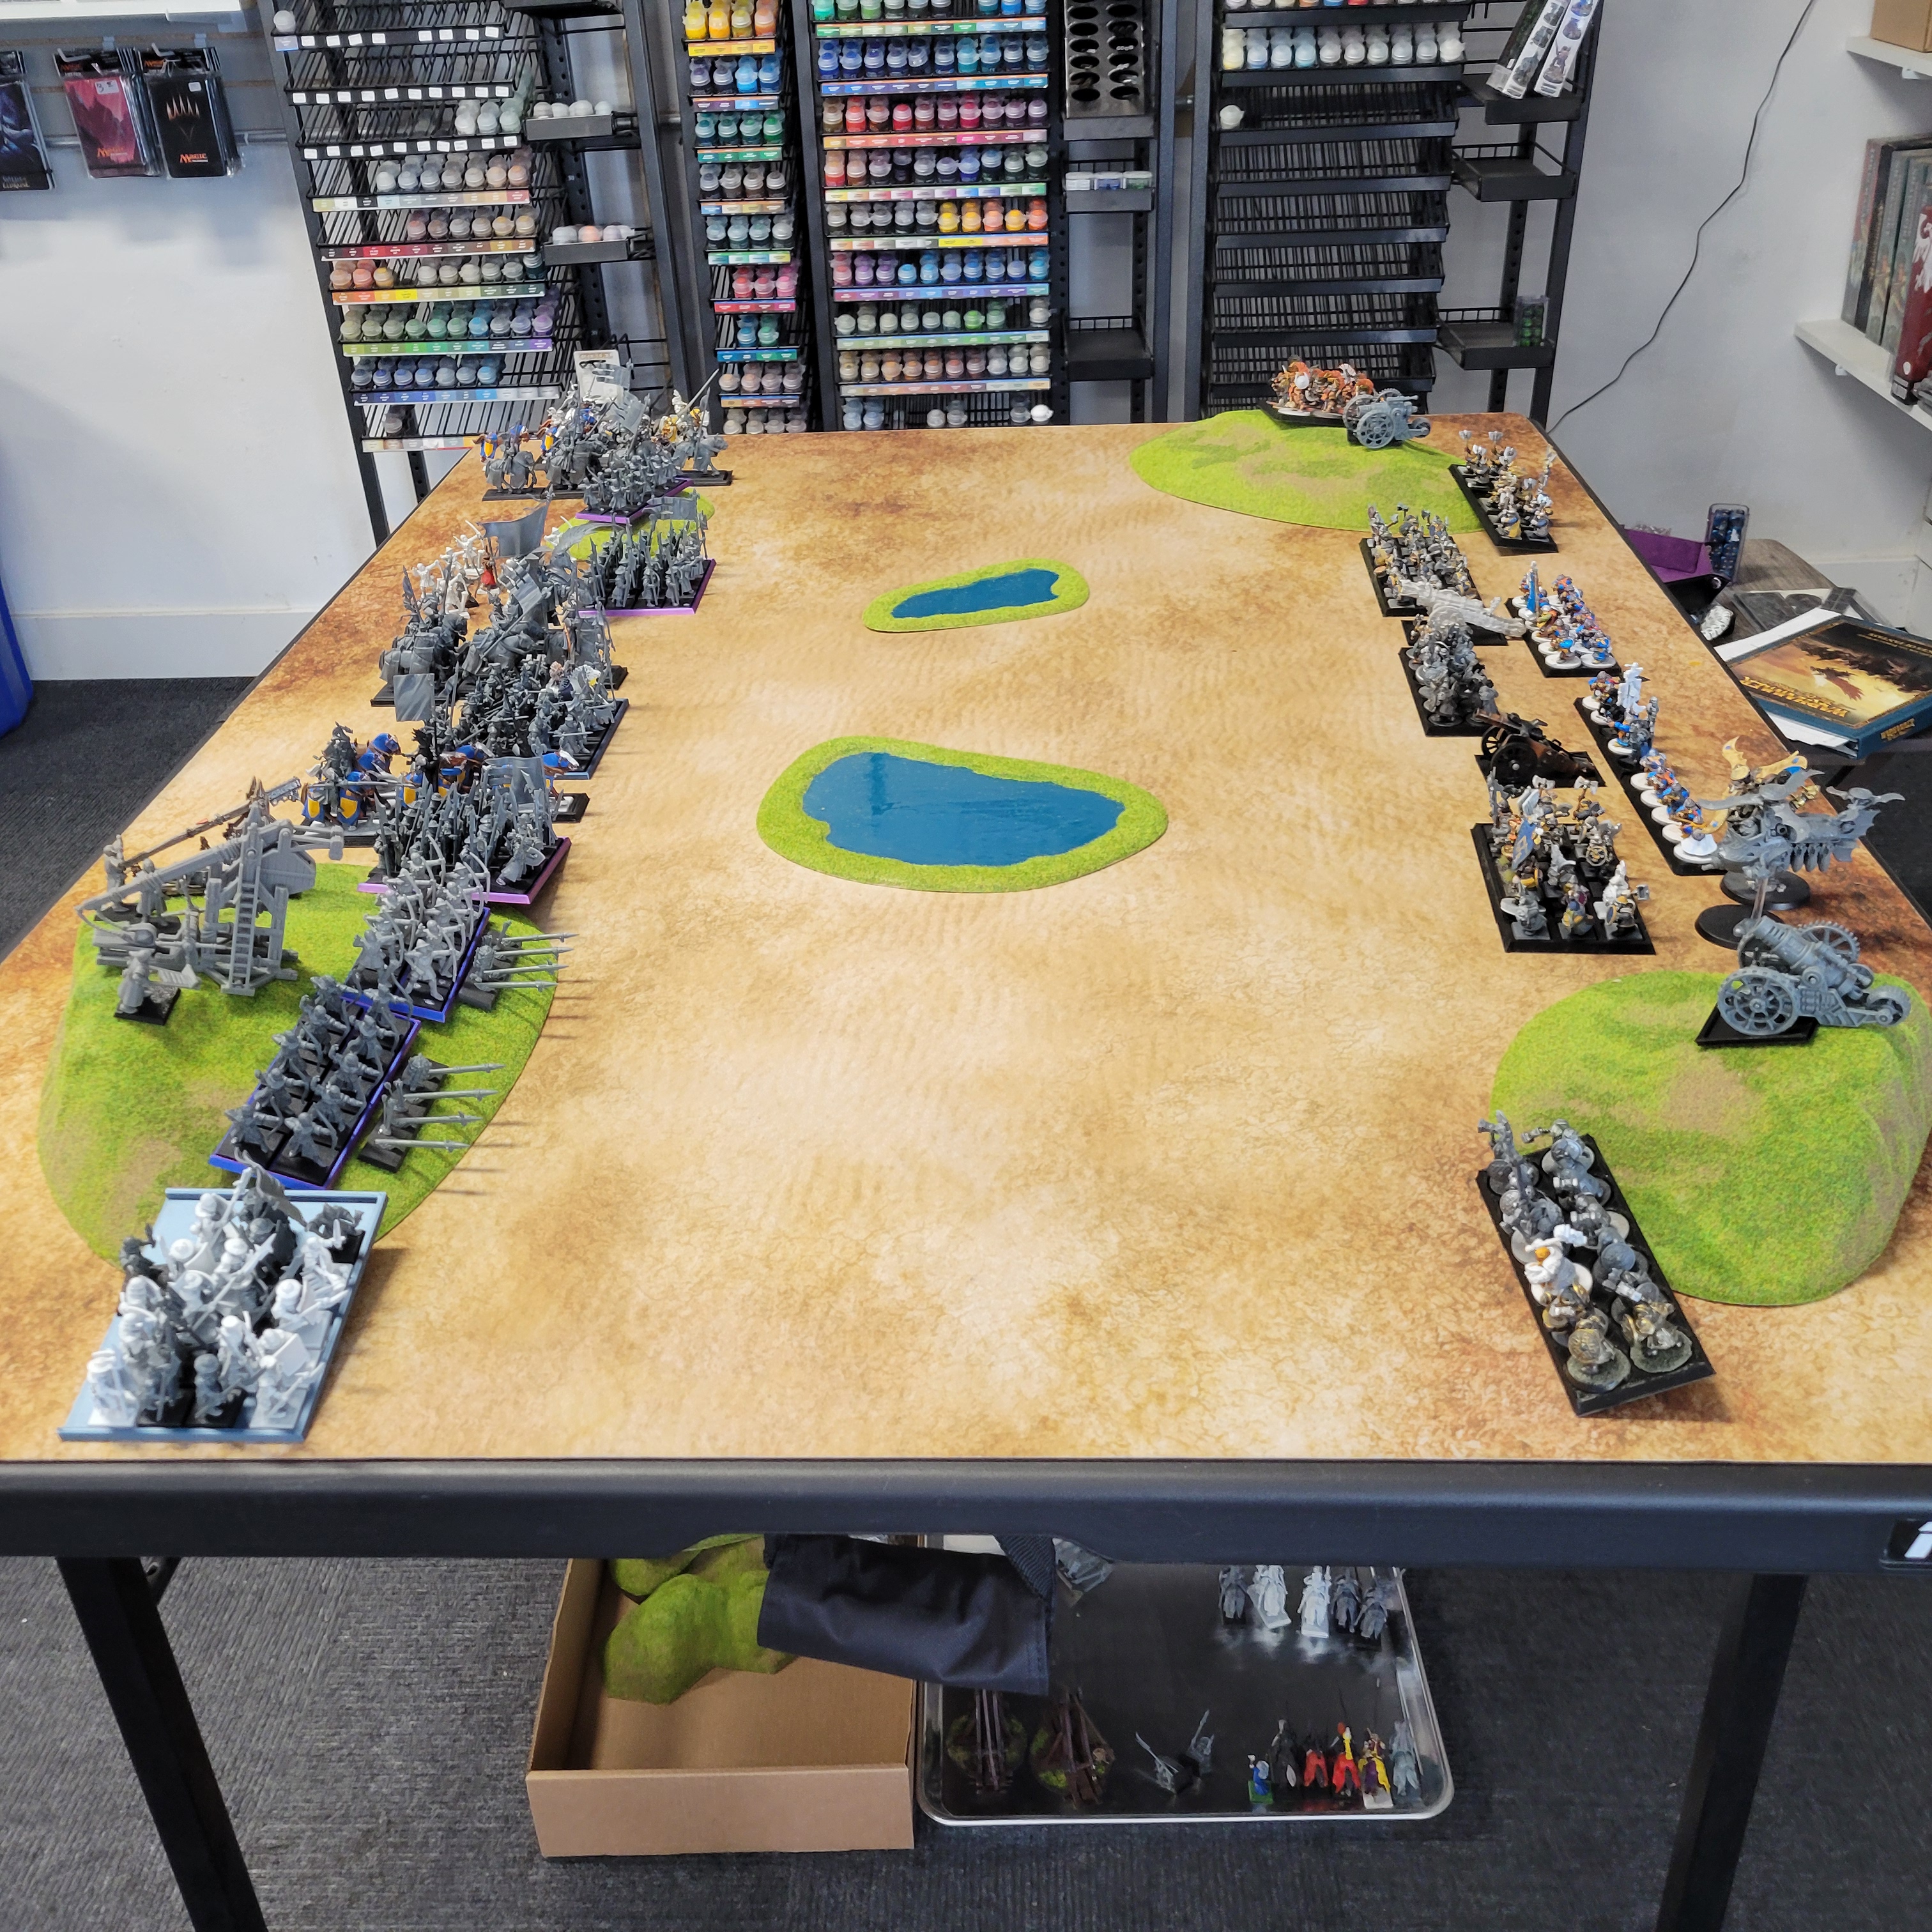

Based on deployment, his forces look far more numerous than mine. I was able to grab the first turn and did a moderate amount of shooting. I also deployed as far back as possible. I wanted him to come to me. I should have positioned the units slightly better to take advantage of the impassable lakes. Of course, the pegasi just flew over them.
I was sitting down and took this shot because it just looked cool. To see the knights bearing down on the dwarves and such.
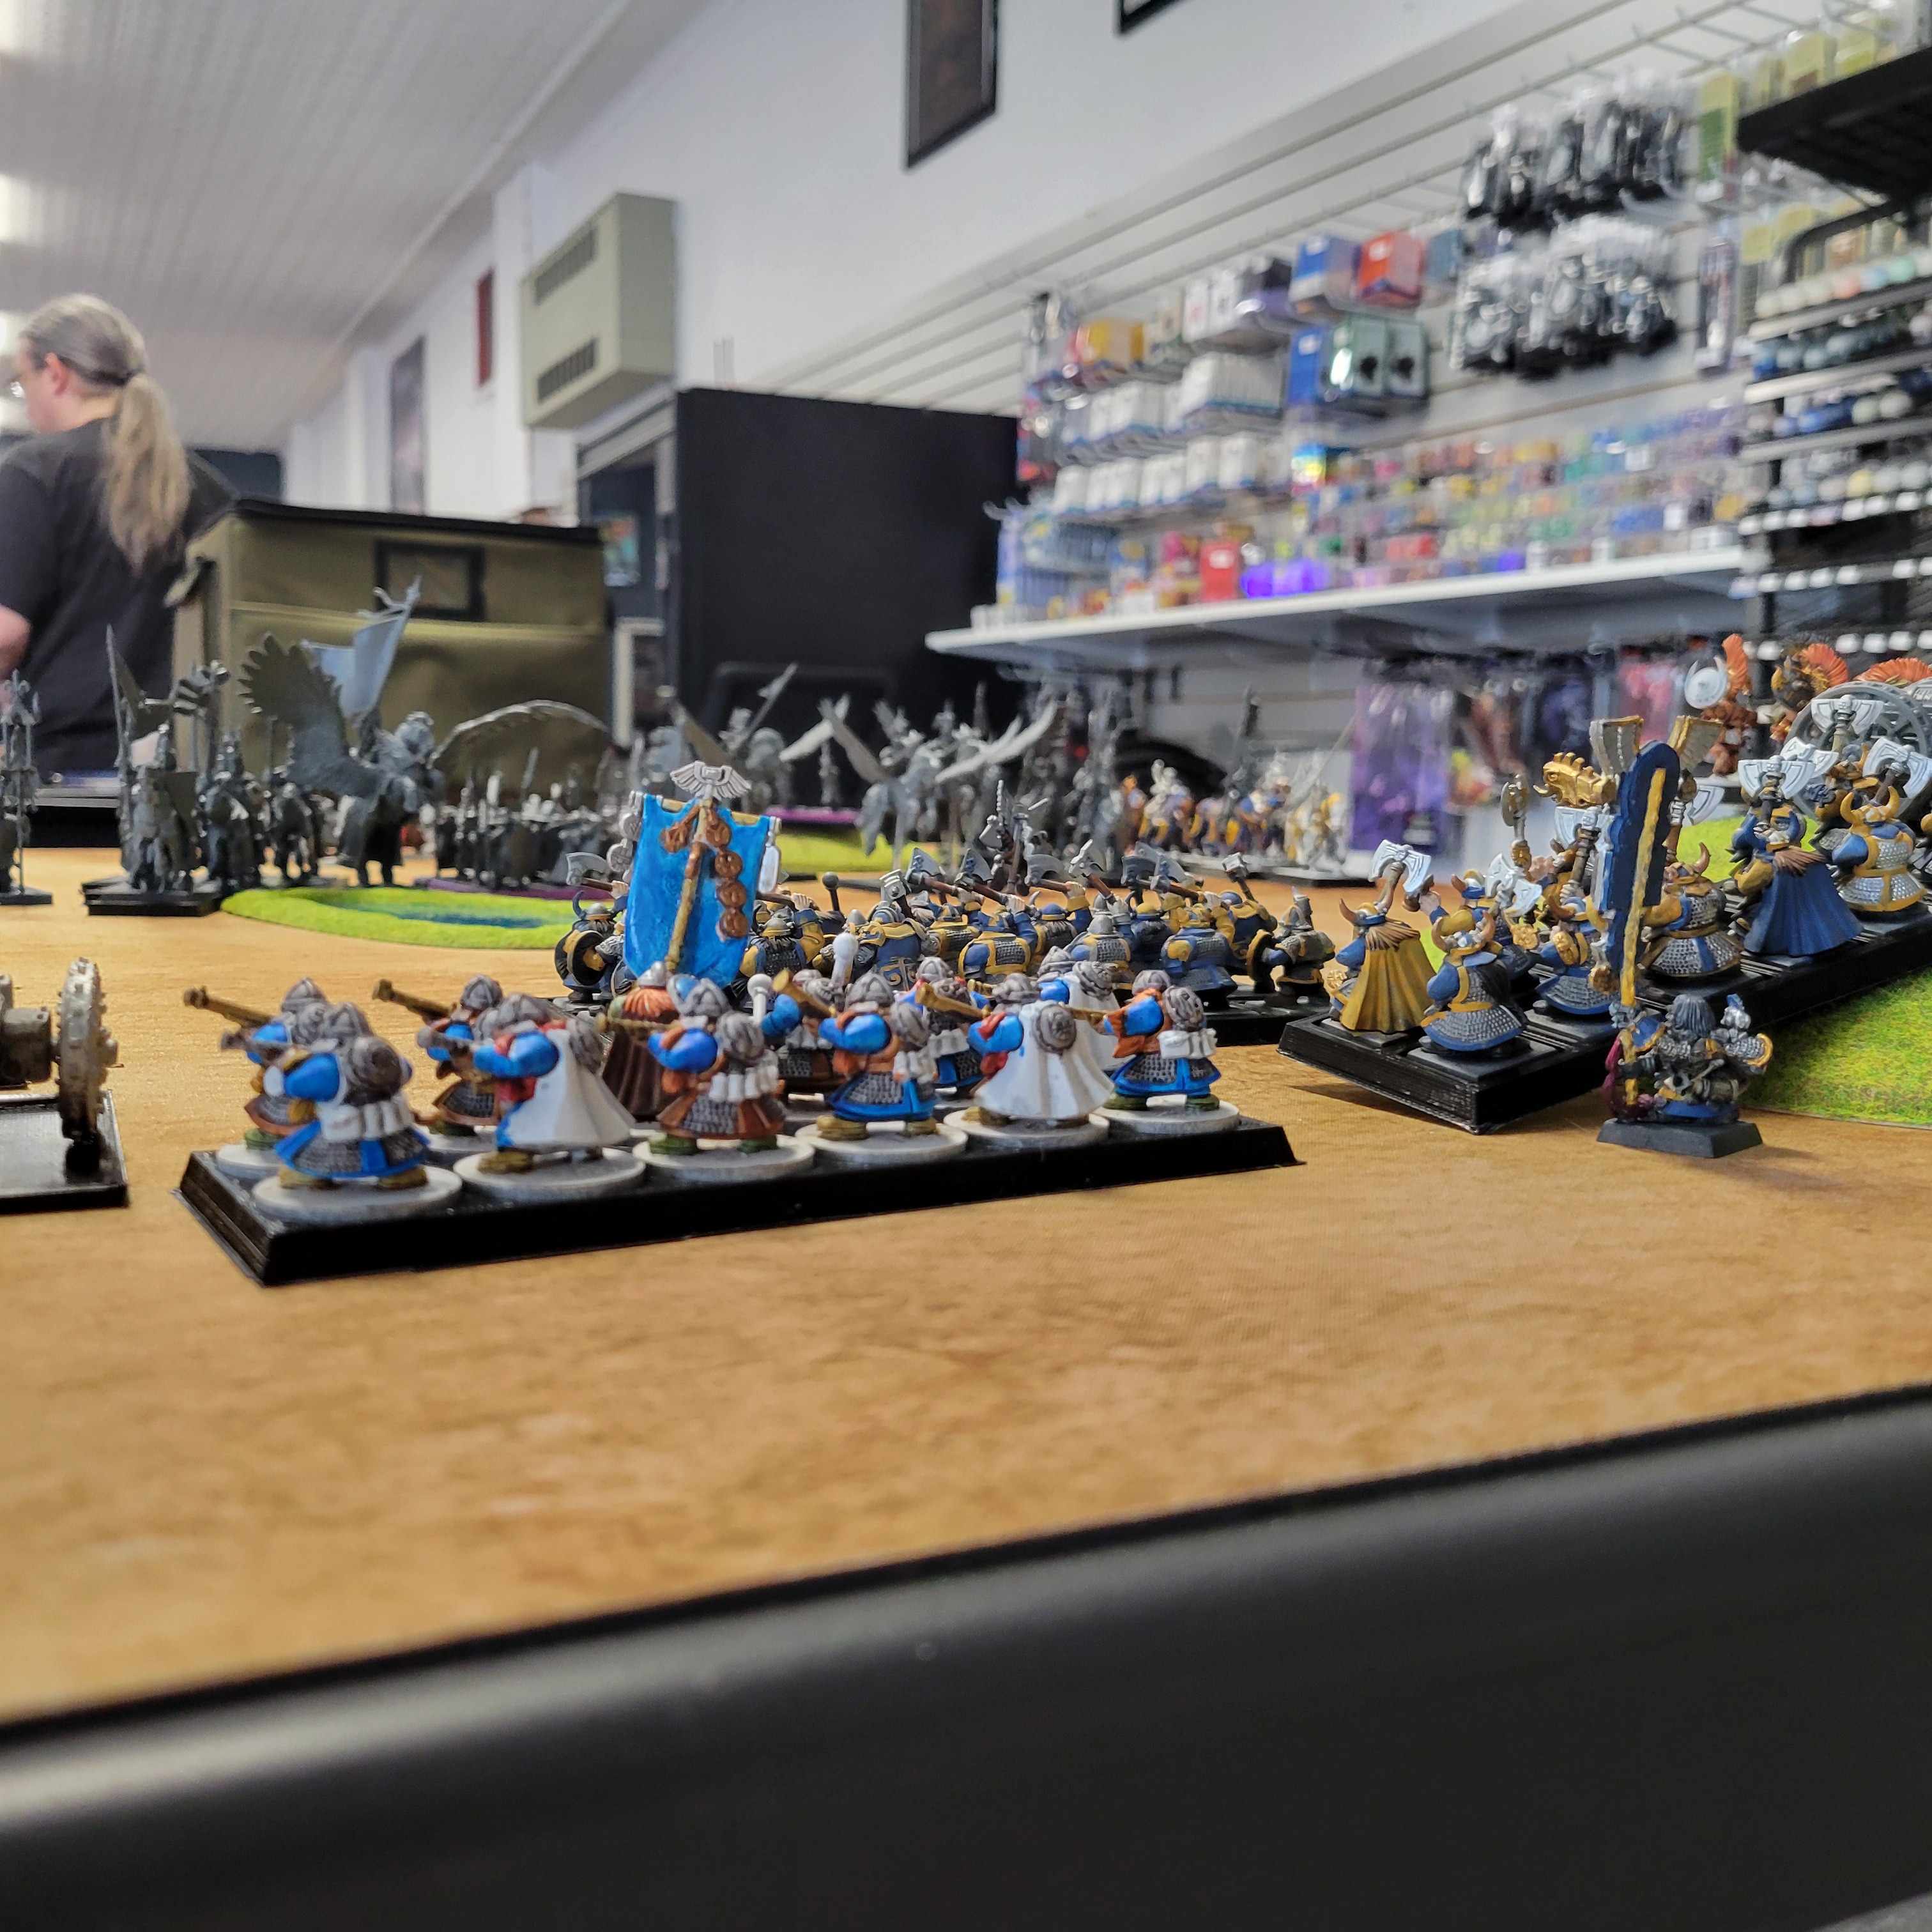
Ditto this one as well.

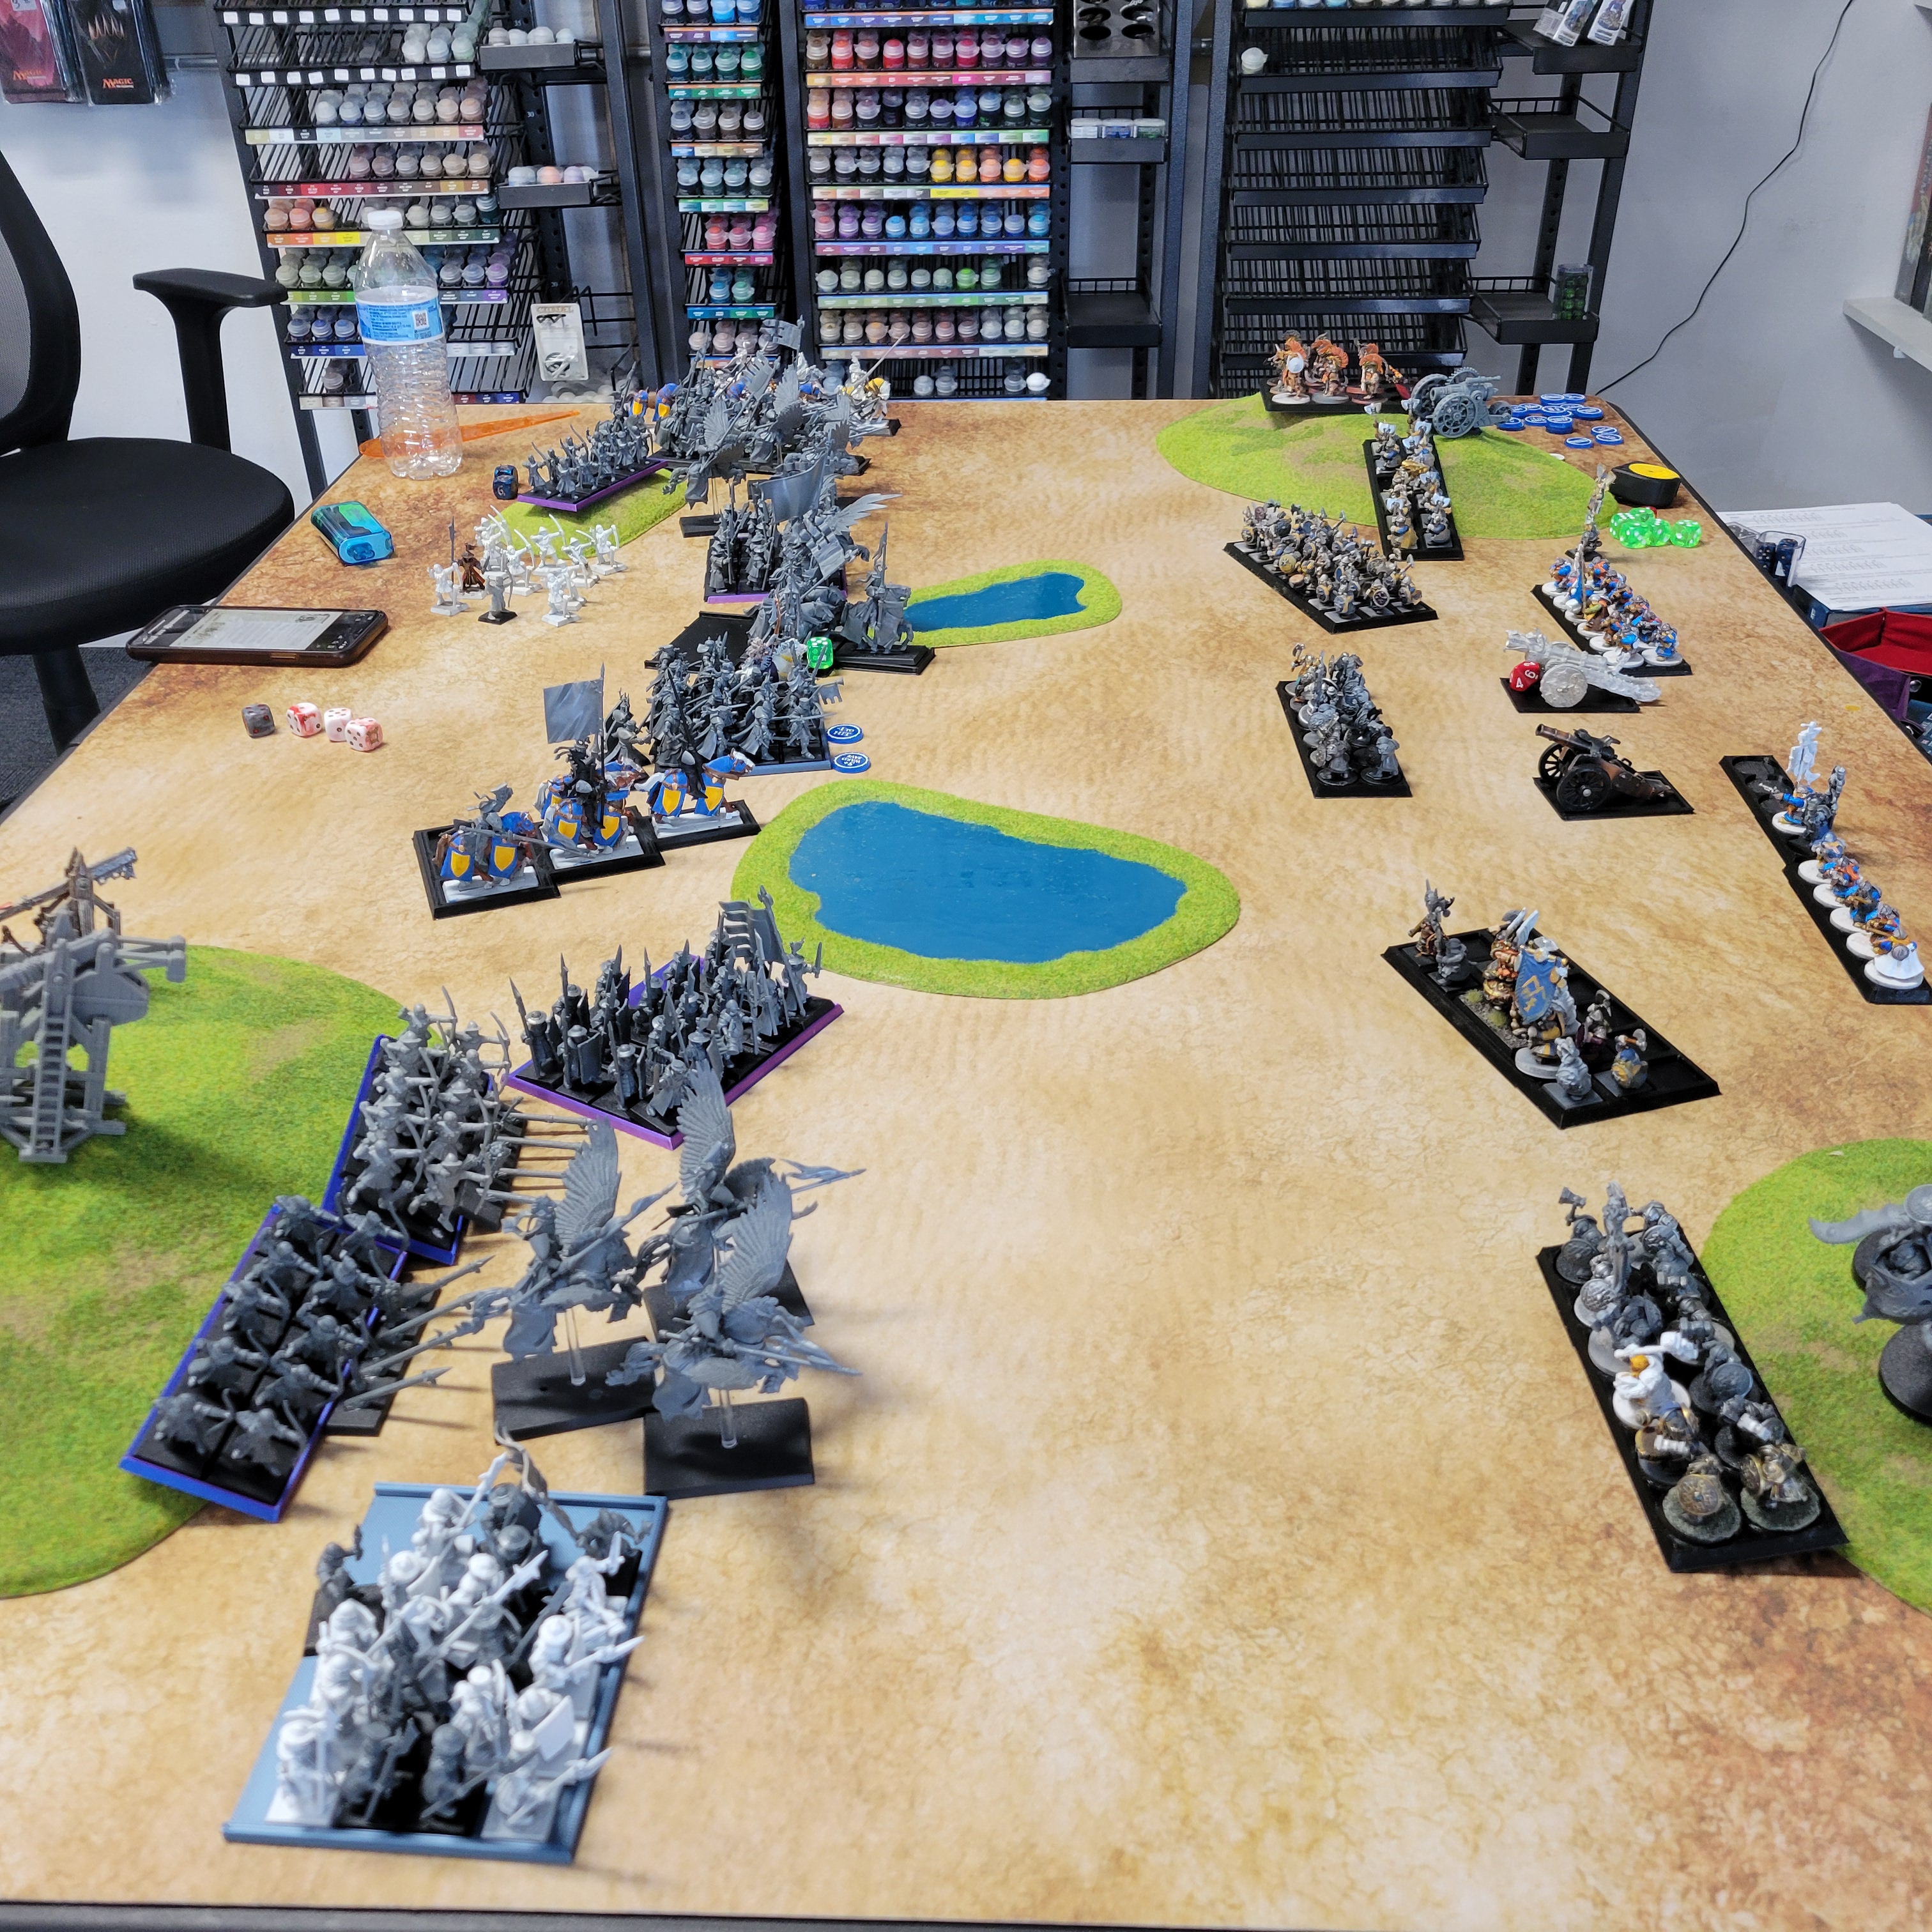
The game went as expected, with me sitting back and waiting, his knights charging. The gist of the game was that my right flank completely failed, and he just rolled up my center by turn 4. One interesting thing, after the third turn, we totaled our artillery shots. Of the 18 total possible shots to that point in the game, 14 misfired. The image below is turn 2, I think.
The game was basically over turn 3, and I stopped taking pictures. When a militia unit routes my Ironbreakers, I knew it was over.

I did learn a very interesting lesson. Much more damage is done on the charge. My Ironbreakers in the center went toe to toe for three rounds with his knights, and we lost about two models total. I just didn’t bring enough stopping power. I thought the longbeards and slayers would be more deadly, and had I hit either charge roll, they probably would have been. I just didn’t hit a charge roll. The above picture shows how many knights he has bearing down on my right flank (top of the image). My opponent said that once he saw my slayers go onto the table, he knew their weakness and wanted to strike that location. He had 5 more units to drop on the table than I did, allowing him to control deployment and set the matchups. I was setting my main damage units while he was deploying Yeomen.
