Horus Heresy Stalingrad 3

Another thrilling engagement for the Horus Heresey Series. It took me too long to get this particular game in.

The Ravenguard started off aggressively and with ample destruction. However, clever maneuvers to negate the Lord of War Fellblade and strike a crucial counter-attack doomed them by Turn 4. The Word Bearers were victorious, and this plays nicely into scenario 4, where the Ravenguard is backed up by a river in a desperate struggle for survival. The battle played out very similarly to the Bolt Action version, where each side picked a flank to focus fire and efforts . The strength of the deep strike played a major role here, just like the flanking assaults in Bolt Action.

Conclusions and Thoughts

It was my first time bringing out the Gal Vorbak; wow, they impressed me.
The terrain was a little thick which negated the Fellblade, the three turns it got to shoot, something did die. They just were not the optimum targets.
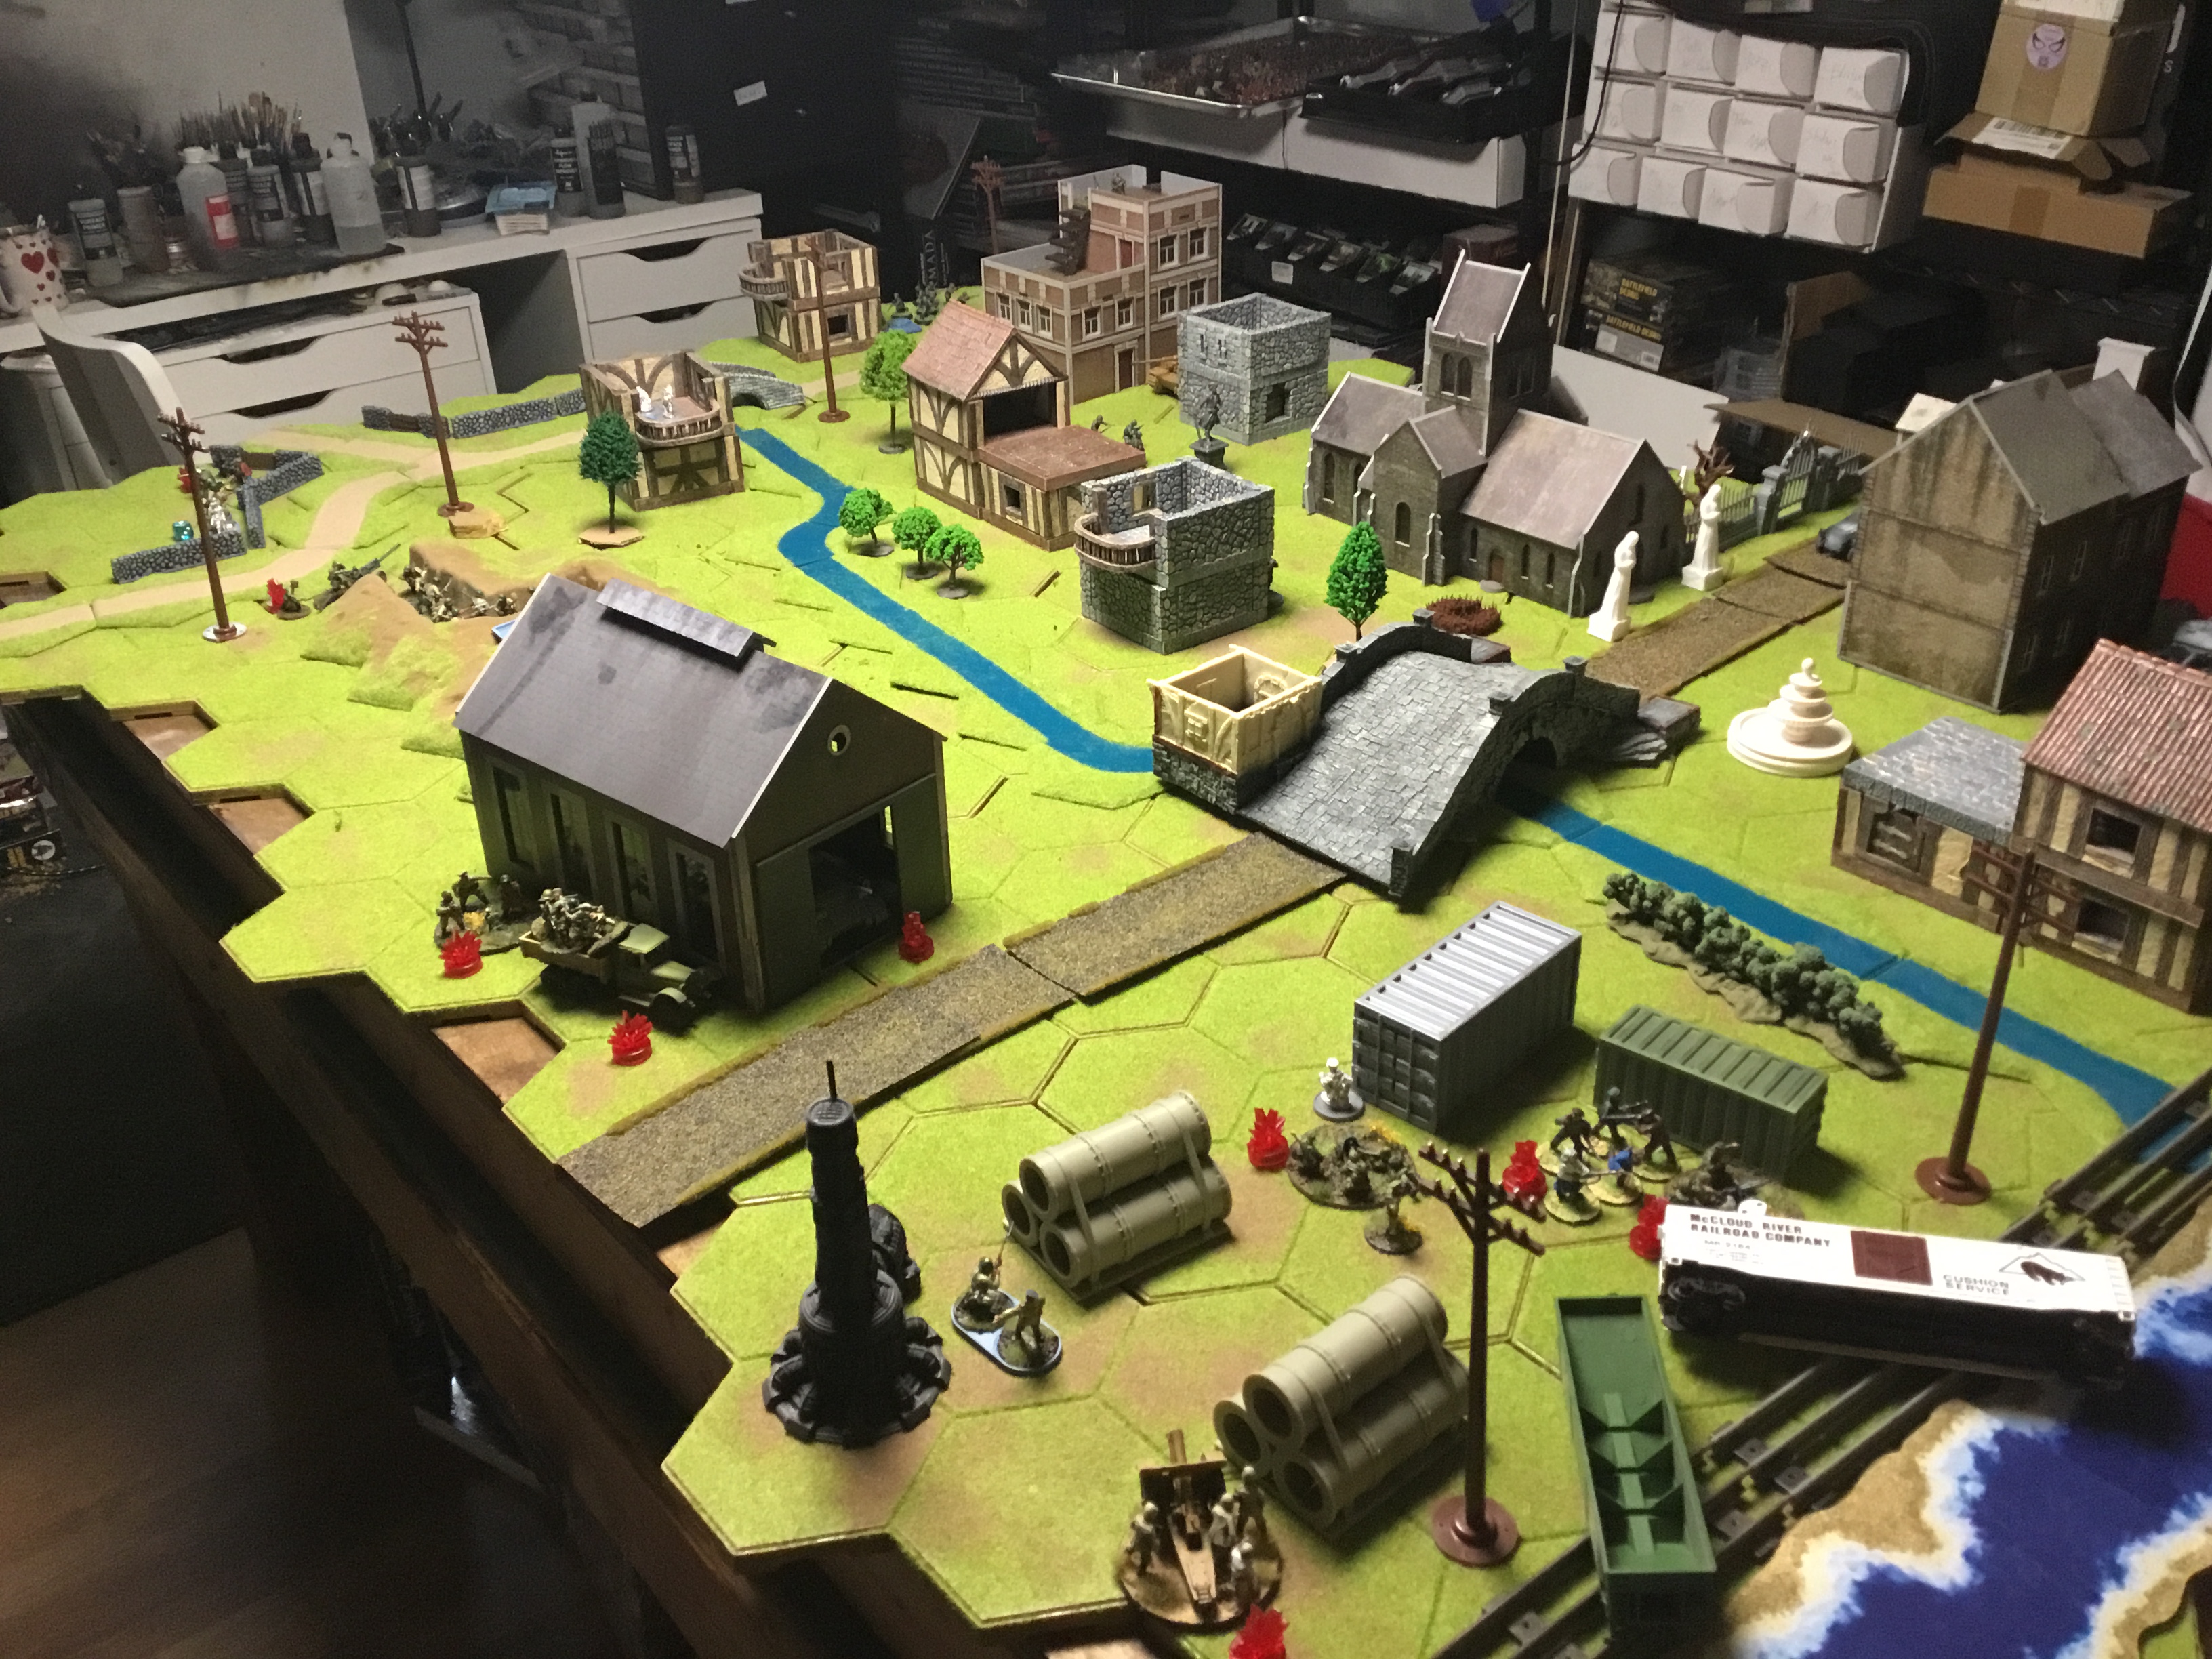
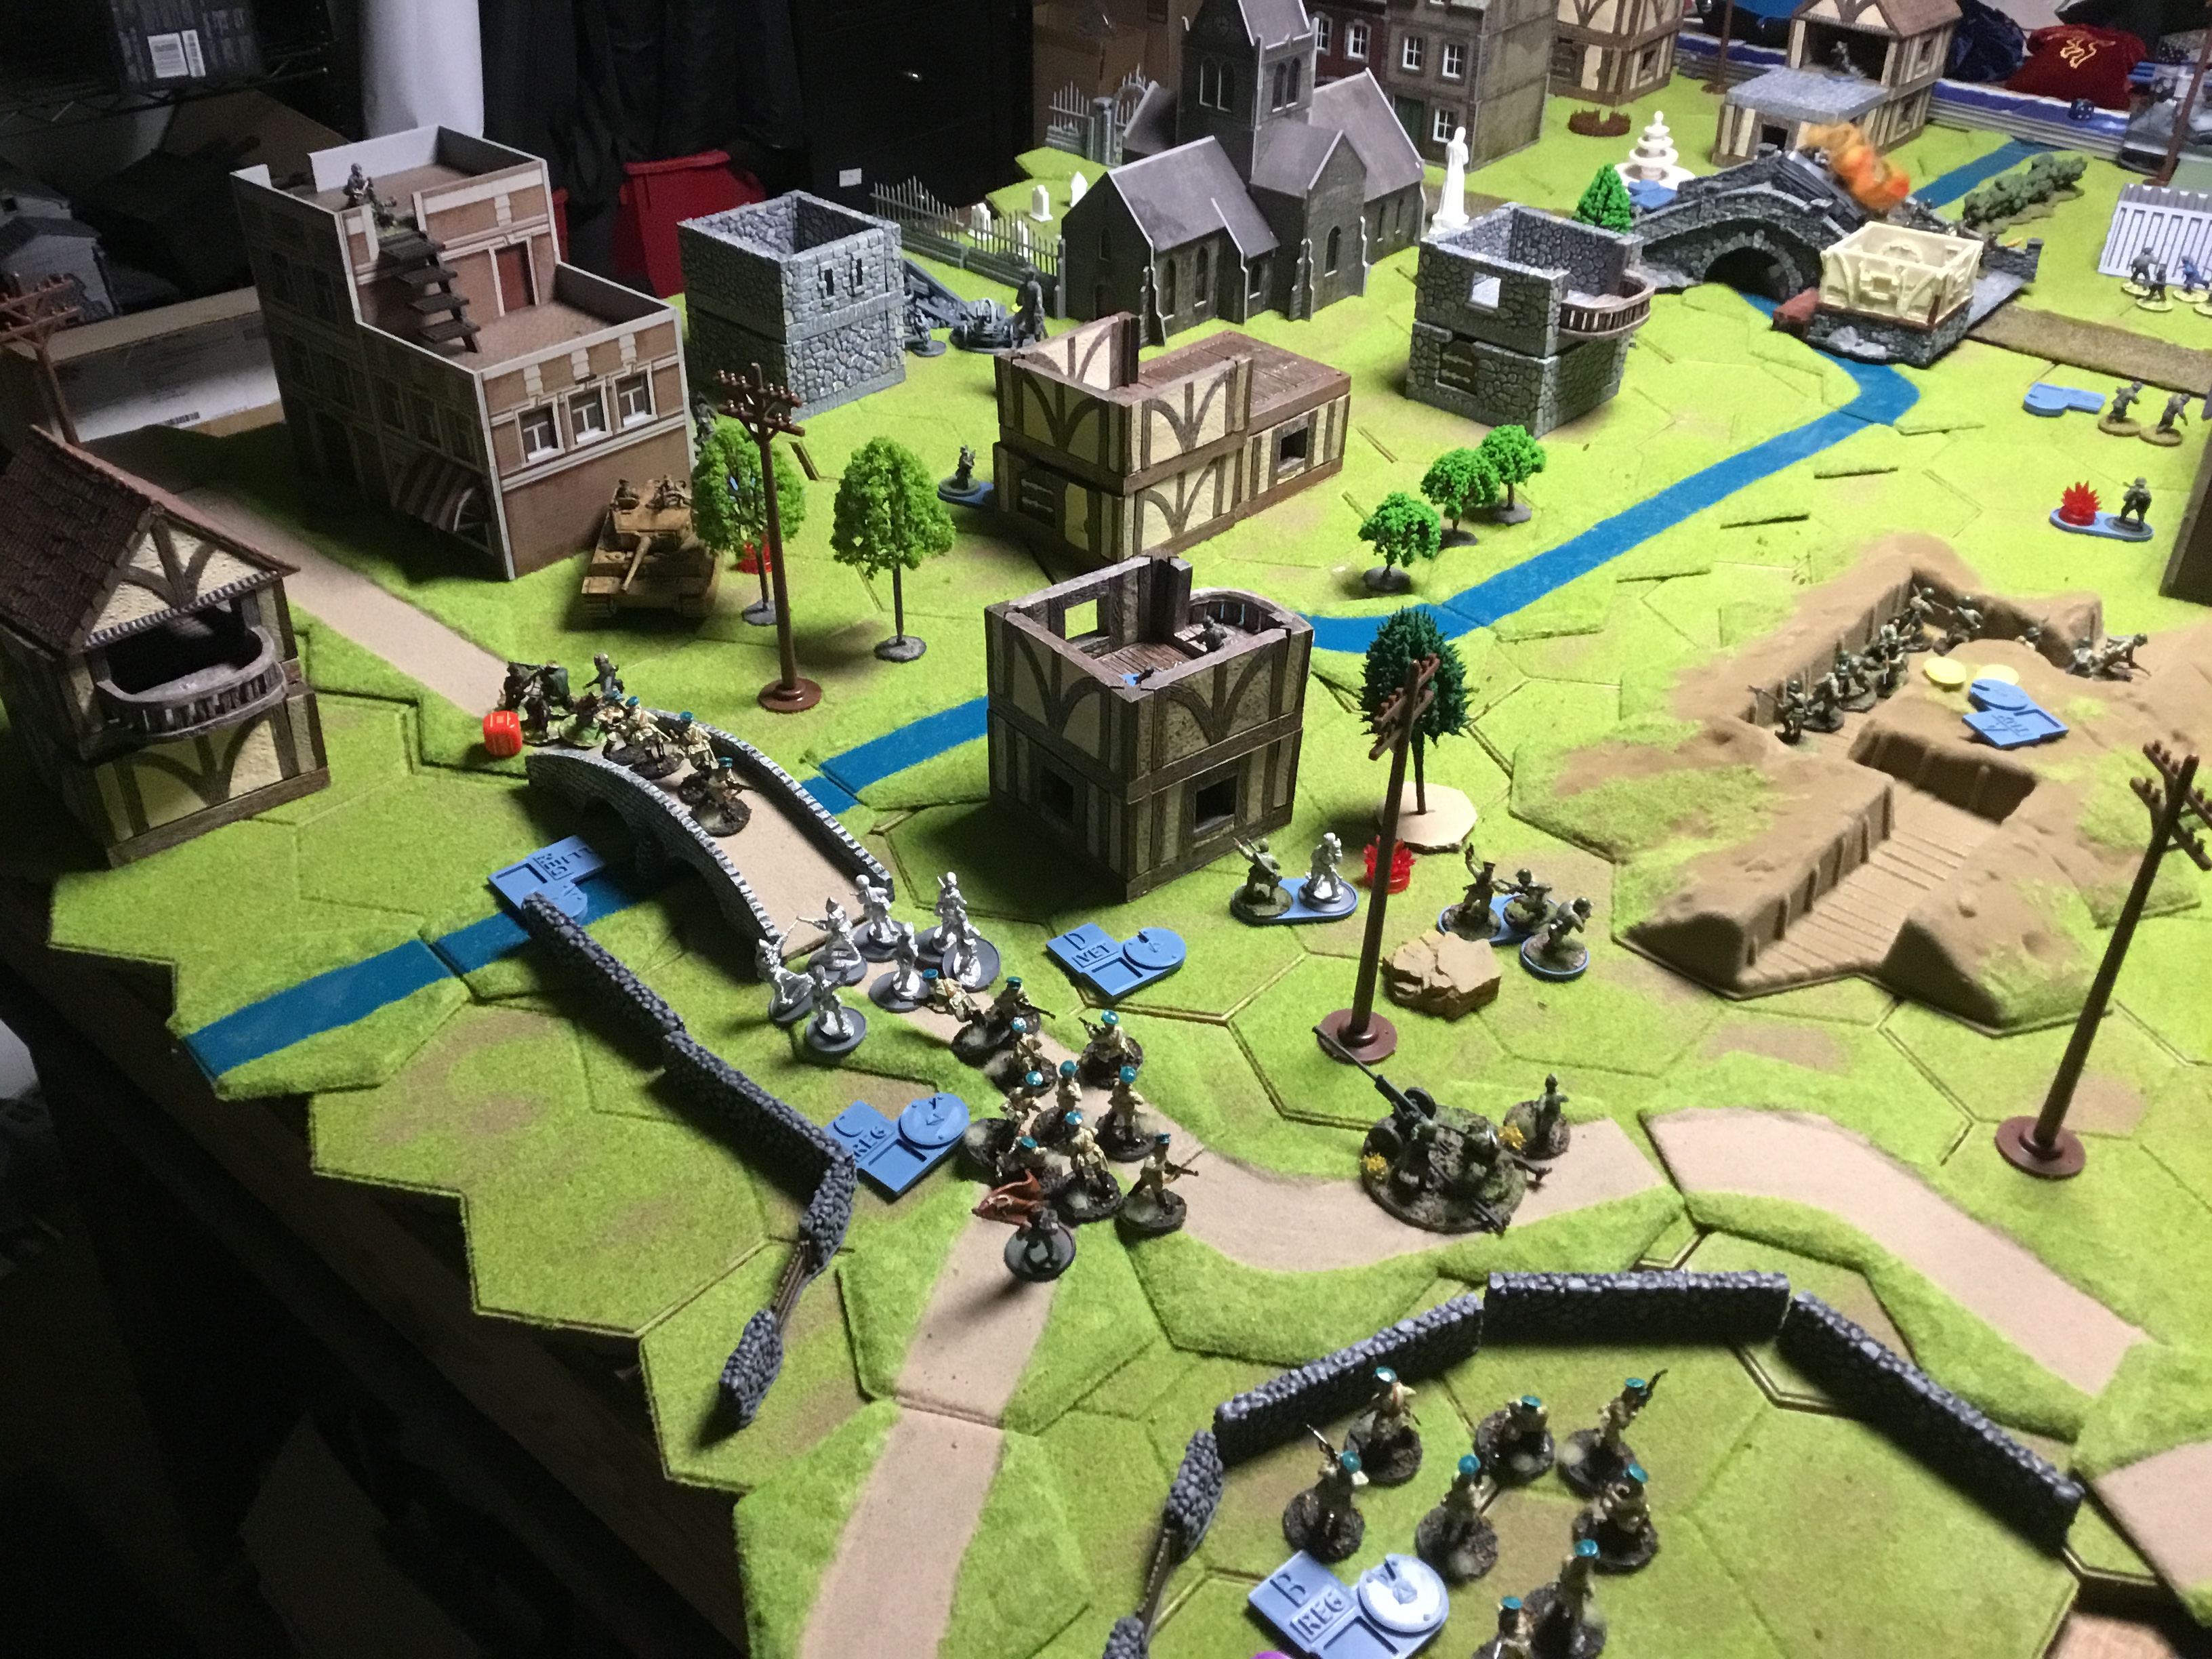
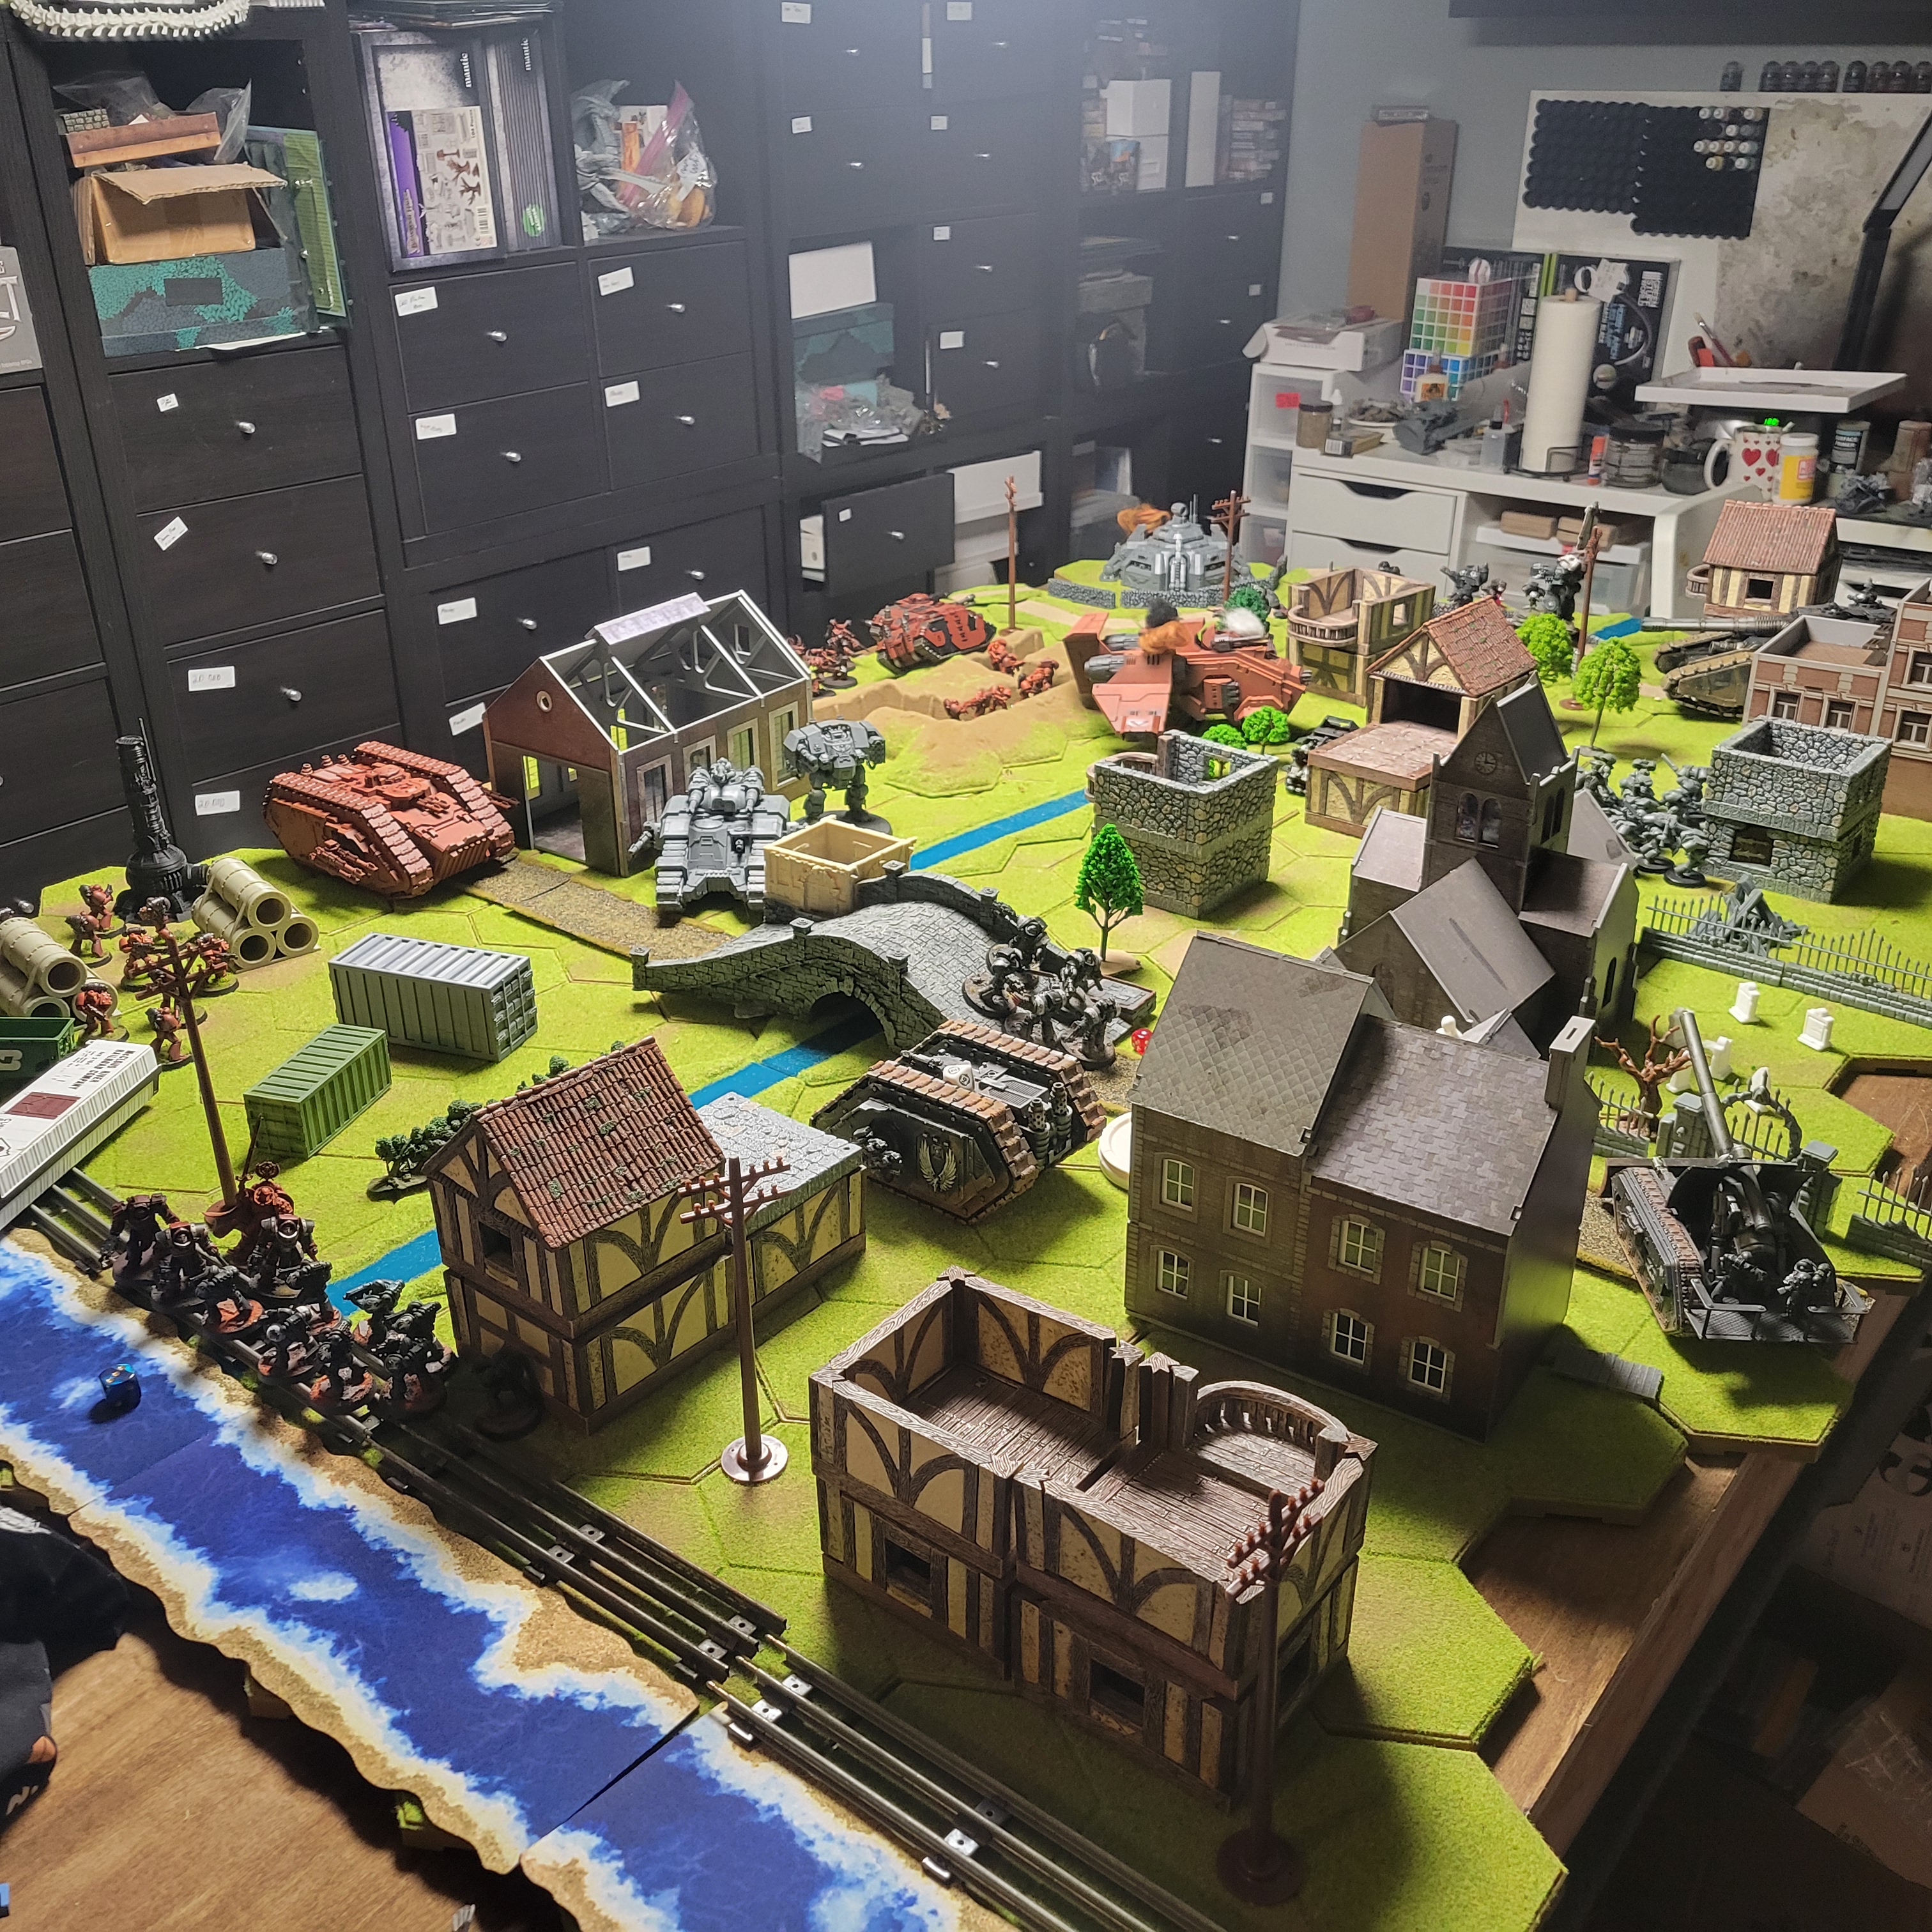
The Scenario
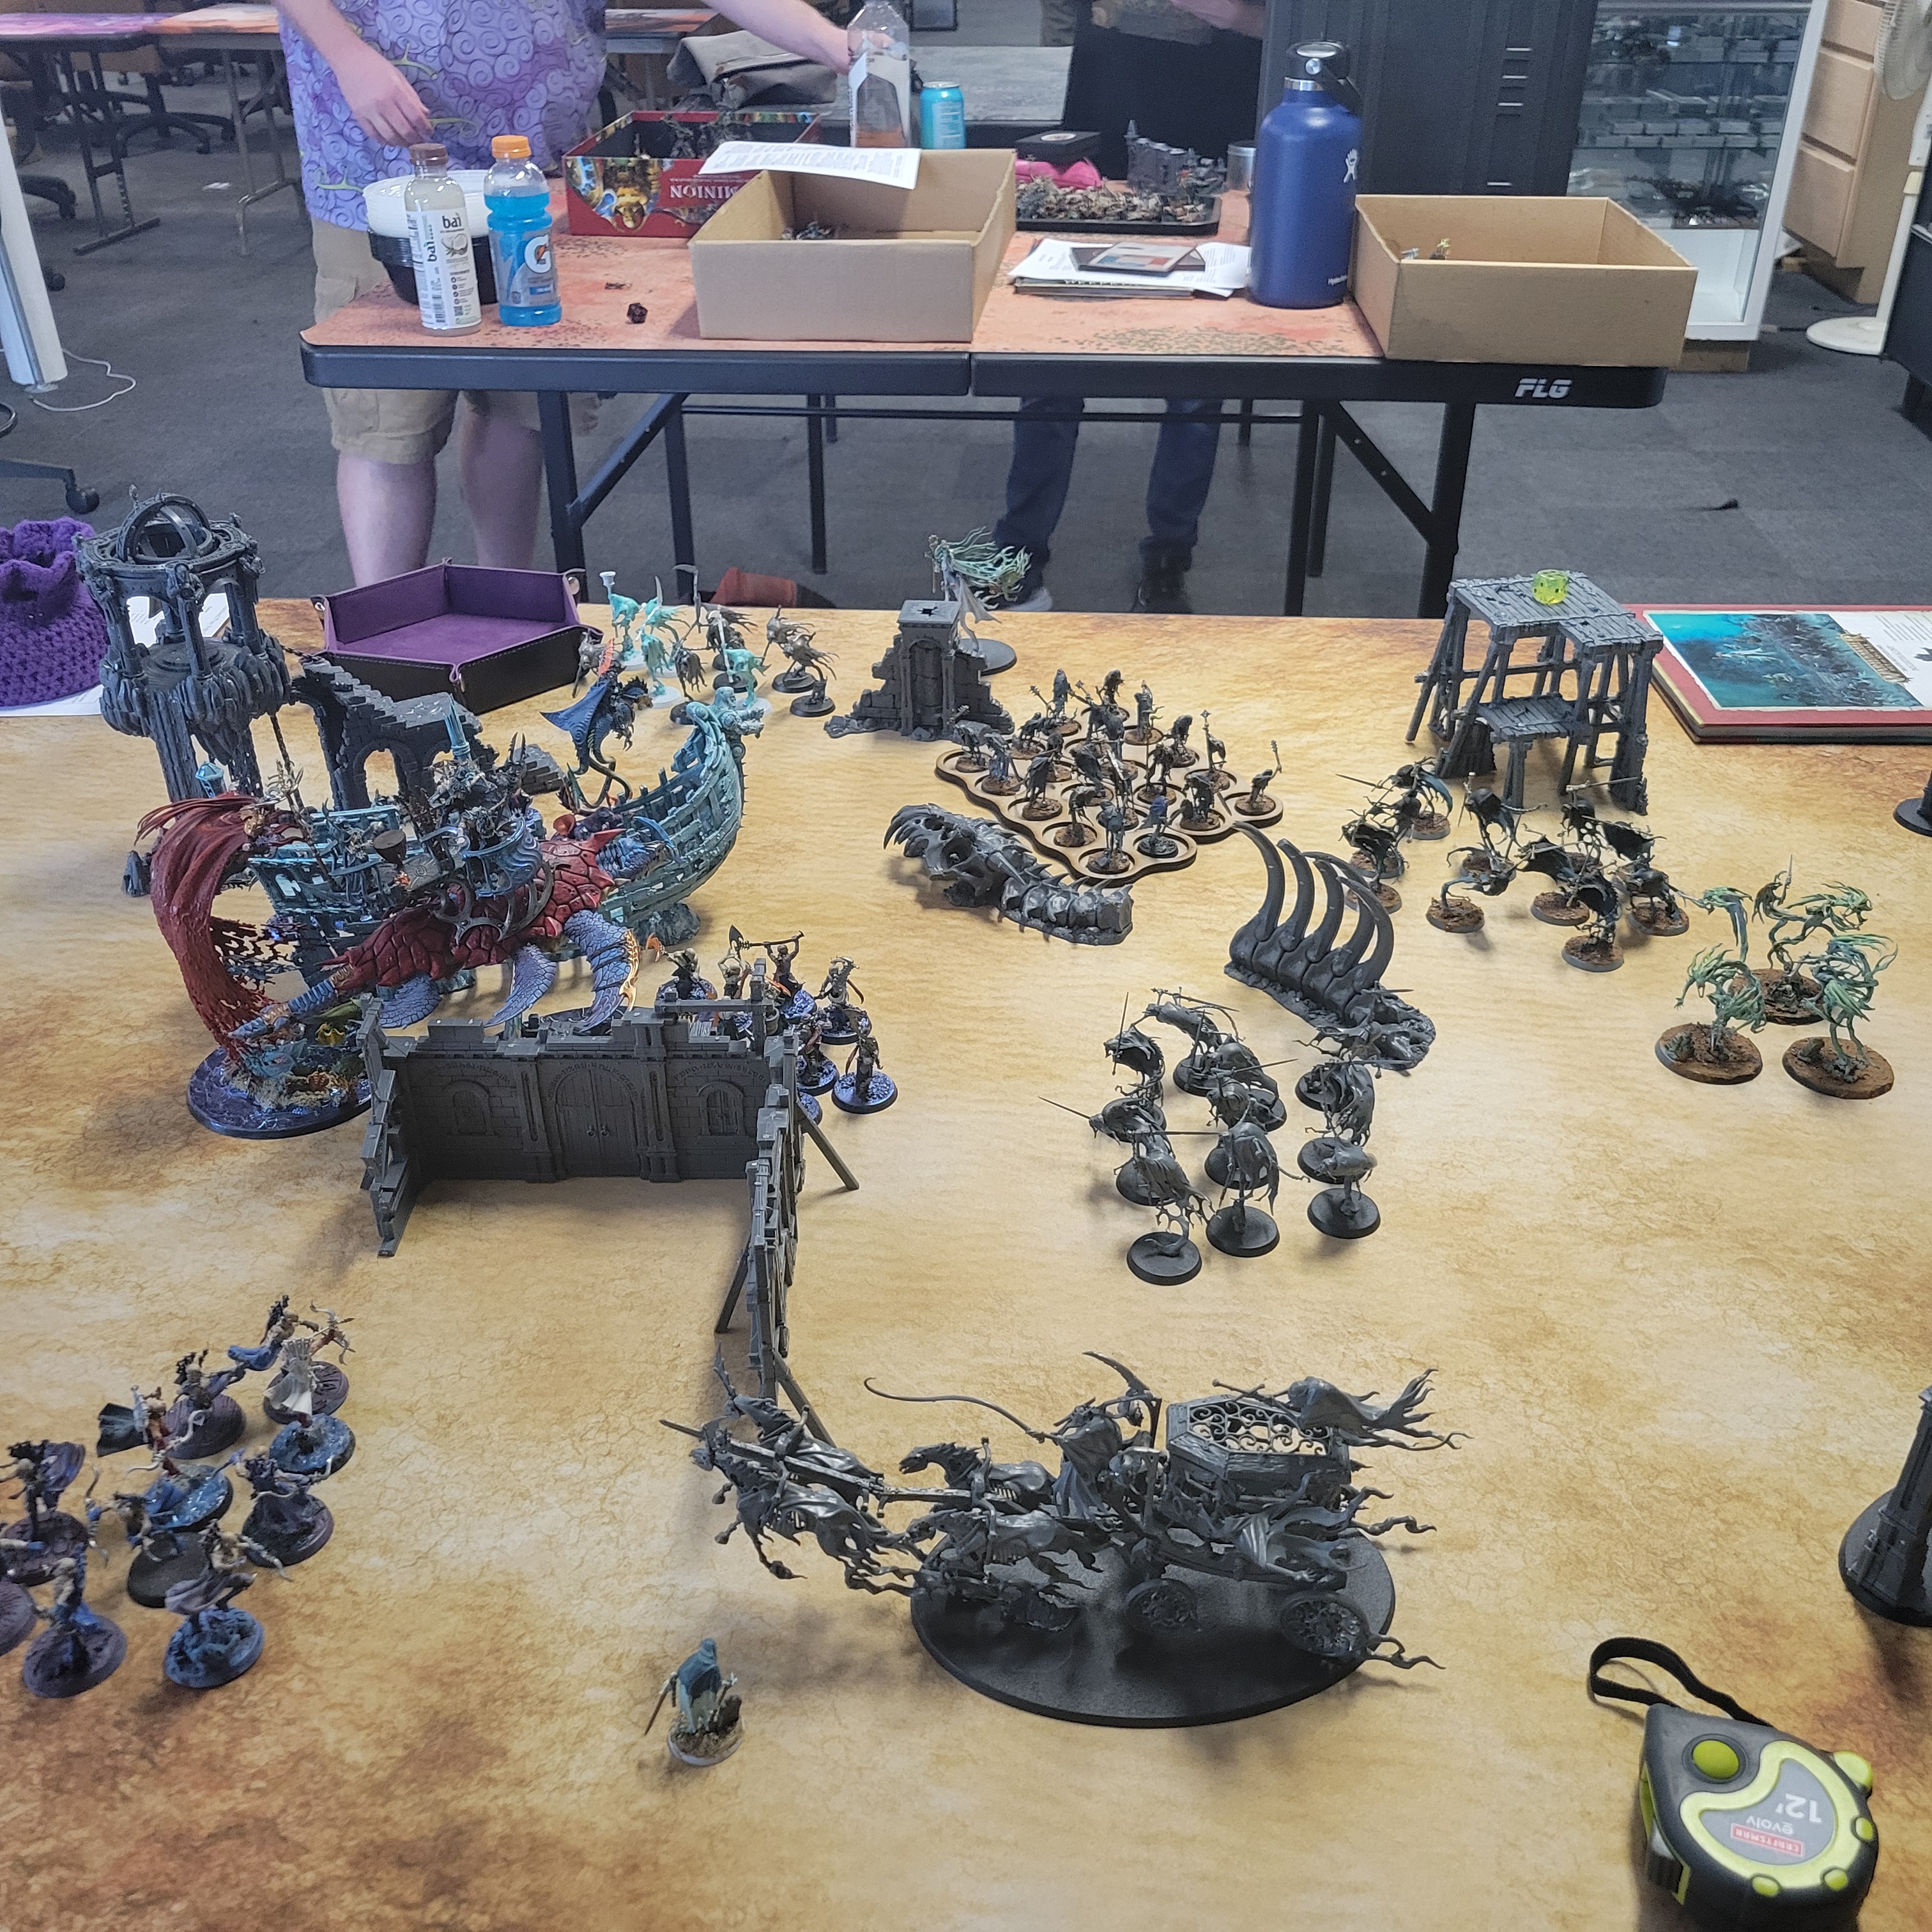
As with the Bolt Action Version, there is a small river separating a subdivision of the city. The Word Bearers have been ordered to push back the Ravenguard, while the Ravenguard have been ordered to seize both sides.

Forces get 1VP for each unit on their opponent’s side of the river and 1VP for each unit destroyed.

Army Lists

(The lists were equal when I originally built them)

Ravenguard3000Word Bearers2850
Damocles Command Rhino150Praetor Cataphractii140
Strike Captain Alvarex Maun140Gal Vorbak Squad550
Contemptor Dreadnought Talon x2350Mhara Gal Dreadnought240
Deliverers Squad225Terminator Cataphractii175
Assault Squad145Assault Squad X20265
Assault Squad145Tactical Squad100
Tactical Squad x18250Tactical Squad100
Dark Furies150Sabre Strike Squadron150
Javelin Squadron x2180Storm Eagle Gunship210
Proteus Land Speeder x3180Deredeo Dreadnought Talon205
Land Raider Proteus235Land Raider Spartan250
Legion Basilisk200Sicaran Squadron365
Fellblade650

List Choice

Both sides used assault marines to move across the river. I also felt the gunship could help transport that Gal Vorbak to a crucial space. The Ravenguard pushed with their land speeders, emphasizing their speed, while the Word Bearers wanted to counterattack when holes opened in the Ravenguard lines.

Deployment

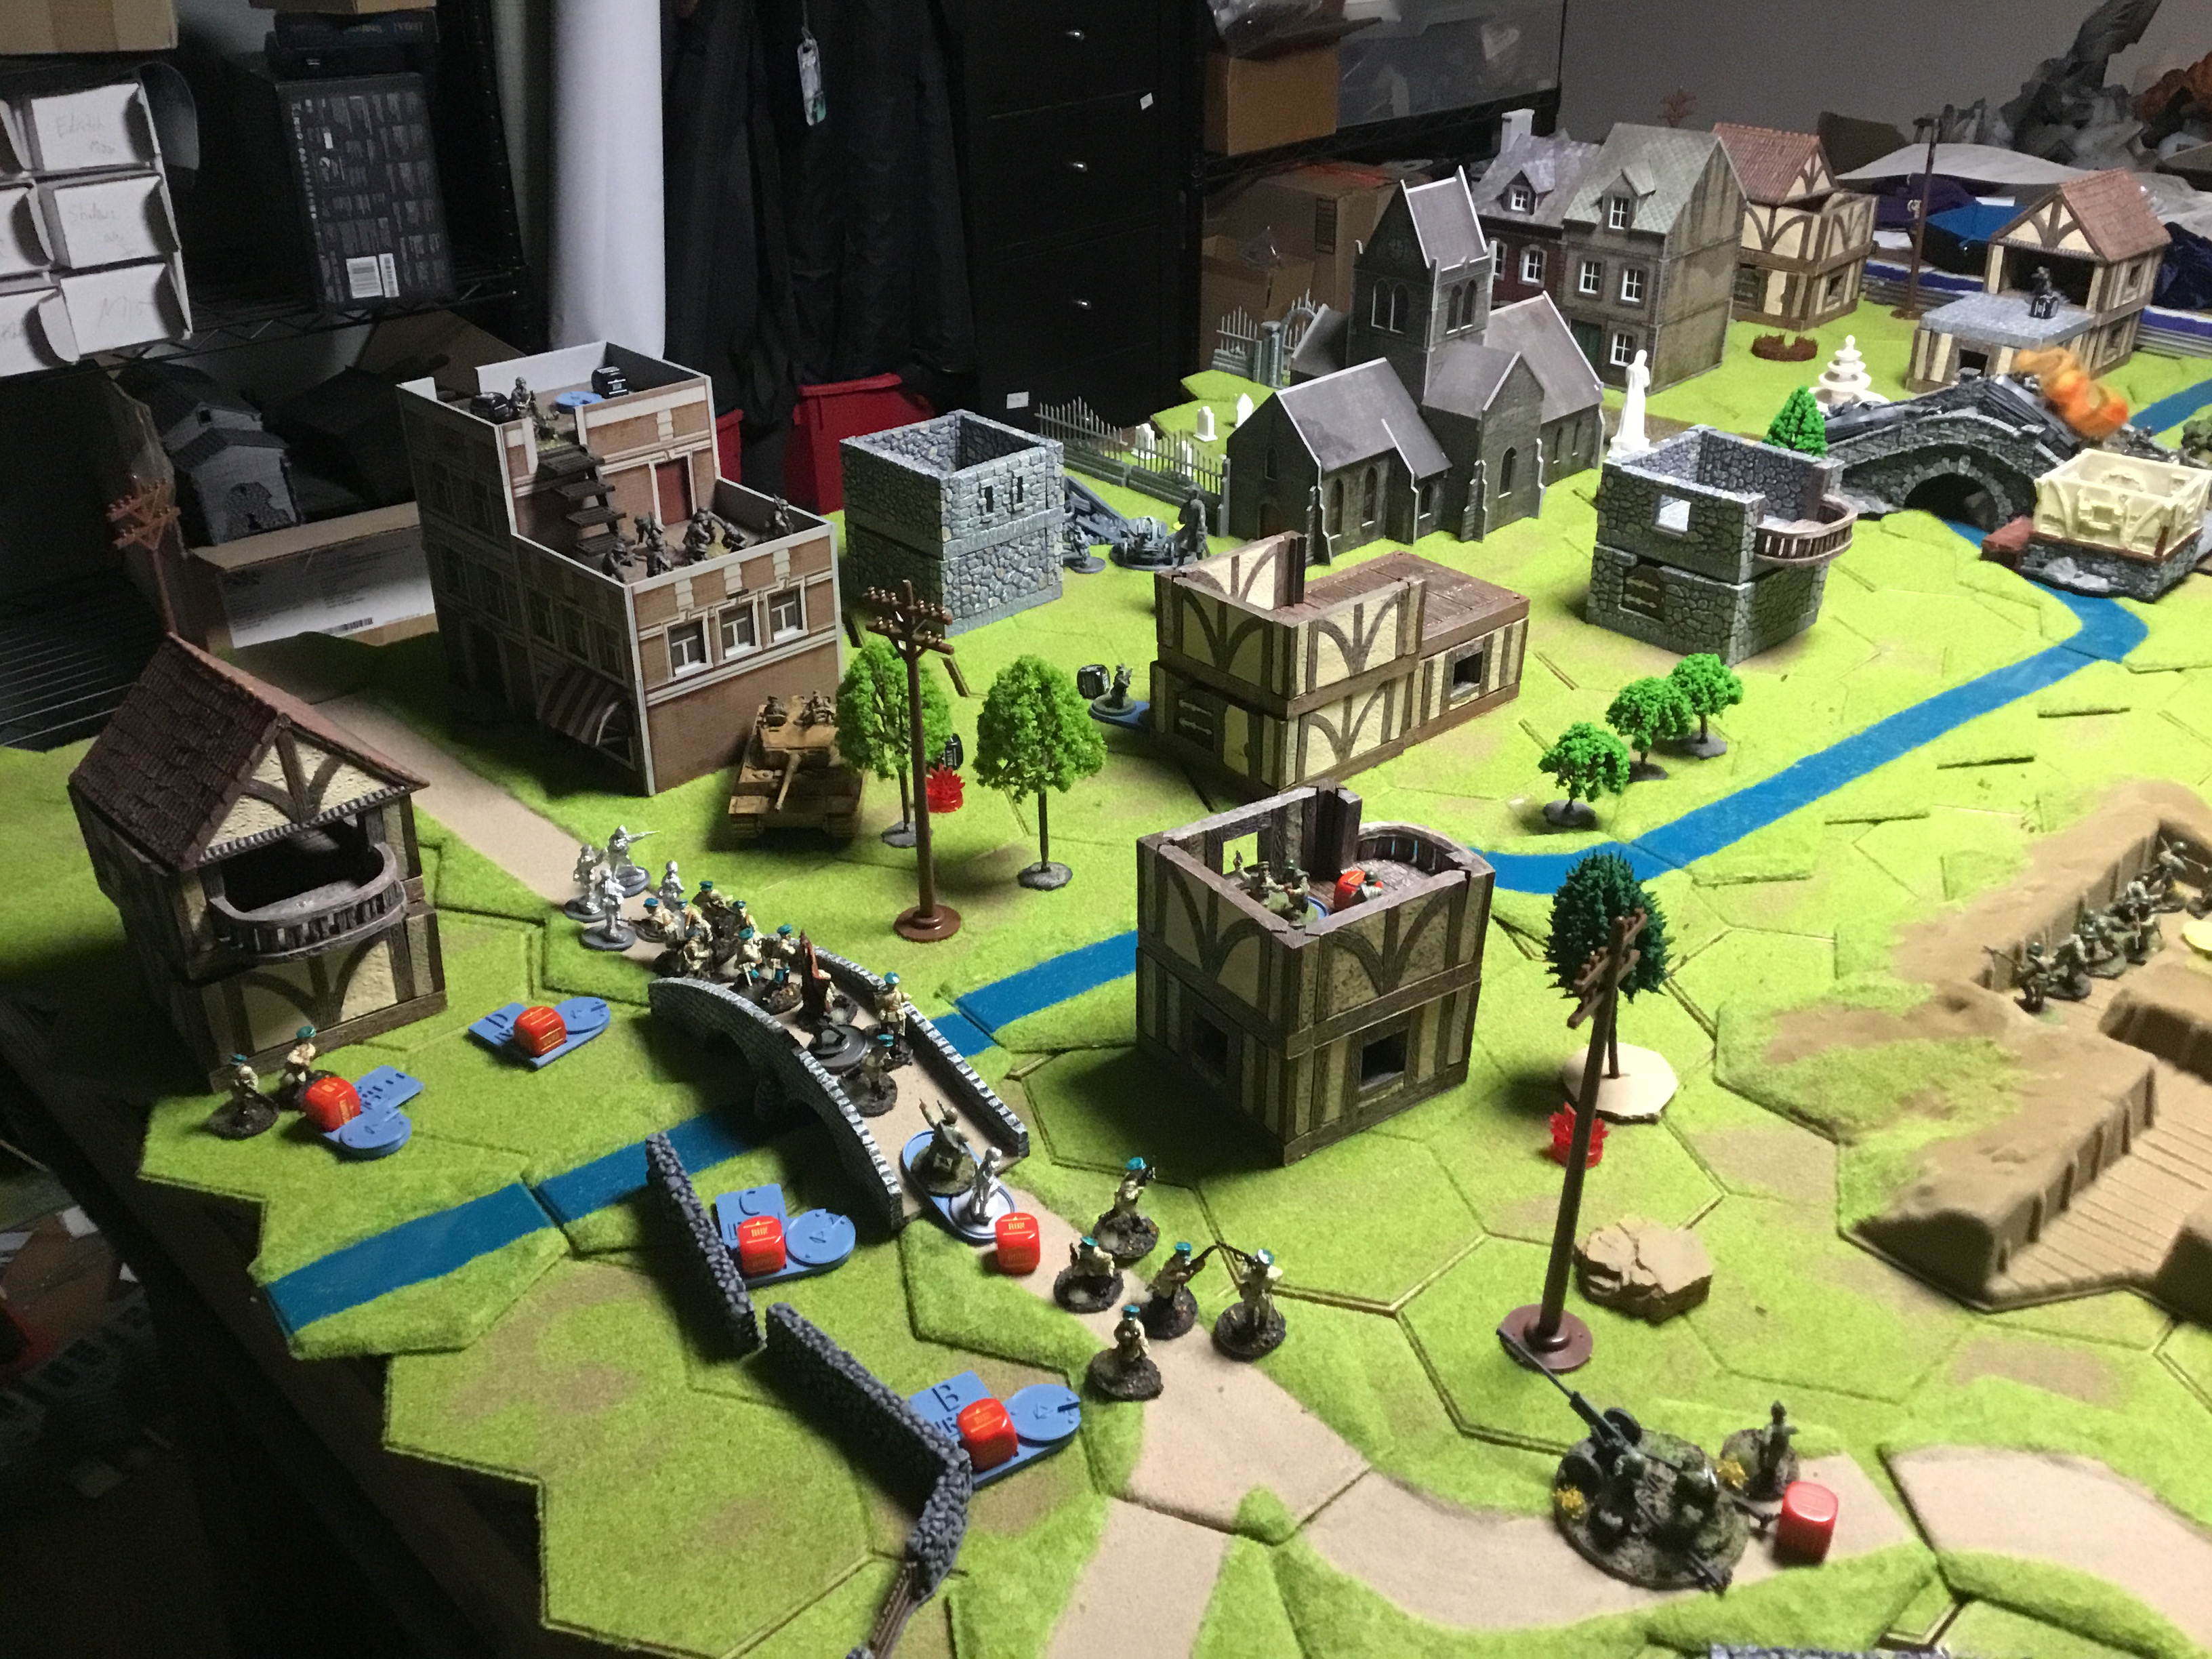
The Word Bearers needed to limit the Fellblade’s effectiveness, as they had little that could even dent it. 14 Armour with 12 HP is a challenge. I placed the Gal Vorbak inside the warehouse. I think thematically having the Ravenguard “surprised” with the new mutants would be a little shocking.

The Ravenguard wanted to get their heaviest units across the board and hold them while using their two units of assault marines and a single unit of furies to disrupt the situation.

Turn 1

The Ravenguard Fellblade knocks out the hammerfall bunker. I wanted to make sure there were options to get the assault marines in the backfield. It was also one of the only units in line of sight. I could have taken out a sabre tank instead. There were very few casualties and most units were just positioning, and checking sightlines.
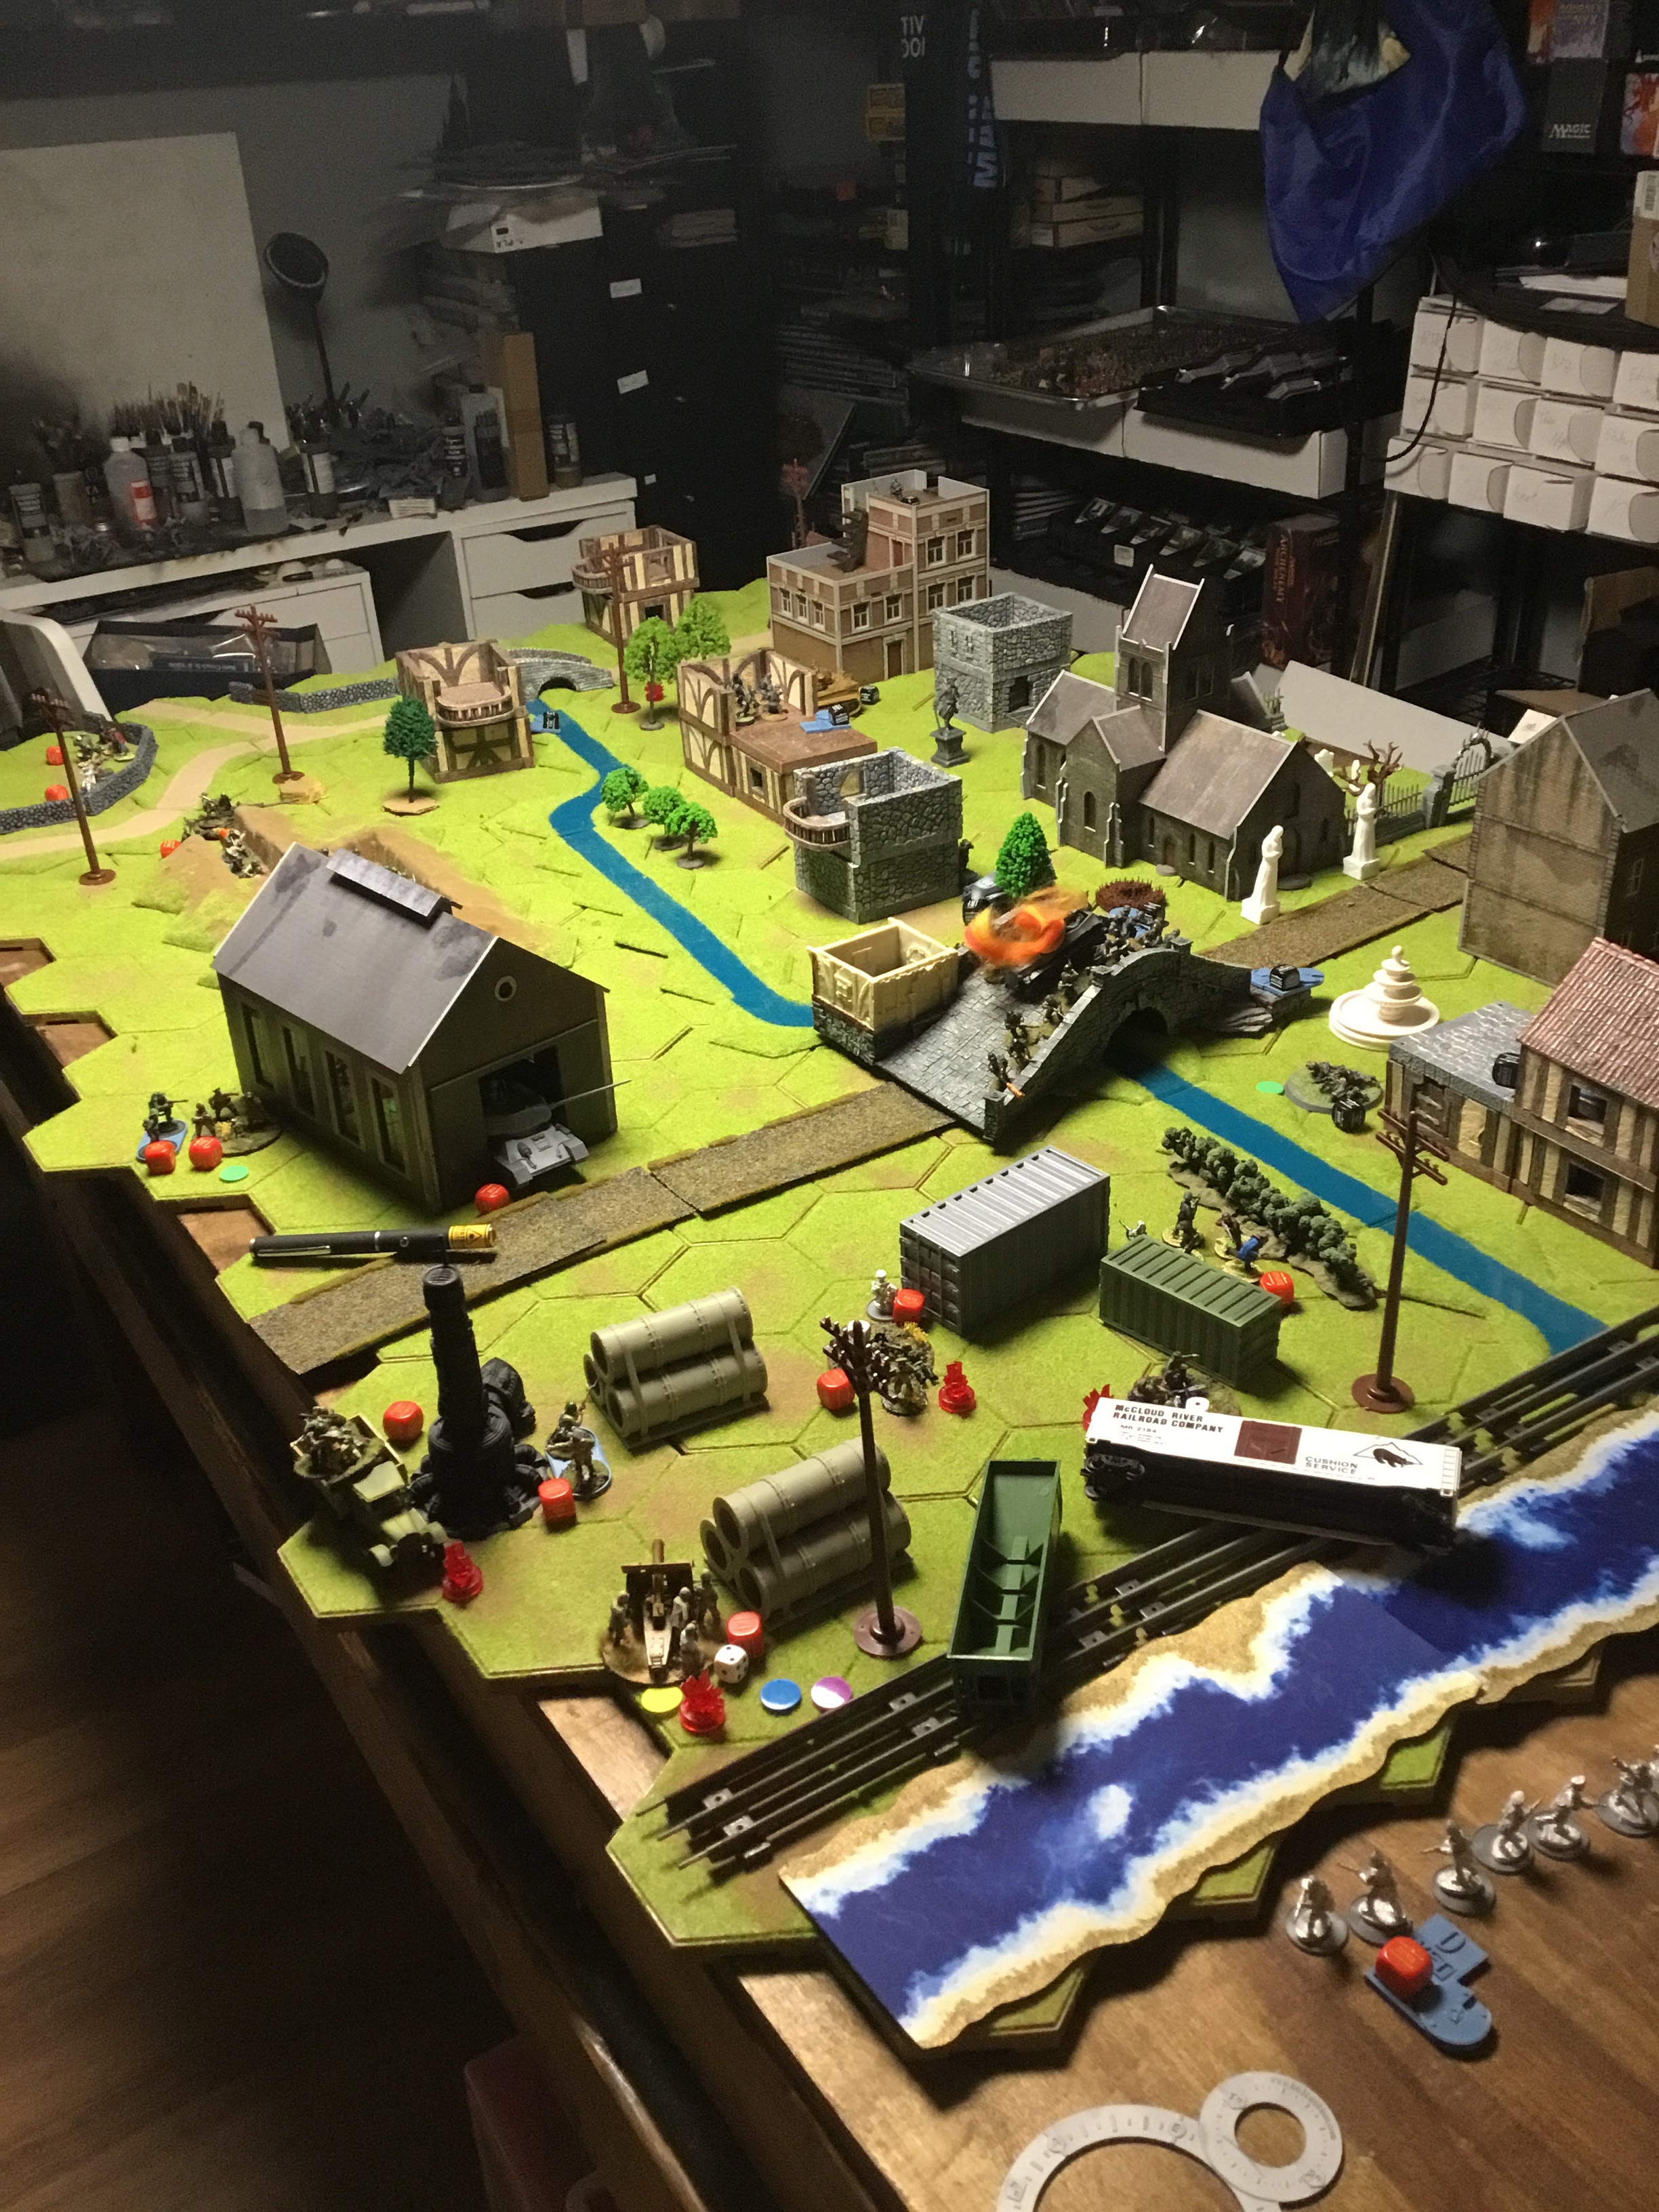
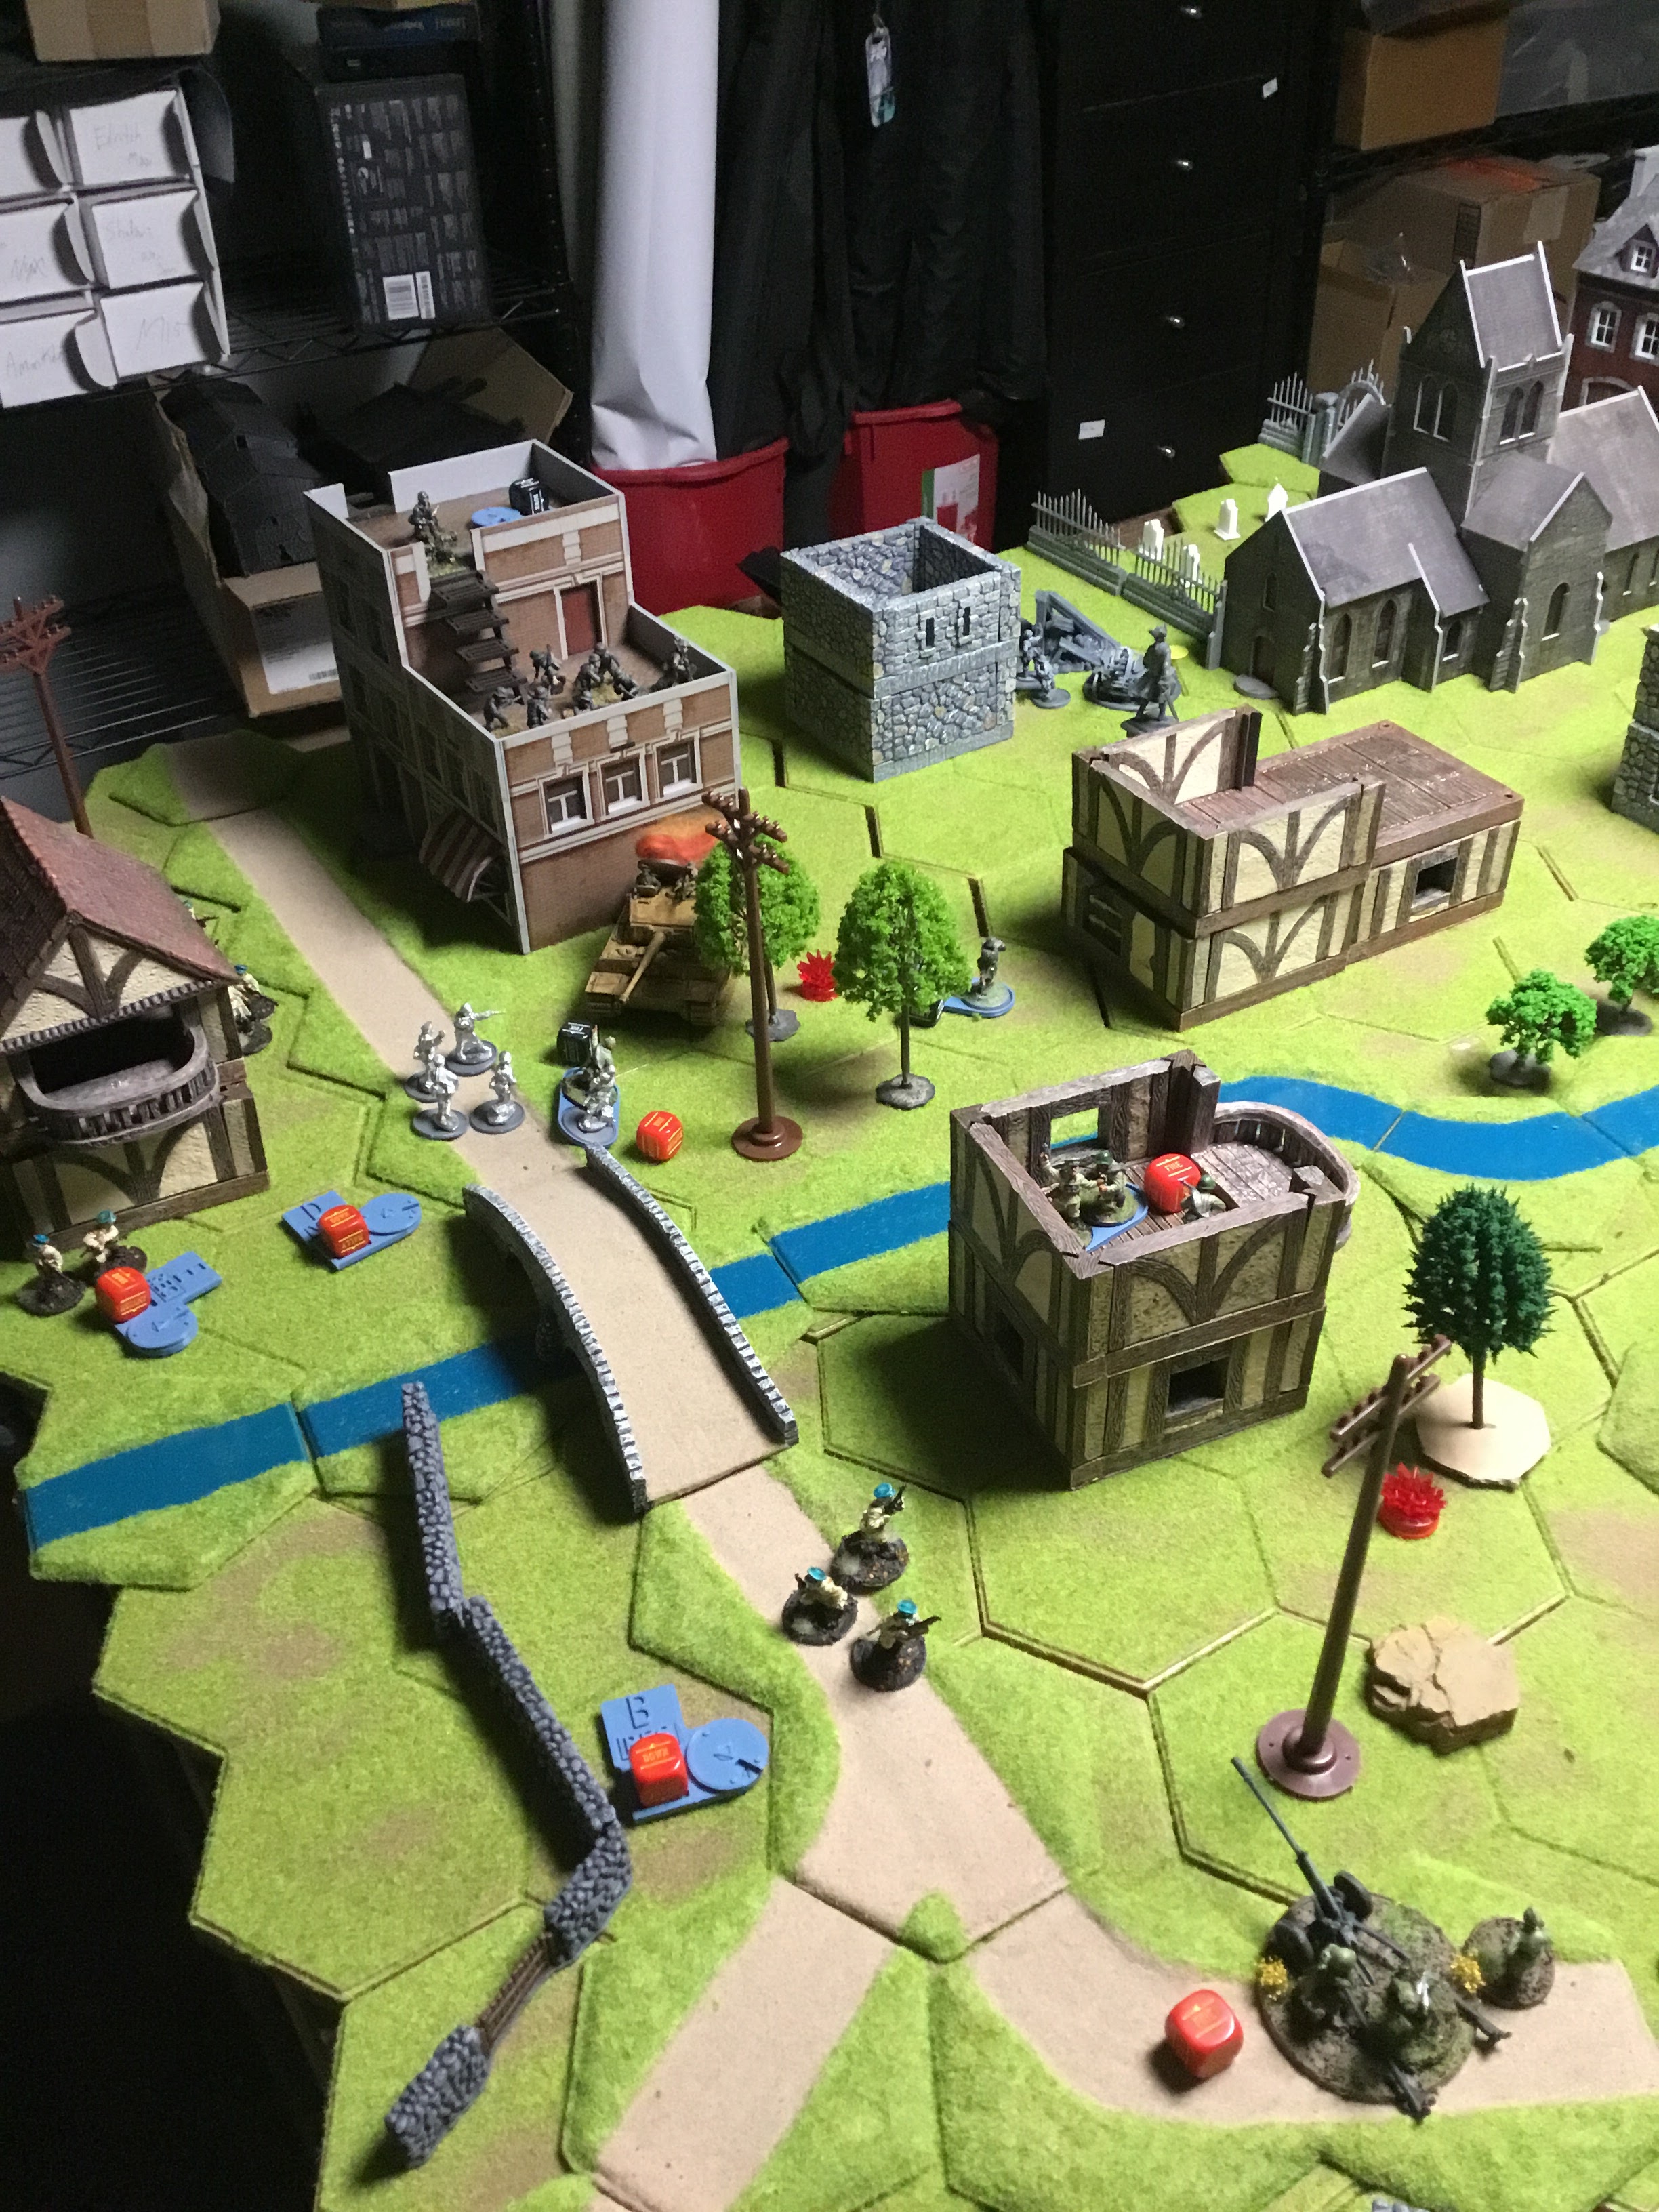
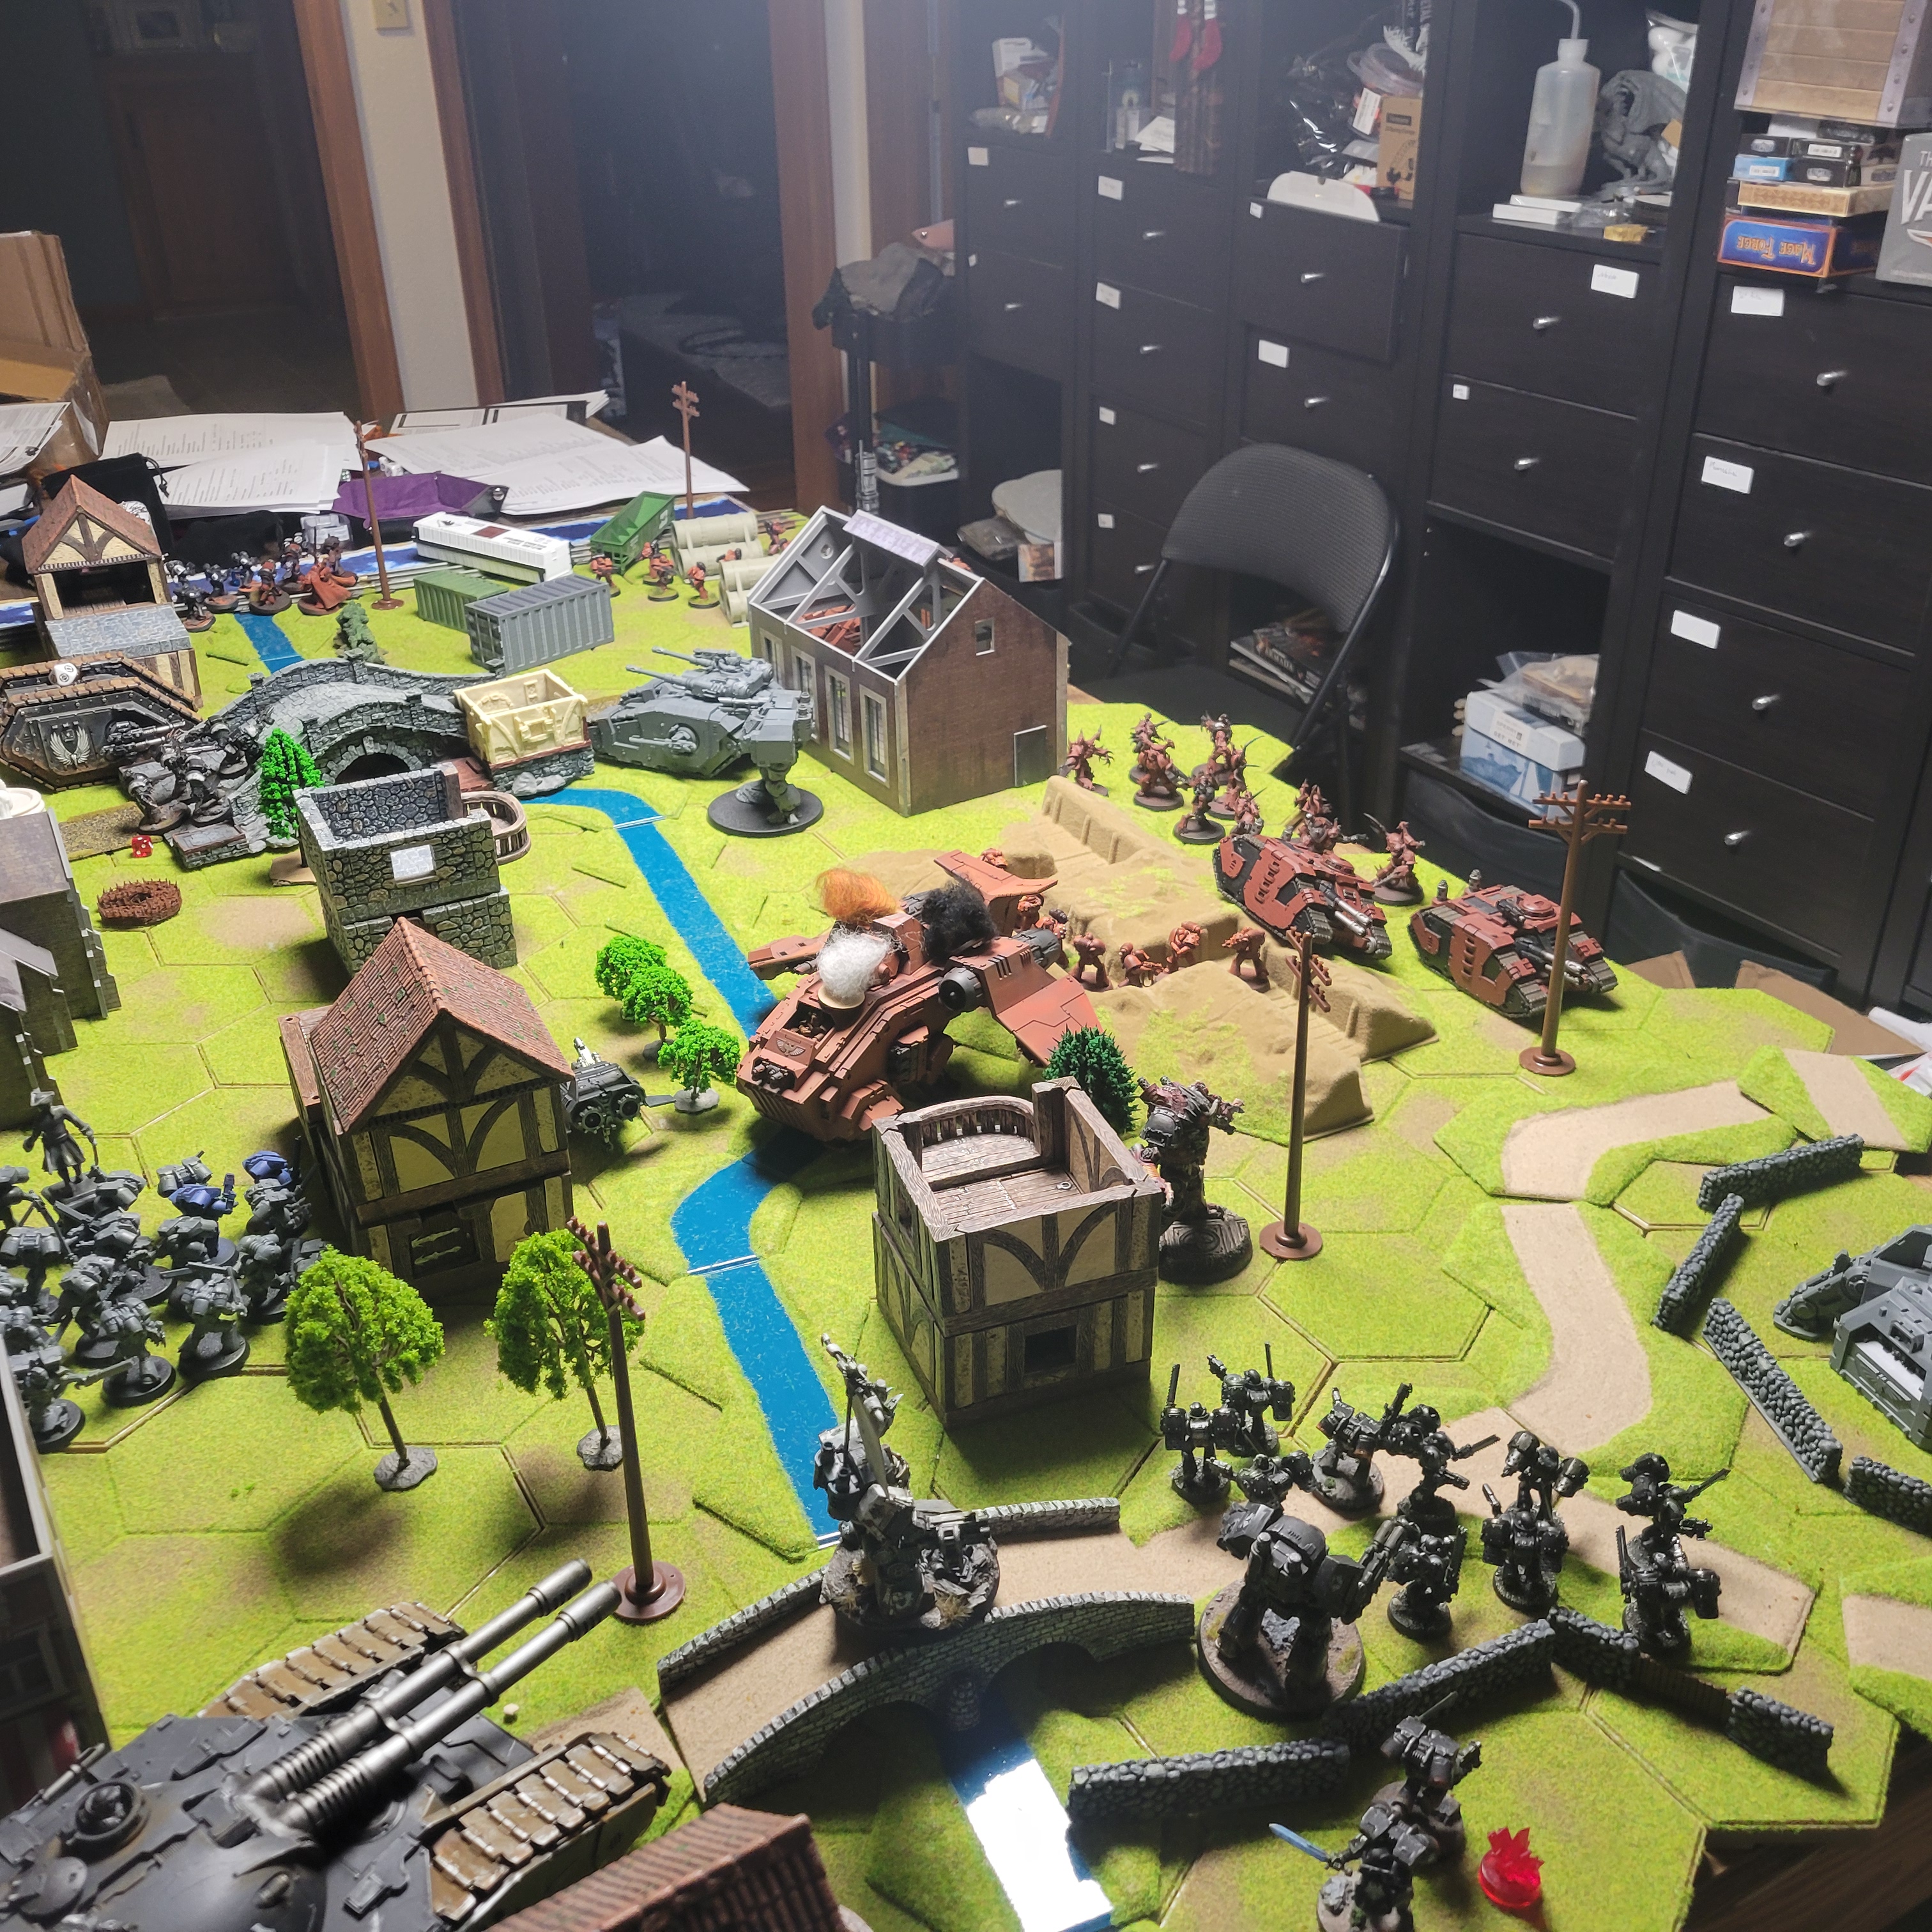
Turn 2

Heavy shooting here, the Fellblade knocks down the Gunship. The Ravenguard Landraider destroyed the Sicaran. The Ravengaurd are very aggressive with their land speeders and have dropped in their assault marines. They have also pushed with the Rhino carrying the Deliverers. The Word Bearers countered the tactical marine advance on the railroad bridge with their own terminators and they moved their own land raider into position to cover the bridge along with the daredeo dreadnought.
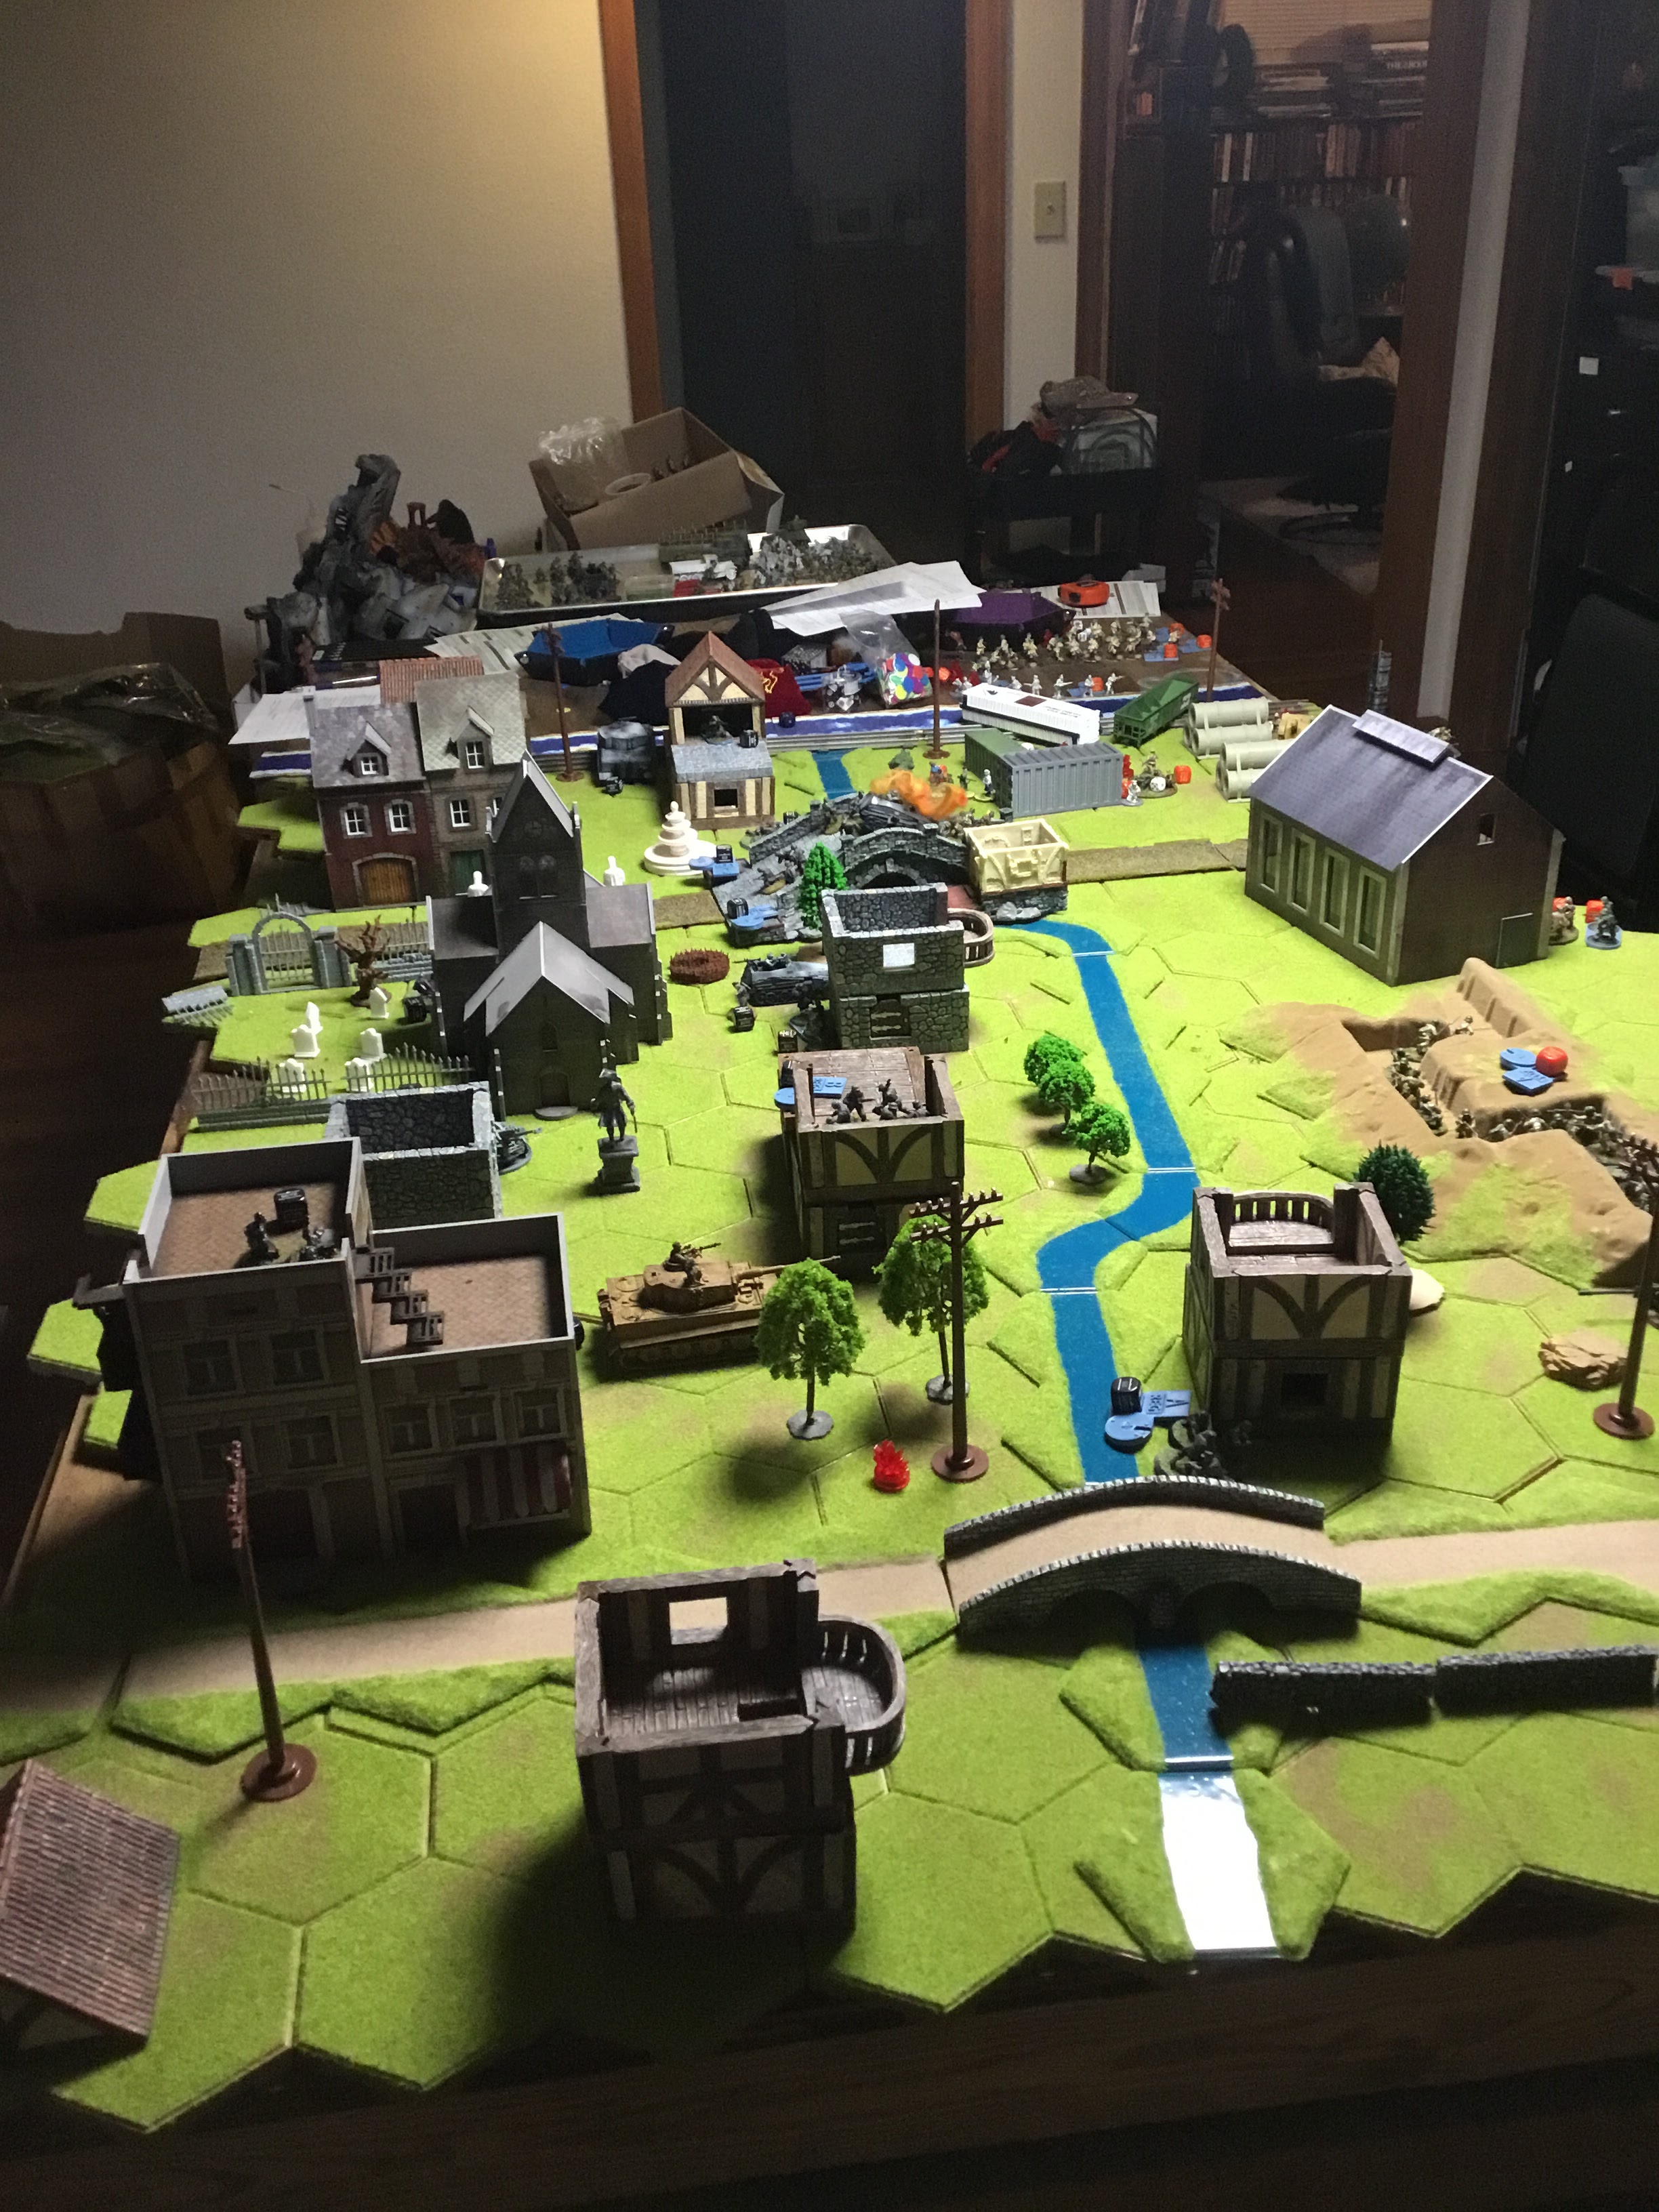
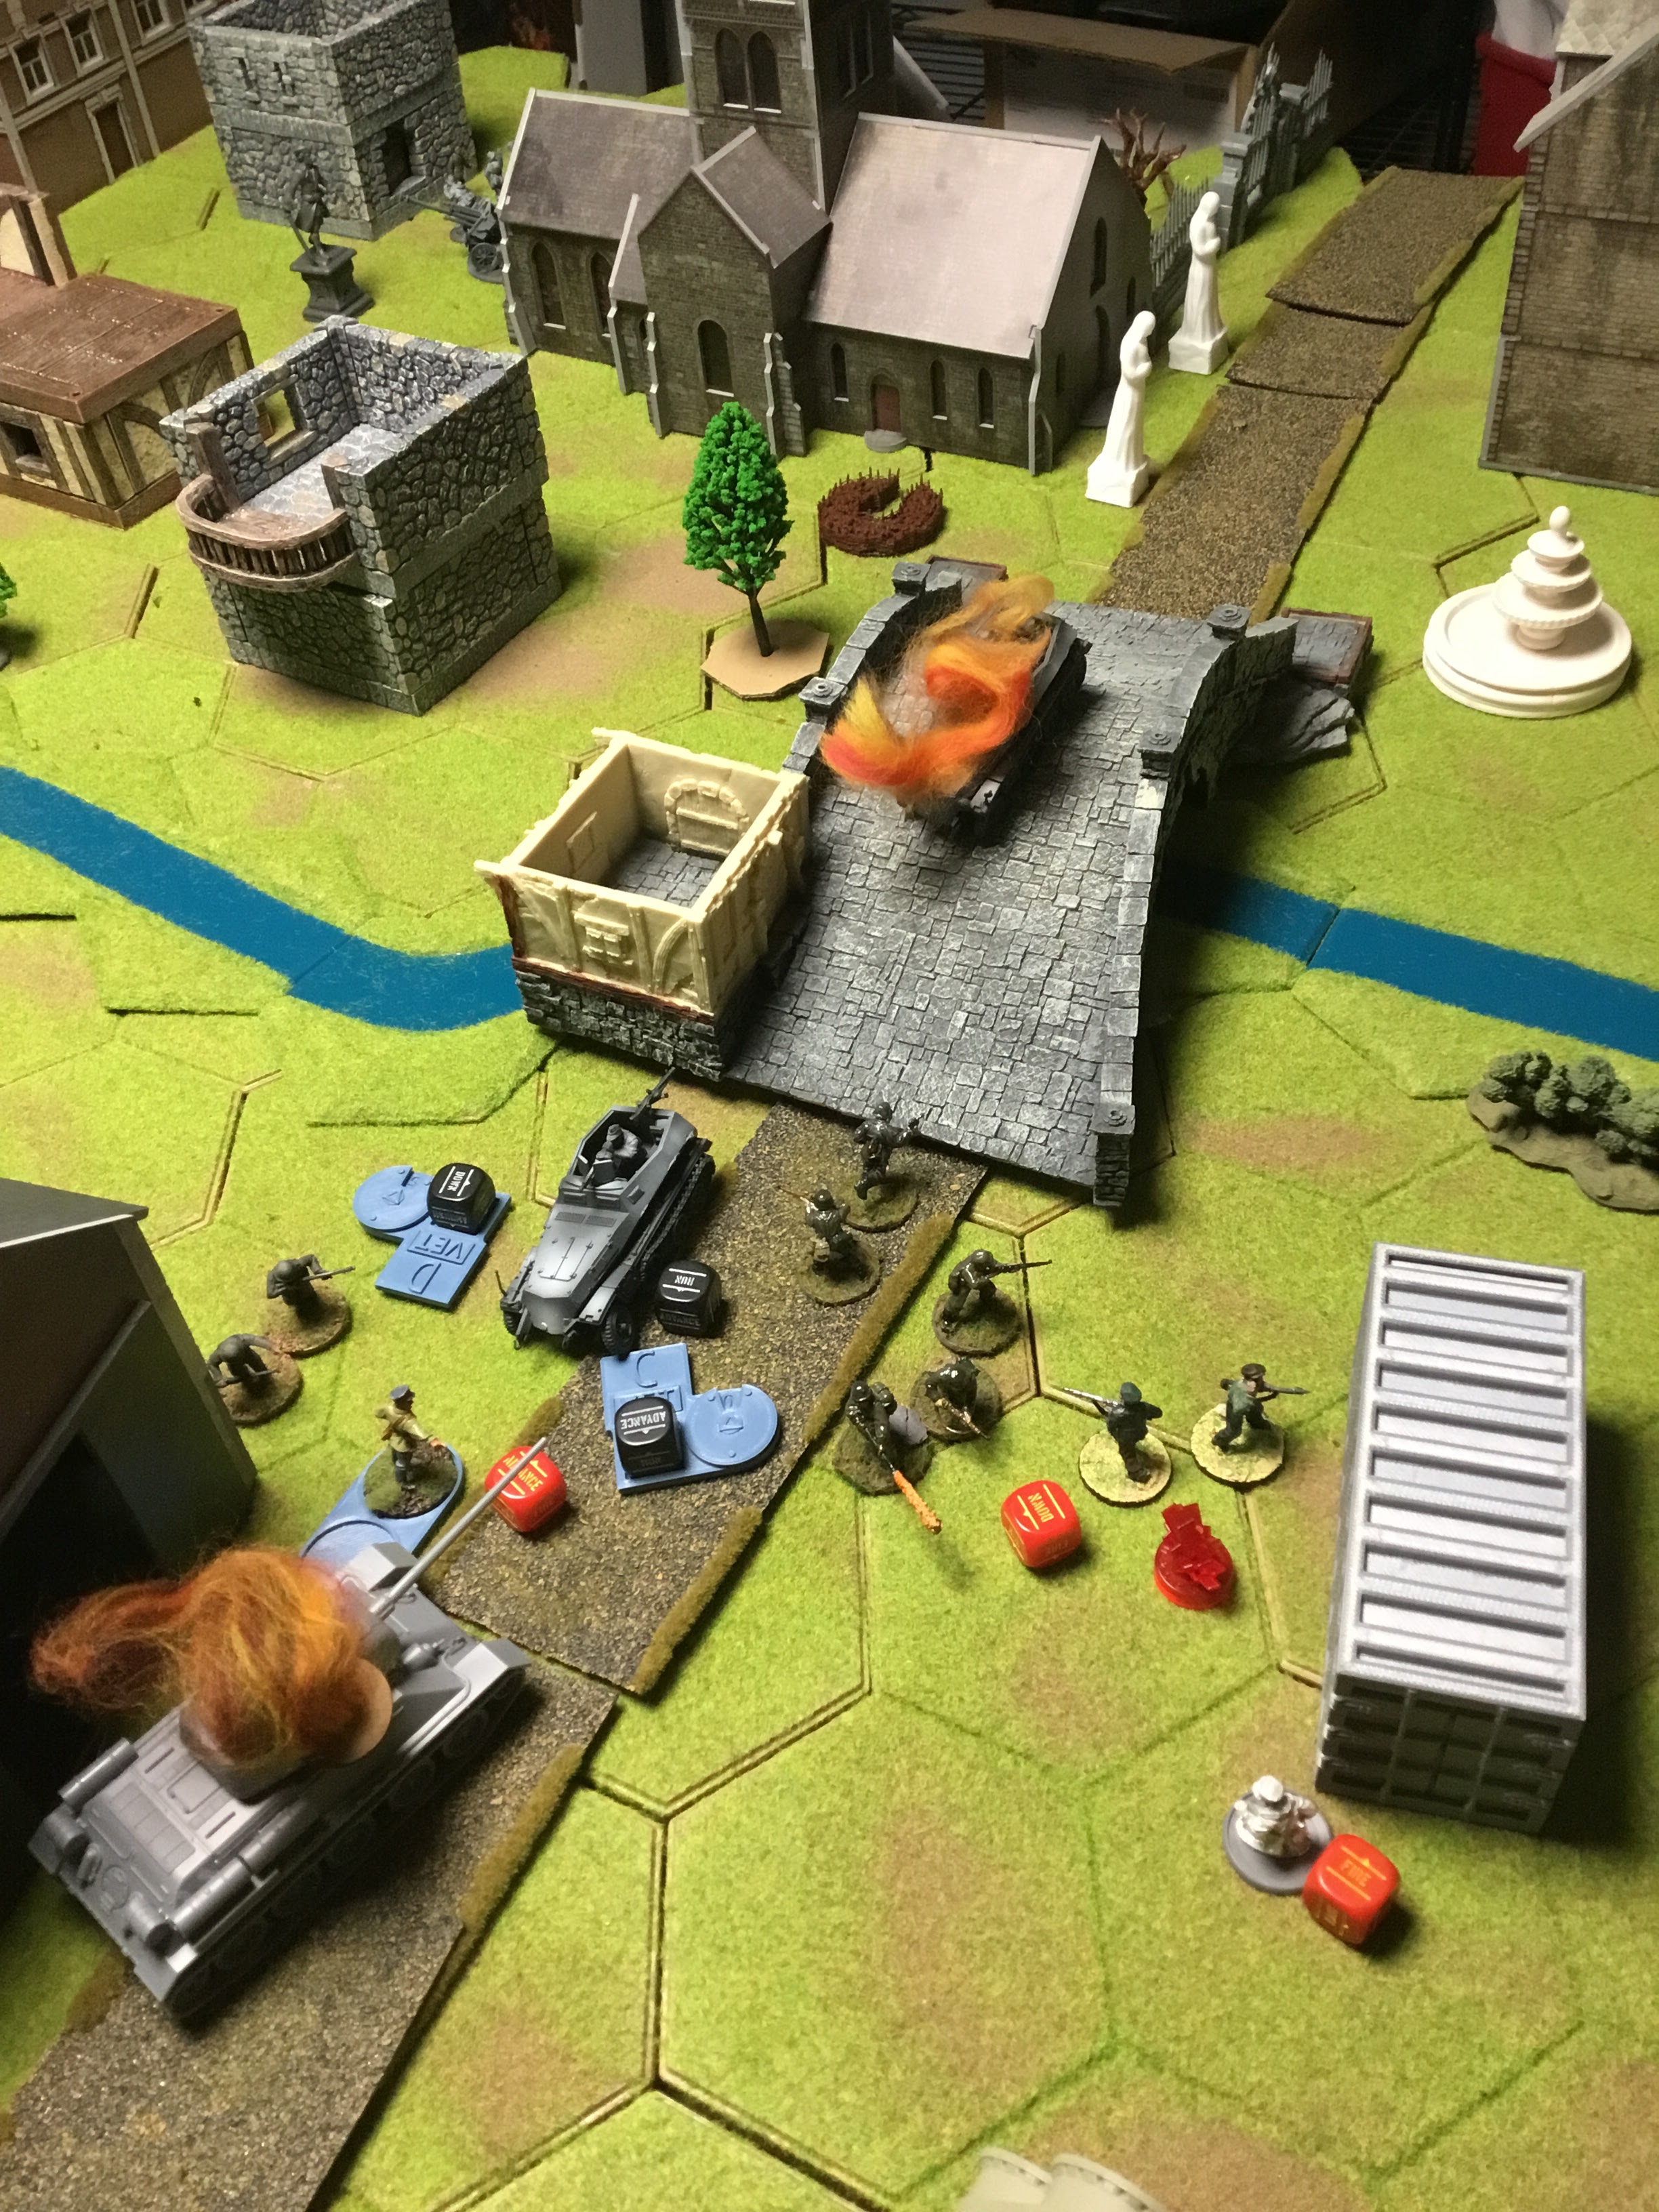
Turn 3

The Word Bearers have turned the corner. With some clever movement, the Word Bearers took the Fellblade out of the game; the Fellblade did not have a line of sight with its lascannons and had to take a hopeful shot against the Deredeo Dreadnought but missed. The Word Bearers destroyed most of the speeders for the Ravenguard, destroyed an entire assault squad, and pinned the unit of tactical marines as they tried to cross the railroad bridge. They also destroyed the command rhino attempting to deliver the Deliverers. Finally, they landed 20 assault marines behind Ravenguard lines. The Ravenguard didn’t really do anything helpful.
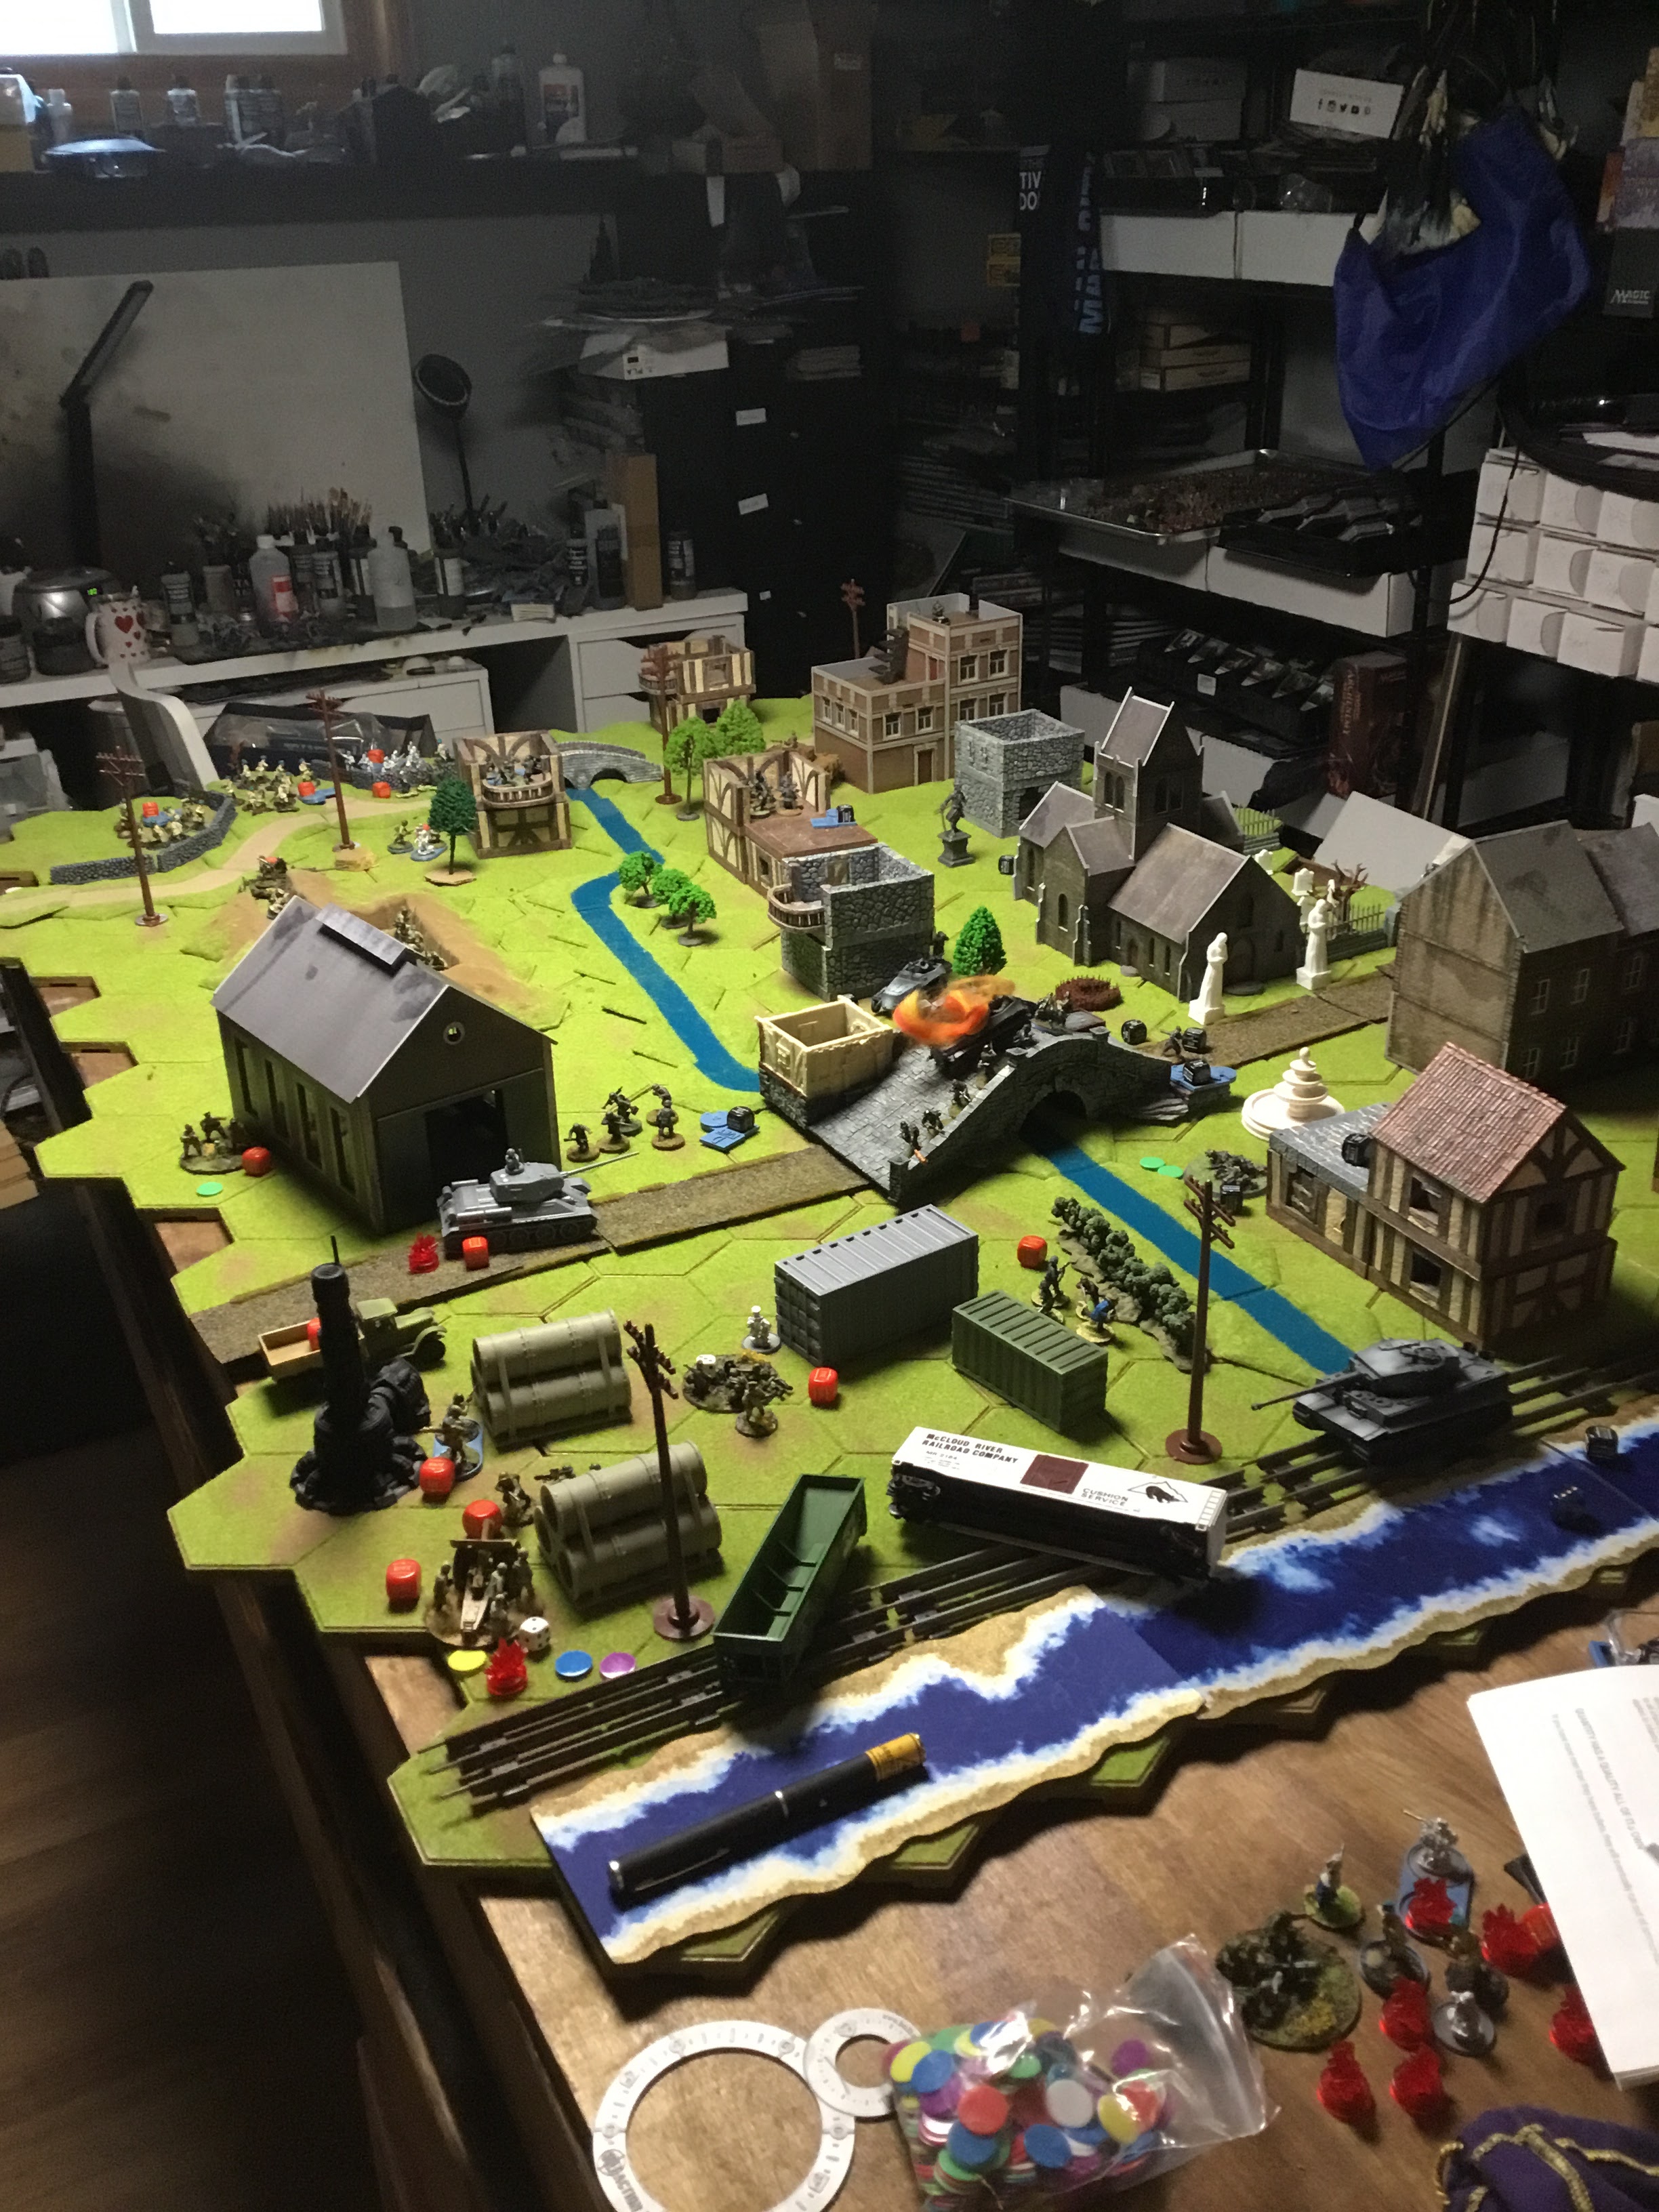
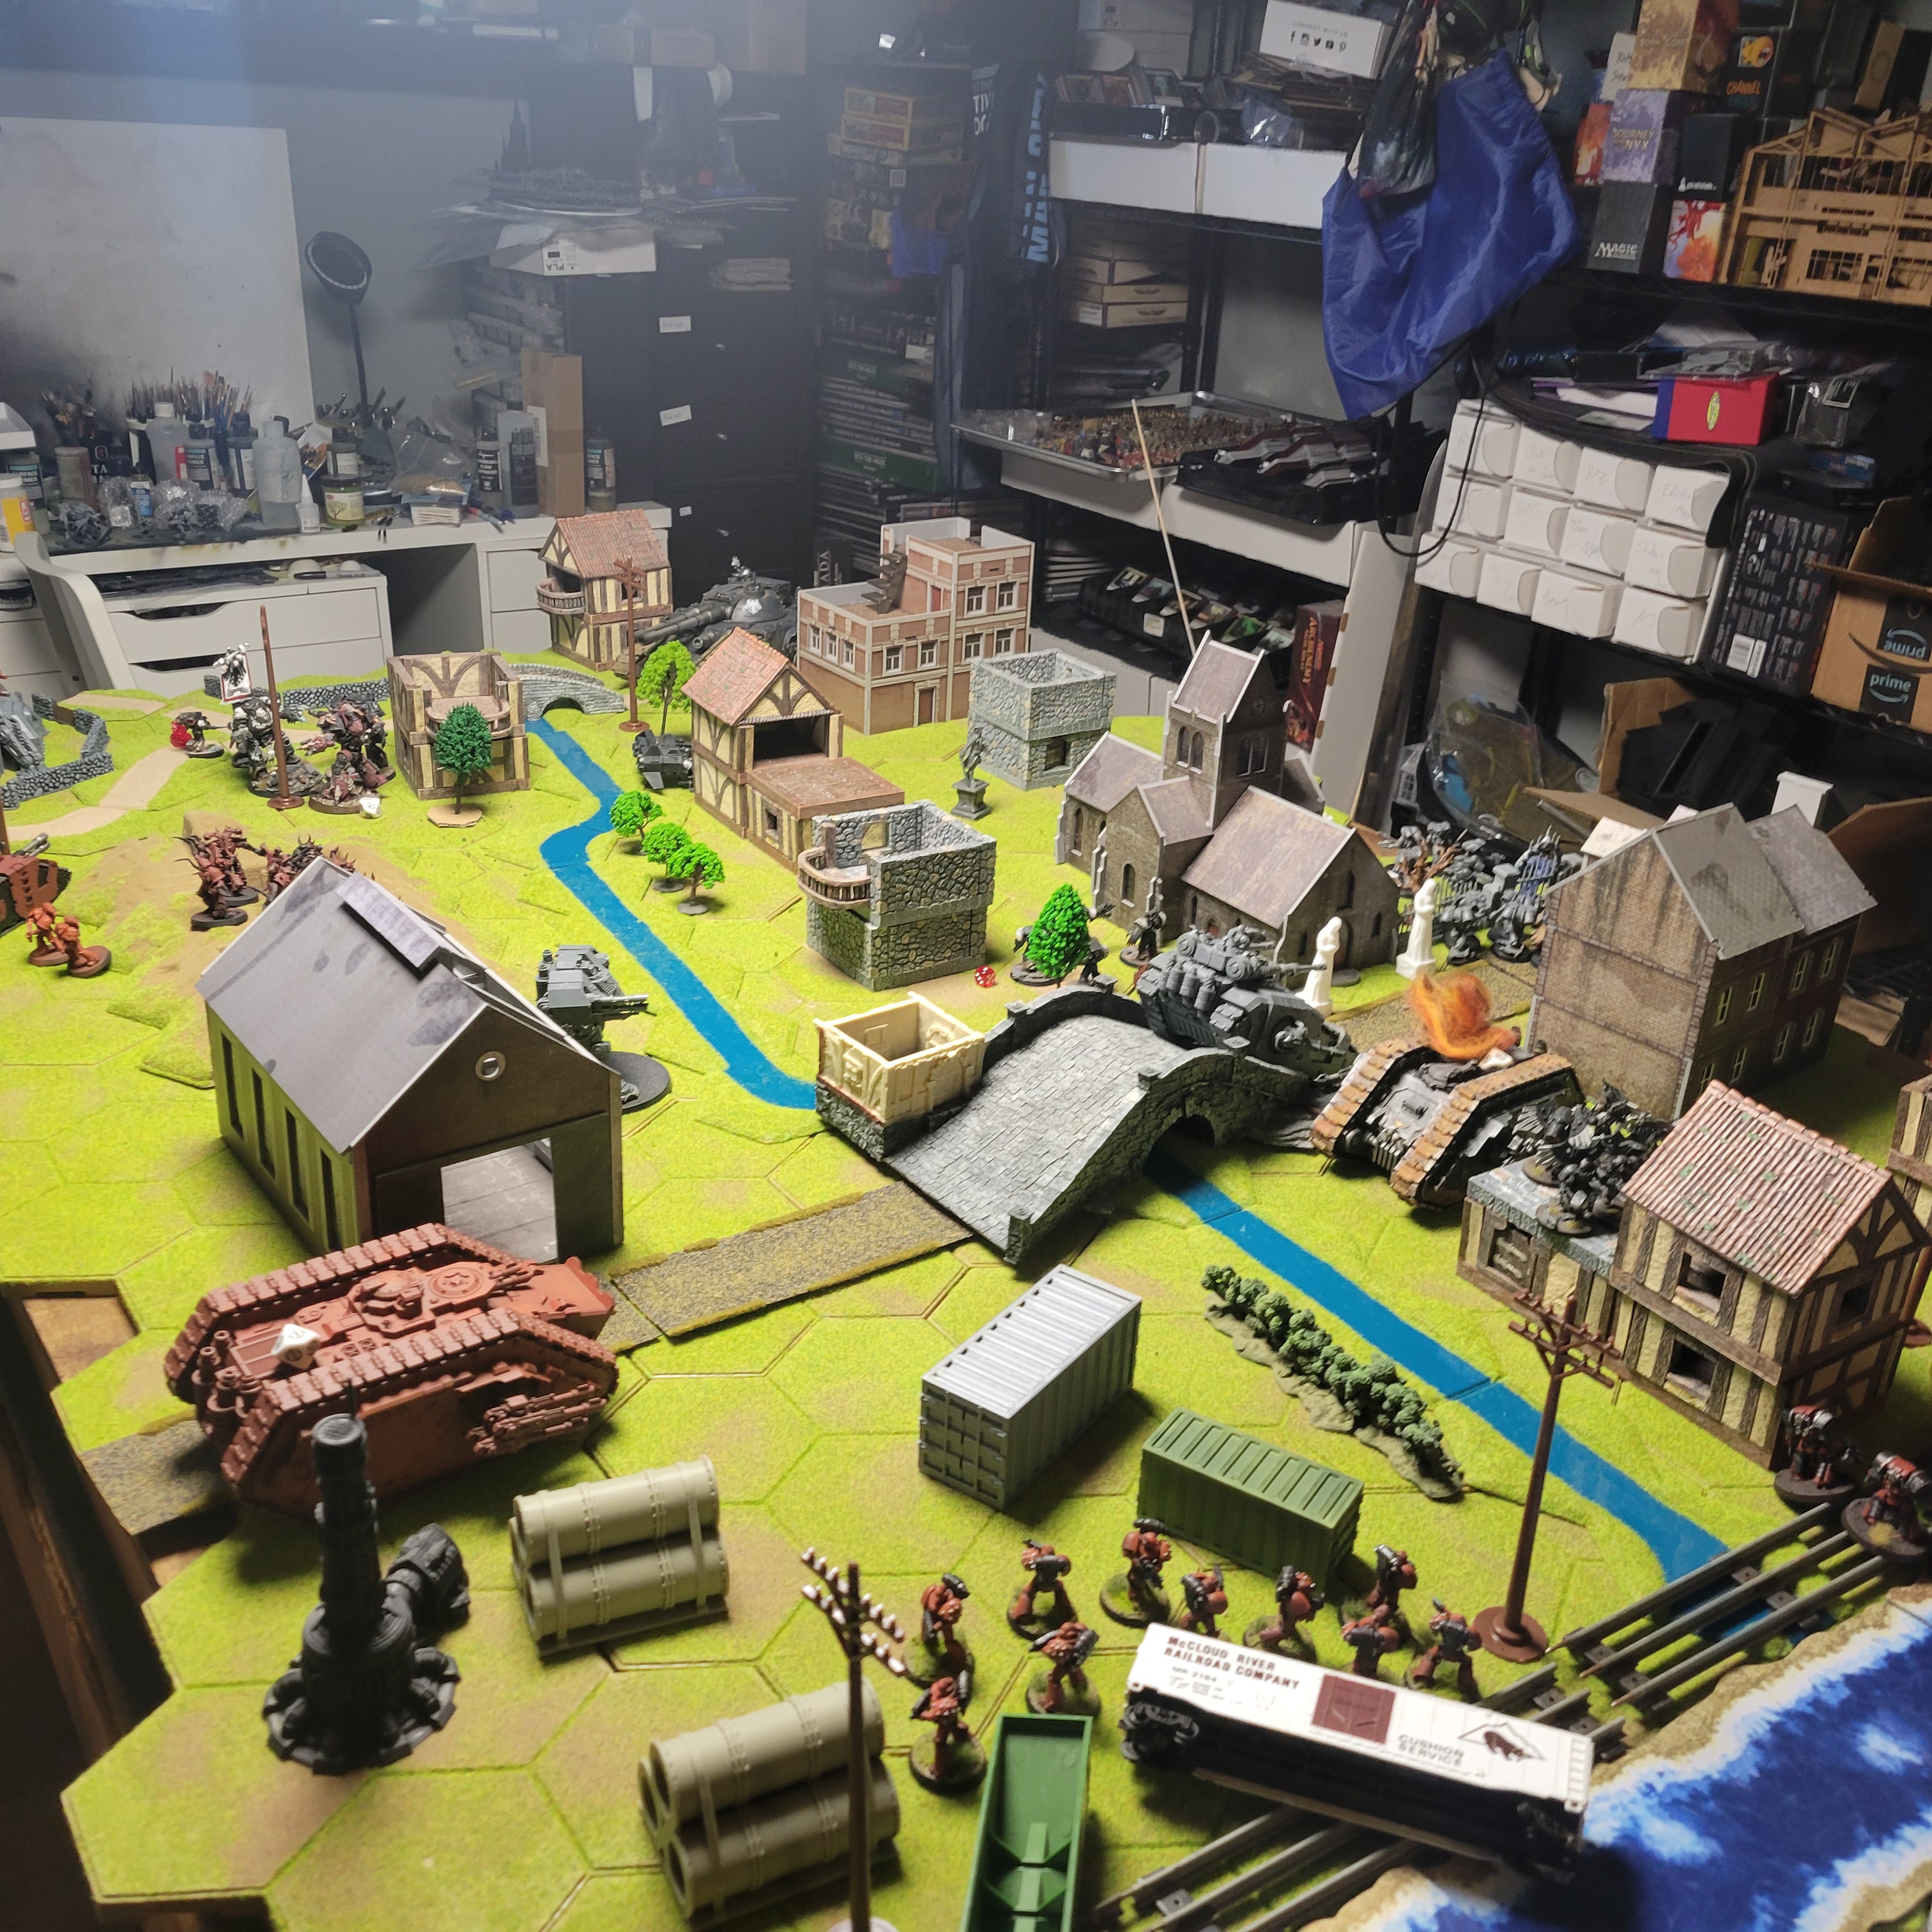
Turn 4,

After this turn, I called the game. I could not see a path forward to victory for Ravenguard. The Ravenguard lost their Land Raider, lost all their assault squads, and did zero damage to the Mhara Ghal Dreadnought who tied up both Contemptors. The Ravenguard did manage to kill a Sabre, a tactical squad, and, maybe a terminator.

Ravenguard3000Word Bearers2850
Damocles Command Rhino Destroyed150Praetor Cataphractii140
Strike Captain Alvarex Maun140Gal Vorbak Squad550
Contemptor Dreadnought Talon x2350Mhara Gal Dreadnought240
Deliverers Squad225Terminator Cataphractii175
Assault Squad Destroyed145Assault Squad X20265
Assault Squad Destroyed145Tactical Squad 2 Alive100
Tactical Squad x18 2 Left Alive250Tactical Squad100
Dark Furies150Sabre Strike Squadron 1 Destroyed150
Javelin Squadron Destroyed180Storm Eagle Gunship Destroyed210
Proteus Land Speeder x3 Destroyed180Deredeo Dreadnought Talon205
Land Raider Proteus Destroyed235Land Raider Spartan250
Legion Basilisk200Sicaran Squadron 1 Destoyed365
Fellblade650
4 VPs for Destroyed Units3 Units in Enemies Backfield7 VPs for Destroyed Units4 Units in Enemys Backfield

Why I Called It

The very best turn imaginable would have been the following, Fellblade destroying the Daredeo +1 25% chance (no line of sight to the 2nd Sabre), the two contemptors destroying the Mhara Ghal +1, 4% chance, the Dark Furies landing on the far side and living +1 66% chance, the 2 remaining space marines winning combat on bad initiative and forcing back the terminators and praetor -2, <1% chance, which would have resulted in a +1 win for the Ravenguard.

The Word Bearers would have responded with, focusing fire on the basilisk, 75% of destroying it. +1, using the Land Raider and Tactical Squad to Destroy the Dark Furies 33% chance +1 and -1. The Ghal Vorbak charging the damaged dreadnought 18% +1 and -1 chance of destroying it. Killing the remaining 2 tactical marines. 85% chance.

AOS 4th Edition First Impressions

Age of Sigmar 4th edition has been out for about a month, and I finally played my first game.

Conclusions

Pros
– The gameplay is faster, especially compared to 40k or 2nd edition
– The new app is a significant improvement over the old
– Armies feel different
– New command point structure and reactions
– Consequences for double turn

Cons
– New detachment rules will be challenging as new books get released
– Simplification leads to a lack of depth
– New missions were a tad confusing

Other Thoughts
– Fly is a big deal
– The game is about Hero’s and monsters
– Know your army’s rules!!!

At first glance, the game was the same as in the prior editions. Most things will be the game you remember. I think the changes that were made helped differentiate AOS from 40k. The new list-building rules, the reactions, how command points work, and losing VPs for taking the double turn all add up to a unique game.

Since the 8th edition, 40k has always felt competitive and gamey rather than beer and pretzels. While I love a good league and competition, I would prefer to roll dice and make pew noises on a summer Saturday afternoon while trying to pull off a ridiculous combo. Age of Sigmar gave me that beer and pretzels vibe.

Using the app during gameplay was easy once you did it a few times. I would prefer one less touch of the screen when going from unit to army and vice versa, but it felt natural once you did it a few times. I have always thought that you should be able to add your opponent’s force and have a dice rolling function in the app, so if your unit A was shooting at his unit B, with this buff, here is how many casualties. I understand why they don’t. In competitive games, they want there to be skill involved in Mathhammer.

I did glance through several individual armies’ various rules, and at first, they appeared very well balanced. I am fearful that as new army books are released, we will see classic power creep, and every couple of months, it will be about the newest army.

Battle Report
My friend was interested in getting into AOS, and I was itching for a match. He was looking at purchasing either Nighthaunt or Idoneth. I brought both to our battle. I built the lists based on what my friend wanted to buy rather than what I thought would be good. I honestly hadn’t even opened my 4th edition rulebook and knew nothing about the army’s special rules. Of our 3-hour session, 1.5 was spent looking up rules.

Idoneth1570Nighthaunt1430
Mathlann Aspect of the Storm330Lady Olynder Gen300
Akhelian King200Black Coach260
Akhelian Leviadon500Bladeghast Revenants150
Akhelian Morrsarr Guard170Bladeghast Revenants150
Namarti Reavers130Chainrasps Reinforced200
Namarti Thralls120Chainrasps100
Namarti Thralls120Grimghast Reapers140
Spirit Hosts130

The entire game took less than three hours, from mission selection to set-up, 5 battle rounds, and tear down.

We used a random card from the Skaventide box. After looking through the GHB missions, we found that they were all a little rule-heavy for what we were looking for today, so we just said kill.

In what ended up being a very close game, my friend did just a bit more damage to my Nighthaunts than I did to his Idoneth. My black coach’s failed 4″ charge into his reavers would have changed the game. He also had an additional unit that would have been a beneficial screen.

Stalingrad 3 Spartanovka

The third Stalingrad scenario played very simply. 2 Armies with 1500 points. Each unit across the river gets you a victory point. The Germans will launch a preparatory bombardment, while the Soviets can begin dug-in. The Soviets also get 24″ of trenches. The battle is on a 6×4 table.

Results
Both forces managed to get 4 units across the river. The Germans destroyed 6 units, while the Soviets only killed 3. However, the 3 units for the Germans were worth more points than the 6 units for the Soviets. I called this match a tie.
The scenario played nicely as a whole. The units were forced to flow and move rather than stand and shoot like in other scenarios. Target identification was crucial. The Germans were able to stick a couple of units of Veterans on the Soviet side of the river for most of the game, and they were truly impossible to move. I didn’t like the lack of realism; turns 5 and 6 were just a mad dash to get as many units across as possible, while for the Soviets, this makes thematic sense. The Germans were a little more careful with their manpower.

Army Lists
Germans Kampfgruppe Reinforced
Soviets Tractory Factory Reinforced

Germans1505Soviets1506
Leutnant Reg50Rifle Squad InexFree
Panzgrenadier Reg97Senior Lieutenant Reg85
Panzer IV B,C,D,E,F Reg175Militia Squad Inx35
Panzgrenadier Reg108Militia Squad Inx35
Heer Pioneer Vet124Frontnik Commisar Reg60
Heer Veteran Infantry111Arty Fwd Observer120
MMG Reg50NKVD Squad Reg113
Medium Mortar Reg60NKVD Squad Reg155
Sniper Reg50Naval Squad Vet119
Anti-Tank Rifle Reg30NKVD Squad Reg80
Medium Howitzer Reg85MMG Team Reg55
SDFKZ 250/10 Reg135HMG Team Reg80
Panzer IV Ausf G,H,J Reg235Sniper Reg50
SdKfz 250/1 Reg75Flamethrower Reg55
Tank Hunters Team Reg67
Medium Mortar Reg60
Medium Howitzer Reg85
M-42 Anti Tank Reg58
T-34 Inx Tractor Factory140
Truck Reg54

Based on the scenario, I felt like having the Germans with a few elite sticky units would be helpful. For the Soviets. Numbers all day long. The NKVD and Naval squad would be my crossers, set up as reinforcements.

Table and Deployment

The table was 6×4 with a small river running down the middle. There were three crossings: a railroad bridge, a central large bridge, and a small bridge. The Soviets had industrial cover and trenches, while the Germans had an assortment of residential buildings. The river to the bottom is the Volga, a significant feature in the battle for Stalingrad.

The naval and NKVD squads will deploy to the top of the table in an outflanking maneuver. In hindsight, I should have had them flank from the bottom narratively. The Germans had many buildings with high sightlines, which were great for artillery observers and snipers. The German’s goal will be to pick off whatever units possible and try and overload the bottom table edge. The Soviets are all about numbers, running as many squads as possible over the bridge at the last minute.

The deployed forces

Both armies deployed their units in as much cover as possible, with the German tanks taking up major sightlines.

Round 1 was mostly positioning and clearing the many pins that the predatory bombardment had on the Soviet forces.

The German’s began their assault on the undermanned Soviet defenses, eagerly waiting their reinforcements.

The Soviets fired back, pinning multiple units and destroying a mechanized platoon as it attempted to cross the bridge.

Round 3, the German tanks move into position. At the top of the image, you can see the arrival of the Soviet reserves, which were boosting their cause.

Rounds 4 and 5 were a mad dash across the river to grab as much territory before nightfall.

In the end, both forces took far more casualties than needed for a drawn engagement.