On July 12th 1801, six British ships of the line pursued and attacked nice French and Spanish ships in the strait of Gibraltar. The French and Spanish were attempting to flee the British but were caught in the middle of the night. The ensuing fighting caused confusion as both sides fired upon their own forces.
To wargame this particular battle will require the use of an umpire or other party to determine who can see whom and what.
Set-up use black seas rules
3 players
2 separate identical tables with a grid clearly marked.
6 British ships of the line and 2 frigates, 9 Spanish and French ships of the line with 3 frigates. plus several extra ships.
No terrain is needed
Light markers
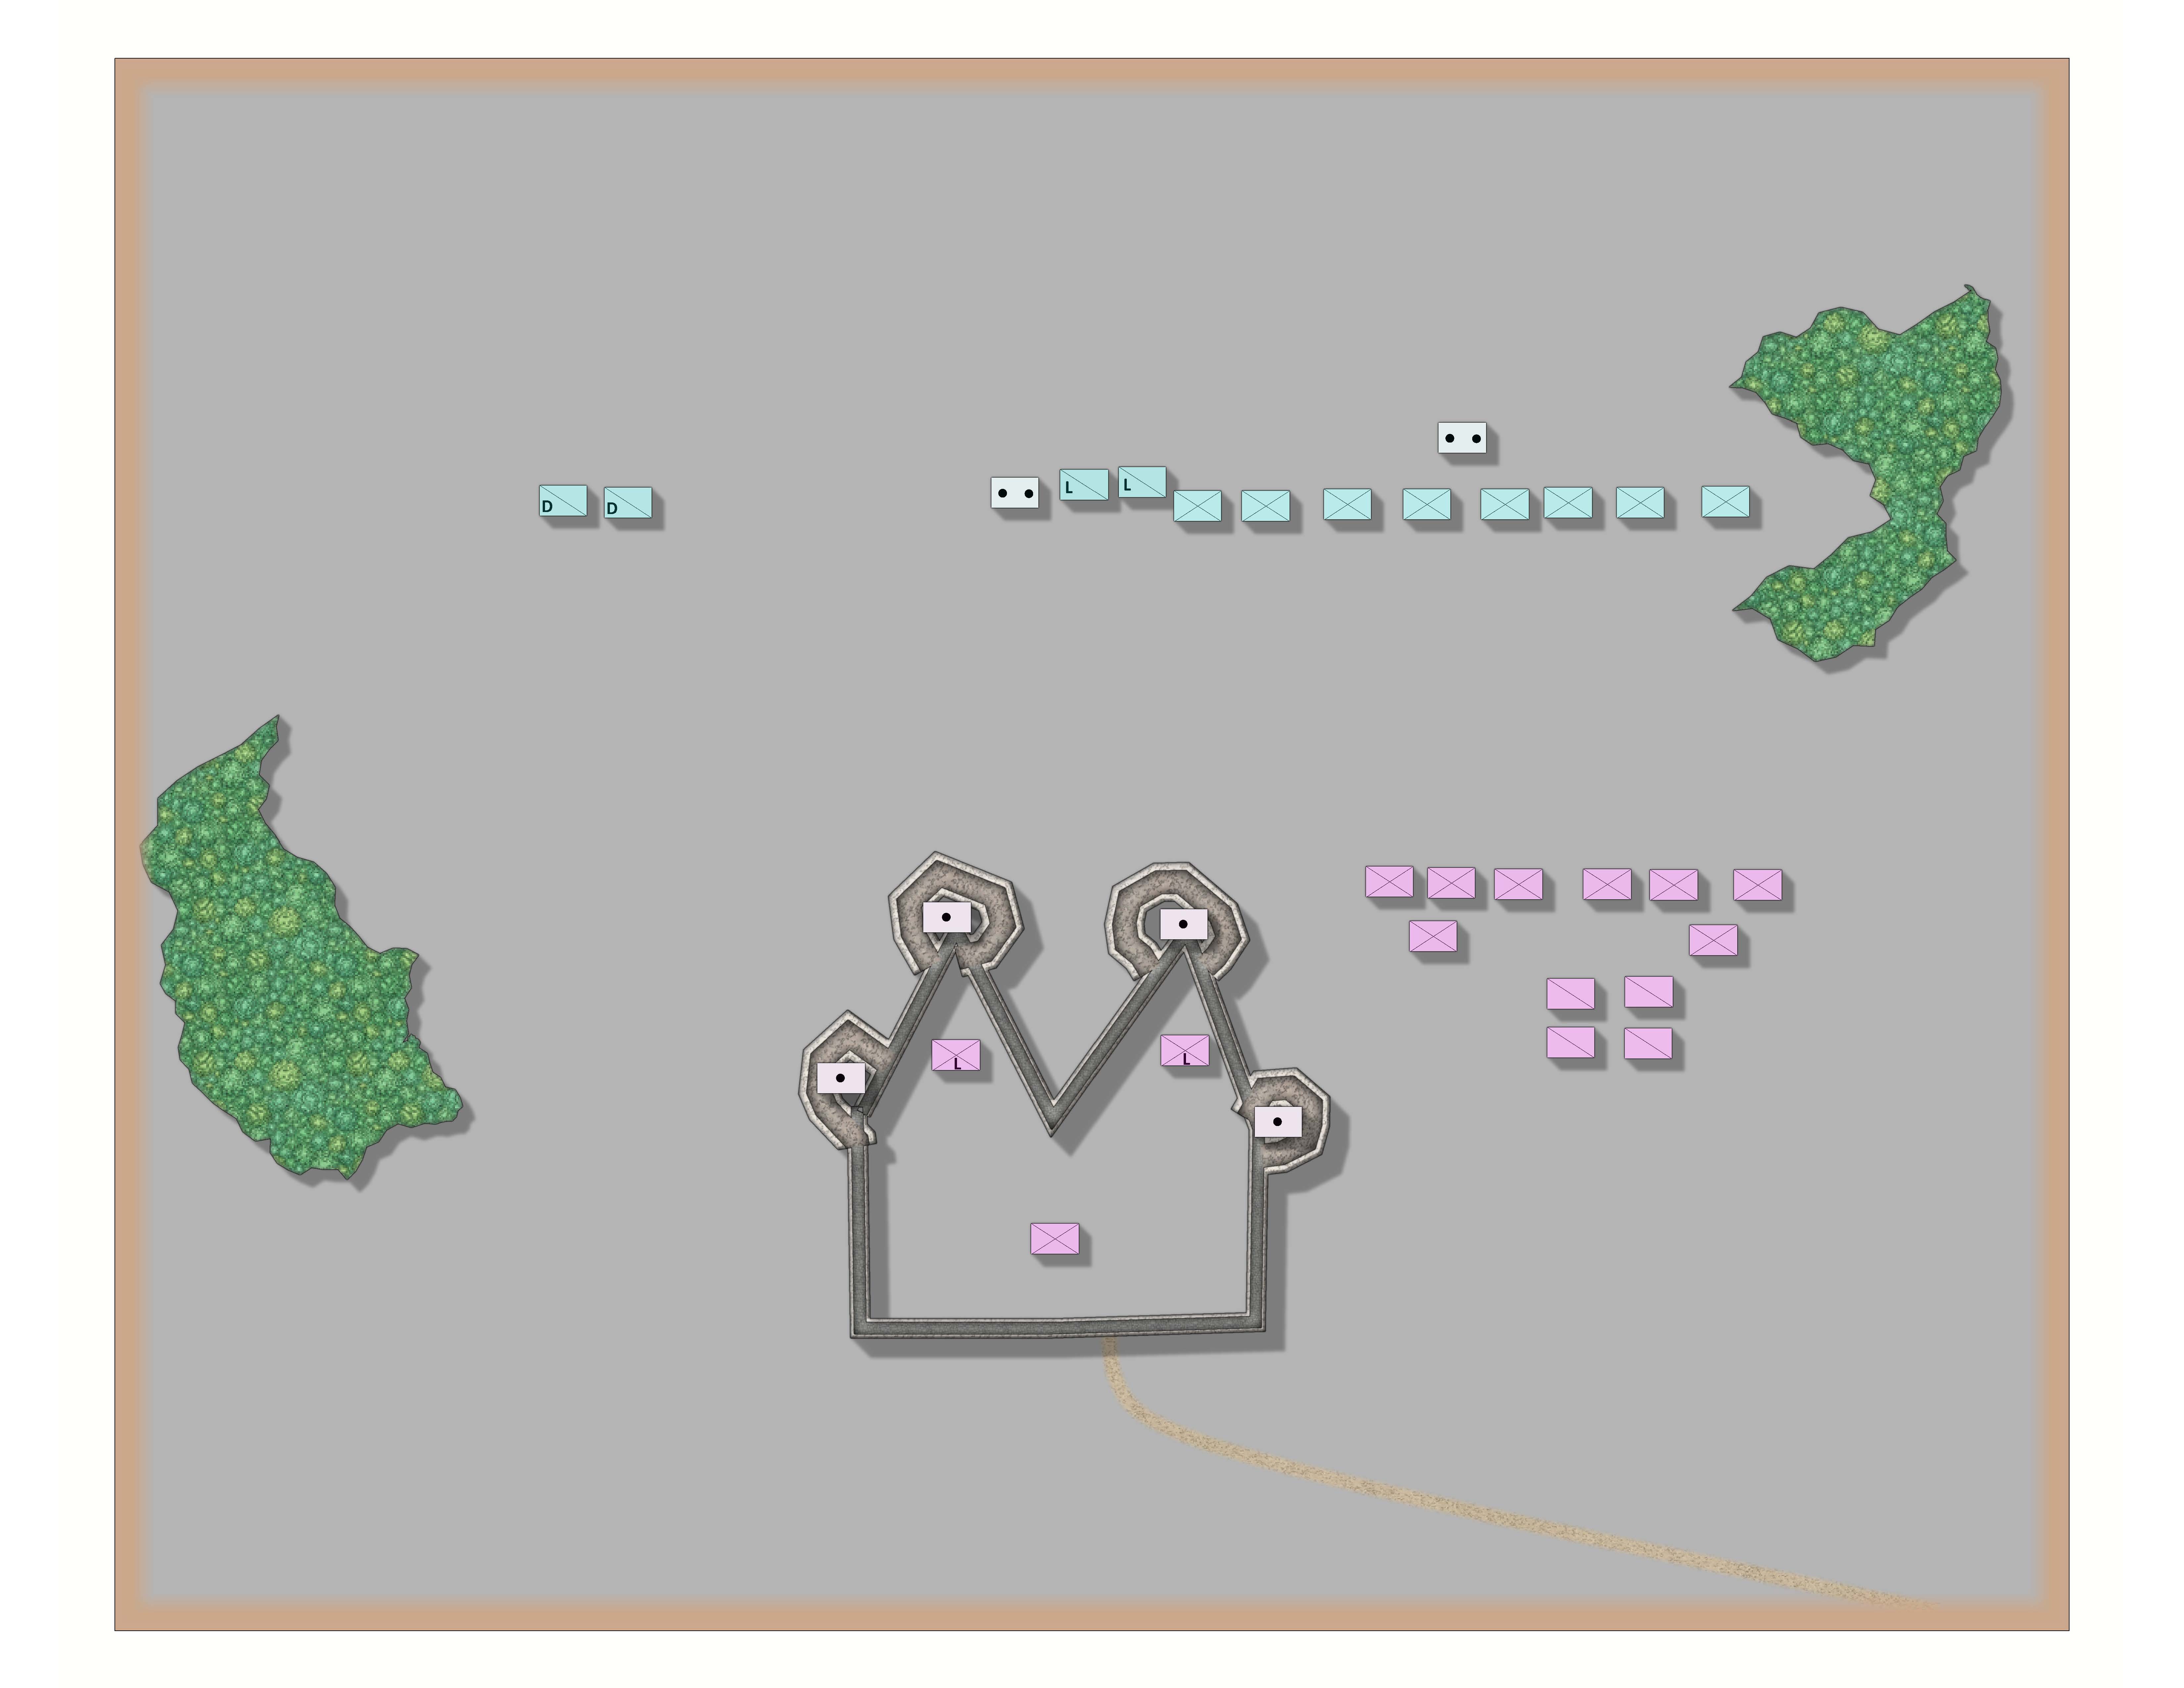
Set-up
Each player should set up their ships on a different table.
The wind should be set with both players sailing with the wind. The Spanish should be spread out with three ships trailing behind the rest of the fleet. The British should be within one move of the Spanish ship.
The umpire should indicate the following, a marker where the closest enemy ship is, and a marker anytime shots are fired. As the battle commences and more ships become involved. The roll of a d6 should be incorporated for friendly shots fired with the 1 indicating the direction to move the marker, and the number of inches away. The goal is to add to the confusion and potentially allied ships being fired upon. Finally if a ship is on fire it should be clearly shown on the opponent board.
An example, the 4th turn of the game a British ship fires where it thinks a Spanish ship is located. The Spanish ship fires where it thinks a British ship is located. The umpire should place two markers on each board. Each marker based on the roll of the dice from the ship that fired.