Old World Battle Report Wood Elves Vs Beastmen

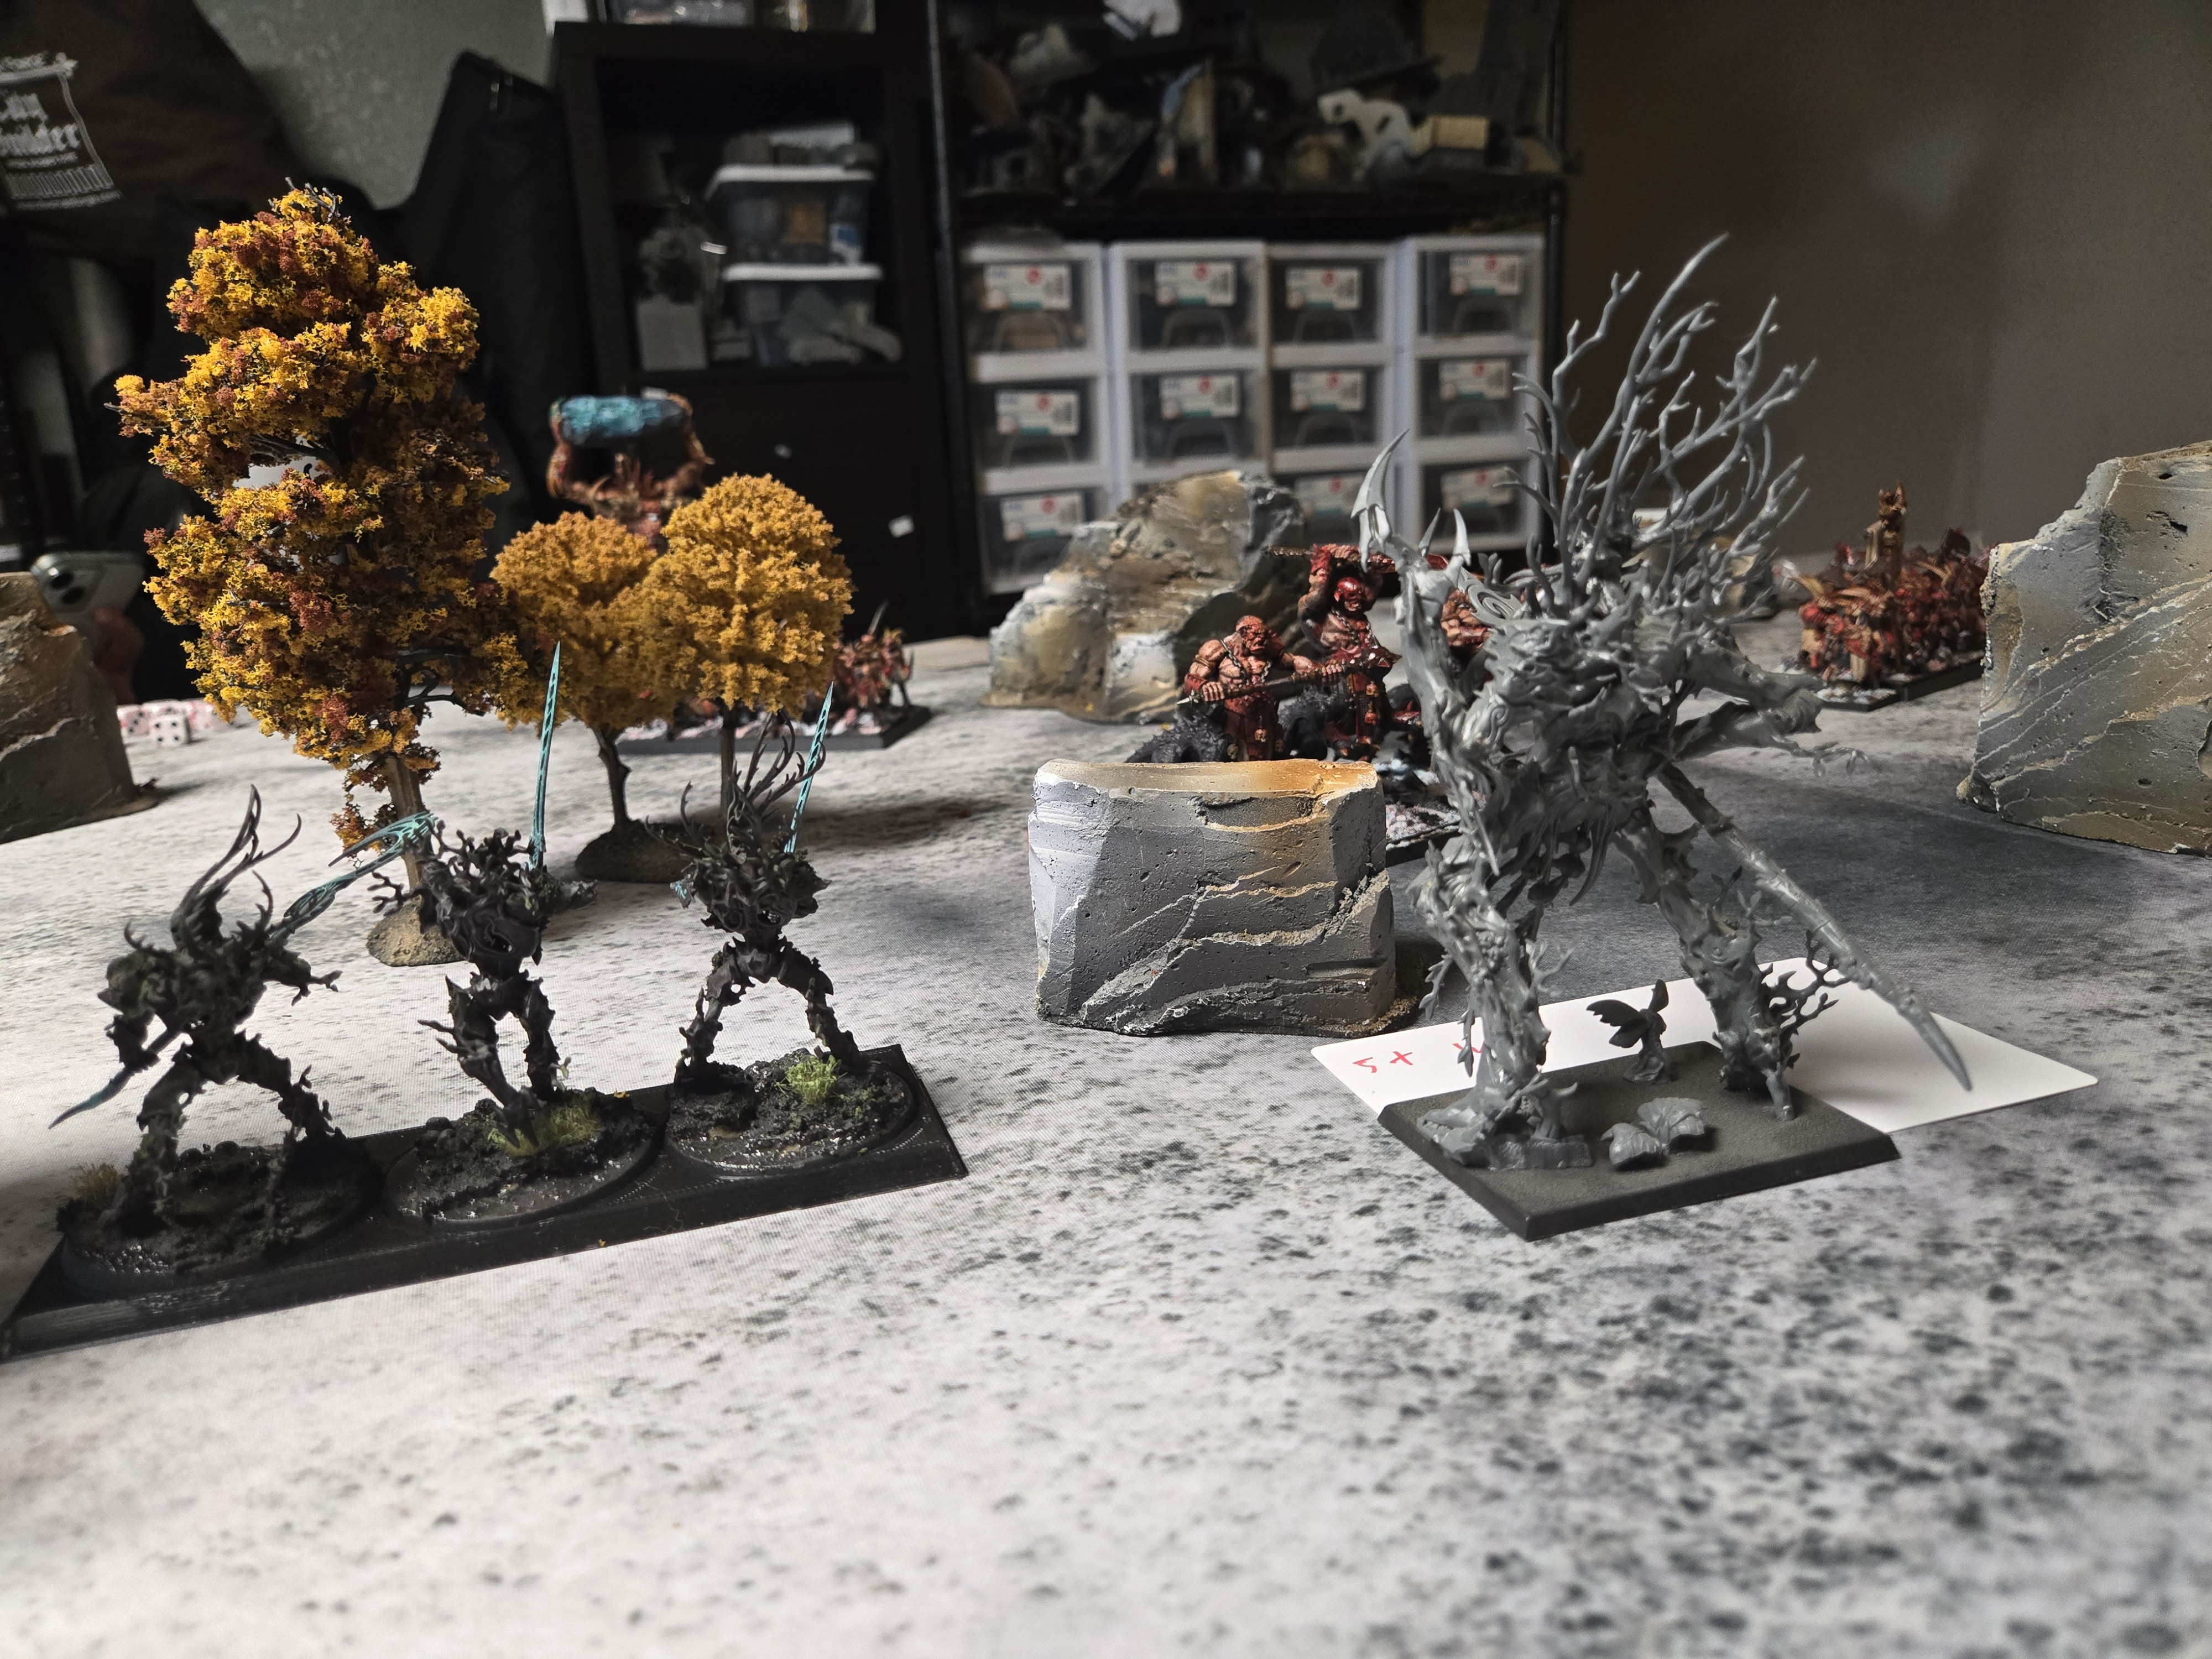
The other day, my friend came over and we had a good old-fashioned brawl with our Old World armies. I brought 2500 points of Wood Elves, and they got 2500 Beastmen.

Conclusion

The game was very close. I think the entire game hinged on turn 3 combat. One crucial item is that I turned to flee with my Wild Riders when charged by the Ghorgon. However, I didn’t flee far enough, and the entire unit was run down and destroyed with not a peep. I also didn’t prioritize my shooting well, and I forgot my hagbane arrows, which did much damage. I also didn’t utilize my forest sprites or my spells effectively. Live and learn.

I was happy with my Glade Guard and Glade Riders. The treekin did ok, and the eagles, I think, are essential to screen troubling units. I would have rather had another unit of the Guard rather than the Sisters of Thorn.

The game mat is by FLG, and the terrain was made by Greenleaf

Beastment

272 – Beastlord, Additional Hand Weapon, Heavy Armour, Many-limbed Fiend, Gouge-tusks, General, The Black Maul, The Fur of Sharggu
330 – Great Bray-Shaman, Gnarled Hide, Pelt of Midnight, Wizard Level 4, Dark Magic, Scimitar of Skultar, Full Plate Chaos Armour, Horn of the Great Hunt
210 – 10 Bestigor Herds, Stubborn, Veteran, Gouge-horn, Standard Bearer, The Beast Banner, Musician
177 – 15 Gor Herds, Additional Hand Weapon, True-horn, Great Weapon, Scimitar of Skultar, Standard Bearer, Magic Standard, Vitriolic Totem, Musician
85 – Tuskgor Chariots
77 – 10 Ungor Herds, Shield, Throwing Spear, Half-horn, Standard Bearer, Musician
77 – 12 Ungor Herds, Shortbow, Half-horn, Standard Bearer, Musician
205 – 3 Dragon Ogres, Heavy Armour, Great Weapon, Shartak
100 – Herdstone
329 – 6 Minotaur Herds
• 1x Minotaur, Great Weapon, Musician
• 1x Minotaur, Great Weapon, Bloodkine, Burning Blade
• 1x Minotaur, Great Weapon, Standard Bearer
• 1x Minotaur, Great Weapon
• 2x Minotaur, Great Weapon
215 – Cygor
245 – Ghorgon

WoodElves

Glade Lord w/ Cav Spear, Forest Dragon, Hail of Doom Arrow449
Spellweaver, Level 4 Wizard, Elven Steed, Heartwood Pendant, Lore of the Wilds214
Treeman Ancient265
Glade Captain, Battle Standard Bearer, Elven Steed113
4×10 Units of Glade Guard with Hagbane Tips130×4 520
10 Glade Guard with Moonfire Shot120
10 Dryads130
5 Glade Riders with Trueflight Arrows95
5 Sisters of Thorn with Handmaiden128
5 Wild Riders with Standard142
4 Tree Kin204
2x Great Eagle2×60 120

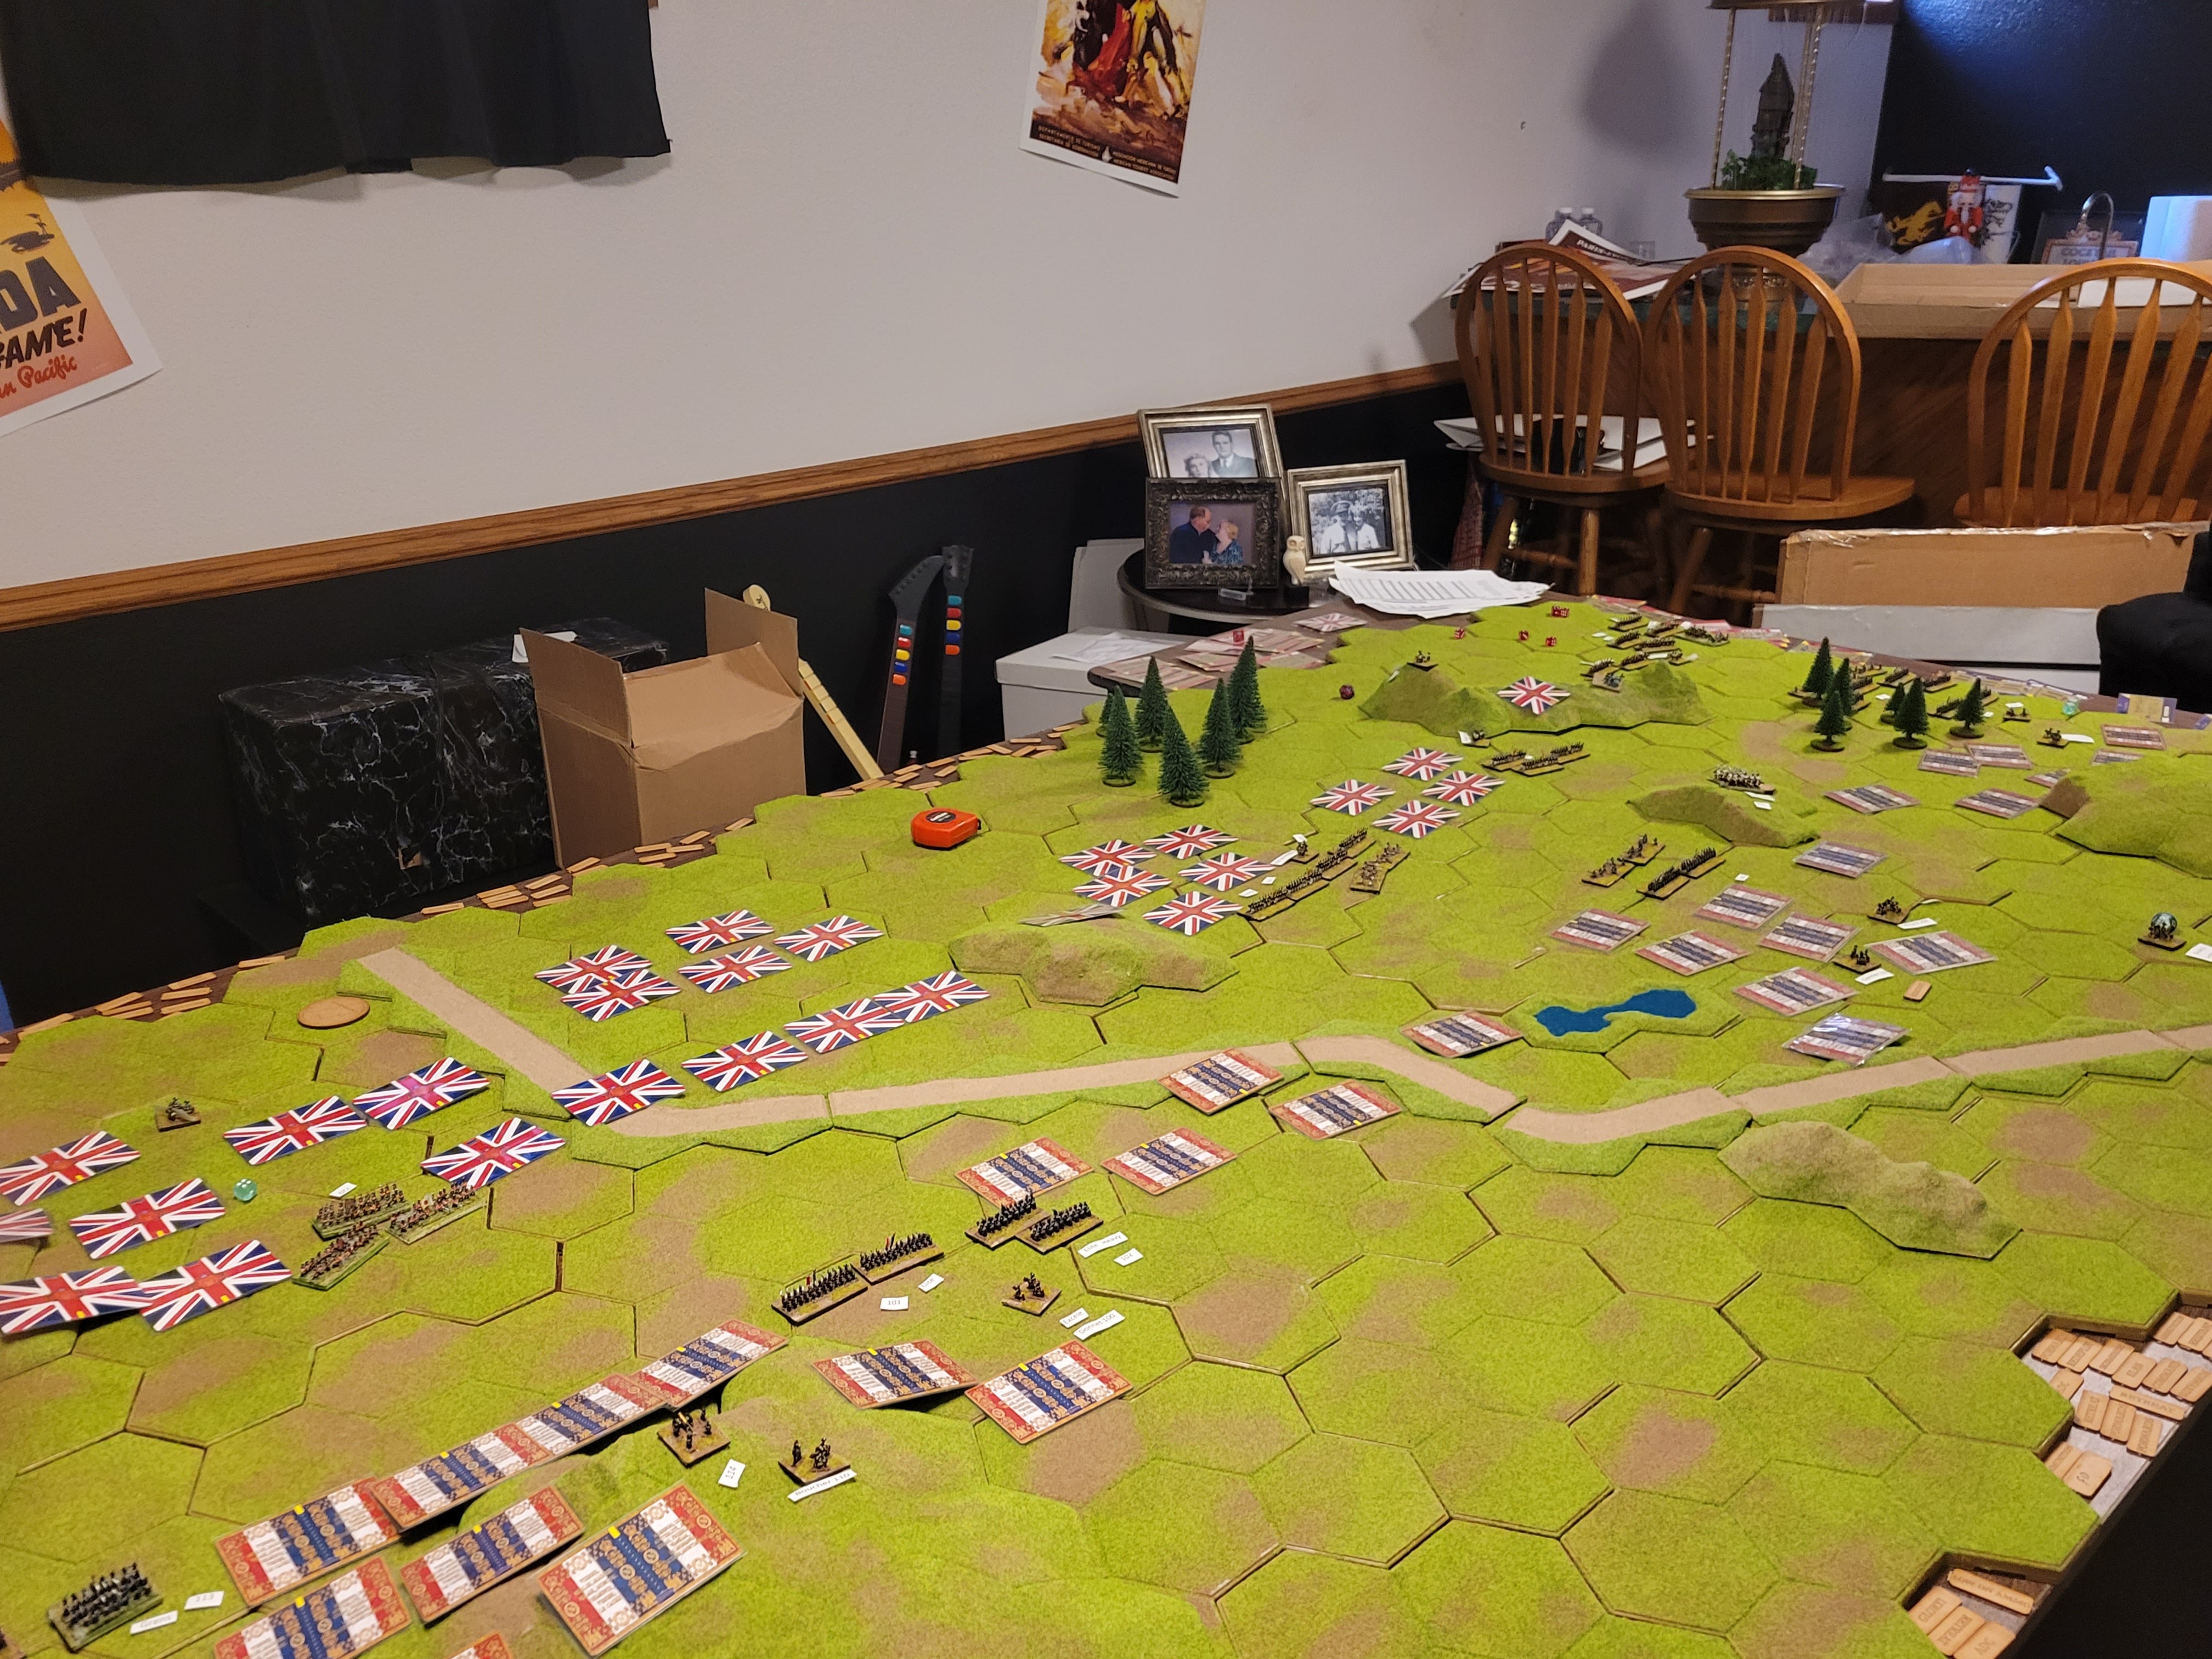
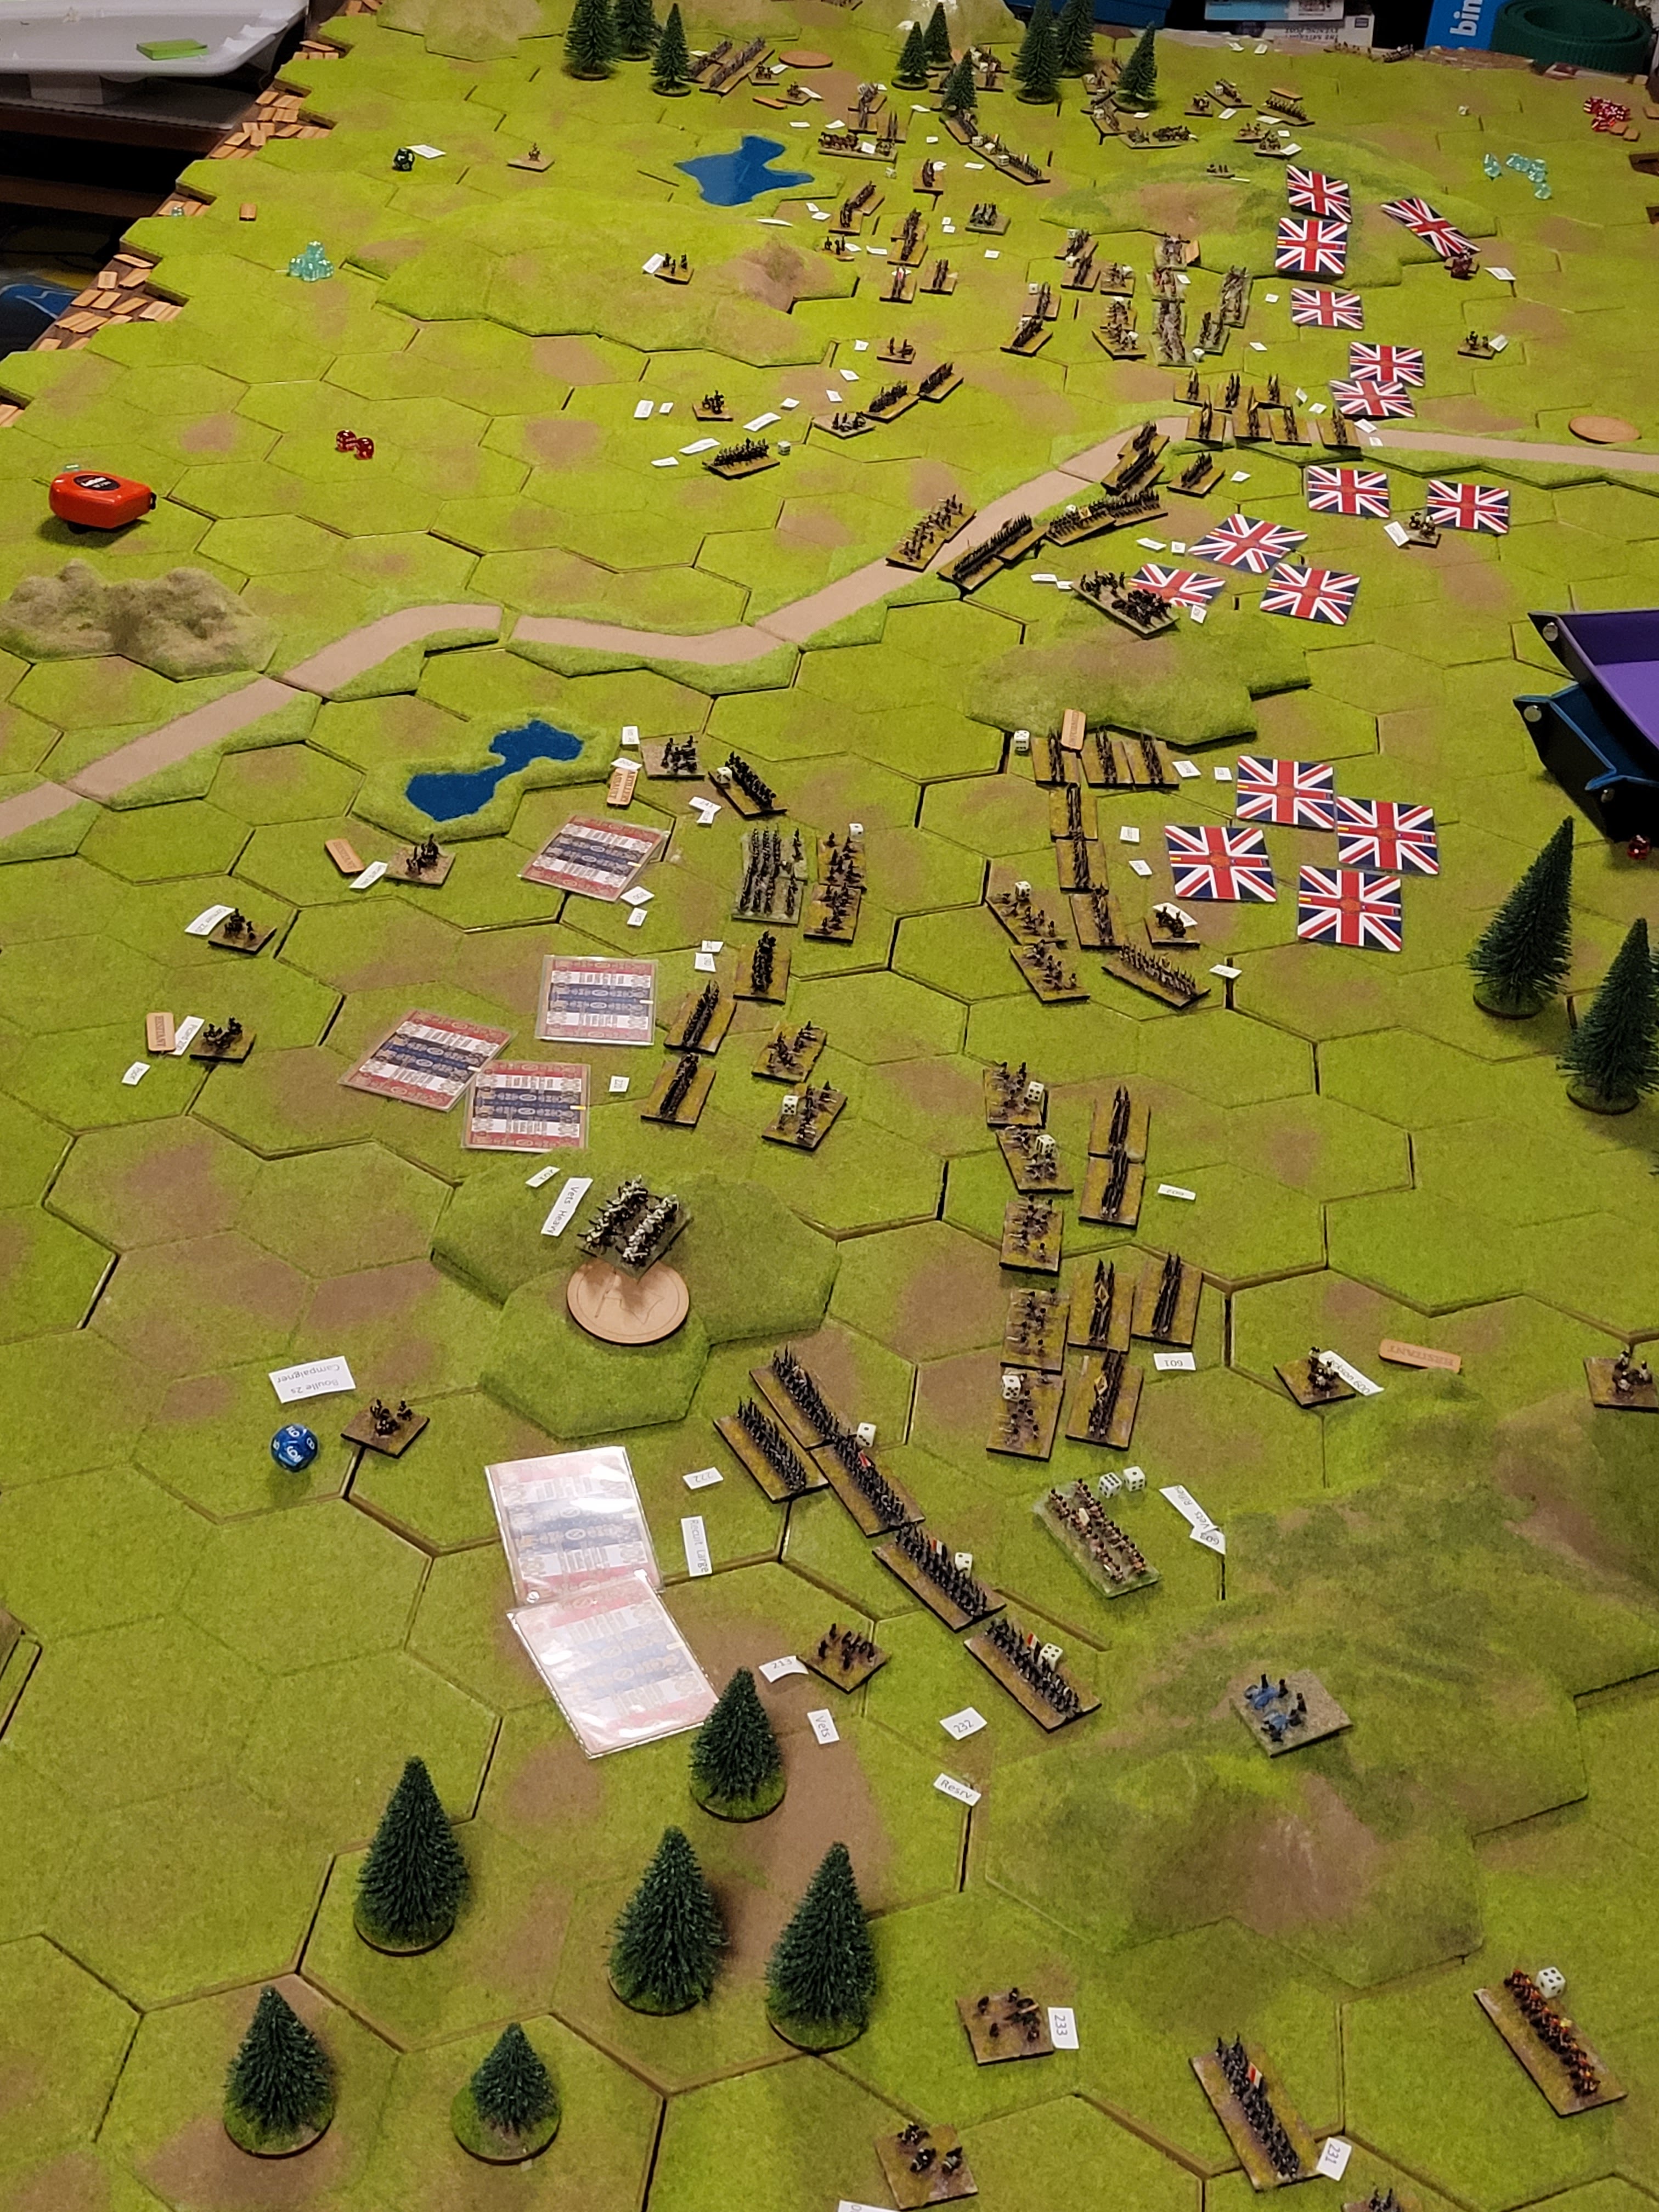
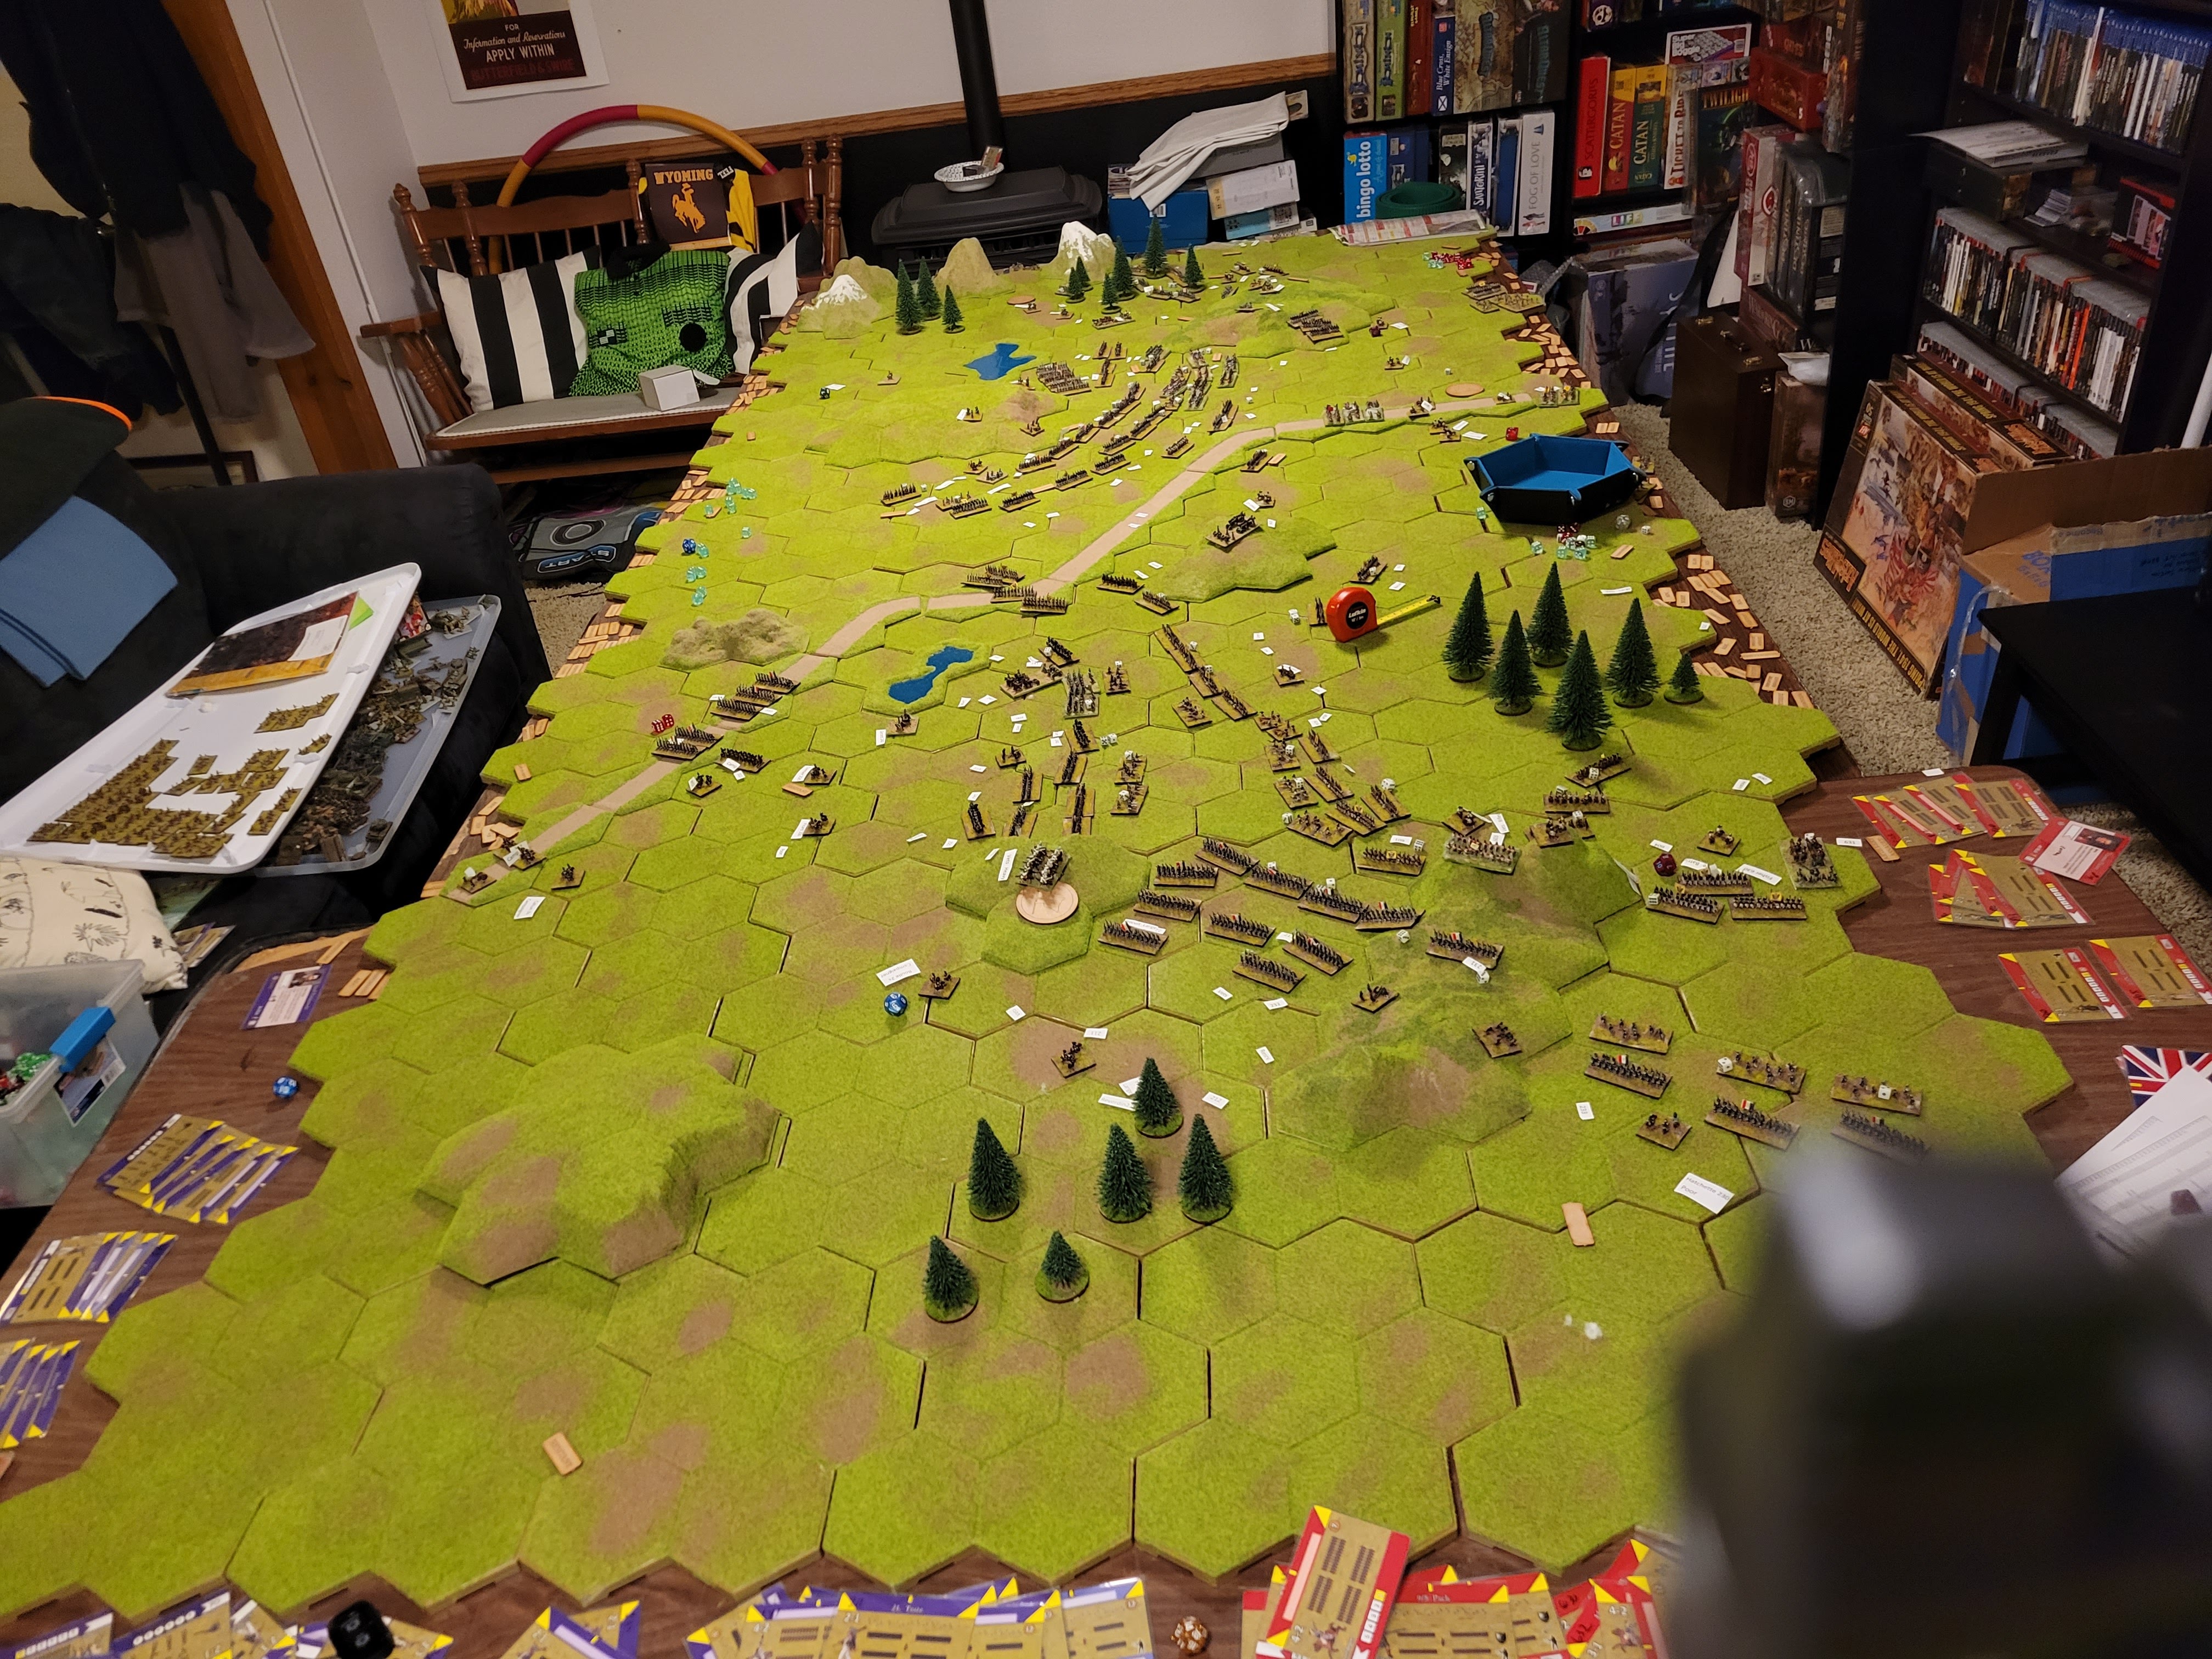
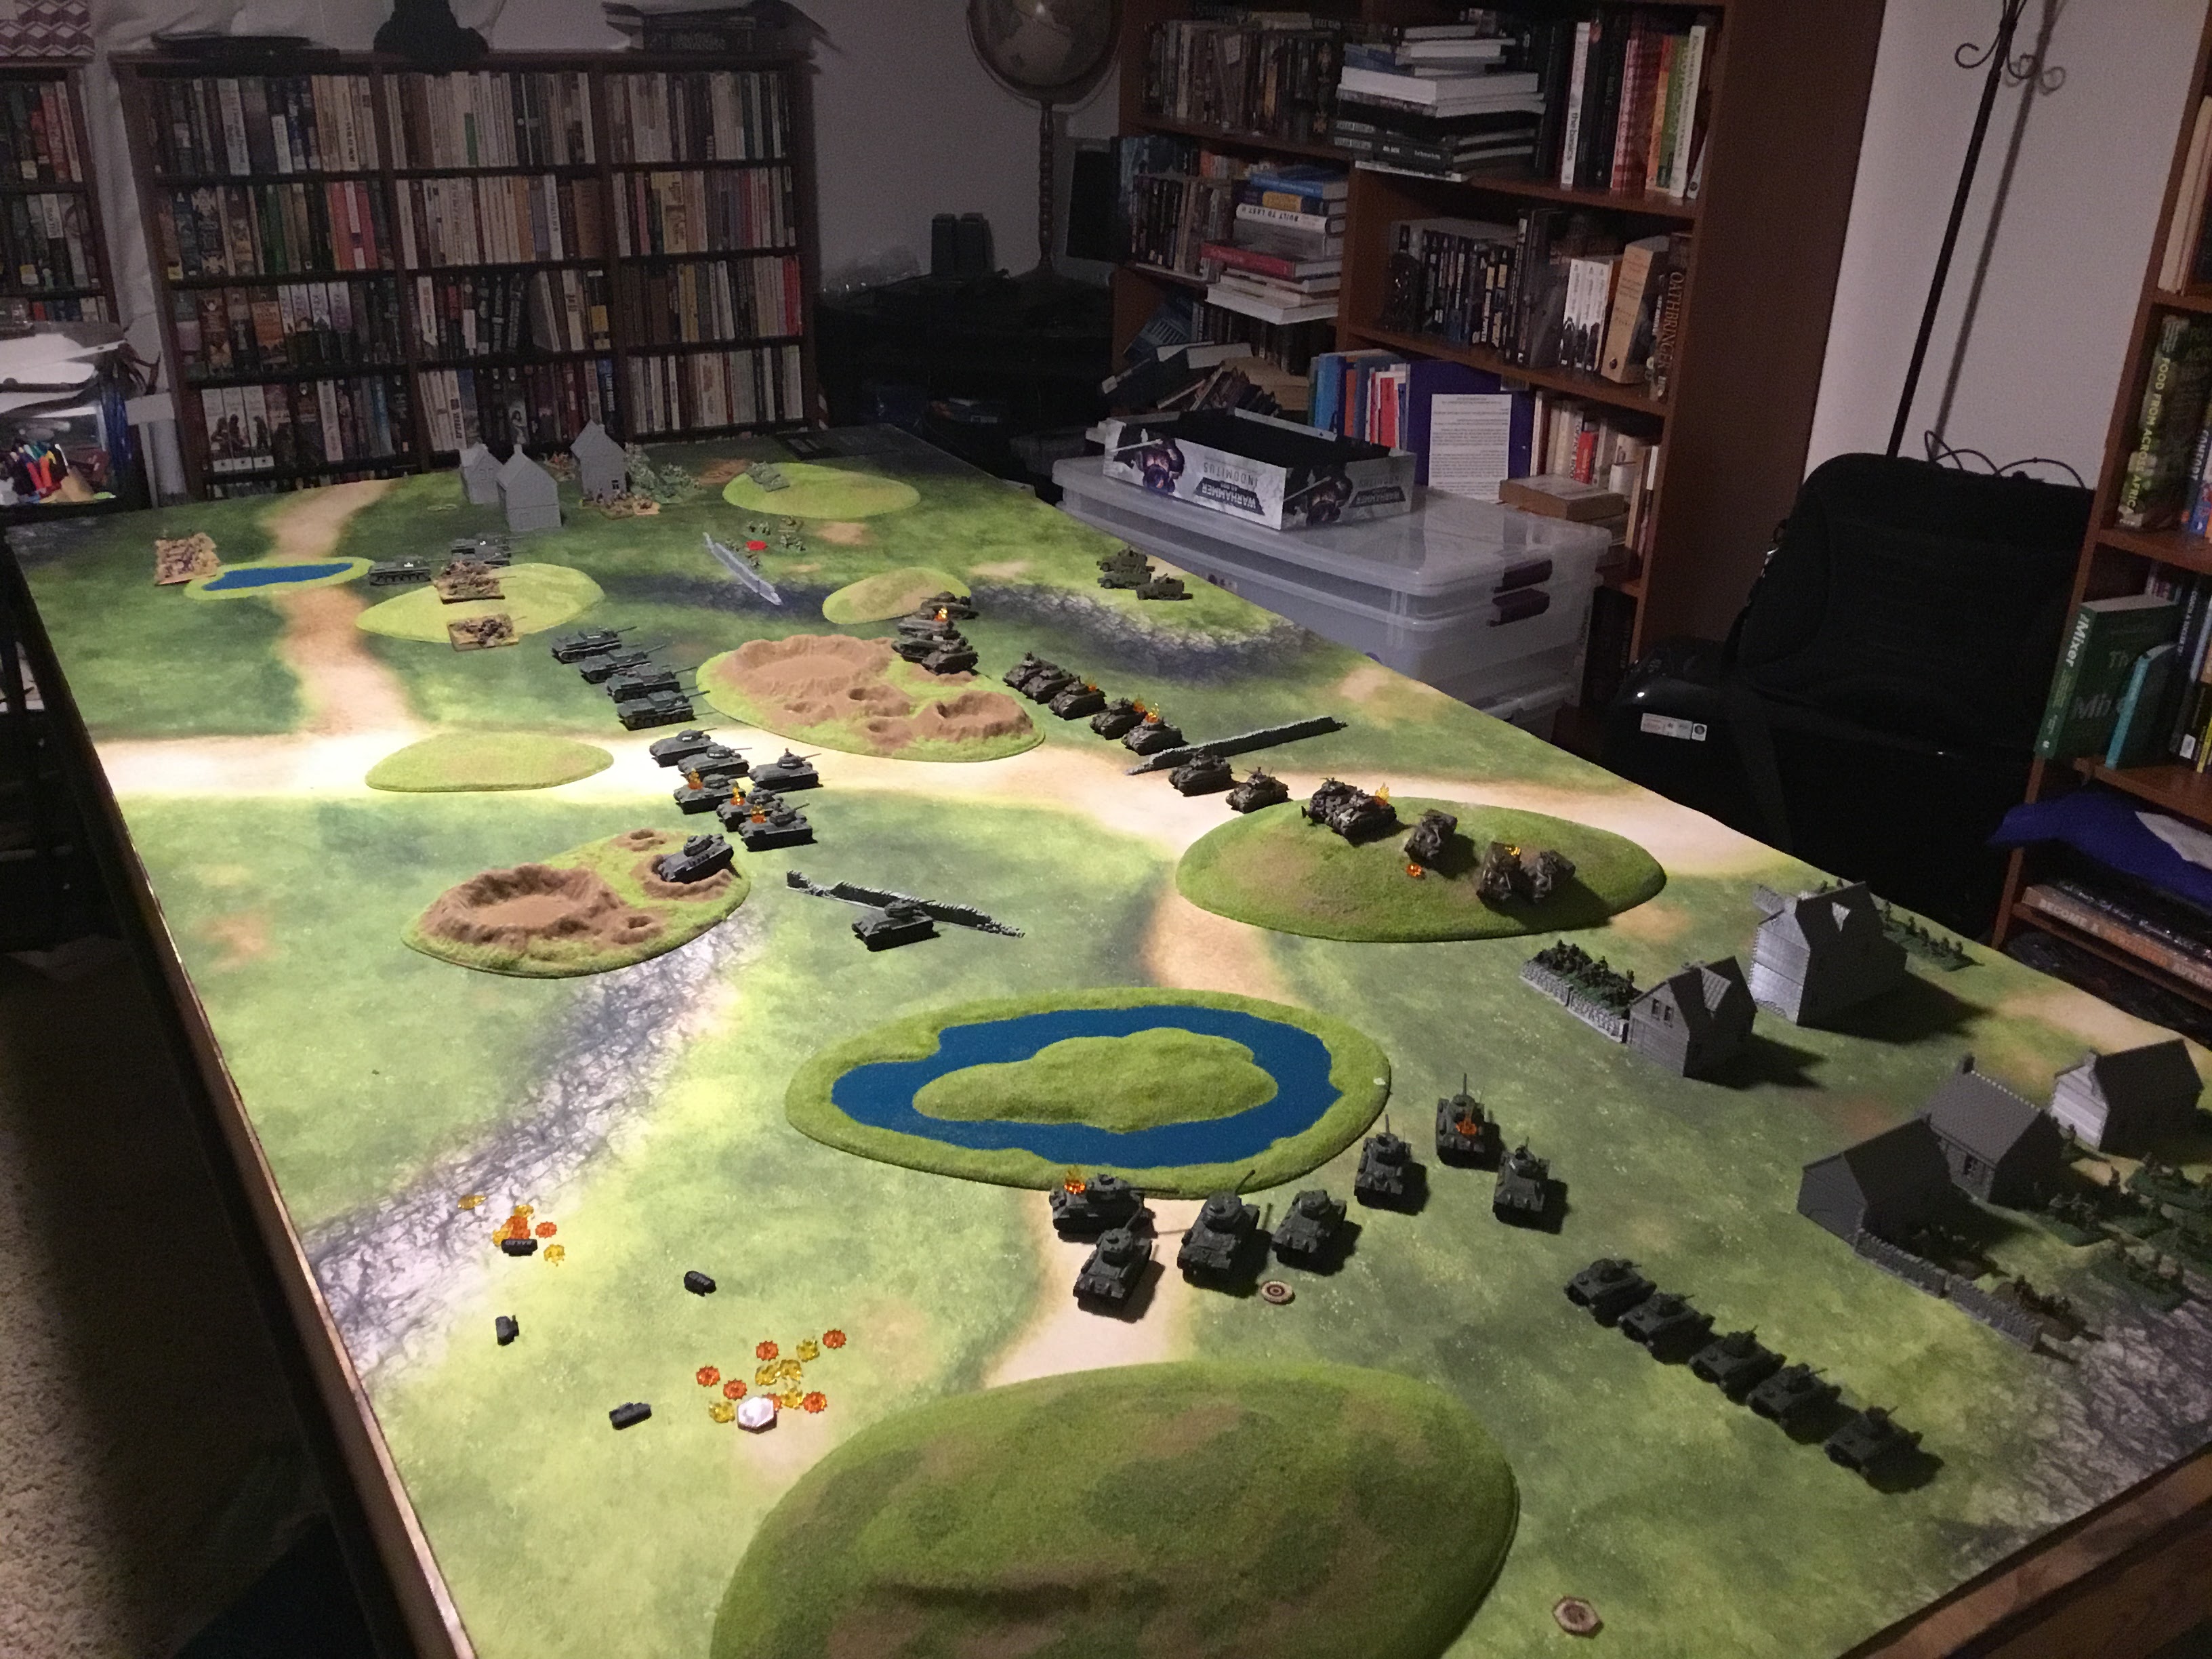
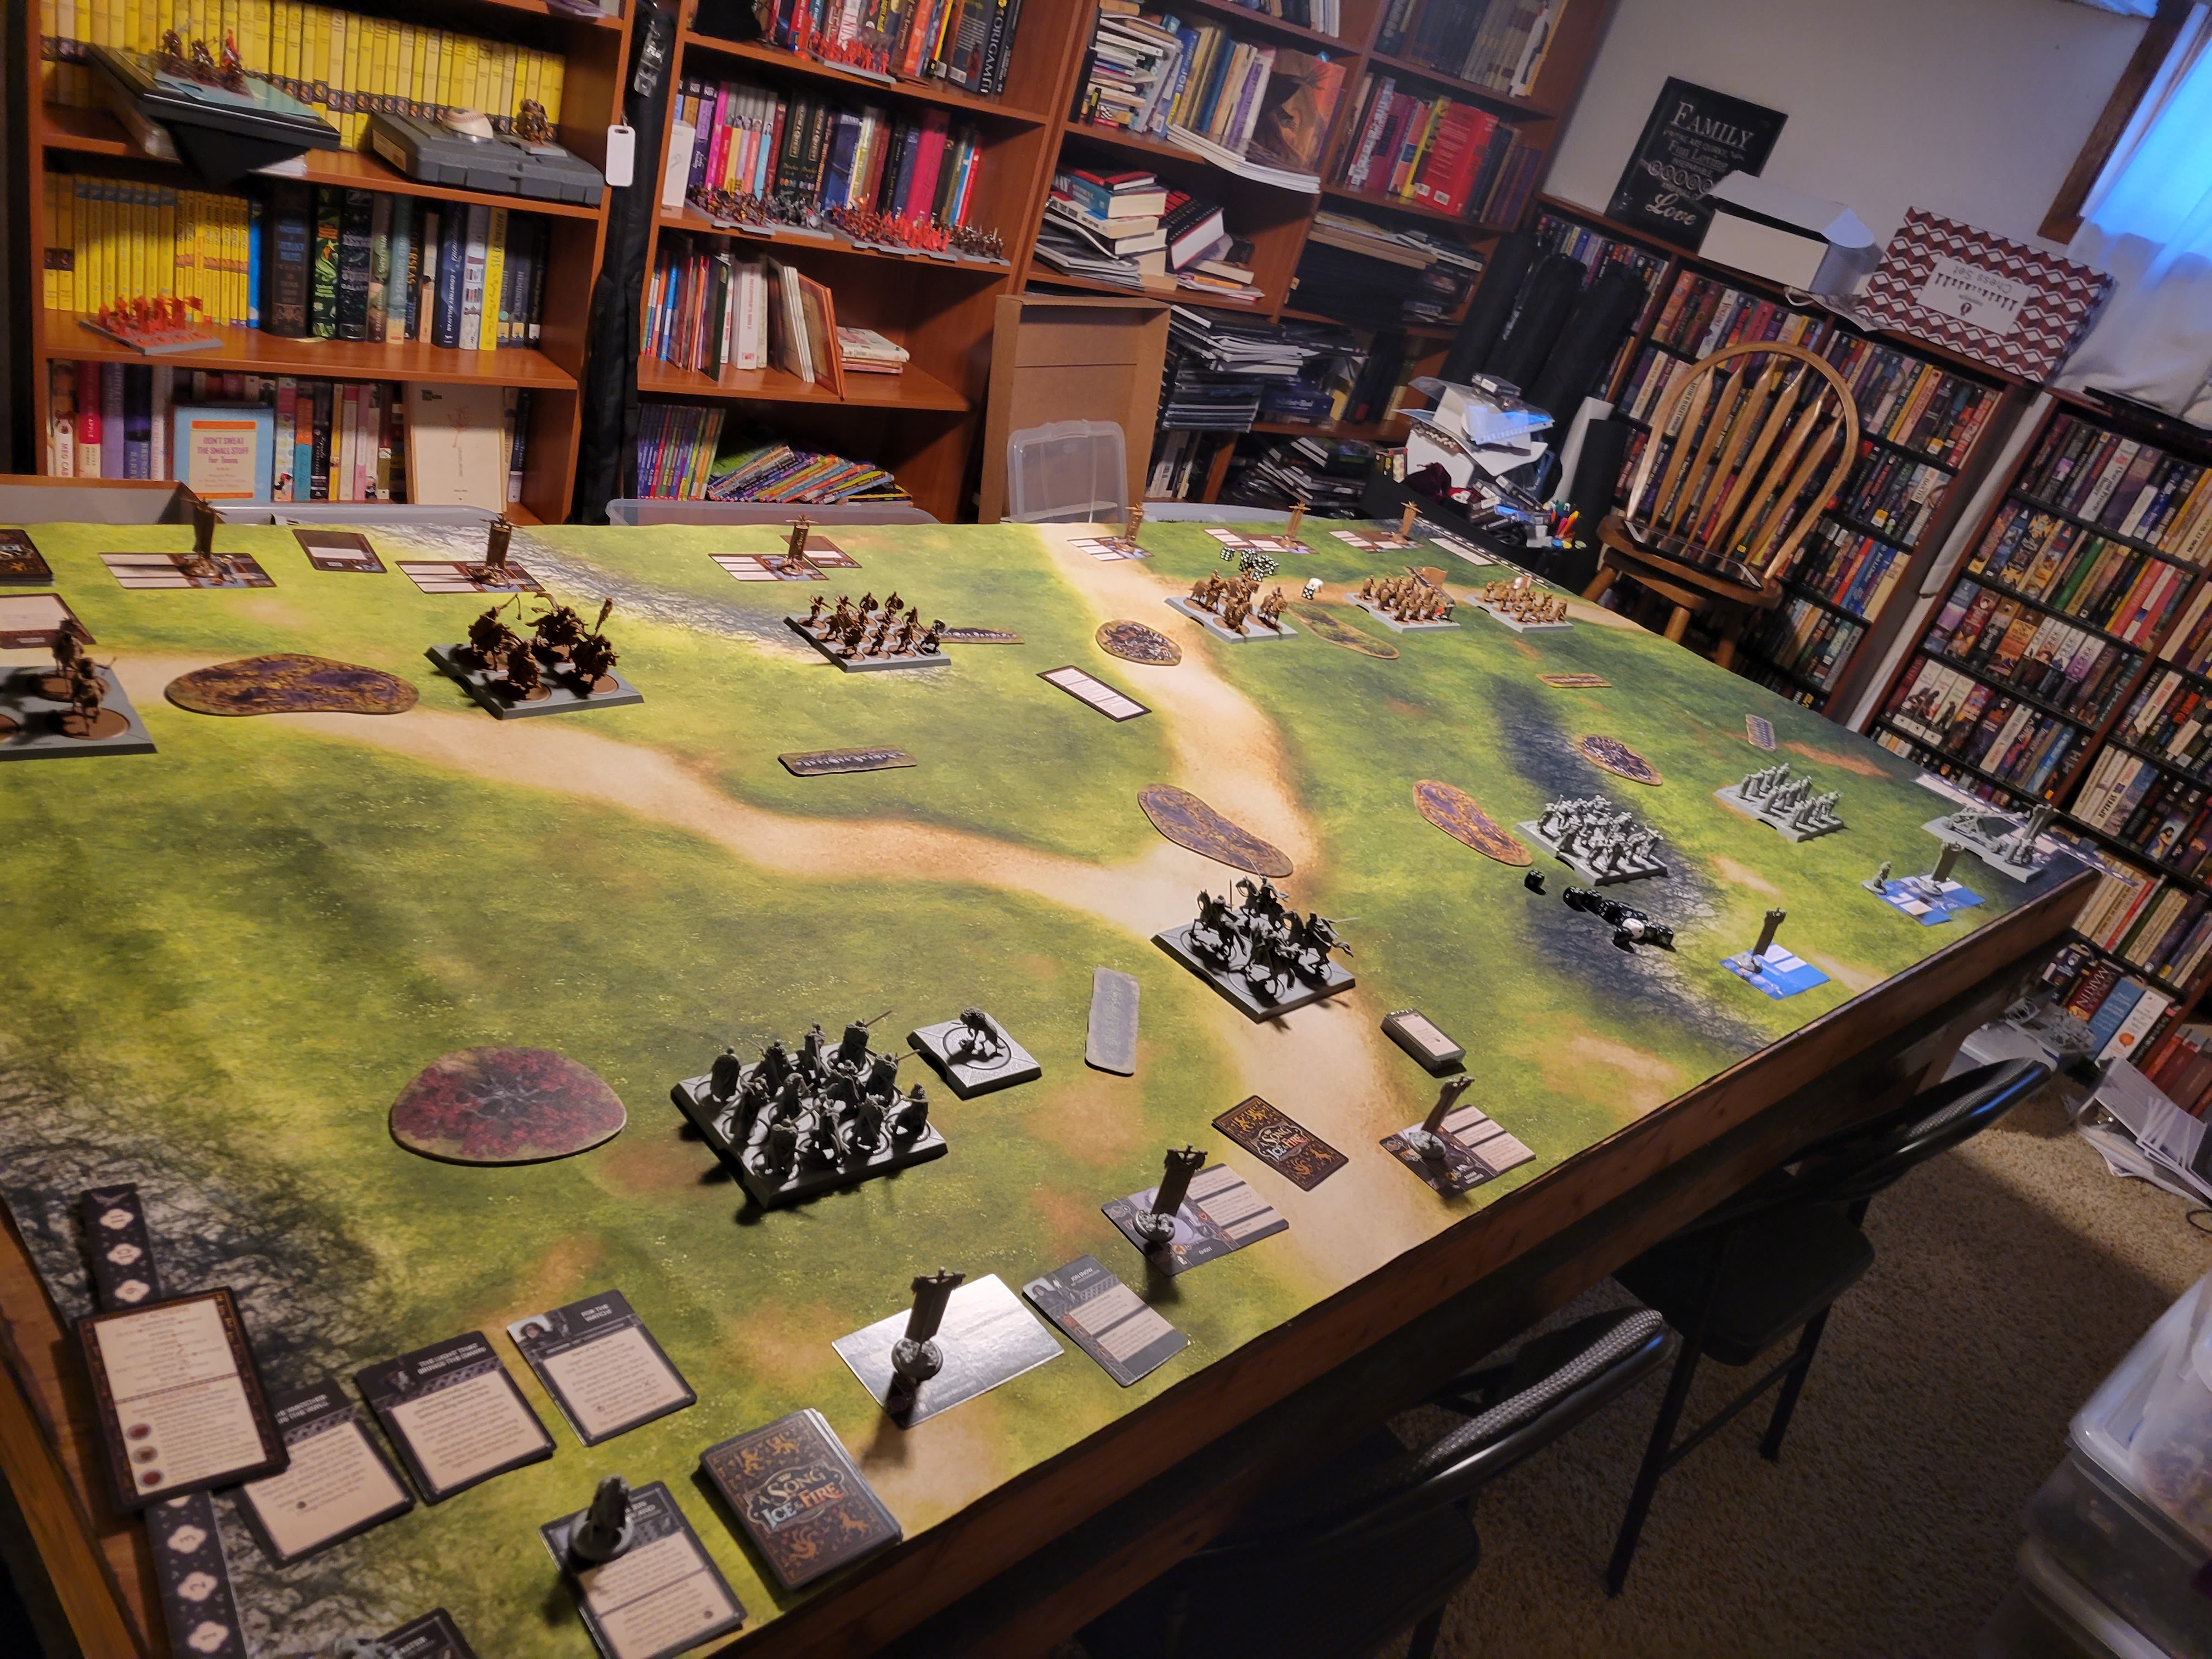
Our initial deployment and round 1. Minimal movement and lots of shooting. The Storm giant in the middle of the picture is my vortex spell.

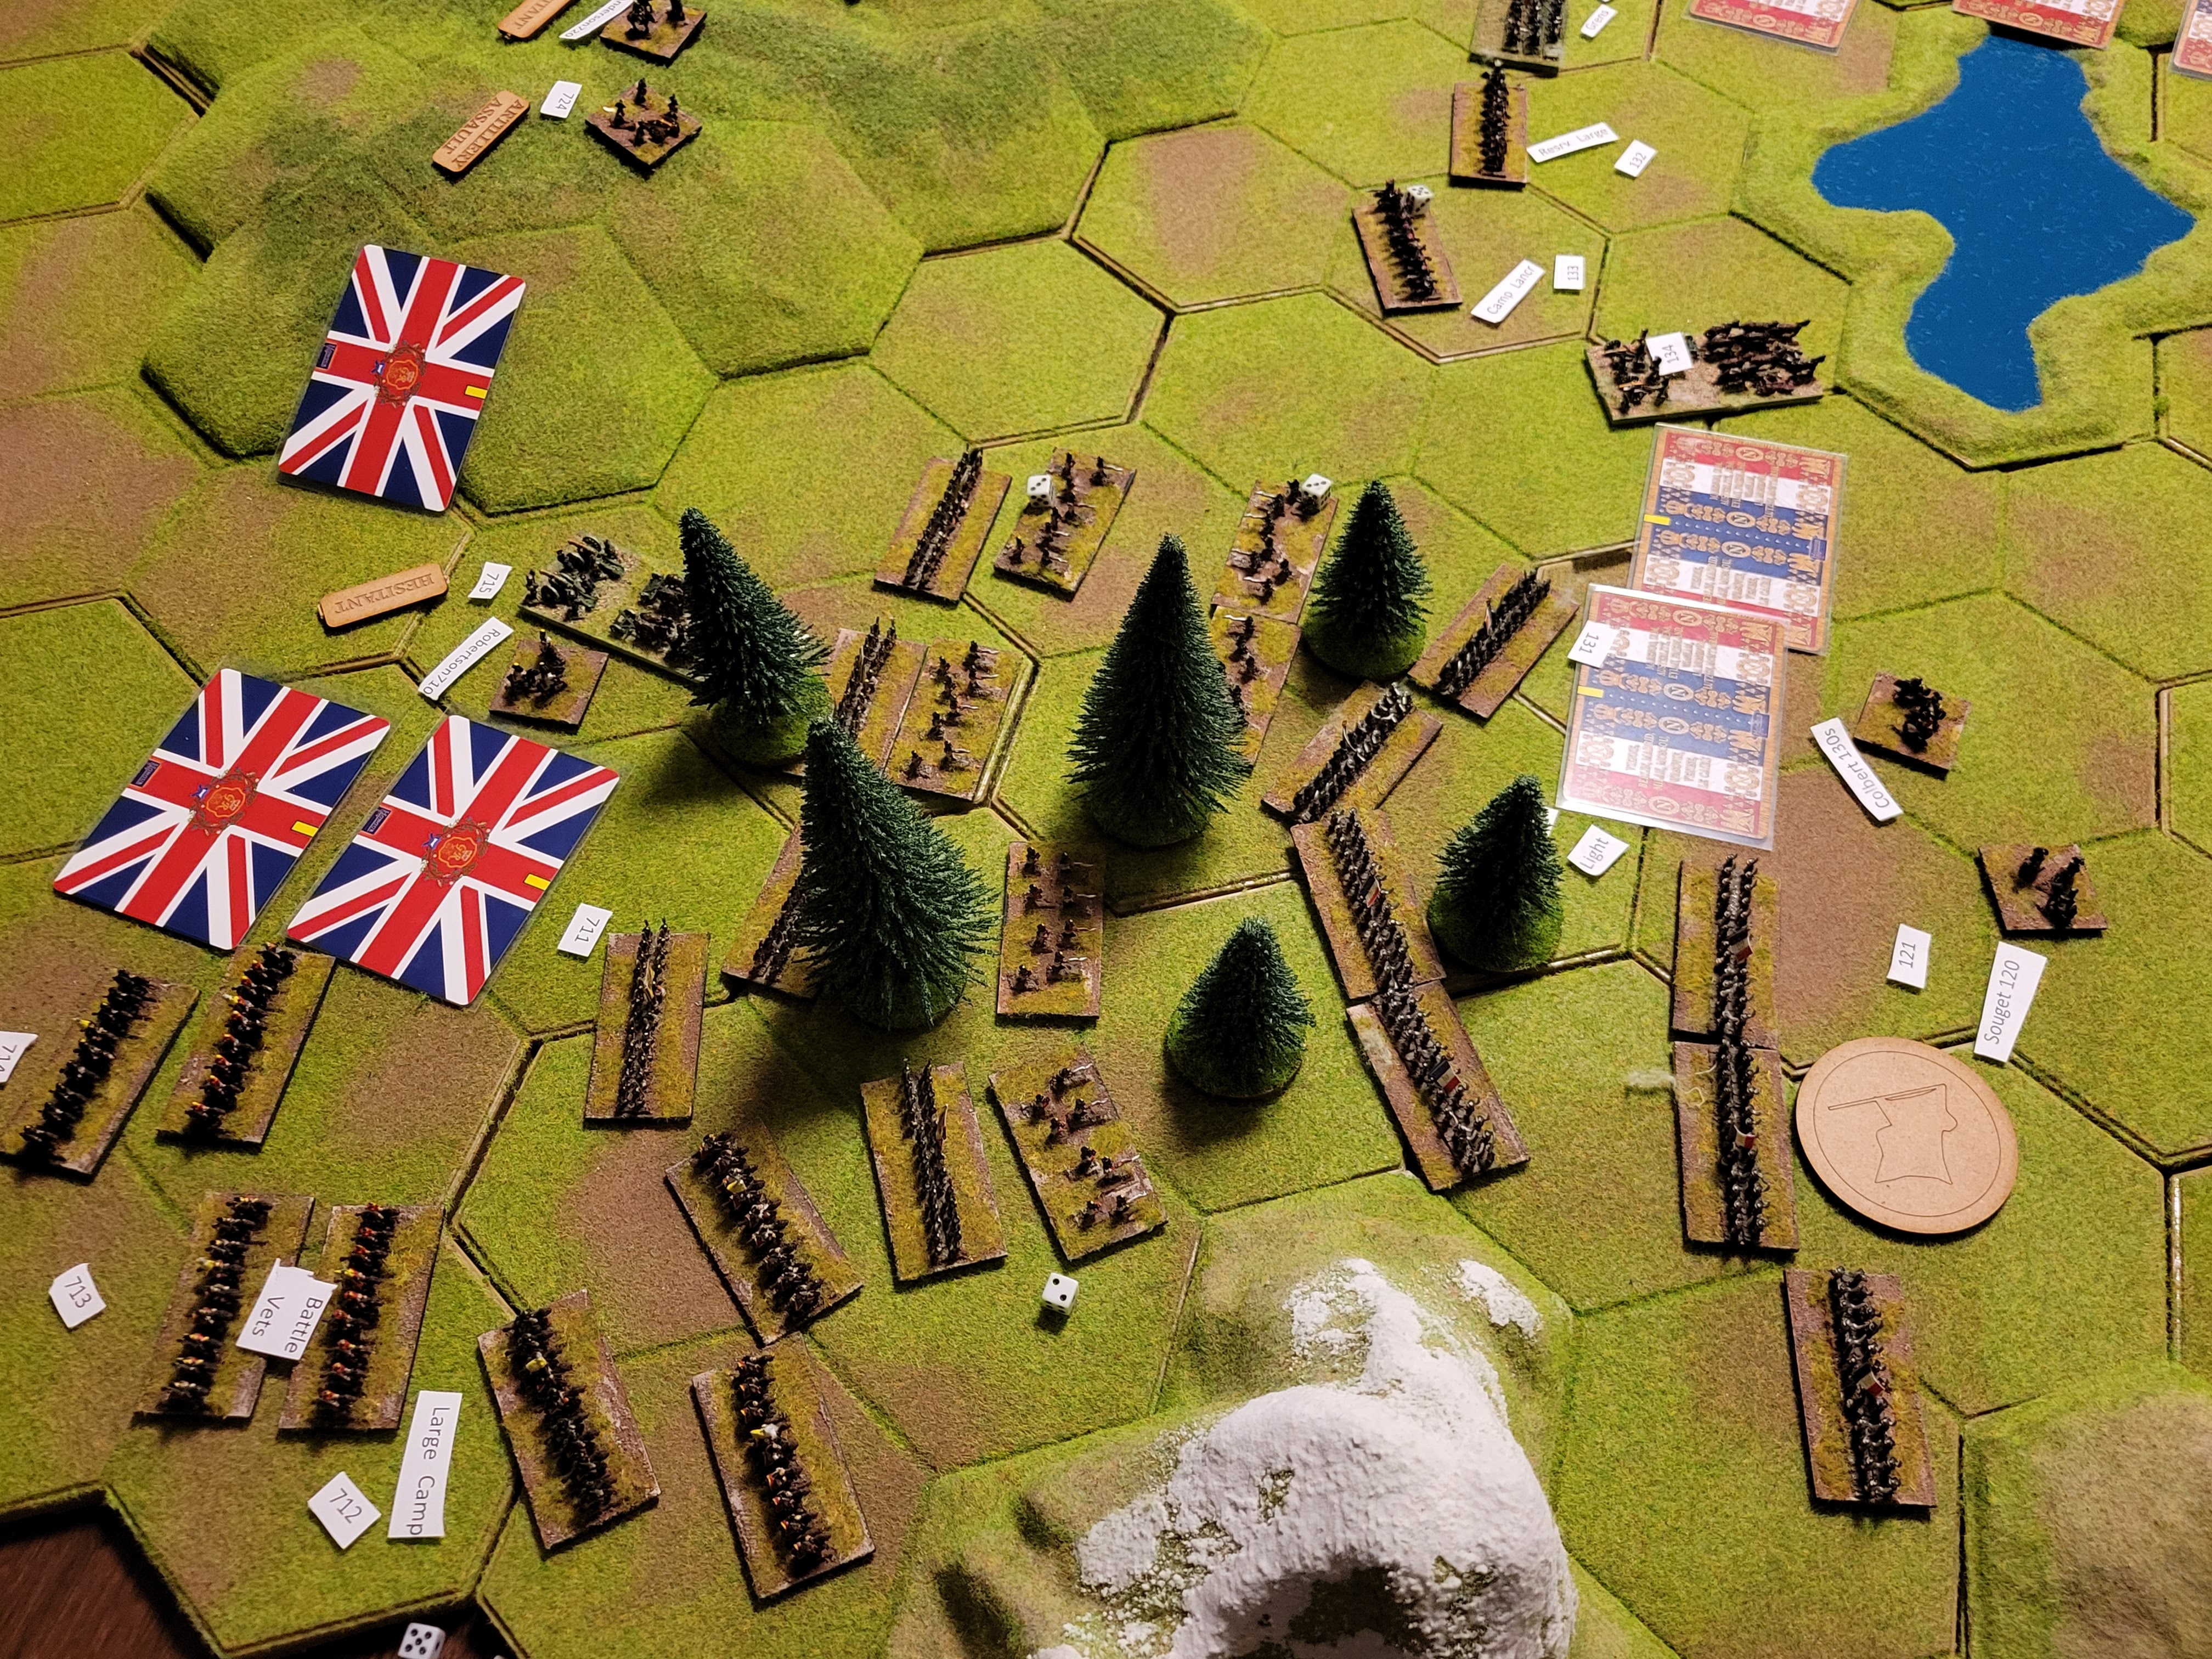
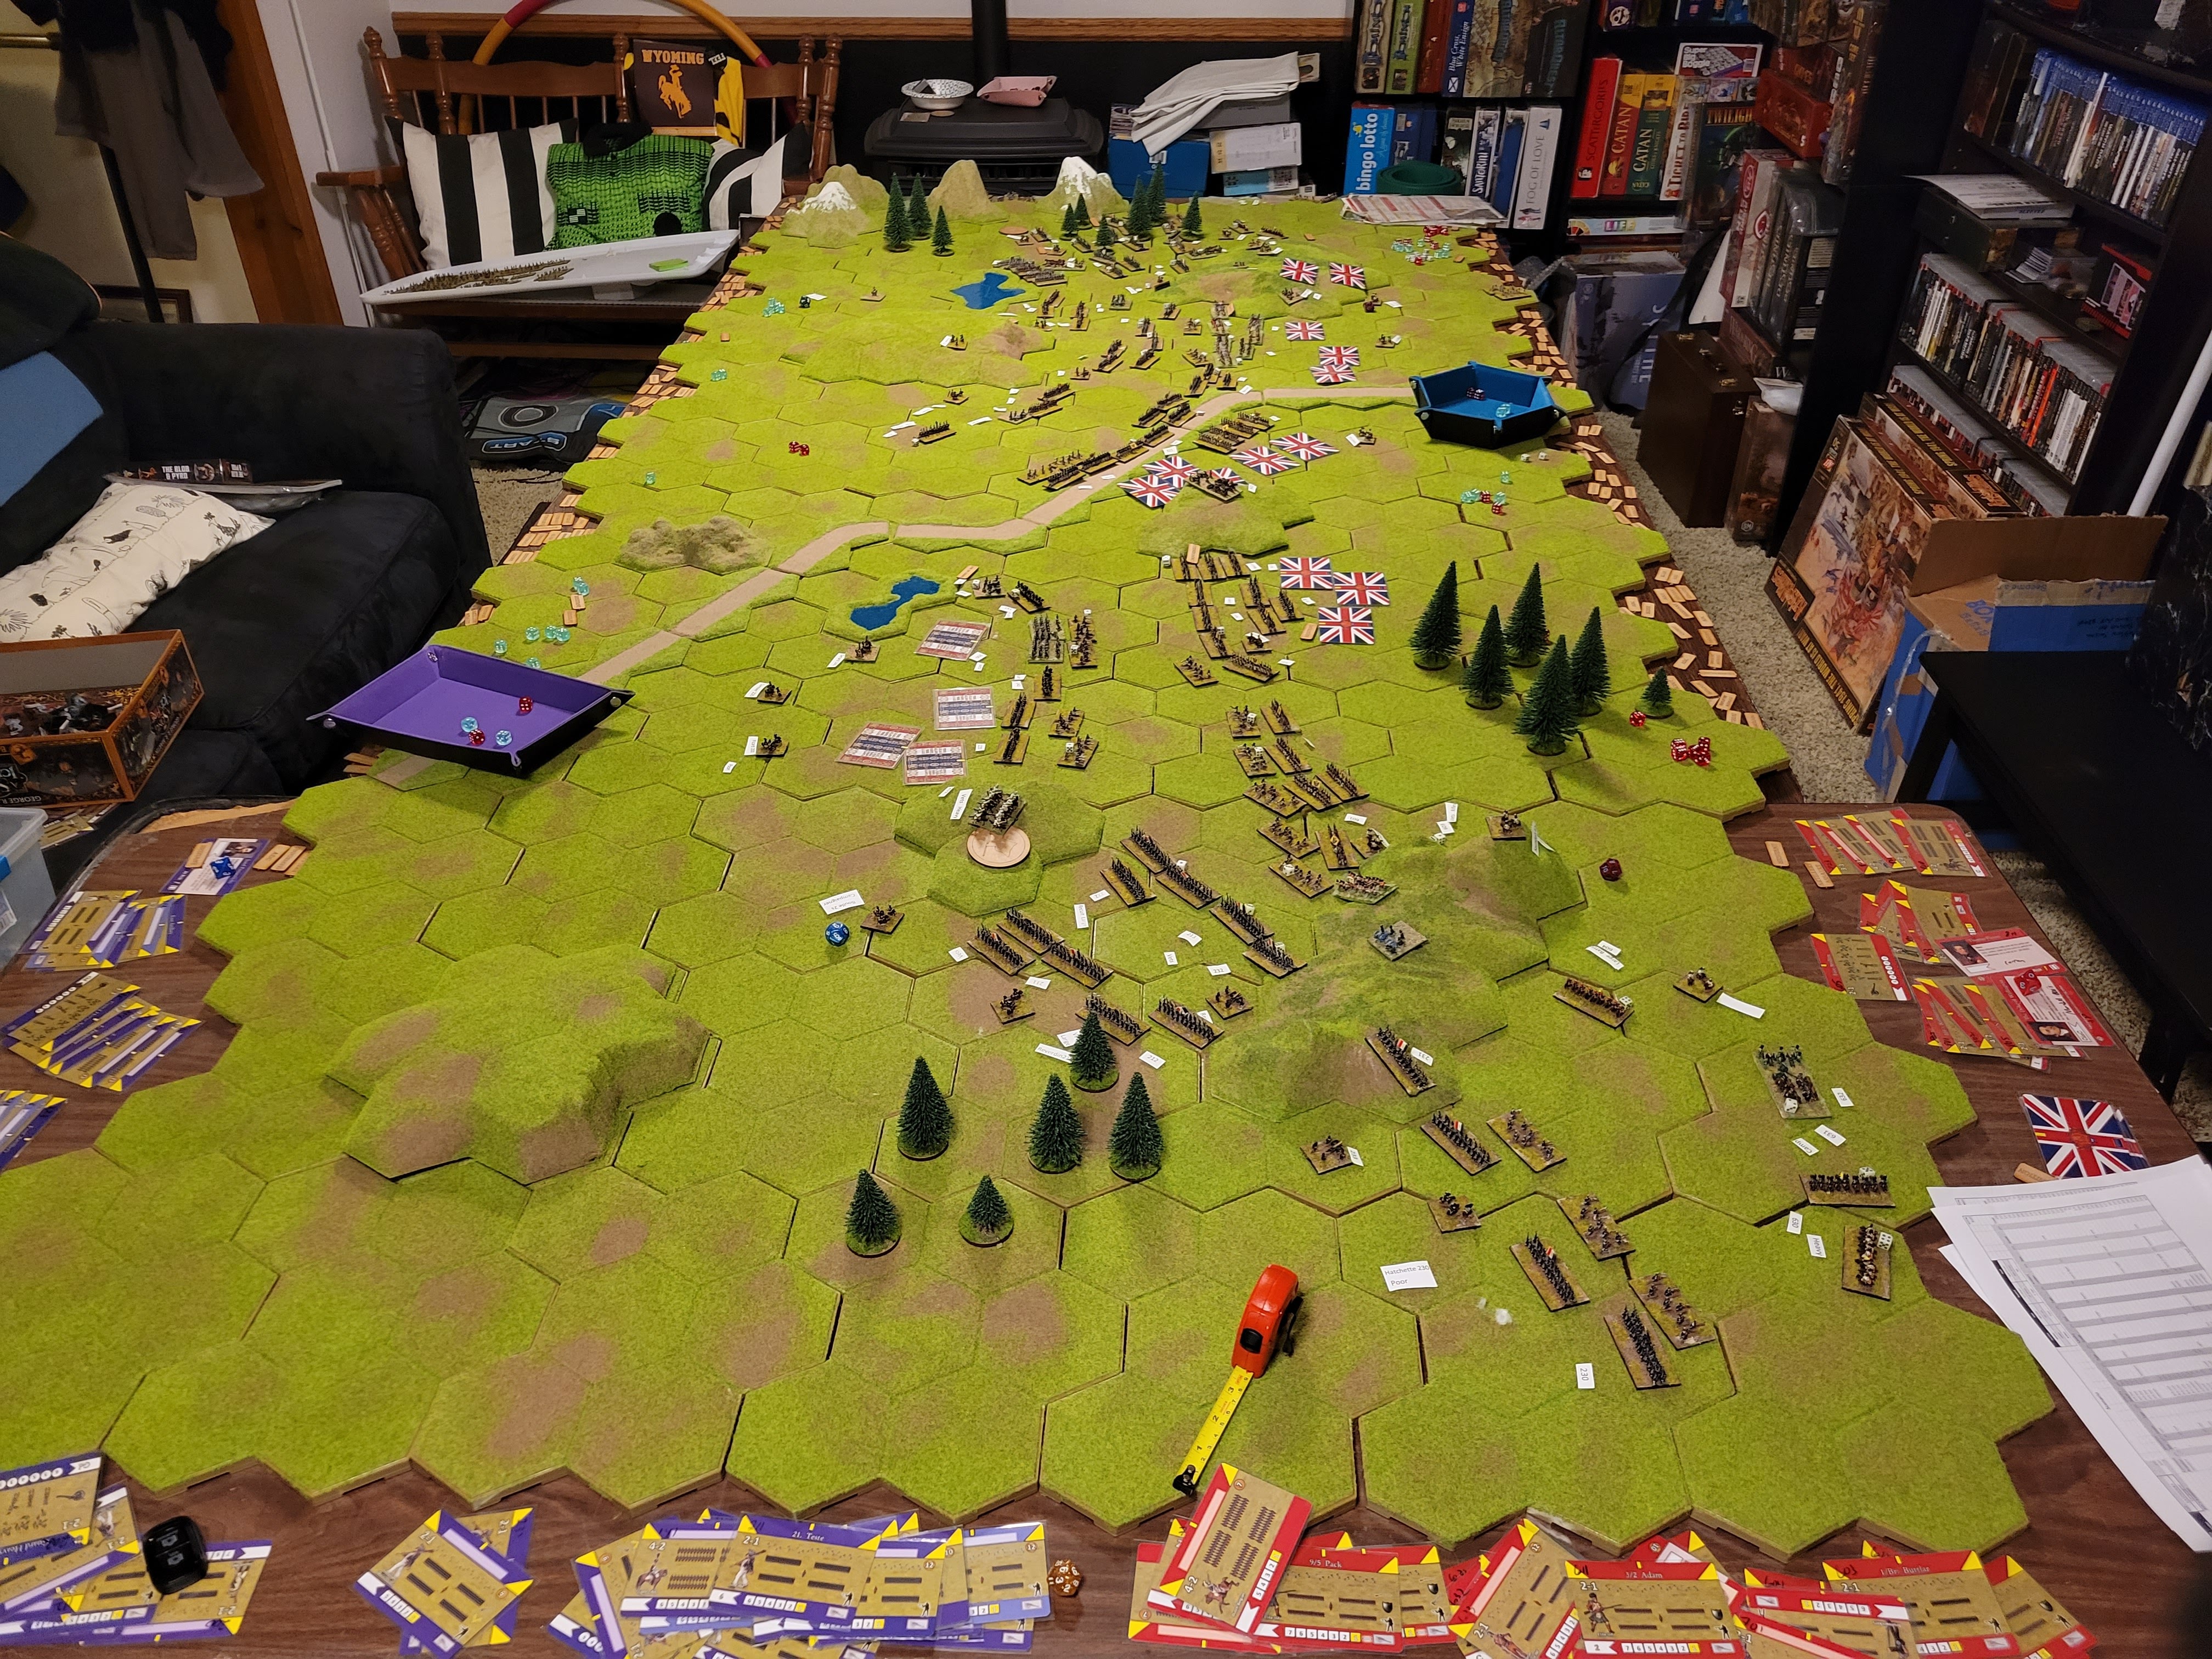
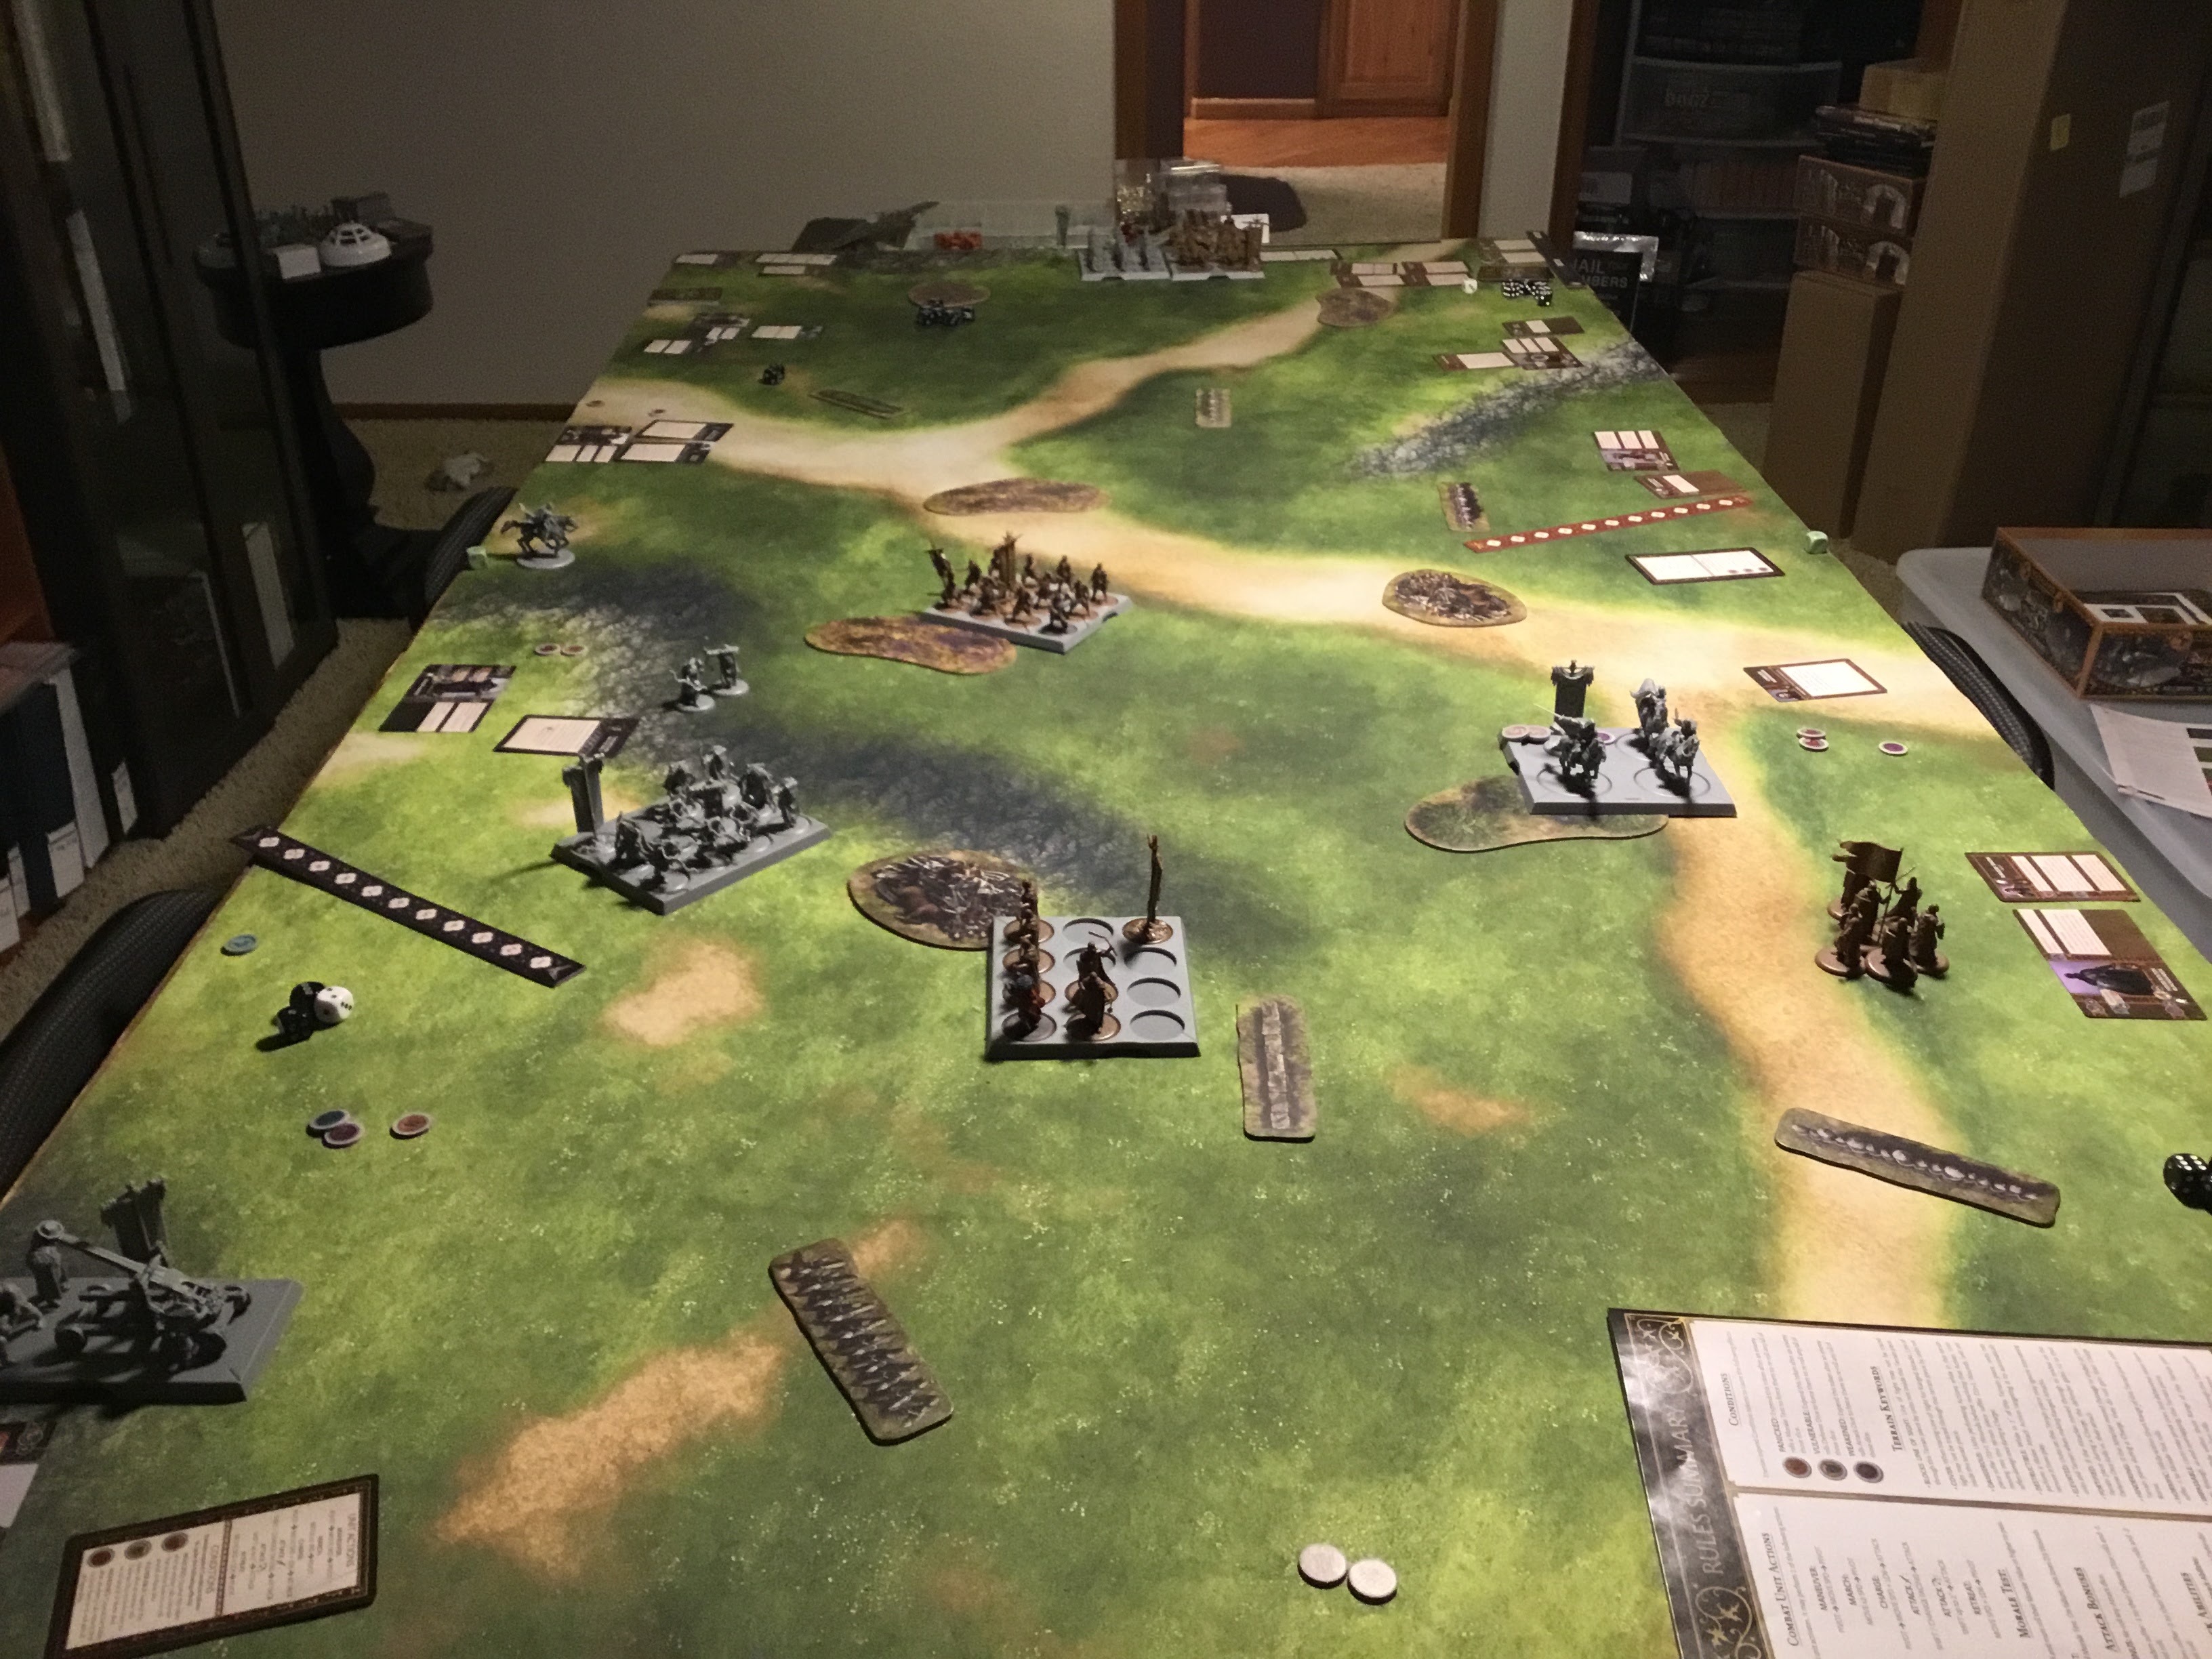
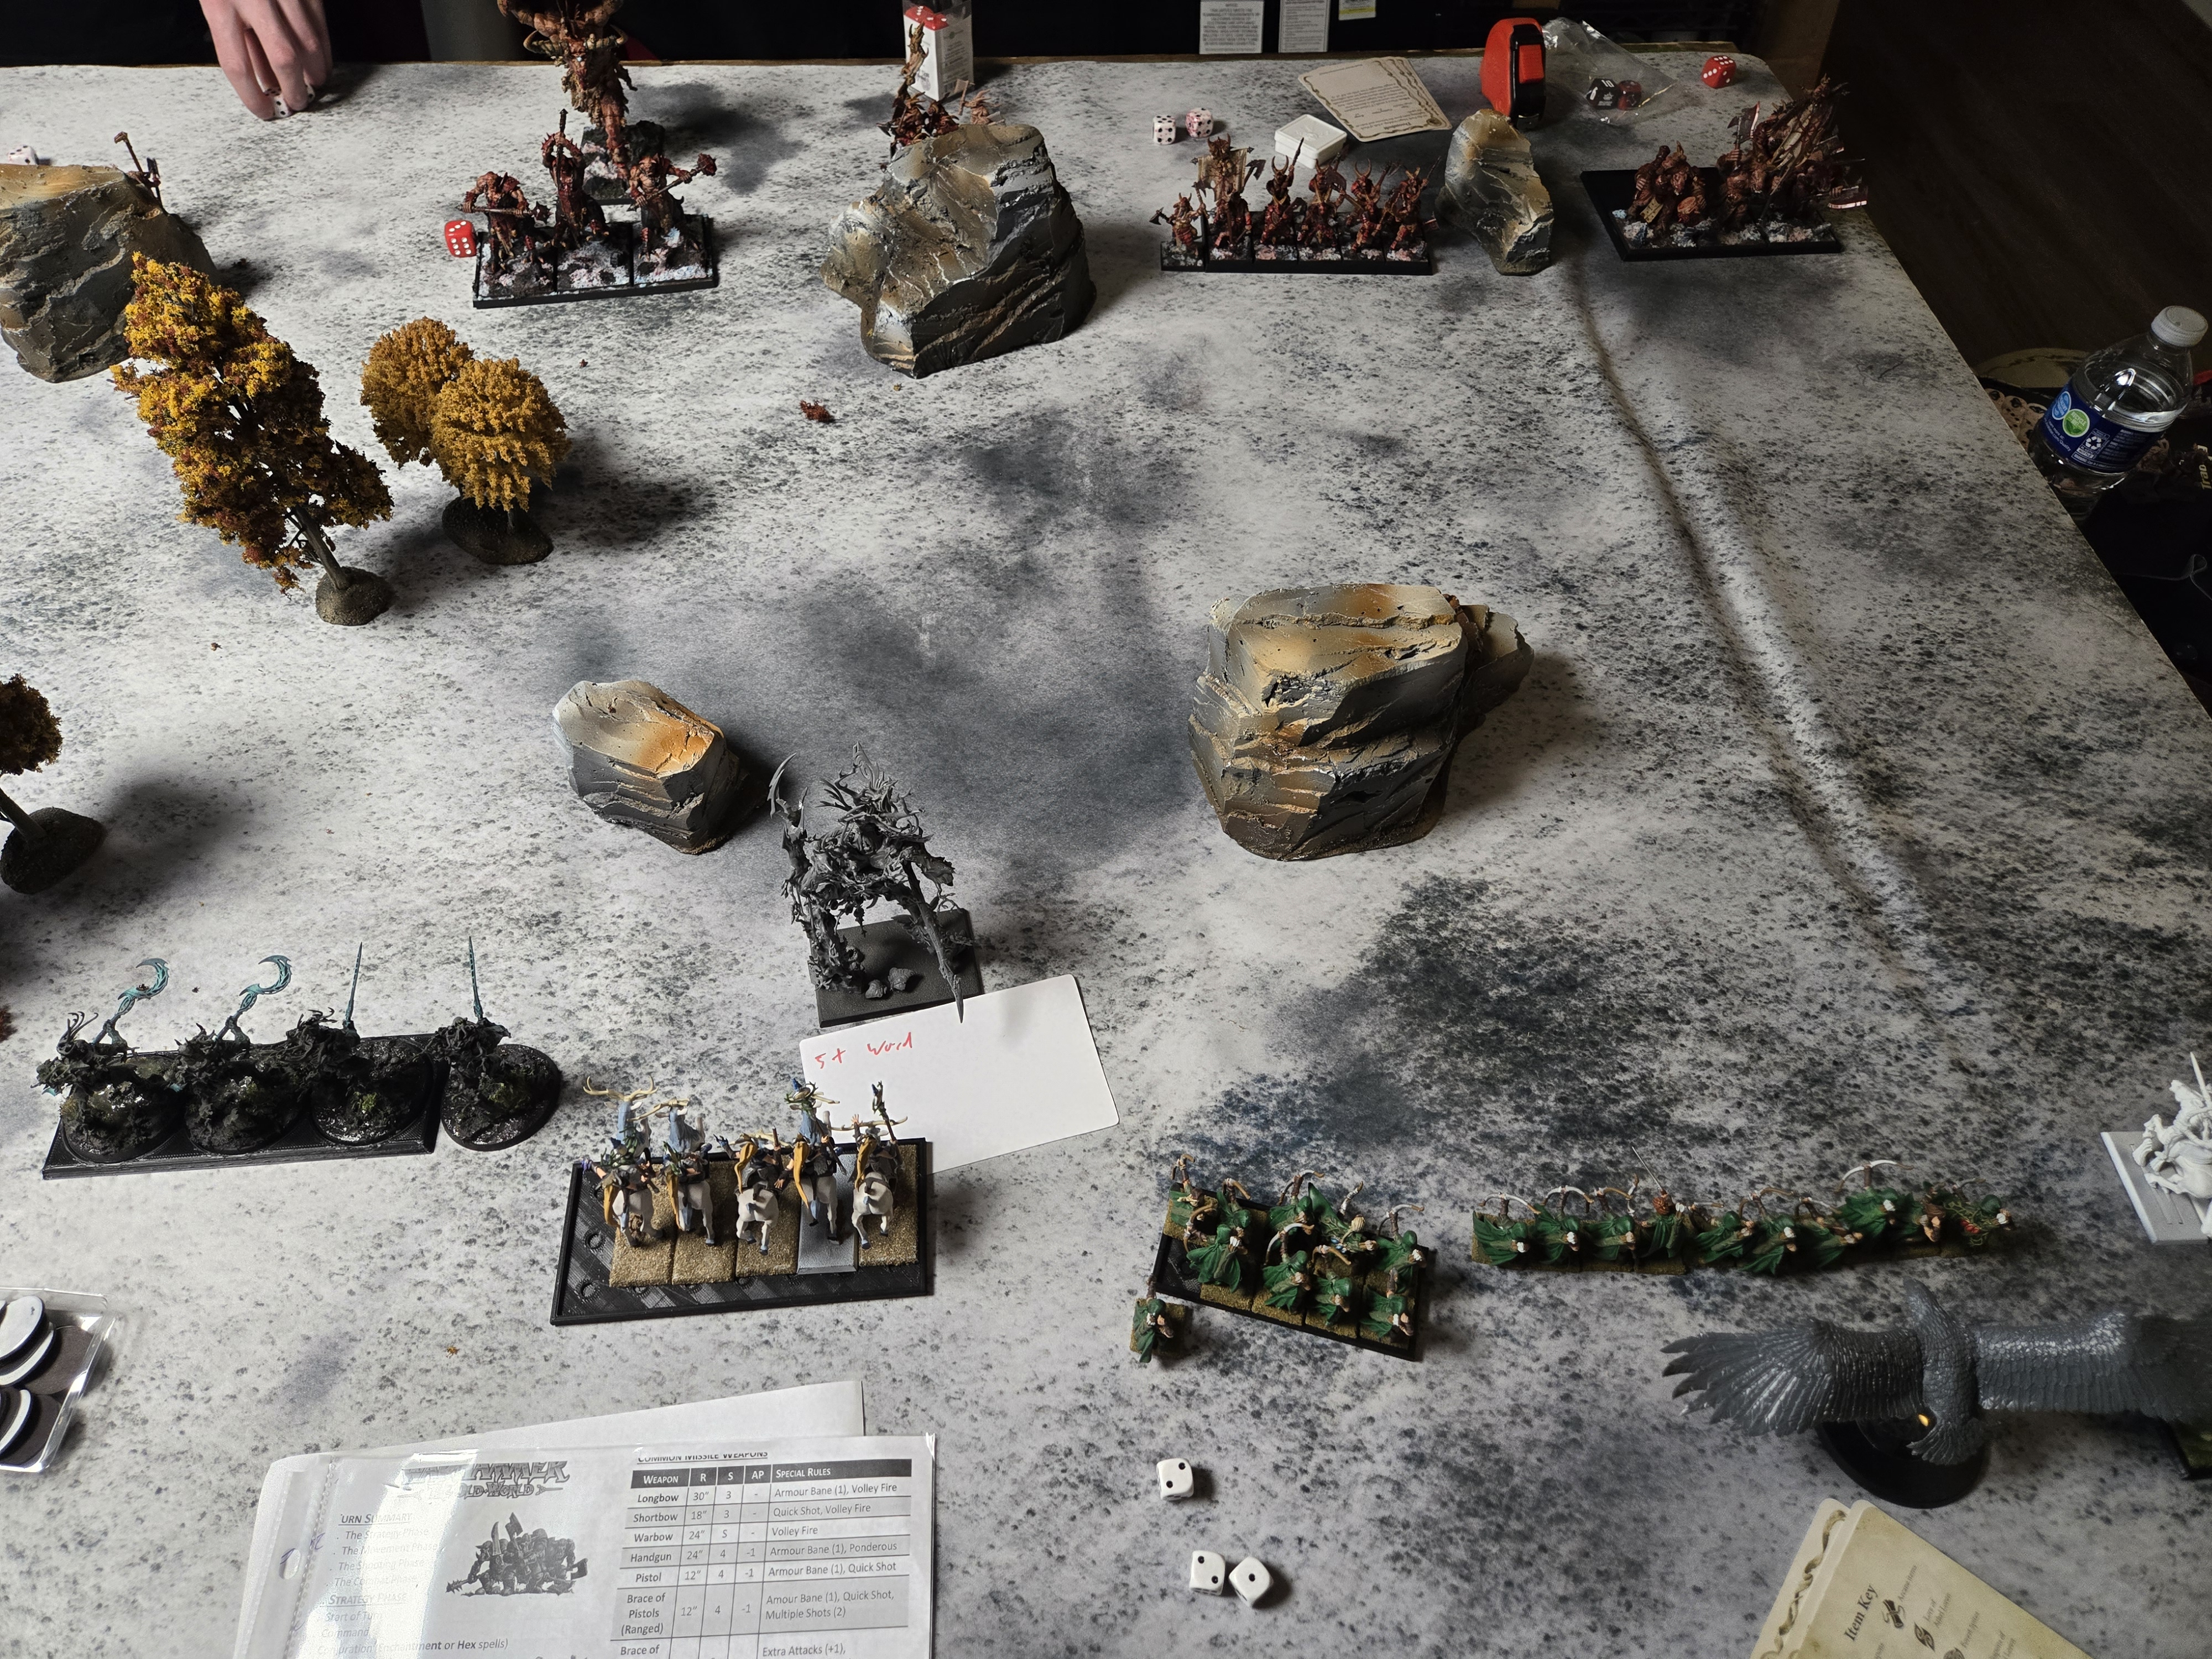
The right flank looked rough, with me facing down the enemy minotaurs and dragon ogres. I was able to kill 2 minotaurs in the first round of shooting.

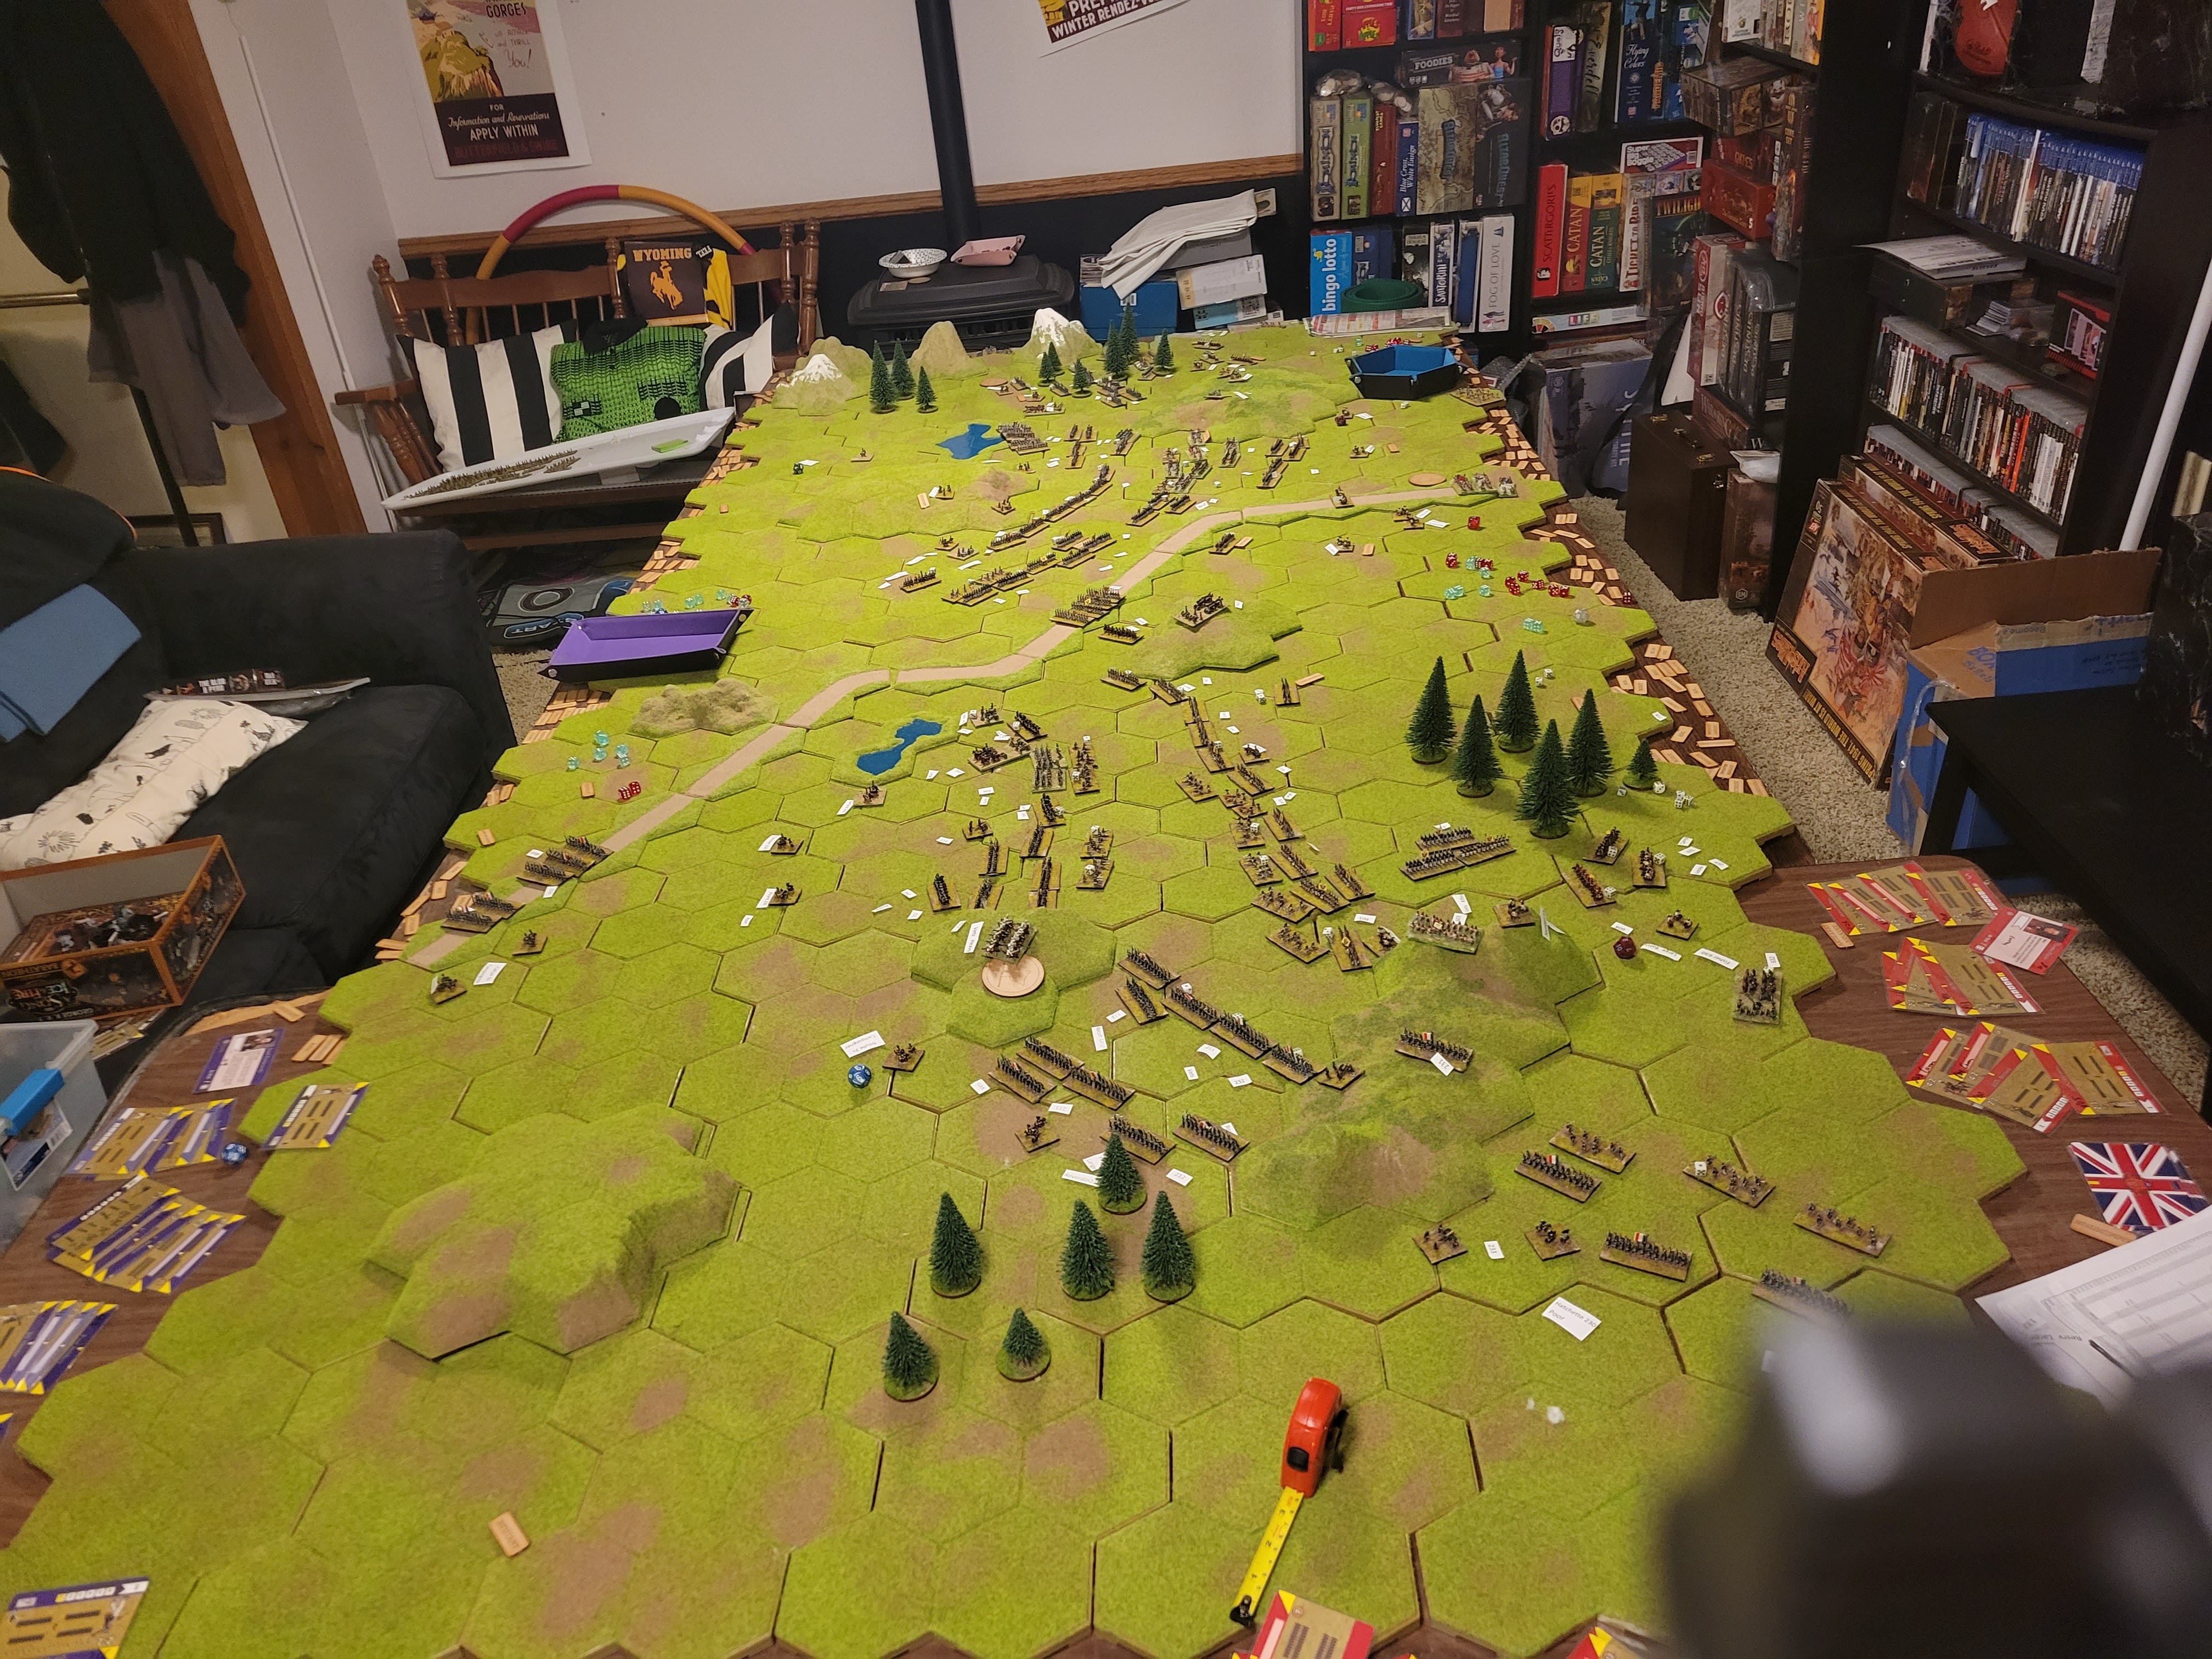
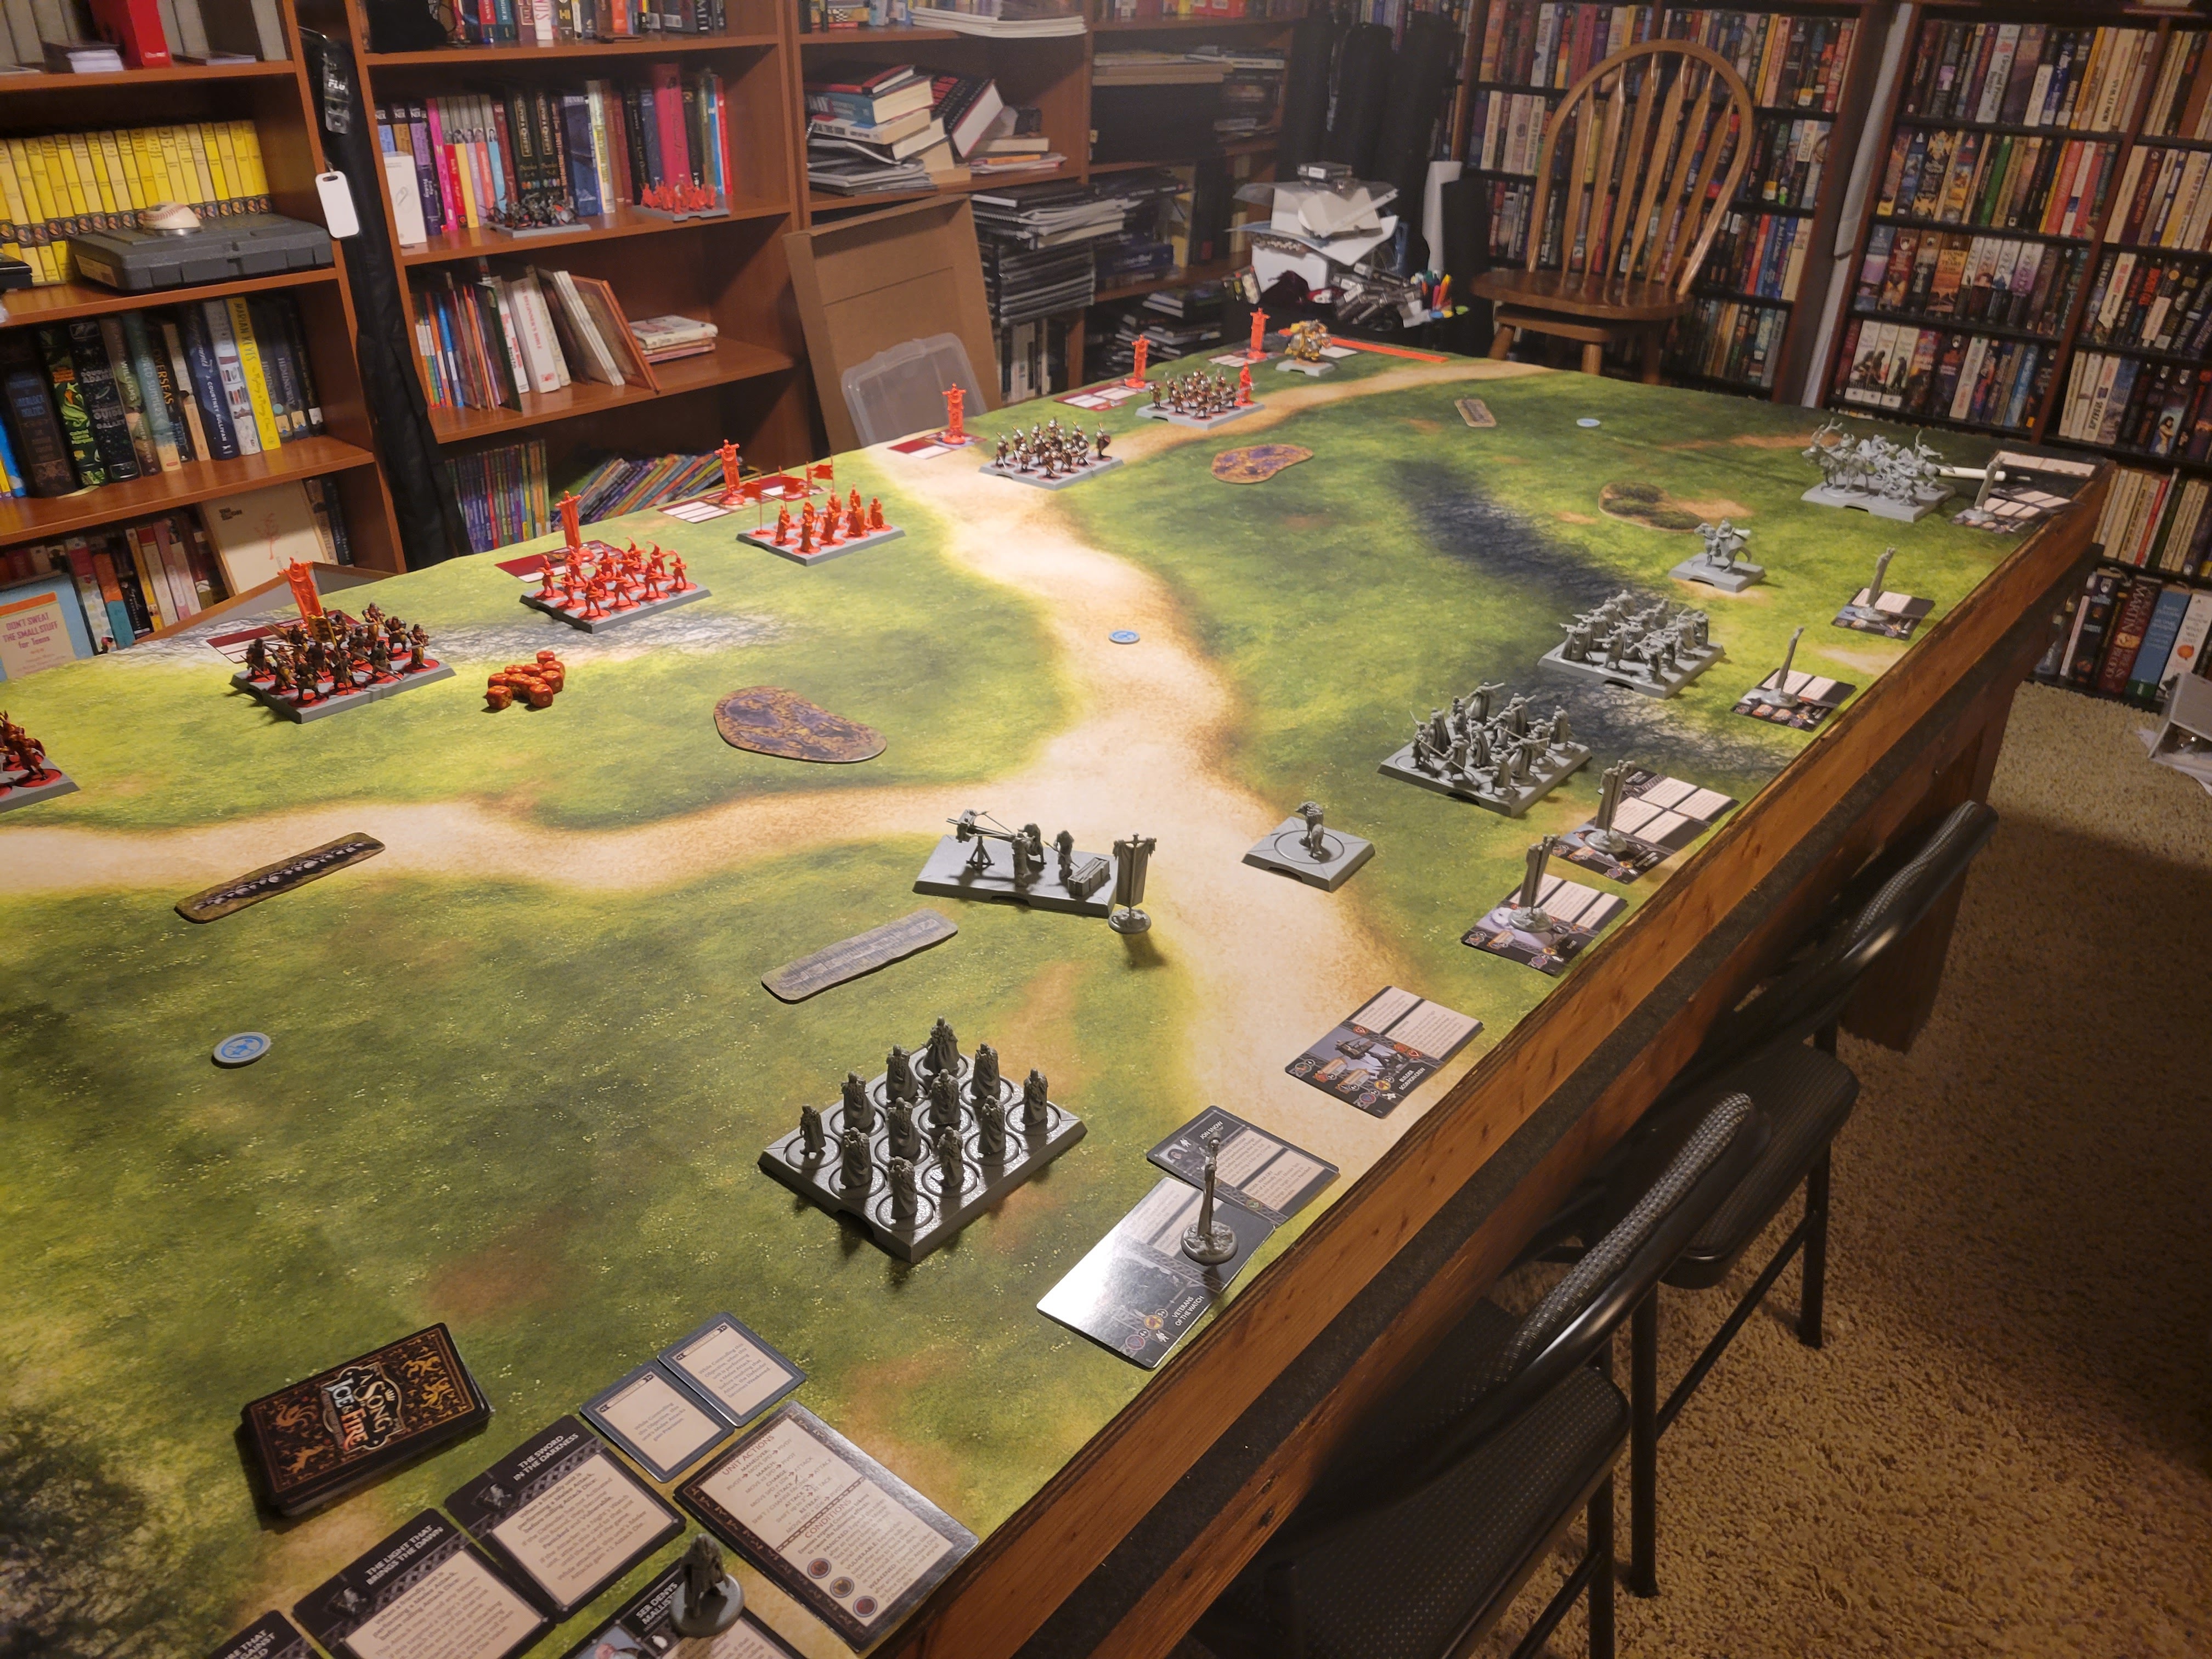
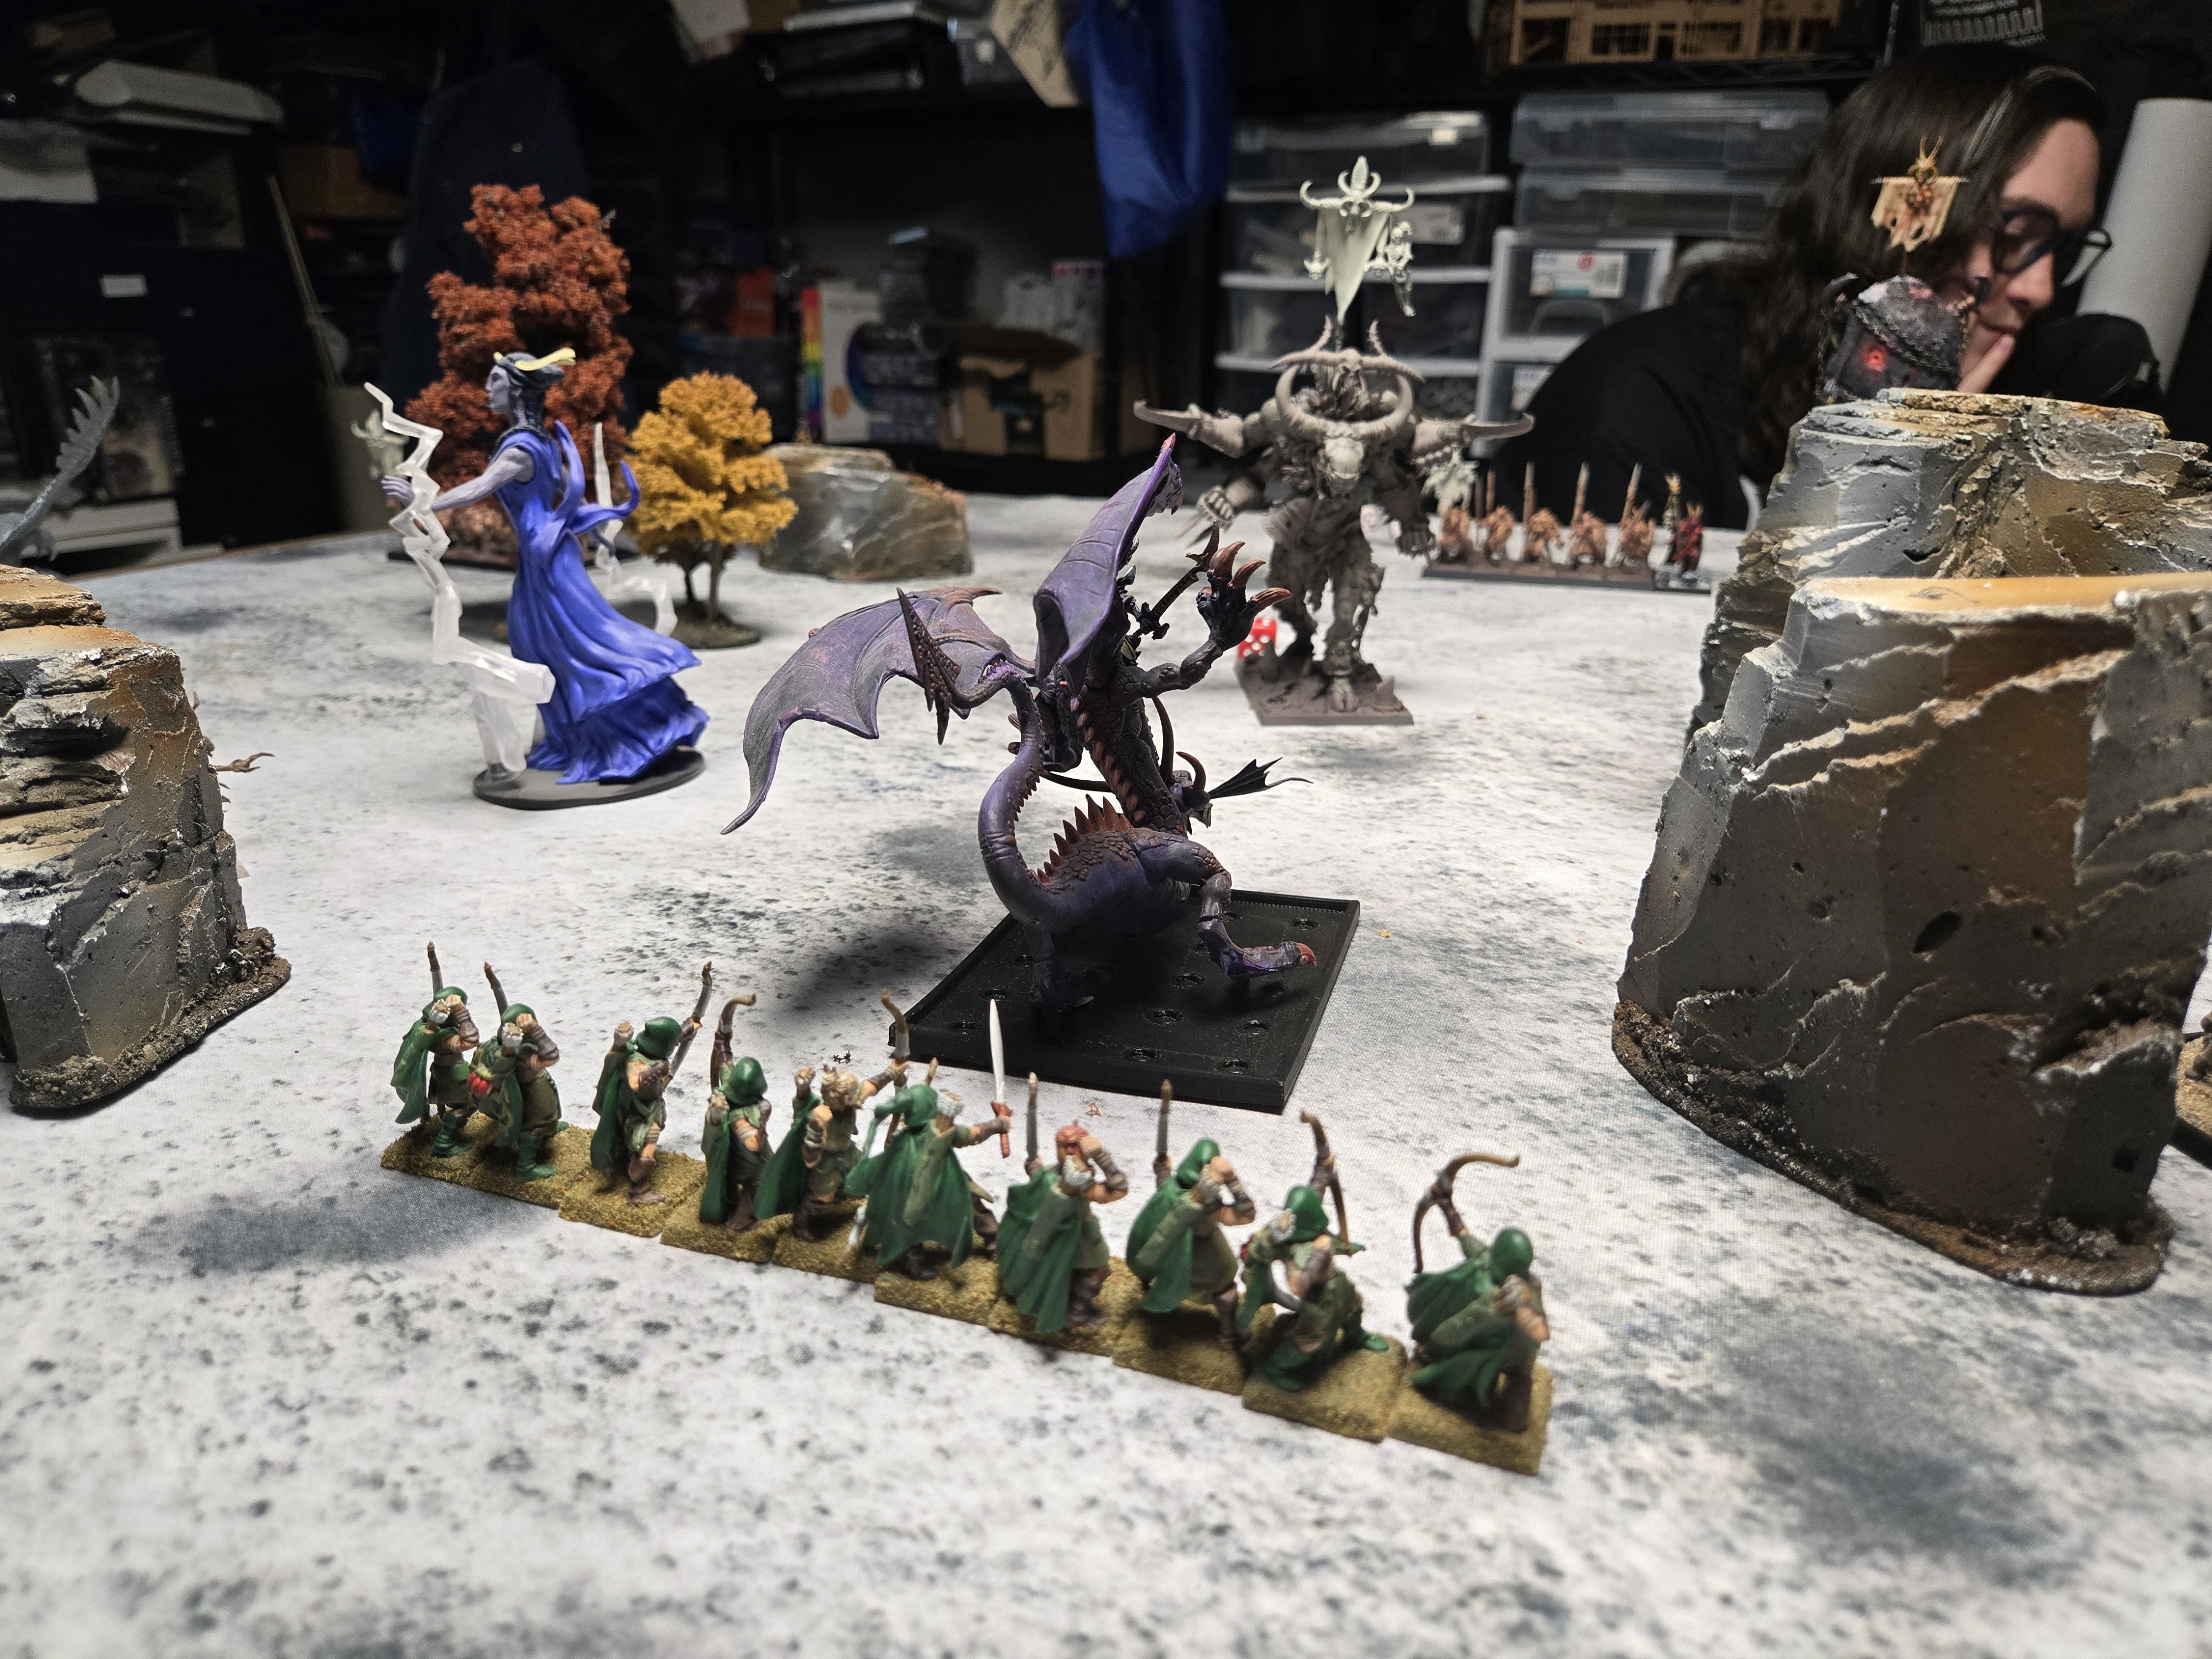
Round 3 resulted in the Ghorgon taking on the Woodelf Dragon. Unfortunately, the single six that was rolled into another six meant the monster slayer, Ghorgon, killed my general.

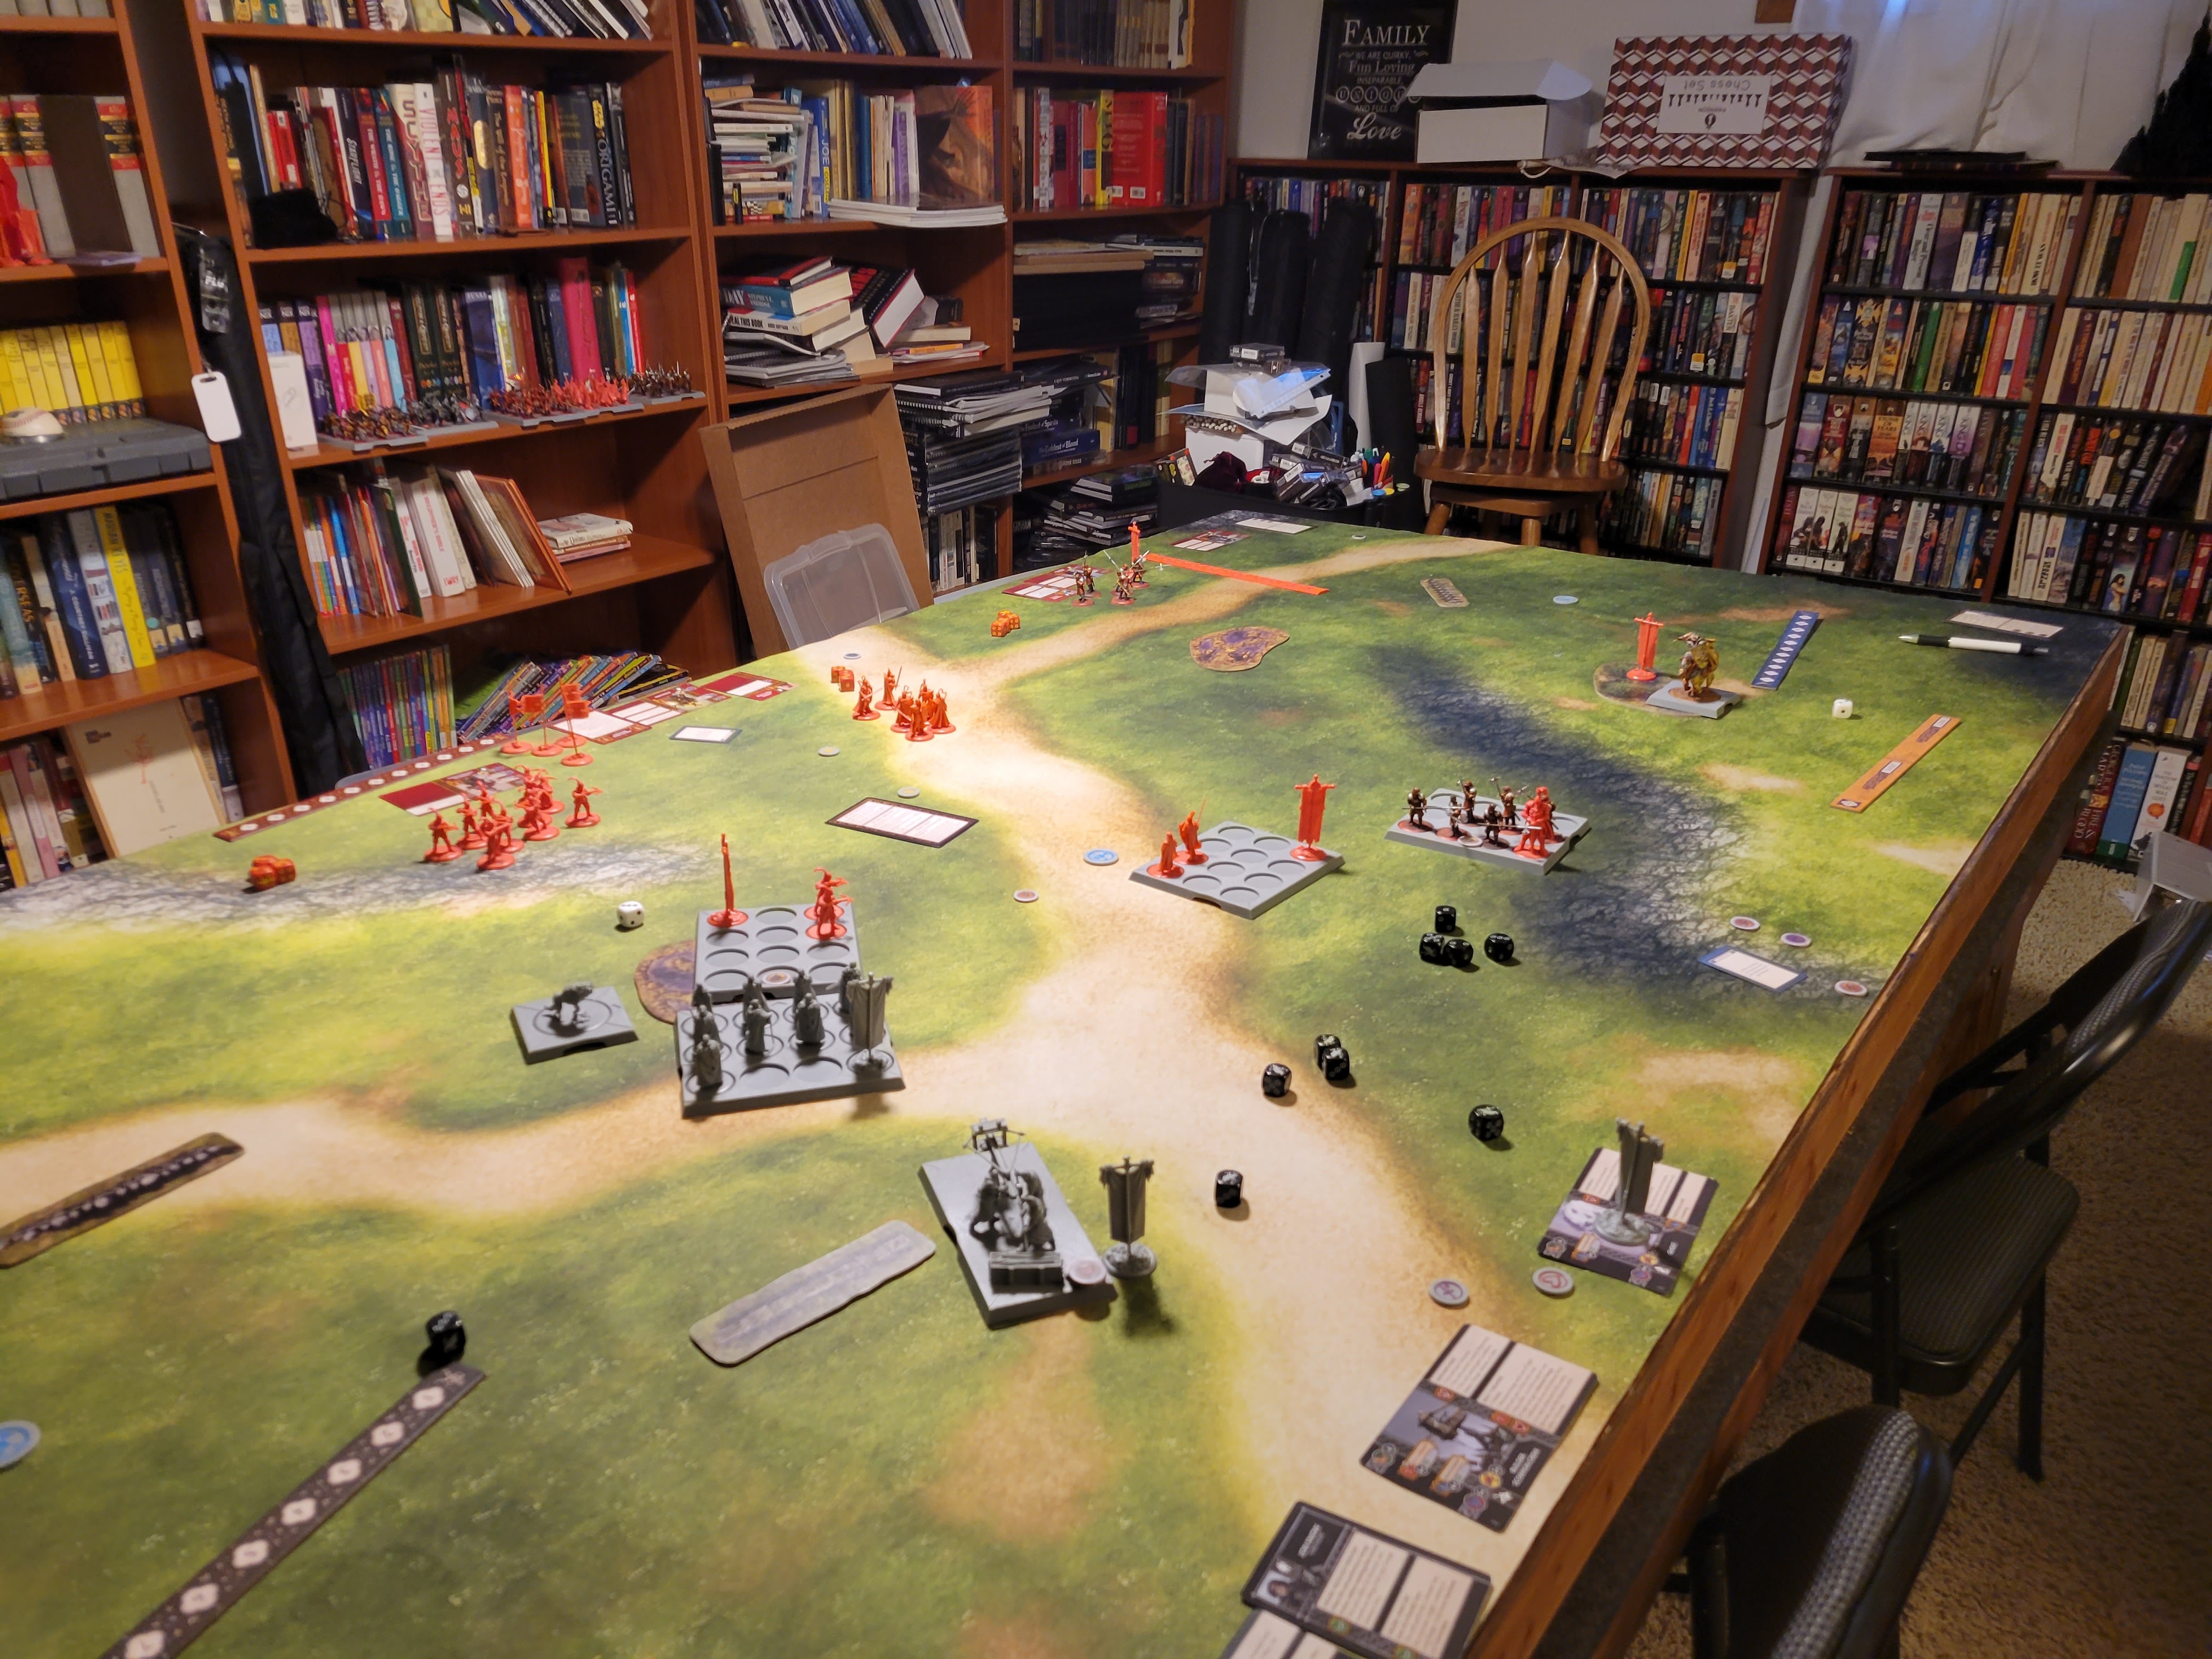
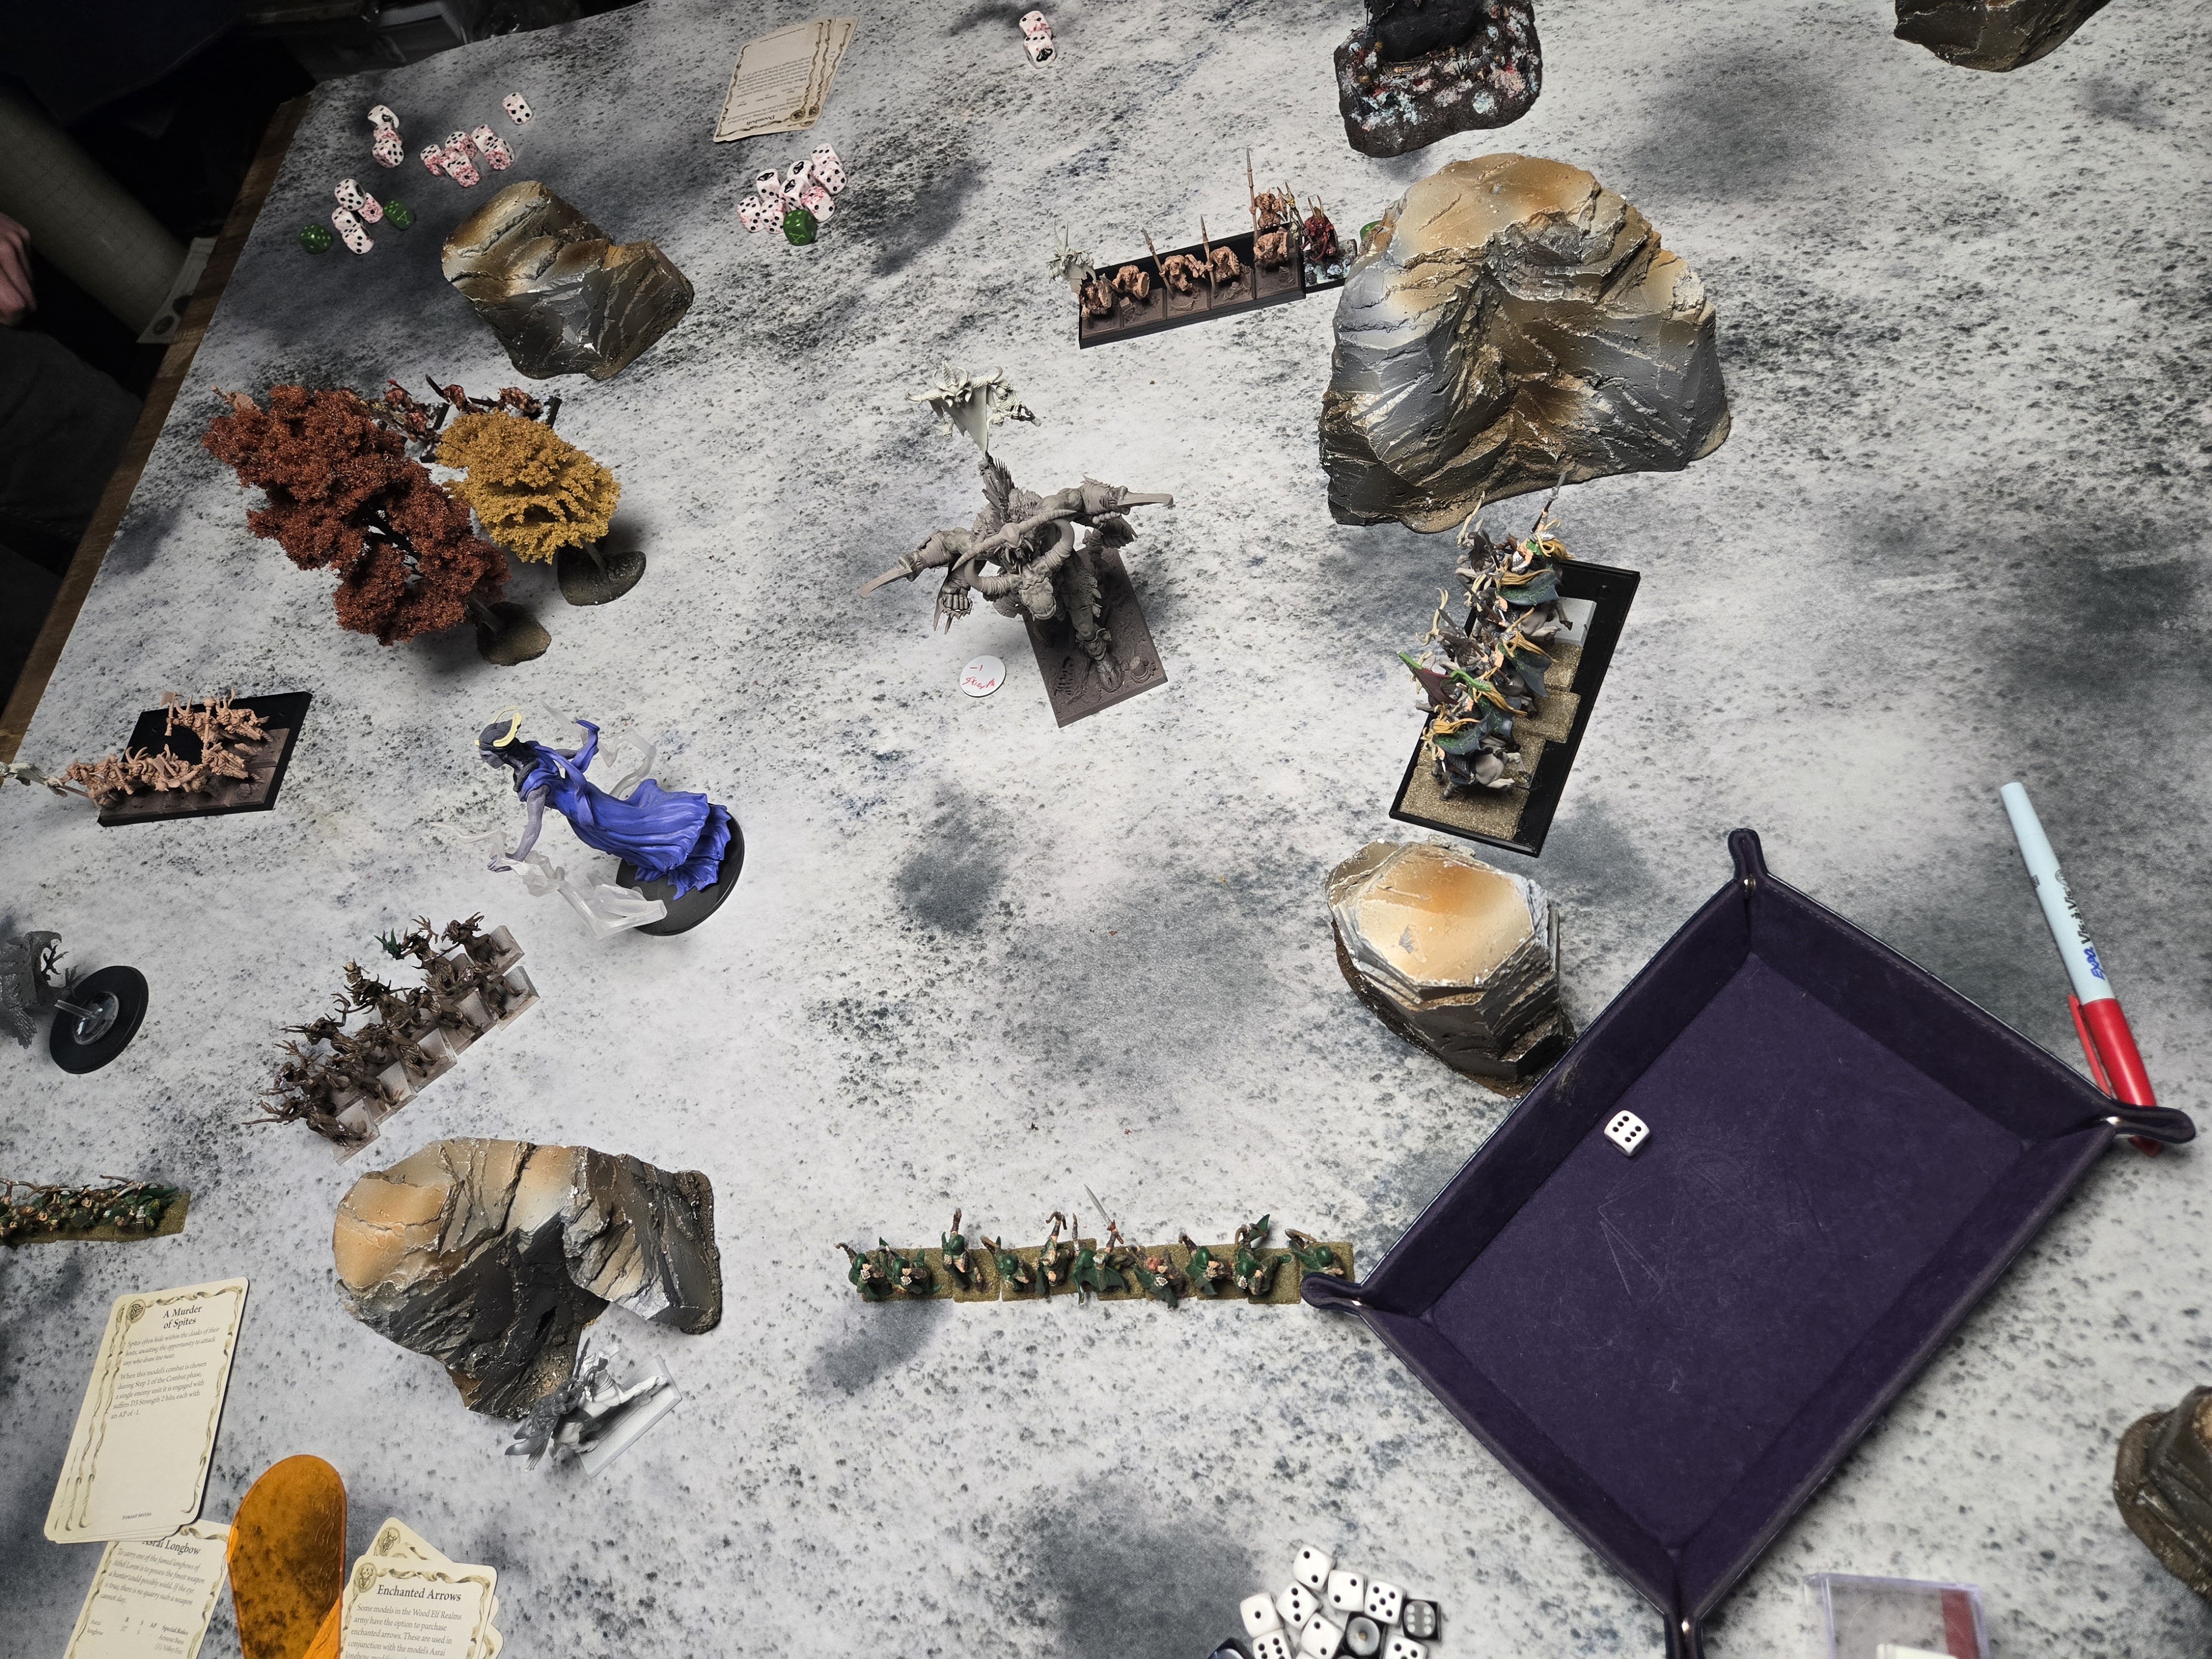
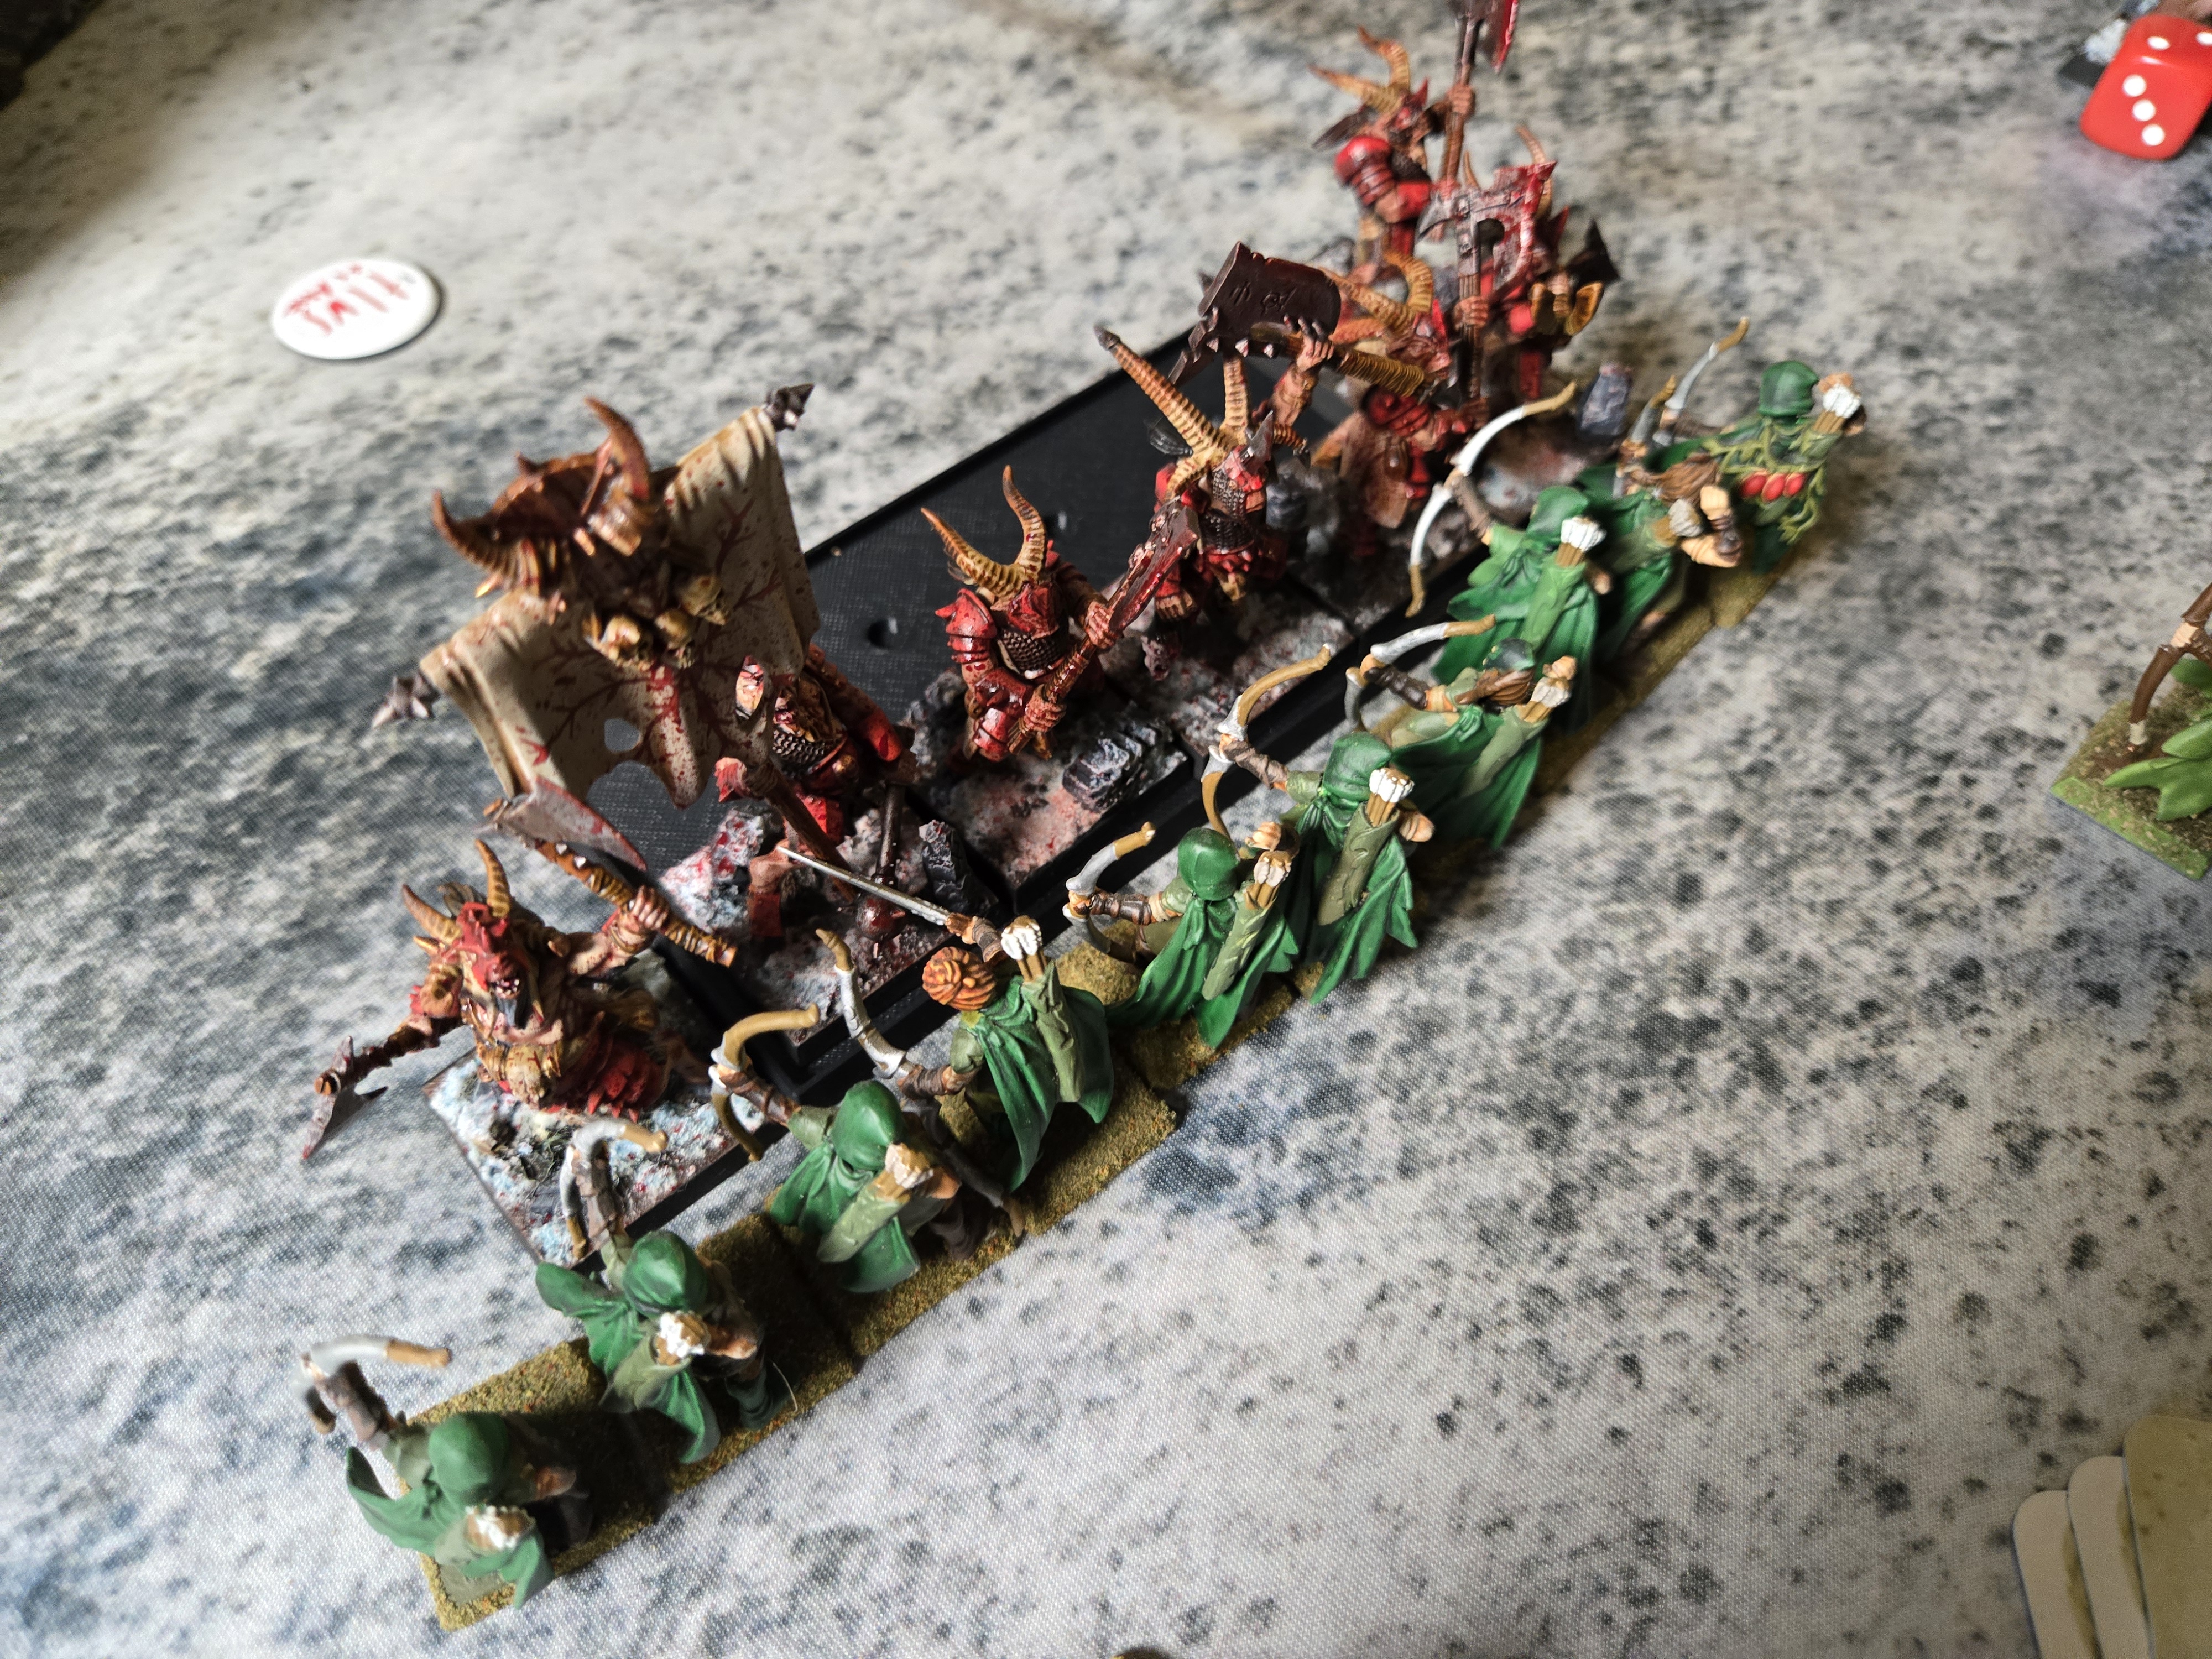
Center of the board after the turn 3 onslaught. My wildriders missed their charge.

Turn 5 meant their main lines could finally get to my bladeguard. It wasn’t pretty.

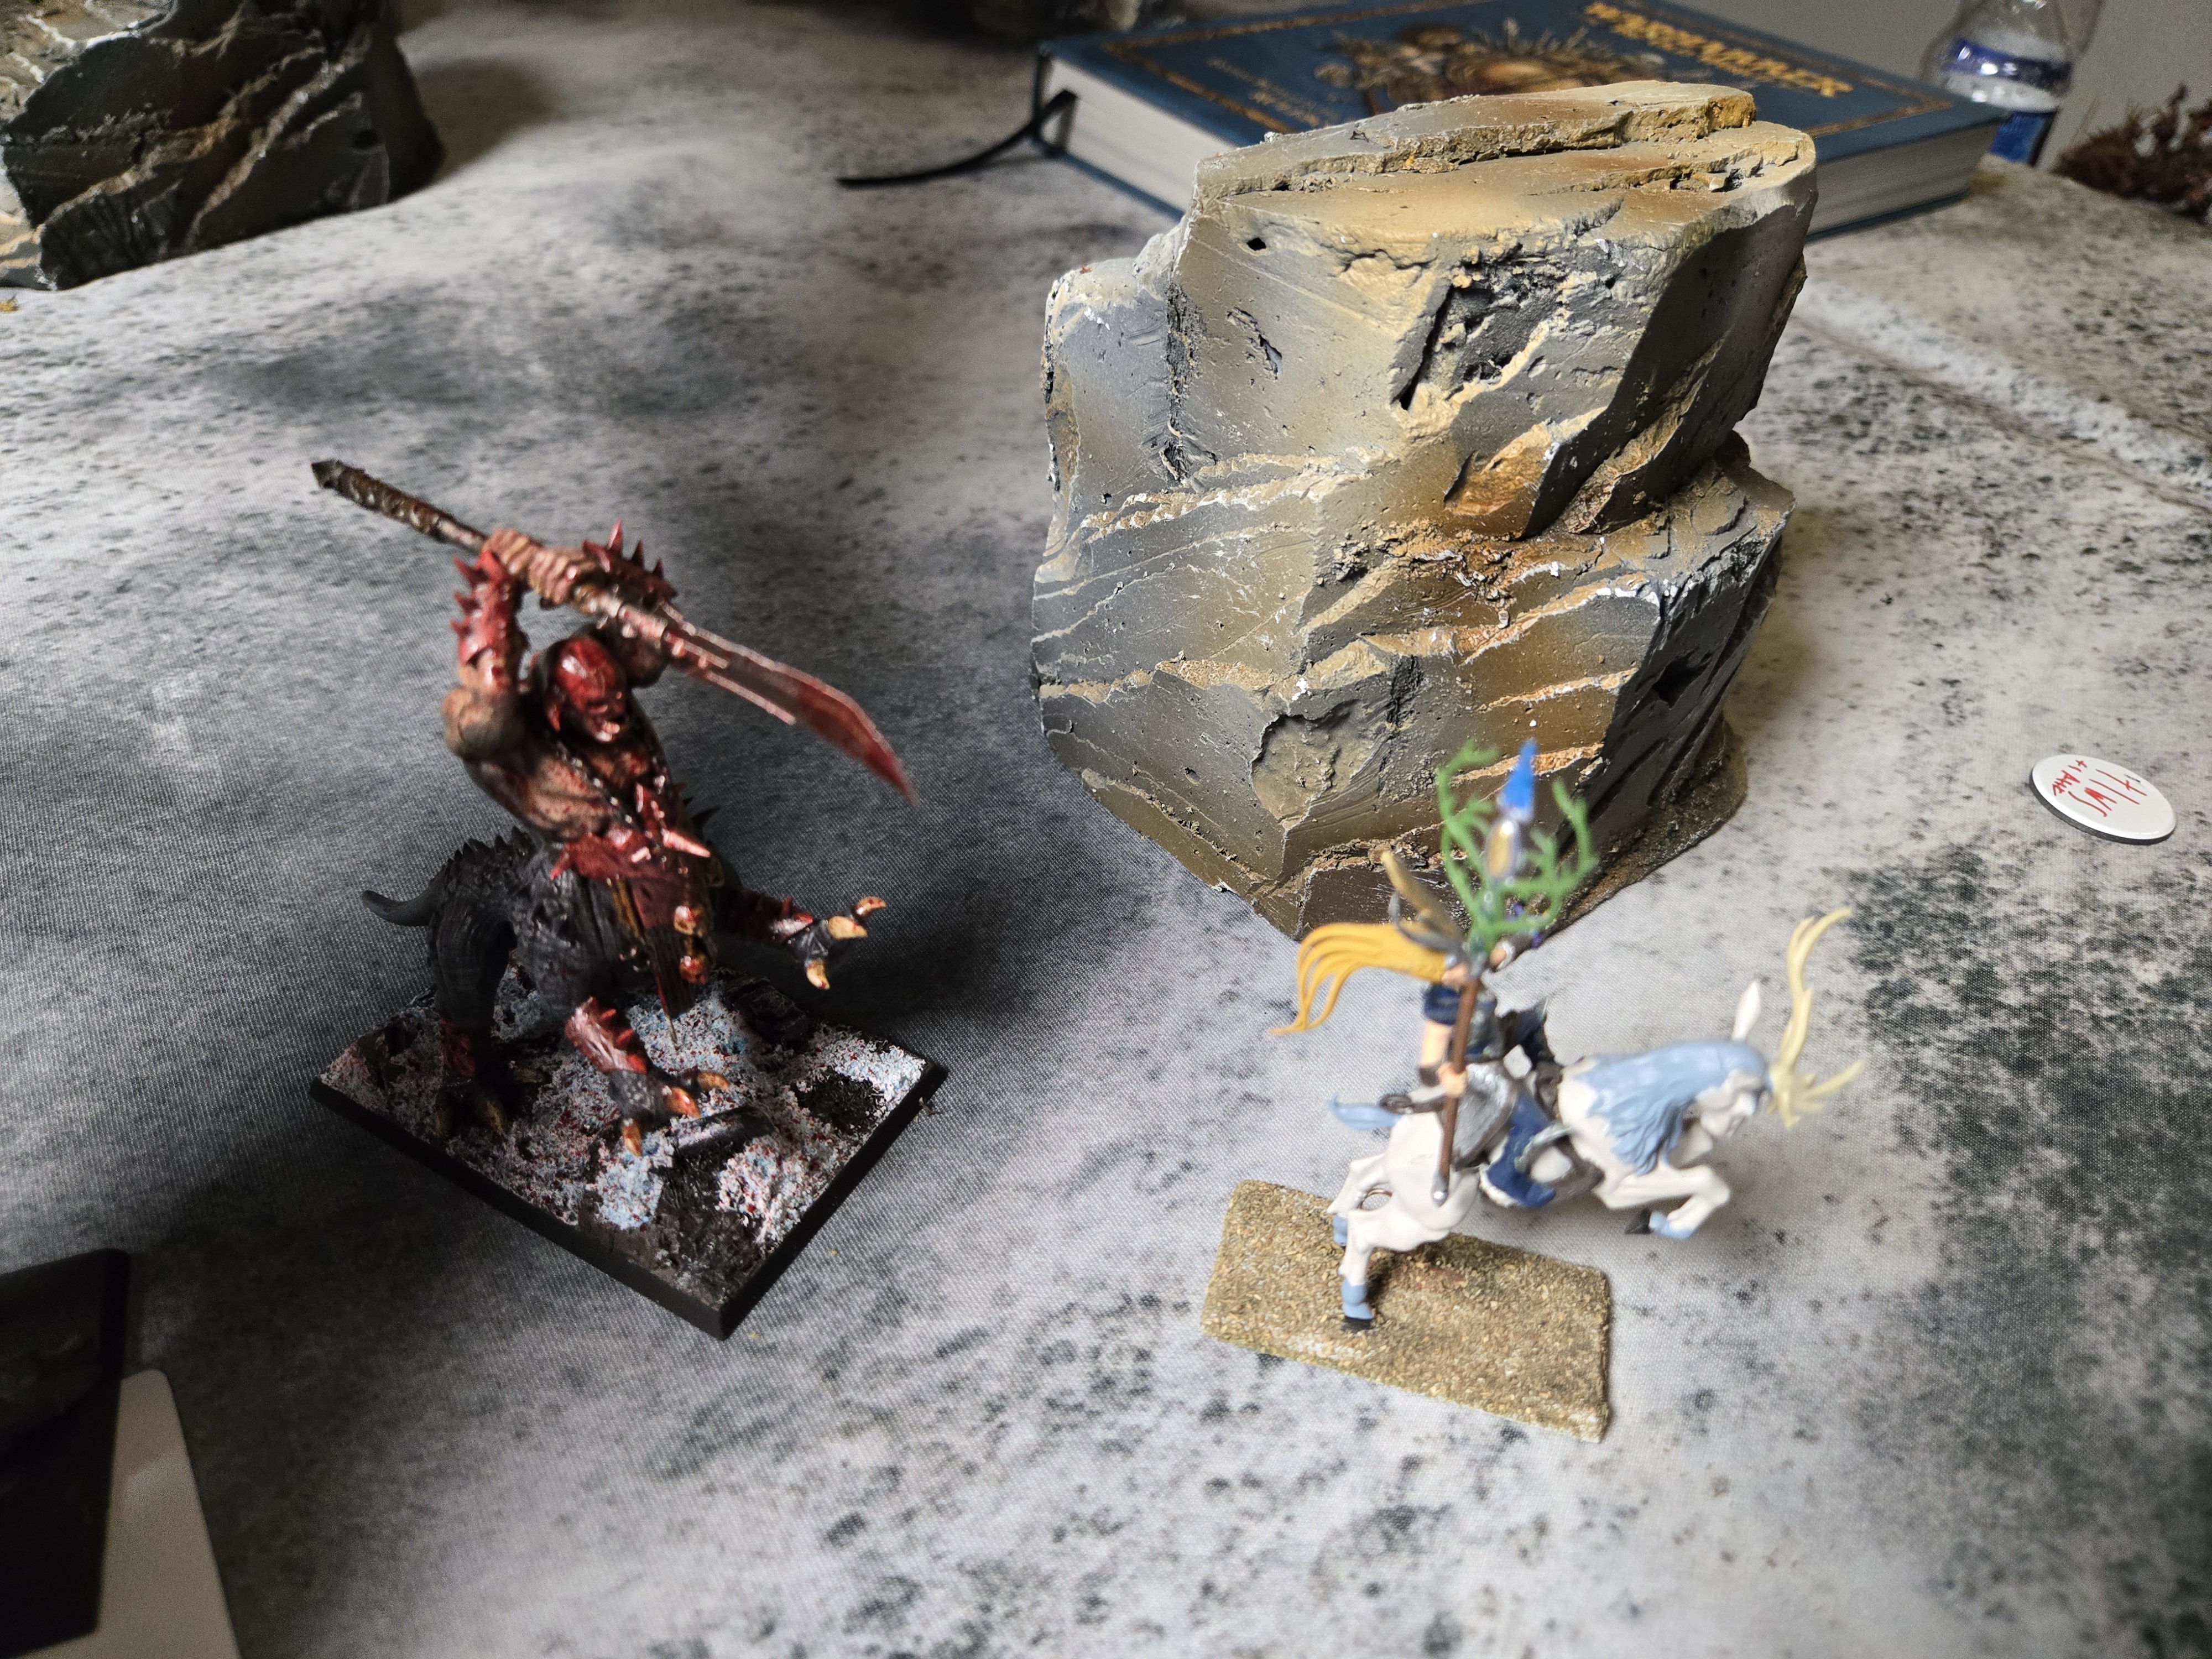
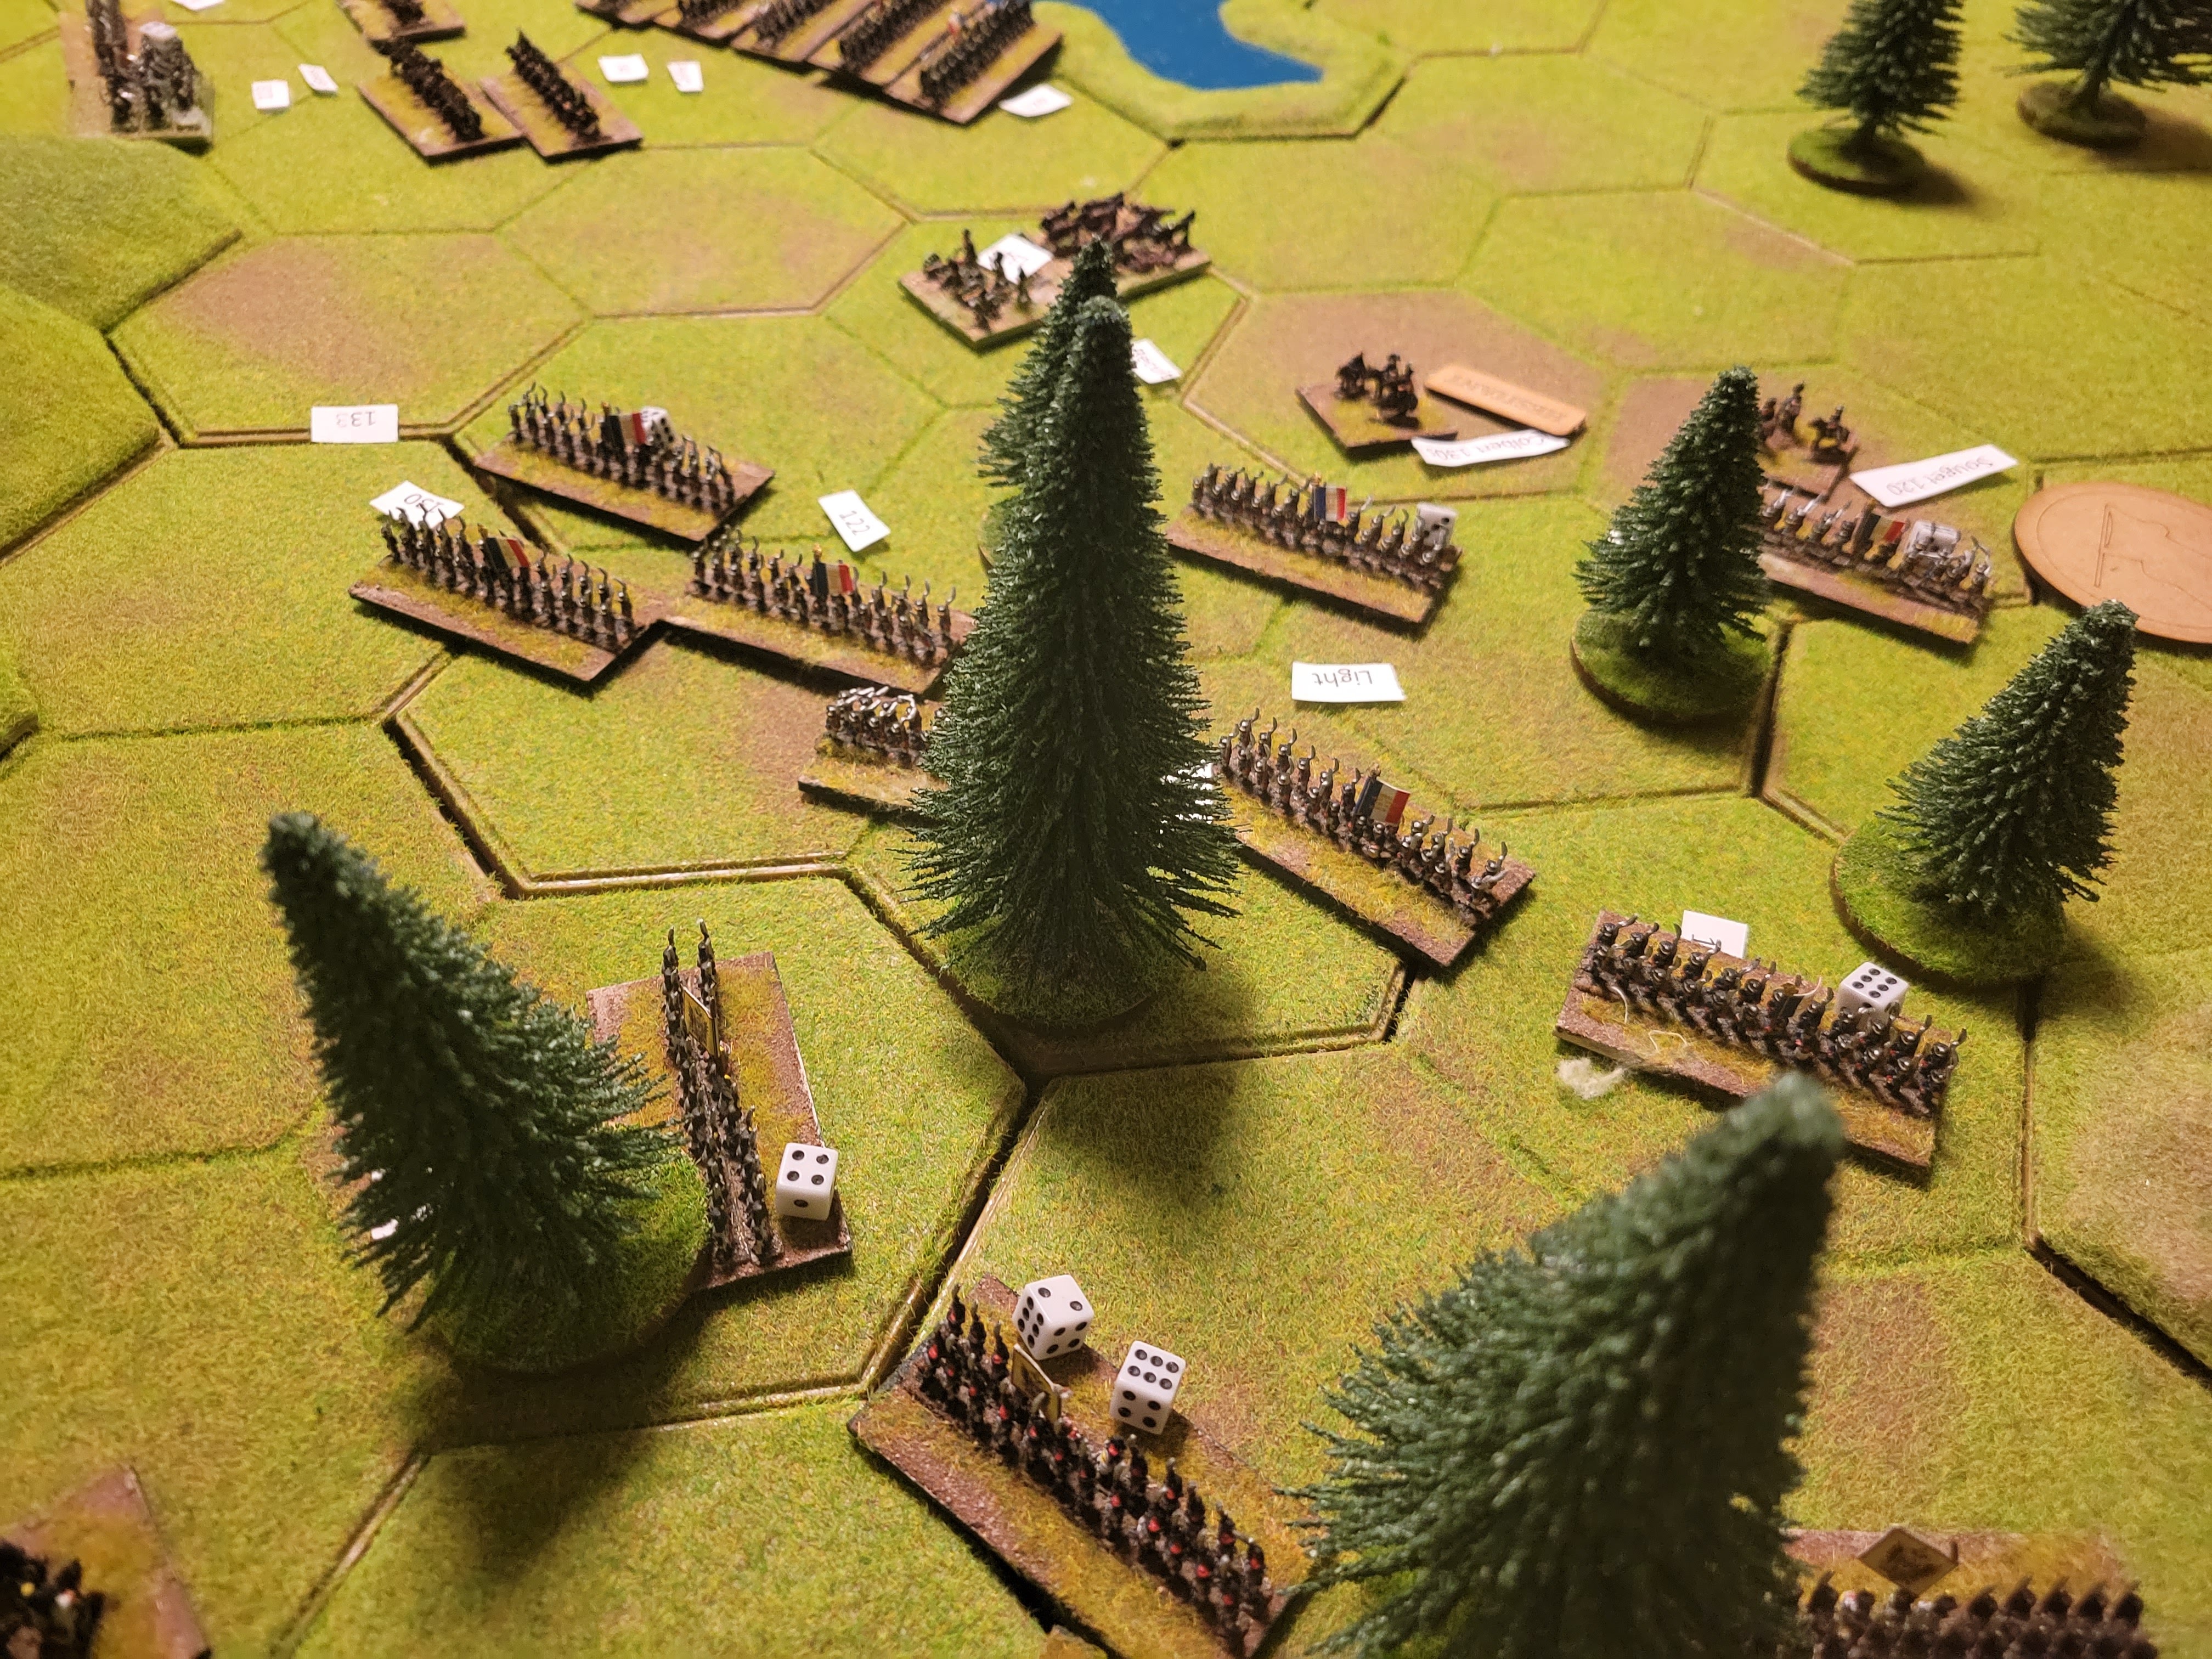
A rather funny image of his final dragon ogre chasing my final sister of the thorn.

General De’ Armee Battlereport

3 Corps. 14000 pts. 5 days of battle. Field 6’x12′ using Kallistra Hex items as a base plus their hills and roads and other terrain. I also used Fog of War rules.

This was by far the largest battle I have ever fought solo. I used 6mm figures that I purchased pre-painted. The scenario was simple. The French wanted to cut off the British reserves and seize the nearby road. The French had two minor objectives, securing their own supply chain through the mountain pass and securing a key hill that overlooked two towns.

The British main objective was to keep their reserve lines open. Secondarily, they wanted to halt the advance near the towns. The hill was irrelevant to them as were the towns, they just did not want any further advances. They also wanted to hold a strong line near the supply lines to weaken future French movements.

Below are the French Army Lists. I had to go with screenshots as I did not want to retype everything.

And the British Lists

The initial deployment is below. I wanted the French to really push towards the flanks in a pincer style movement knowing the reserve Corps could begin to arrive turn 10. Below is the initial setup. I like using the hexes as it keeps me from having to measure every freaking attack and can just use the hexes instead.

Turn 3 the action got heavy quickly. Fierce fighting on the flank near the mountains with skirmishers and artillery hammering away. While the far-flank British Cavalry ran into a large unit of French conscripts.

Turn 5 the game turned. British scouts revealed a huge weakness in the french formation, there was essentially no infantry in the center. They moved their largest units to divide the forces and try and break the flank near the mountain pass as this was the weakest and farthest from potential French reinforcements.

By turn 6 it was nerve-wracking as the French elite units were under heavy pressure and began an orderly withdrawal. It didn’t help that turn 3 the British seized the initiative and continued to hold it. The French on the bottom of the picture had eliminated most of the British Cavalry and were pushing hard to seize the entire flank and sector.

Turn 9 the Brits were pushing as many troops to the center as possible. Near the mountains to the top of the picture they were barely holding on and accepting those losses as this could be the end of the invasion. (I switched to a tripod here for more consistent images)

Turn 11. British troops fly up the center road preparing to cut off the French reserves. They are barely holding on to the flanks while their center continues to divide. the French diverted 5 battalions on the top flank towards the center at risk of losing the Mountain pass. The commanders to the bottom continue to fail in their rolls to advance giving the British some respite there.

Here is a close up of some fighting near the mountains. The British have heavy casualties and are on the brink.

Turn 13 the reserves have flown up the middle of the table and engaged in the center.

Turn 15, shit hit the fan. The British rolled 15, 11’s and 12’s to literally shatter the French’s bottom flank and center. I chose to call the game as this point. 12 French battalions left the field to only 1 British. An entire Corps was broken. I saw no way for the French to recover.

Overall Impressions

This was my 10thish time using the General D Armee system. Having a battle of this size the rules were semi cumbersome and I wouldn’t advise trying it yourself. I had a great time though and could feel the full actions. In the future, I will work on creating a ruleset for the use of dragons on the field. Based on the books His Magesties Dragon. Love the books, love Napoleonic wars, I think Dragons could be used in this system. Thanks for reading talk soon.

Flames of War Battle Report USA vs Soviets

For whatever reason, I have never actually put my Flames of War models to the table. I have 5 armies, fully painted and angry ready for battle, but have never actually played myself. Over the next few weeks there are four battles scheduled so I can teach myself. The rules are vague as to how big of a table to use. How much terrain, deployment areas etc. I am setting up 100 pts on a my standard 8×4 table as such.

I have no idea how much space should be required. I have no idea what is a good list or a competitive list. I have read zero blogs and watched zero Youtube videos. We are going to take an adventure together.

SovietsAmericans
Churchill Guards Heavy Tanks23M4 Sherman Tank Company61
HQ32 HQ M4s7
3 Churchill 6pdr105 M4s18
T-34 Tank Battallion695 M4s18
HQ3Rifle Company39
7 T-34s21HQ 2 SMG Teams2
5 T-70s5Rifles 7 M1s 1 Bazooka 1 HMG8
7 T-34s21Rifles 10 M1s 2 Bazooka9
15 SMG Company+1 Komissar17Rifles 7 M1s 1 Bazooka6
3 82mm Mortar22 81 MM Mortar2
Light Tank Killer Company83 T30 75 MM Assault Guns3
4 45mm Guns84 M1917 HMG3
4 37mm guns6

First movement for the Russians has been made. I only had the Mortars in range of anything, unfortunately I did not have an artillery template.

1 Week later I have an artillery template, plus a few dozen of the other sets of tokens you also need to play. The mortars killed a single set of the M1s. American go. The first few turns took a significant amount of time while I figured out the system. The whole when to save when to to save and other items were perplexing. I have watched several youtube videos and have a better grasp. The Americans did destroy a couple of T34s.

Turn 2 for both teams involved a ton of shooting and numerous tanks destroyed. At this point I think I have the basics of the game figured out. Artillery is very high-powered and can do a ton of damage to infantry. (no kidding) Tanks go up like popcorn making the battles very high-paced. Also any unit that is unsportted is at risk meaning you need well-rounded forces. A horde of infantry may take losses but can generally assault and stop a tank company. For either side I didn’t have much strategy, just kill and learn the rules.

Turn 3 resulted in a ton of damage to the American side. You can see most of the infantry defending the top village were assaulted and destroyed, all but 5 of the shermans were destroyed vs the soviets still having about 12 tanks left. I called the game here. I the soviets just had too much firepower and it would have been a blood bath.

What I learned. This first mission had very little depth aside from lining up units for one side or the other to their best advantage. Table set up is huge and I need to be better. I half hazard through down some hills and other terrain not thinking my next table will be better. I think the game is balanced I wish elevation played a bigger role.

Hobby Streak 11-28-22 To 12-5-22

Hobby streak is still going strong. I didn’t take pics of everything. I doubt you want to see some basic glued grey MCP models.

On November 28 I airbrushed a few dinosaurs and a random piece of terrain I had. I am in an AOS league and our final game is scheduled for 12/7/2022. My list is as follows.

Seraphon Thunder LizardsPoints
Leaders
(General) Saurus Oldblood on Carnasuar250
Skink Starseer145
Battleline
(x3) Steagadon with Skystreak Bow270(ea) 810
Behemoth
Bastiladon with Solar Engine250
Dread Saurian545

I am super stoked for this list and a grand total of 7 models is nice. Battlereport will come

On the 29th I pushed out 10 dwarves with great weapons. My classic zenithal prime. Various contrast paints for the browns and hair. Vallejo Opaque Blue and Yellow. And some Reaper Bones darkened steel.

On the 30th I worked on the Dread Saurian, what a really cool model with so many textures. Worked great with an airbrush, I don’t even have much detail to work on once he is washed.

Primed with Vallejo Forest green primer, it also provided a nice basecoat. From there I mixed in various greens building up highlights and finished with the vallejo golden yellow you see on its side in the second pic. I added some gold fir the fixtures. I honestly think after a wash and some face and mouth detail work this model will be in good shape.

The 1st I was completely exhausted and simply built a handful of MCP models.

On the 2nd I began researching some info for my next DND campaign. The PCs are going to be starting on Wolf Toe Island, in the nation of Asan. I haven’t crafted much of this nation yet, and I want the culture to feel unique. This island has some significant notes in the past as it is where most of the shipwrecked sailers from the frequent storms in the Winsbey Ocean end up. Having a couple of medium fishing villages built from husks of shipwrecks is the start. I think having many different races in the area matters, I am struggling with figuring out how that looks as a culture.

The third I did some minor detail work on the big lizard models and made a couple of washes. Wash recipe is simple, ink, water, and matte medium. The water is about 70%, the medium 25% and ink 5% at most. I didn’t want to use expensive GW washes on a massive dinosaur.

The 4th I based the big models. I still have to paint the Starseer, but he will be mostly contrast paints done tonight. This will conclude what I am doing right now for the Seraphon. I will most likely do an inventory of the total amount of models I have for this collection once we are finished. It is extensive. Probably 100 skinks, 60 warriors, a dozen larger things.

Battle Report ASOIAF Nights Watch vs Neutral

50 pts. 8×4 Table Here we Stand Night’s Watch has the Throne

Below are the Army Lists

Neutral50Nights Watch
Vargo HoatJon Snow
House Bolton Cutthroats5Veterans of the Watch7
Bloody Murmur Skirmishers6Builder Stone Thrower8
(1) Stormcrow Lieutenant1Sworn Brothers7
Bloody Mummer Zorse Riders6(1) Othell Yarrick1
House Bolton Blackguards6Ranger Vanguards7
(2) Ramsay Snow2Ranger Hunters7
House Bolton Flayed Men8Ghost3
(1) Glory Seeker1Craster4
Hedge Knights7Quorin Halfhand6
Walder Frey4
Roose Bolton4

Below is the initial setup. I am nervous about Jon Snow and Ghost being on an island on their own against Flayed Ones and Zorse Riders. Hopefully, the stone-thrower can damage a few units before it is engaged. I liked Neutral’s chances based on the game mode. I always roll a d10, and this was the one. The cav-heavy list could really cause issues for NW.

Round 1 and 2 were relatively simple. Neutral cav pushed to the flanks and the ranger vanguard, with help from the stone thrower locked in the hedge knights. Round 3 is where it got very interesting.

The ranger vets and ghost one-shotted the Zorse riders, and the flayed ones with a charge reroll failed to get a 2+ on either roll. And the ranger hunters did 7 damage to the cuthroats and eliminated them. At that point, the game was essentially over, but I was truly shocked. The sworn swords were eliminated.

I called the game after round 4; the veterans were able to kill the flayed ones, and the blackguard were also killed. It was an easy victory for The Nights Watch. I was very surprised at the result. The one-shot kill of the zorse riders plus failed charge completely changed the game. Also, 7 damage from ranger hunters on the cutthroats was a very good roll. Plus they routed 2 other models for 9 total wounds to eliminate them.

As far as the game itself, Walder Frey was really good. He was the only reason Neutral had a chance after round 3. It was my first time bringing a stone-thrower which was a complete glass cannon, it did 8 wounds against the blackguard, 3 against the hedge knights and that was it. The only reason it did so well against the blackguard was Yarrick, who was killed by one of the boltons. It was also my first time with Zorse Riders. I was shocked at how easily they left the table, but sometimes that’s how it goes.

This will be my last ASOIAF battle report for awhile. I am going to switch to Flames of War for a few weeks.

Battle Report ASOIAF Lannister vs Night’s Watch

Game review, it was a thrilling game. I did not think the Lannister’s had a chance after round 3/4. A huge turn for them in 5 to kill the opposing leader and win the game. I have ASOIAF 4 times in the last couple of weeks (all solo, none competitive) each game seems to hinge on a single diceroll, or timely card draw. As a magic player, I emphasize maximizing cards.

I definitely want to play more with the Spearmen they are a solid unit and good value for points. I think experimenting with some of the attachments could be interesting. The scorpion underperformed that game, only generating 3 wounds. Ghost, as always, did work so did the Watch Marshal. I feel like Coldhand’s ability was near useless. Cotter Pyke as a general is fantastic, his cards allowing an extra attack nearly made the difference.

I also felt that Ser Robert Strong is a complete house. 2 extra auto wounds are huge, especially on the charge. His unit did 9 wounds, caused a failed panic test then they rolled a 6 on the test to literally one-shot a decent builder crossbow unit.

Played a 50 pt match of Lannister vs Night’s Watch 4×8 table. Clash of Kings Scenario, Night’s Watch with the Throne

Lannisters50Nights Watch
(c) Joffery Baratheon(c) Cotter Pyke
Kingsguard6Shadowtower Spearmen7
Gregor Clegane4Veterans of the Watch7
House Clegane Mountains Men6(2) Jon Snow2
(1) Sandor Clegane1Builder Scorpion Crew5
Lannister Hallberdiers6Ghost3
(3) Ser Robert Strong3Watch Marshal4
Lannister Crossbow6Ranger Trackers6
Lannister Guardsmen5(Coldhands)1
Lannister Guardsmen5Bowen Marsh4
Cersi Lannister4Ser Denys Mallister4
Pycell4

Setting up the game, I wanted to see how many Clegane’s I could put in a list. I should have thrown in some brigands instead of the guardsmen, but it made points very awkward. I had some new units I hadn’t played with before on the Nightswatch end. Notably the Spearmen and Watch Marshal. Here is a picture of turn 1 deployment after the scorpion moved.

Nothing really interesting happened until turn 3. The Mountains Men failed a charge, the builder crossbow plus a flank attack from the watch marshal almost eliminated a unit of guardsmen. The veterans of the watch charged the other guardsmen nearly destroying them. And Gregor engaged and drove off the trackers.

Turn 4 I almost called it quits the spearmen nearly had the Kingsguard destroyed, the guards were dead. Ghost was on the rear of the Mountains Men, it didn’t look good. Then turn 5 came. Lannister shinanegans. They killed the Builder Crossbow with a brilliant charge from the halberdiers, eliminated the spears with a great shot from their own crossbows, and the Mountains Men nearly survived their engagement with the veterans.

Turn 6 with the Lannisters having the throne. They first took the wealth to give 3 more wounds to the Kingsguard preventing any scorpion luck with double attacks. At that point the game was over, Nightswatch were too far behind. I did play it out using the scorpion to kill the mountain’s men hoping for the unlikliest of charges. Lannisters took the maneuver point on the board and moved the Kingsguard out of charge and attack range to kill Joeffery. Lannister 9 NW 7