“Don’t fire until you see the whites of their eyes.” William Prescott
2,400 inexperienced American militia went toe to toe with 3,000 hardened British regulars. The Americans lost the ground, but only took 450 casualties to the 1,054 of the British. Historically, the battle was a fighting retreat for the Americans. Which is where our game comes into play.
American Colonists Led by William Prescott 2400 Militia
Britain Led by William Howe.
Scenario
To be used with General D’Armee, Black Powder, or any other massed horse and musket battle system. 2 Players Models needed 10 or 12 militia units, and 16 or so British units Terrain required: a small hill and a peninsula from an island.
Objective,
The Americans must flee the Peninsula, while the British must try to trap the Americans.
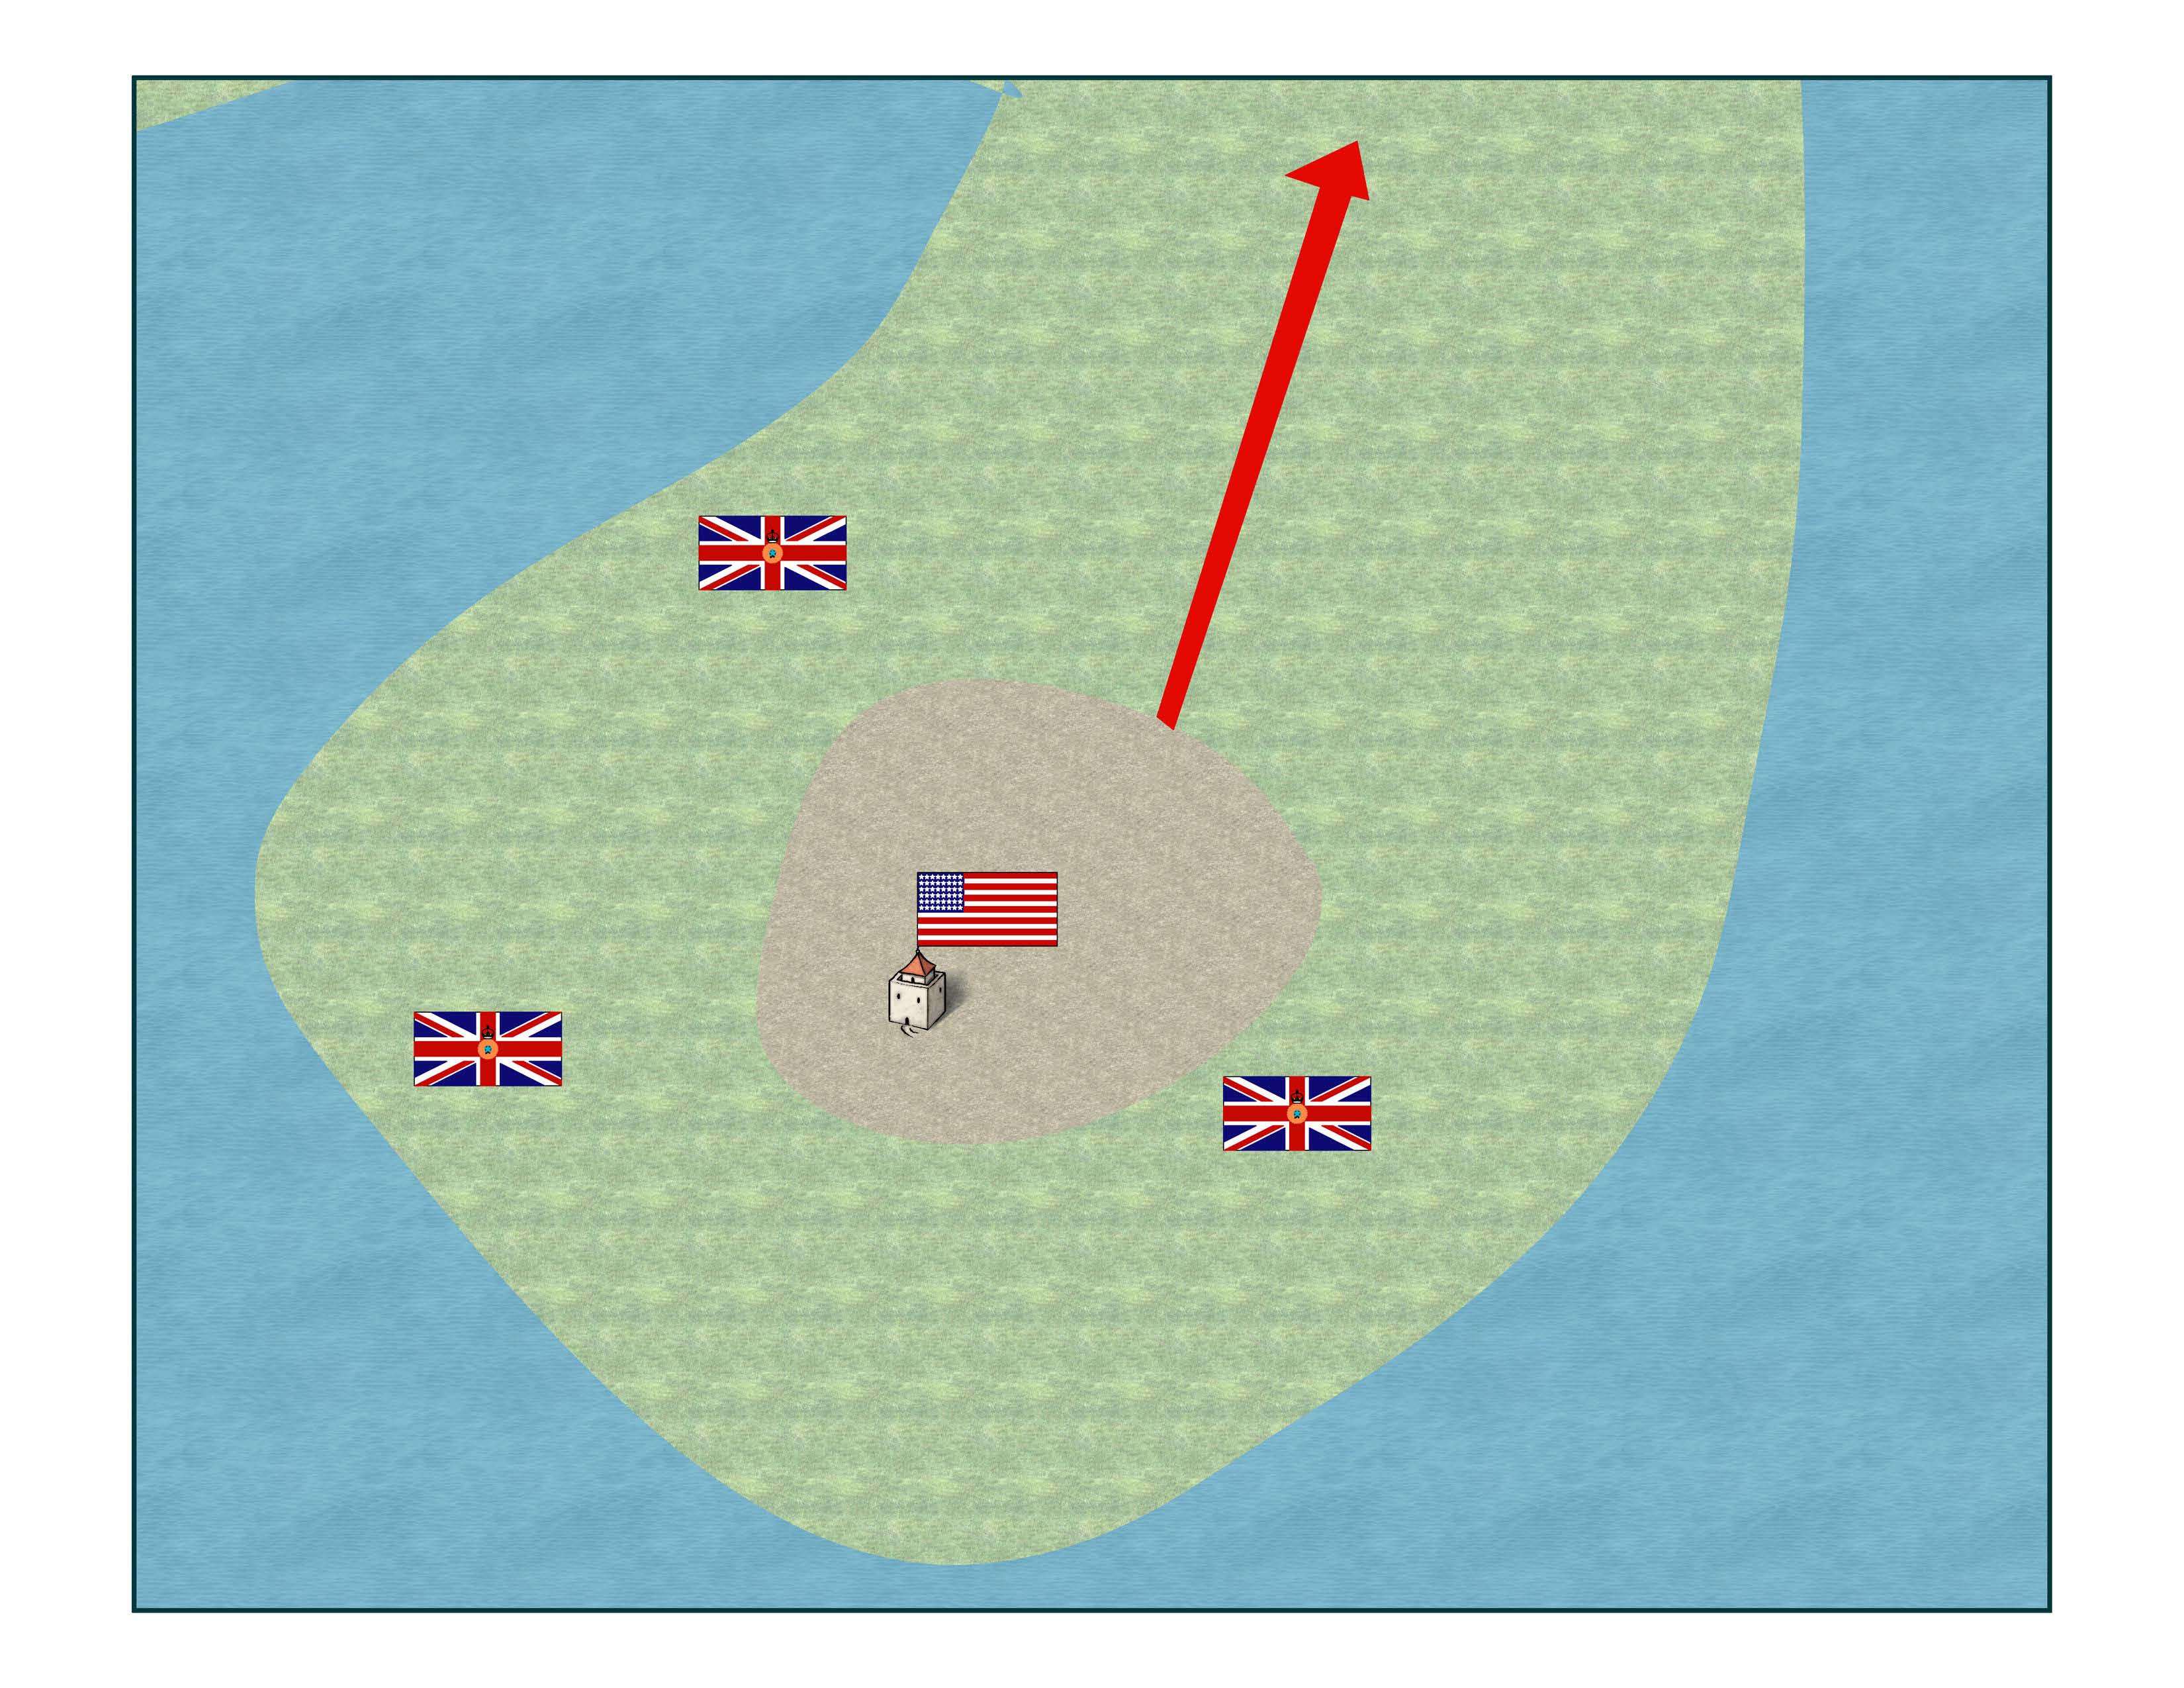
Set-Up
The British should be deployed in three equal forces in the locations shown, while the Americans should be massed in the middle on the hill. The American positions should be somewhat fortified.
No real special rules apply other than the lack of artillery and cavalry.
On June 14th, 1800. The Austrian forces of General der Kavallerie Michael von Melas attempted a surprise attack on Napoleon’s troops across the Bromida River. The Austrians, being numerically superior at the start of the battle, forced back the French. However, a well-timed assault from an incoming French division turned the tide of battle to the French.
Order of Battle (Wikipedia has a very nice, detailed list if you are interested)
French 29,942 soldiers 33 guns General Napoleon Bonaparte Corps Lannes 12 Battalions 6 Horse Artillery Cannons 5th Dragoon Regiment
Corps Victor 9 Battalions 4 Horse Artillery Cannons 3rd Cavalry Regiment
Wargame Scenario For use with General D’Armee, Black Power, or any other large-scale Napoleonic Wargame 2-8 Players, players can take control of the entire army on either side, or each Corps/Wing could have a commander as well French Players will need 31 Battalions, 36 Cavalry Squadrons, and 5 Artillery Batteries Austrian Players will need 41 Battalion,s 40 Cavalry Squadrons, and 6 Artillery Batteries Terrain should have a river near one field edge with a bridge crossing the river. There should be several forested areas and a large hill opposite the edge where the bridge stands Table Size 8×4 or even 10×4
Objective
The Austrians want to use their numerical advantage to break the French before the French forces can flank them. The French want to hold until Desaix arrives, then break the Austrians using a hard flank attack.
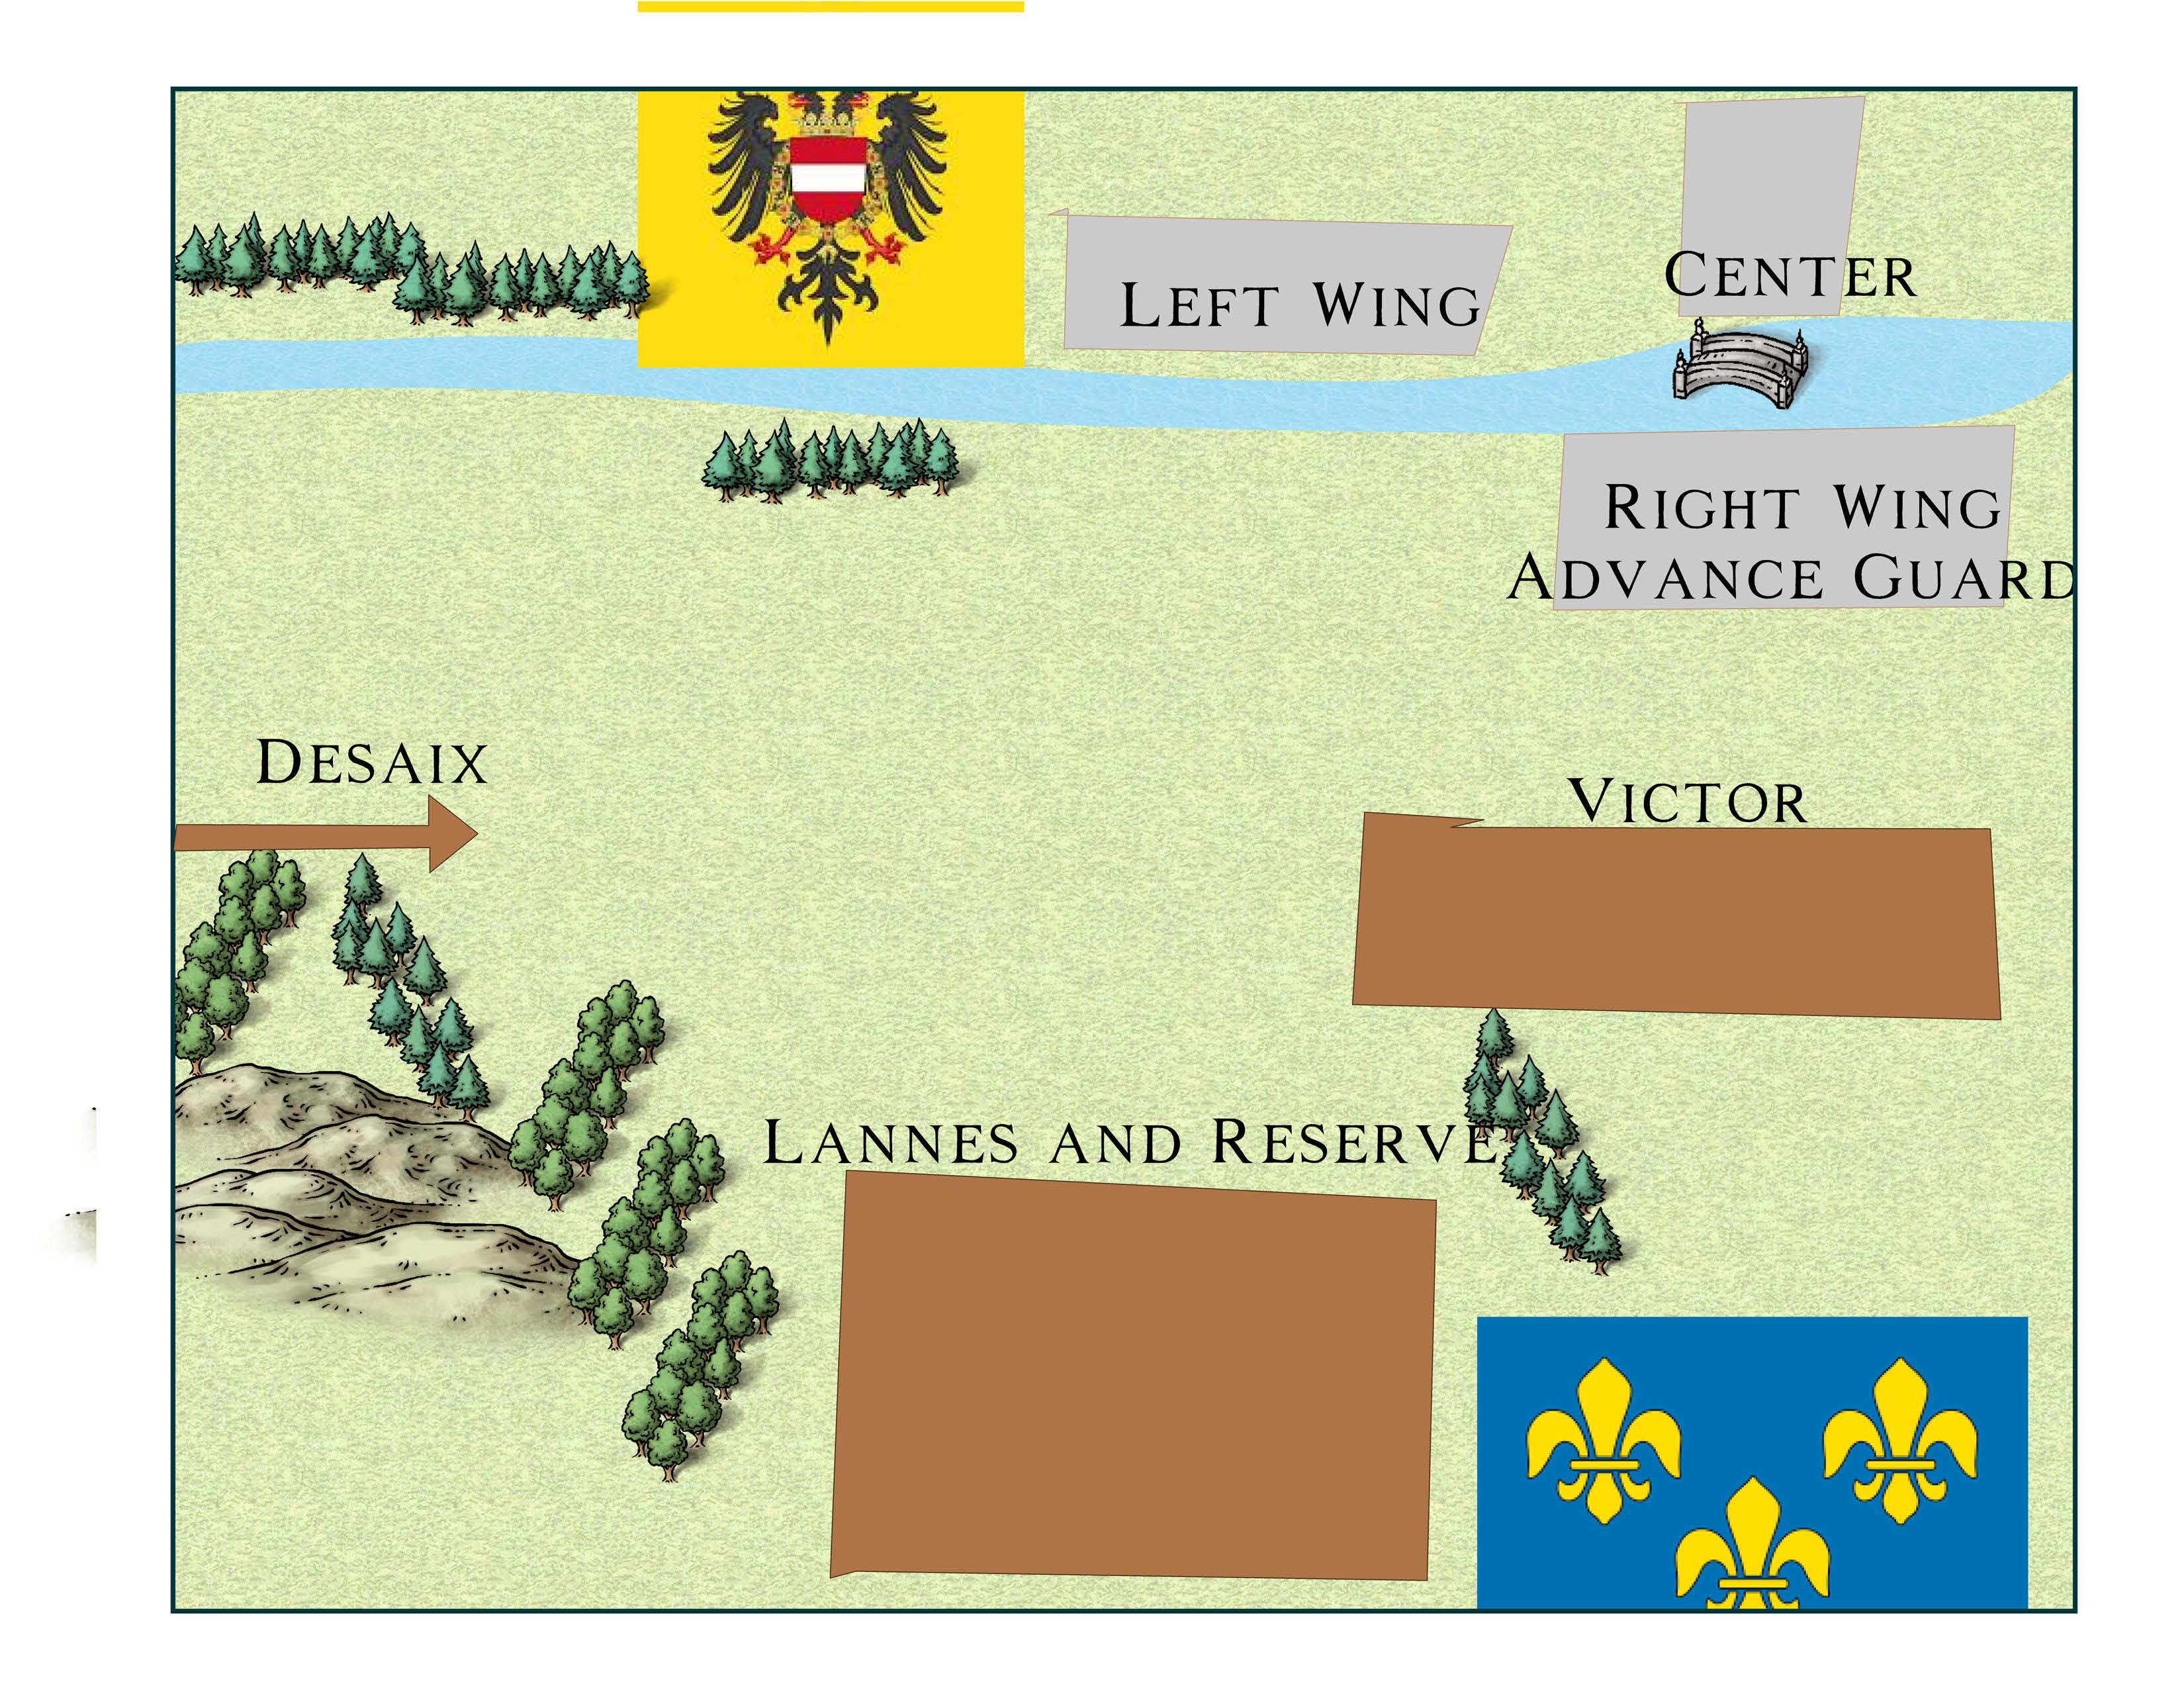
Set Up
During the battle, the Austrians struggled to mobilize all their forces against the French. The Austrians should start with their advanced guard and right wing on the French side of the river, holding a bridgehead while the Center and Left wings continue to cross.
The French should start with the Victor Corps engaged with the advanced guard of the Austrians. Lannes and the Reserve Corps to the rear, and Desaix corps off the table to arrive at turn 10
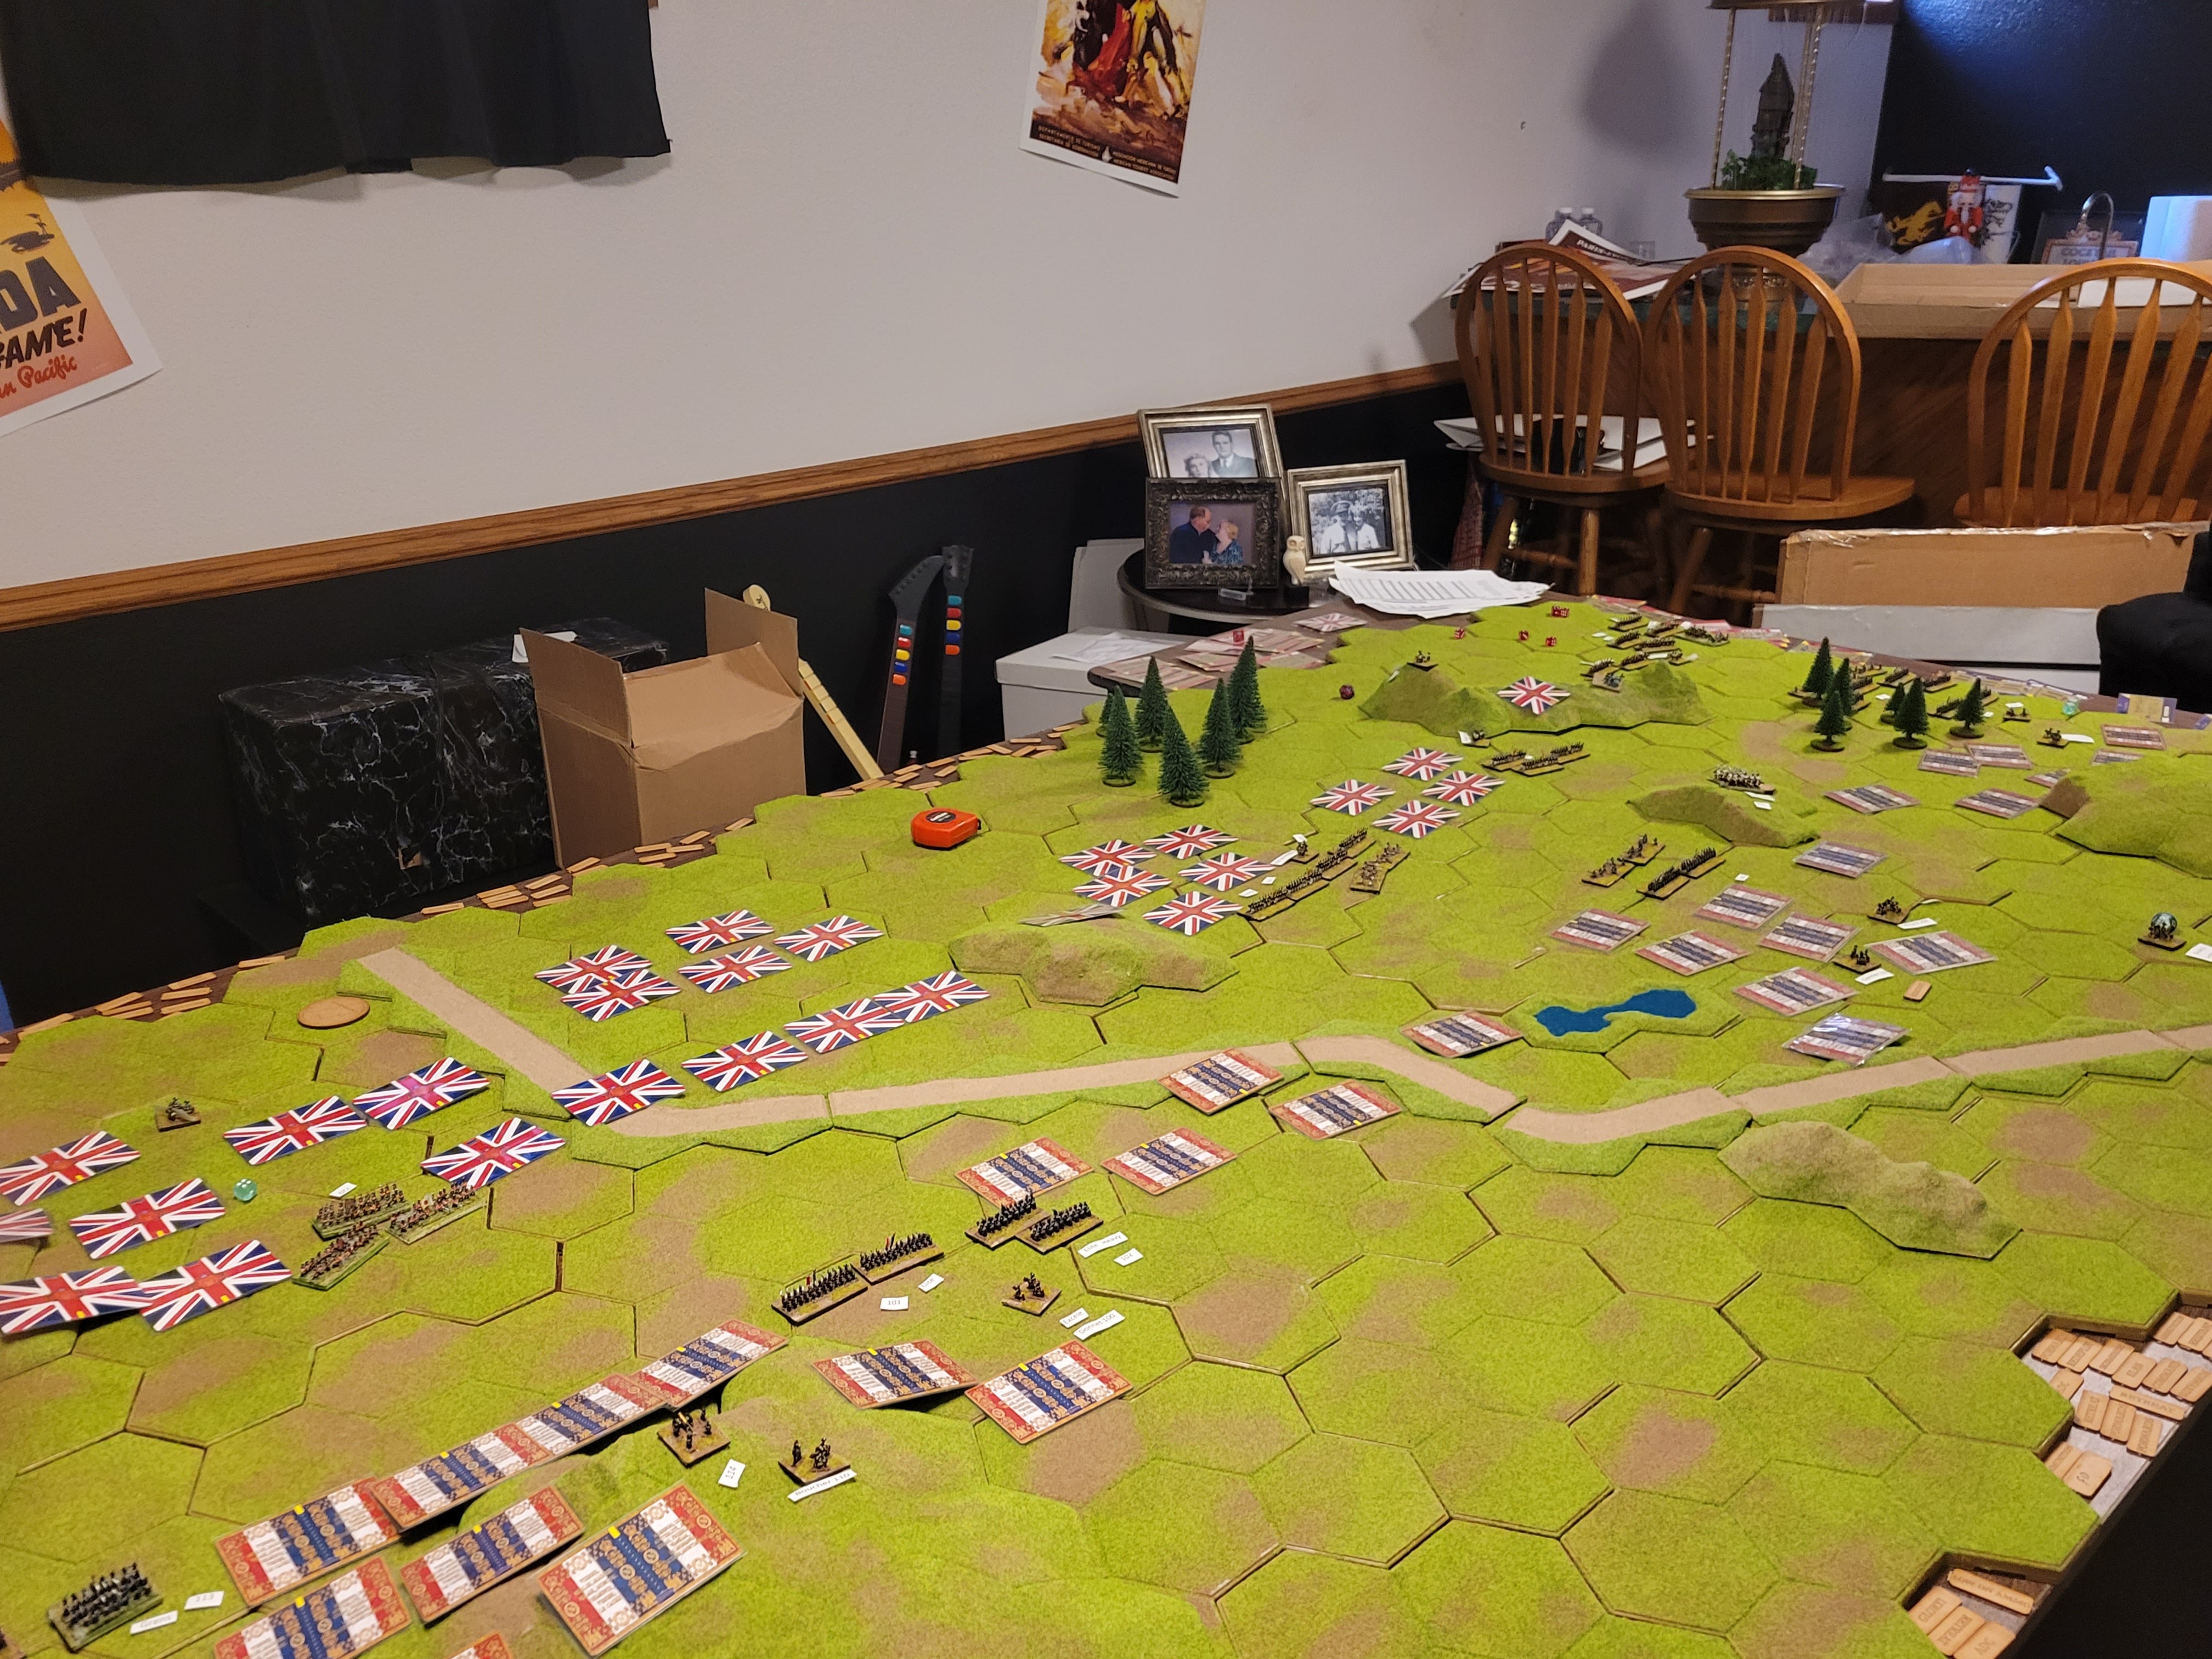
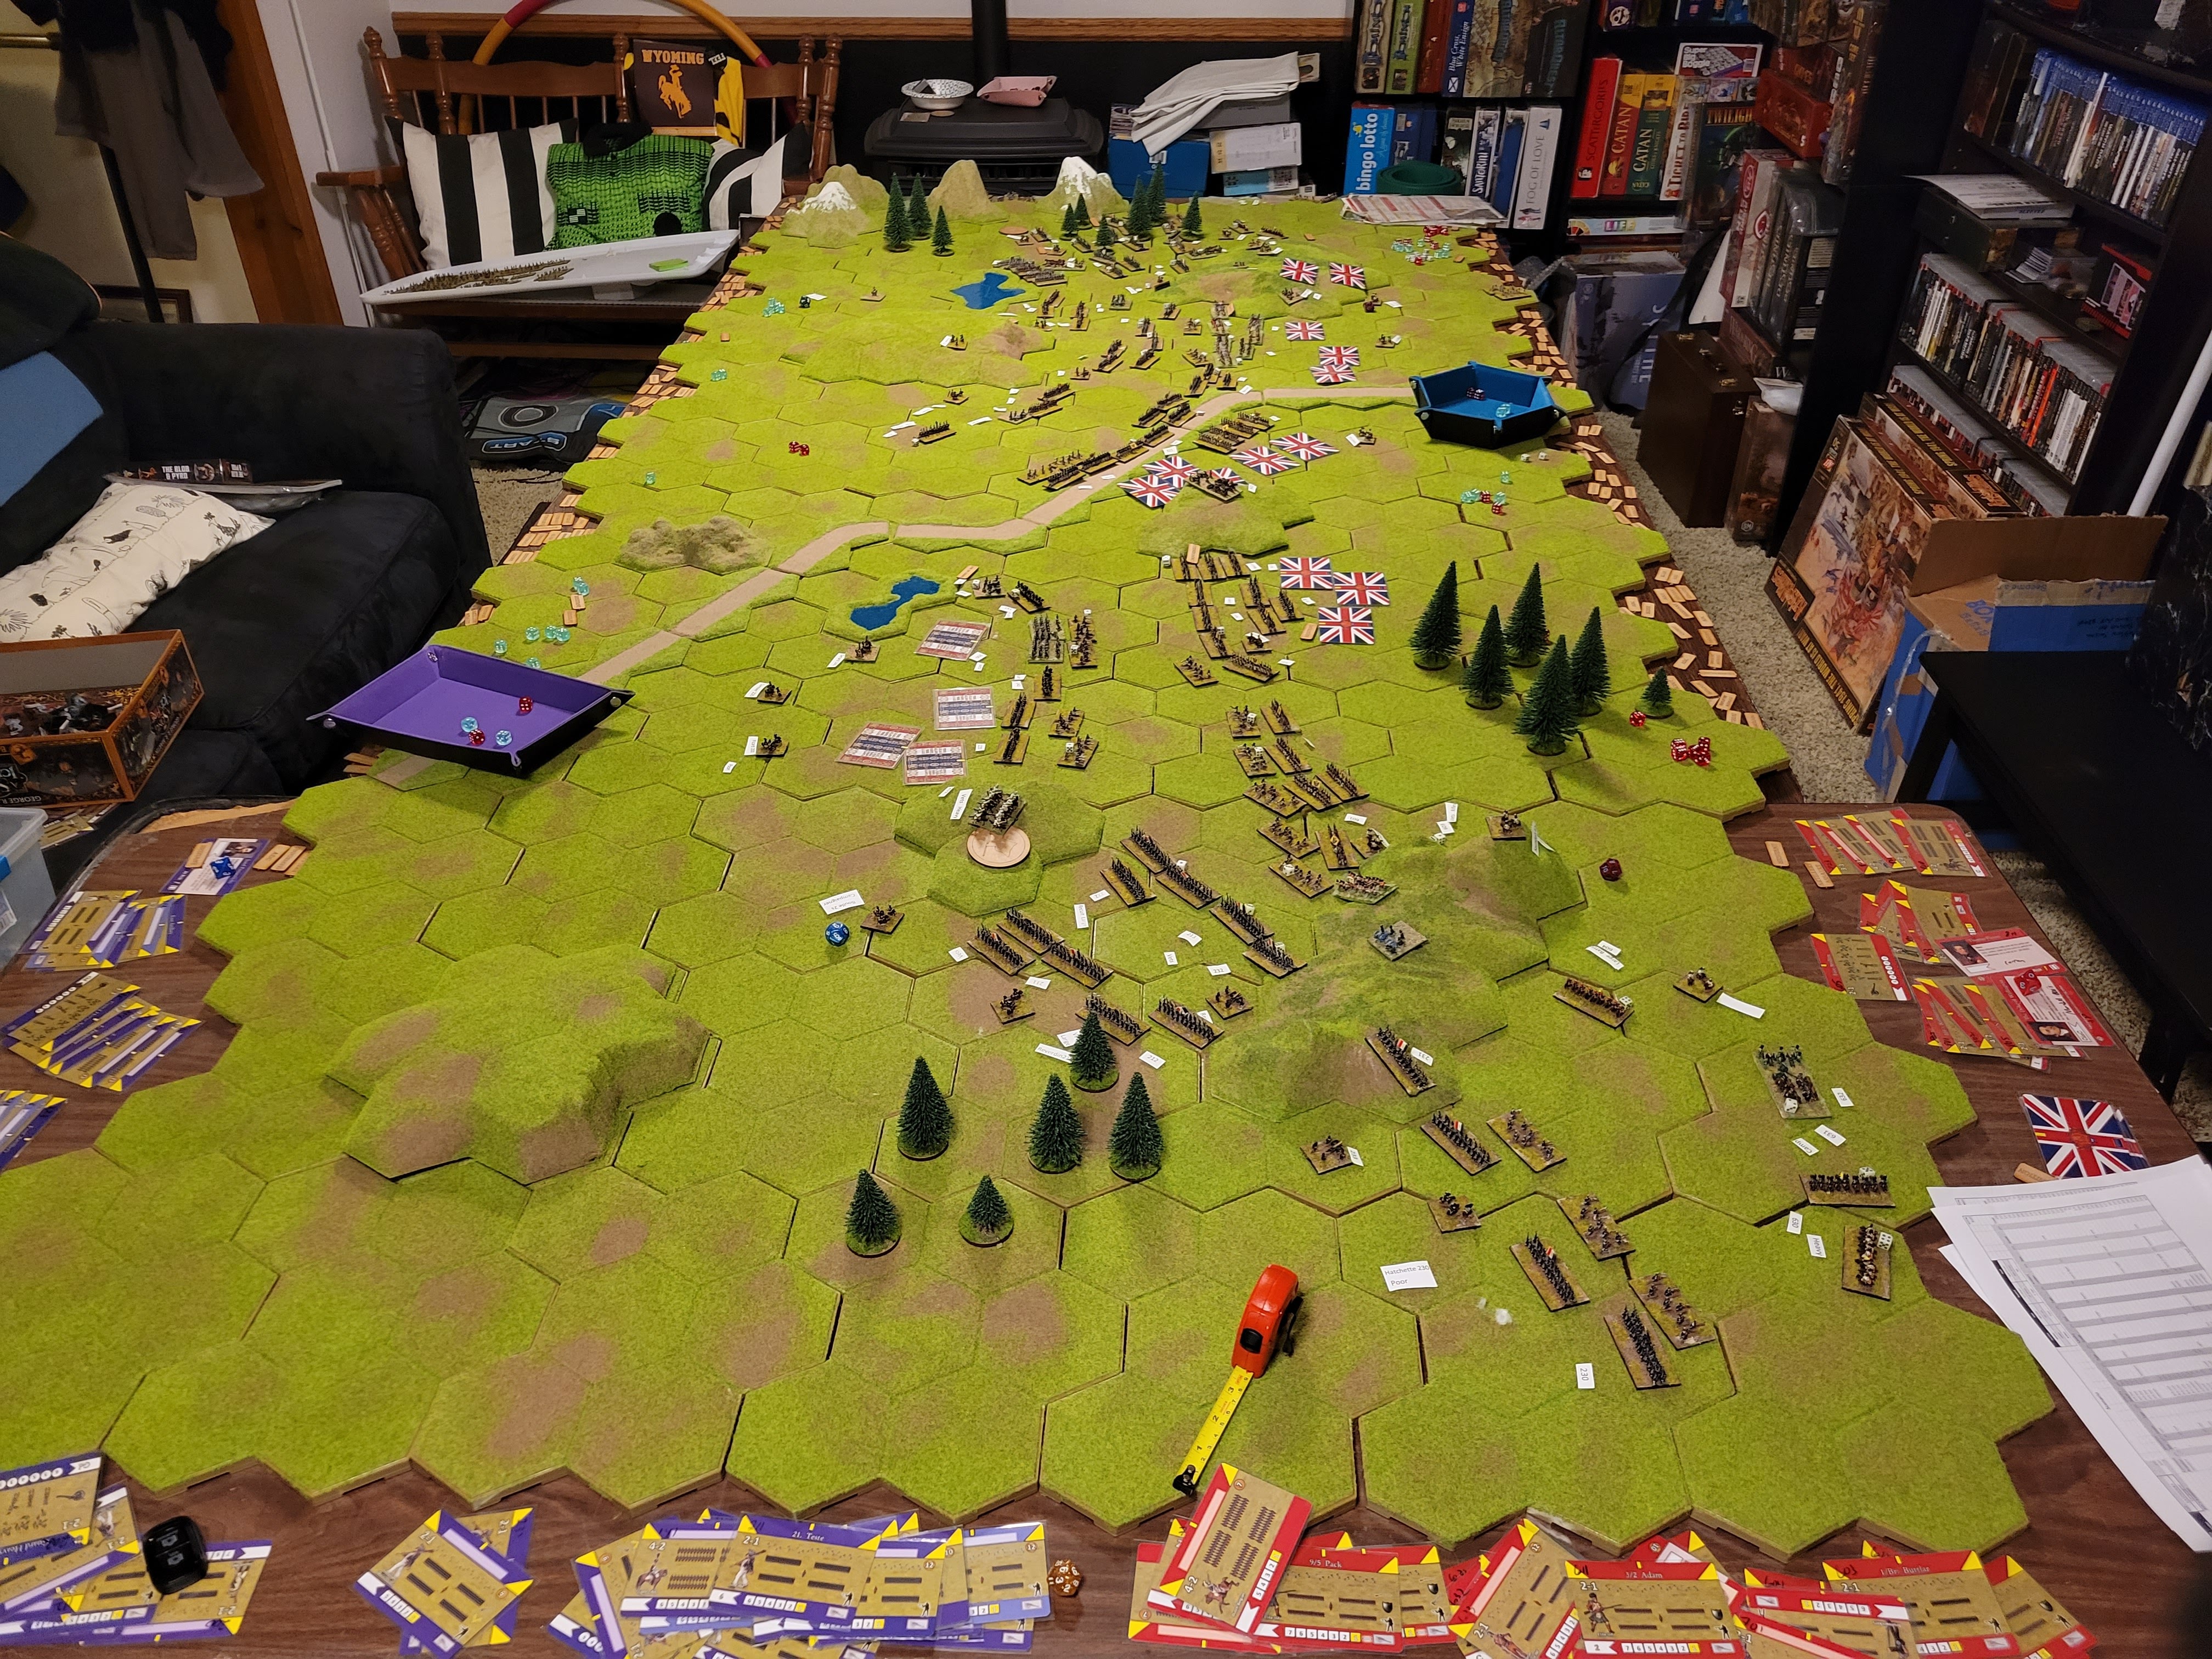
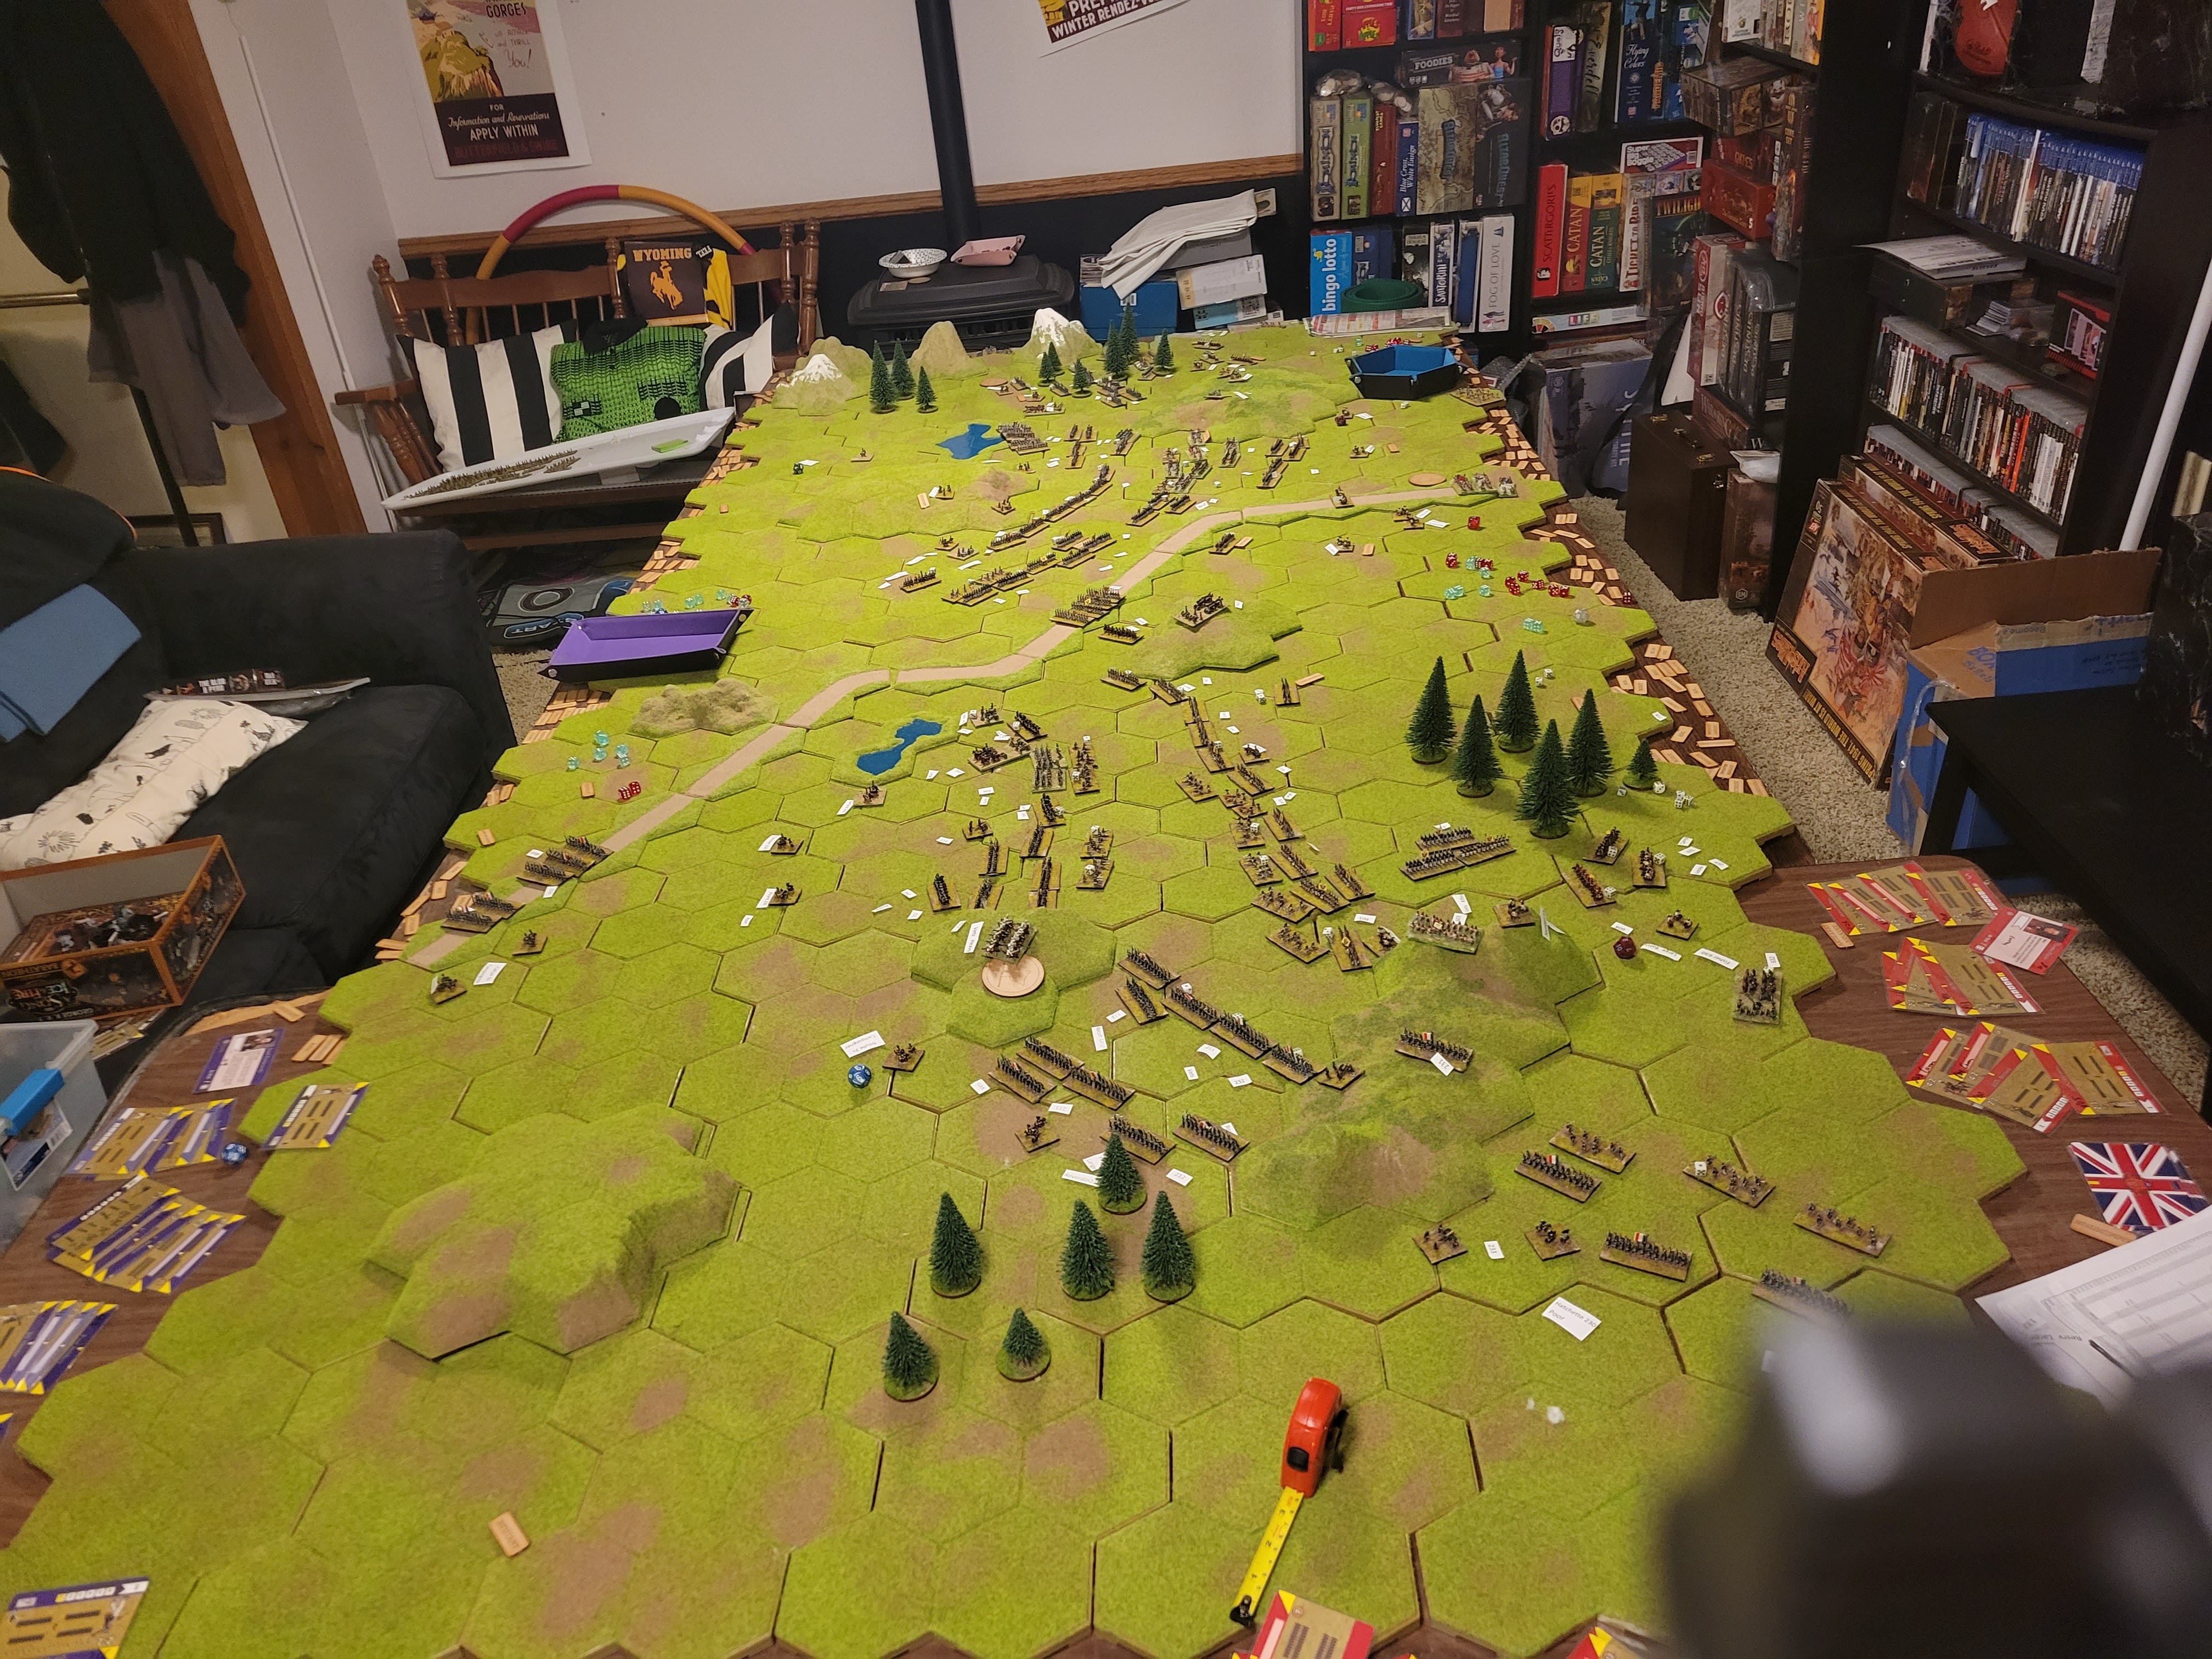
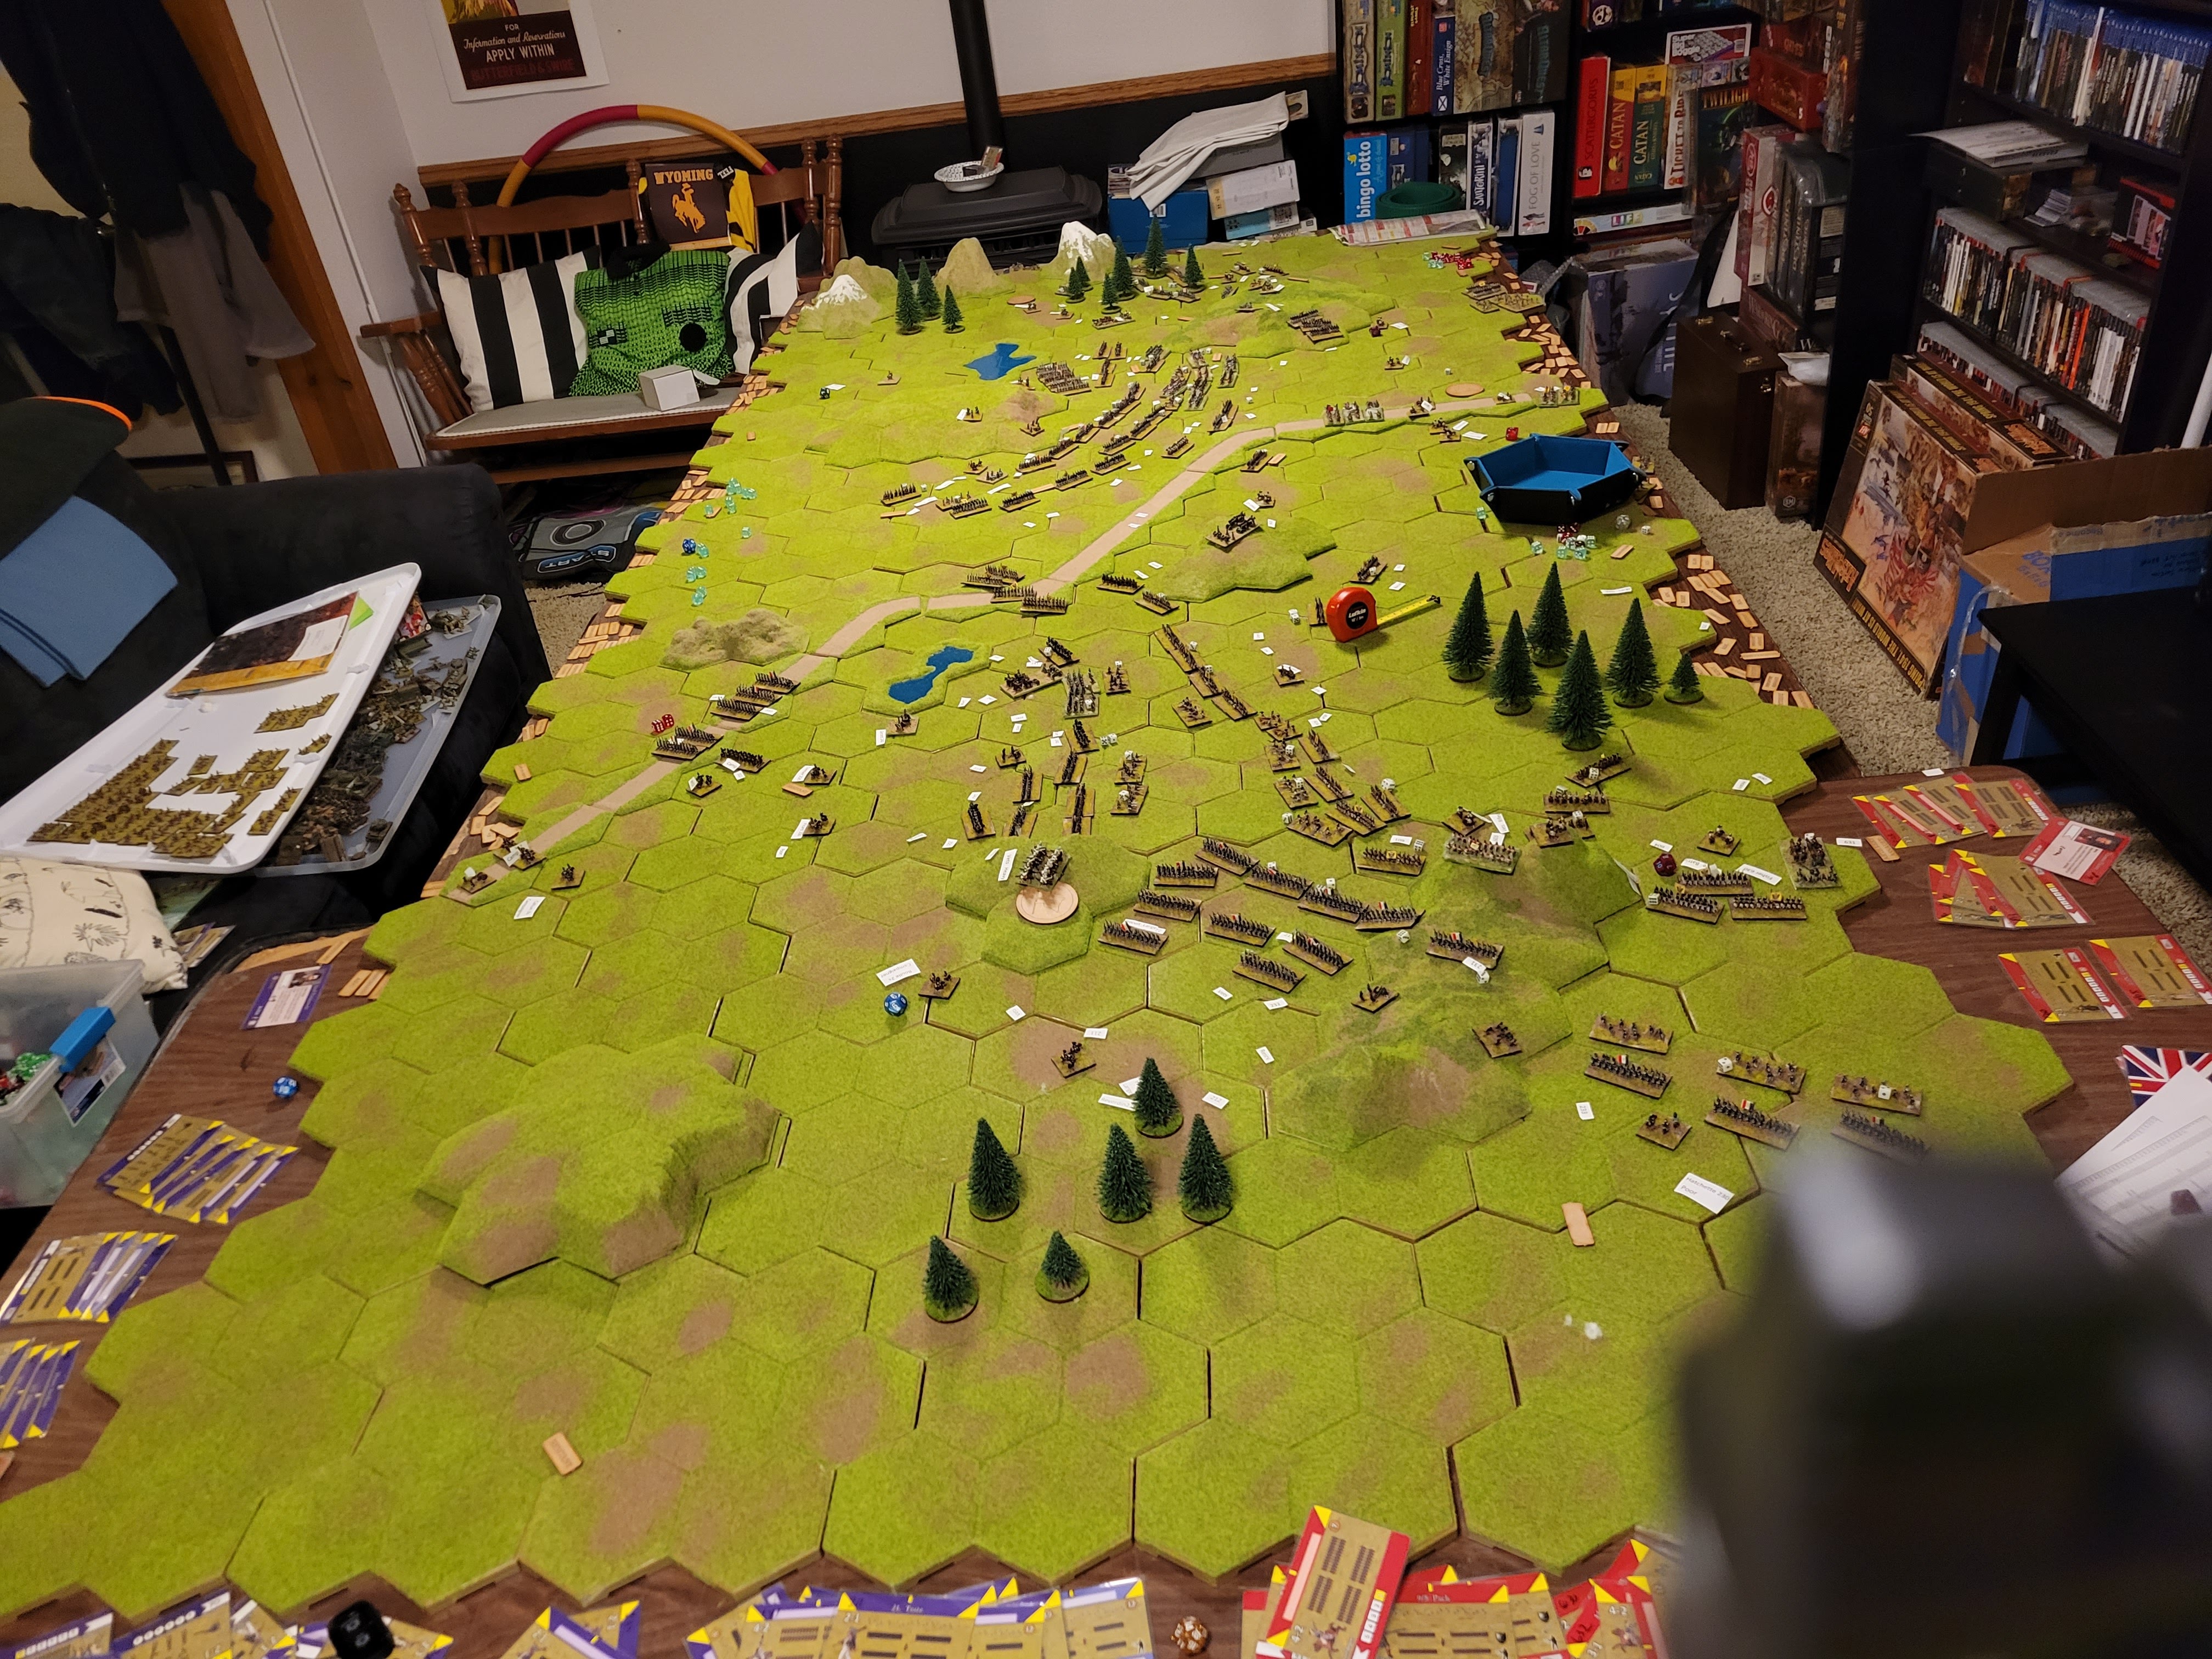
3 Corps. 14000 pts. 5 days of battle. Field 6’x12′ using Kallistra Hex items as a base plus their hills and roads and other terrain. I also used Fog of War rules.
This was by far the largest battle I have ever fought solo. I used 6mm figures that I purchased pre-painted. The scenario was simple. The French wanted to cut off the British reserves and seize the nearby road. The French had two minor objectives, securing their own supply chain through the mountain pass and securing a key hill that overlooked two towns.
The British main objective was to keep their reserve lines open. Secondarily, they wanted to halt the advance near the towns. The hill was irrelevant to them as were the towns, they just did not want any further advances. They also wanted to hold a strong line near the supply lines to weaken future French movements.
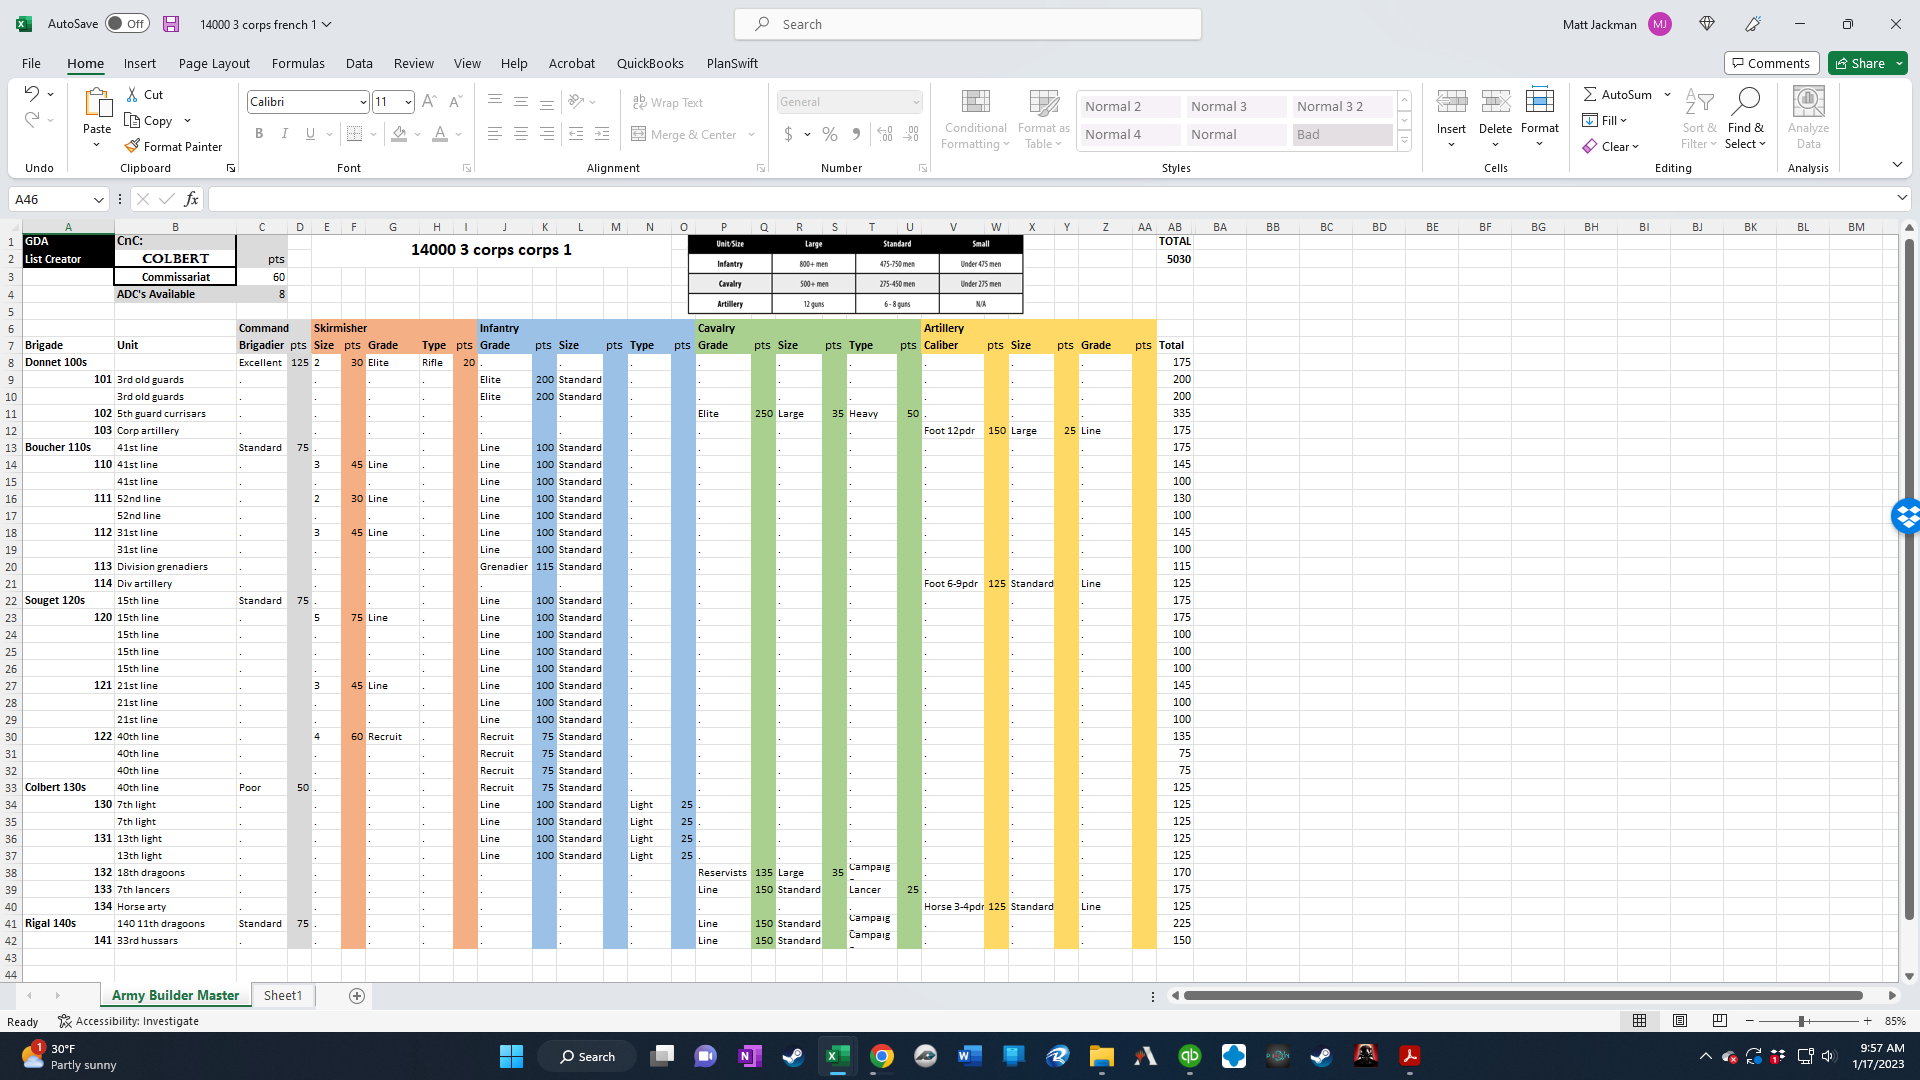
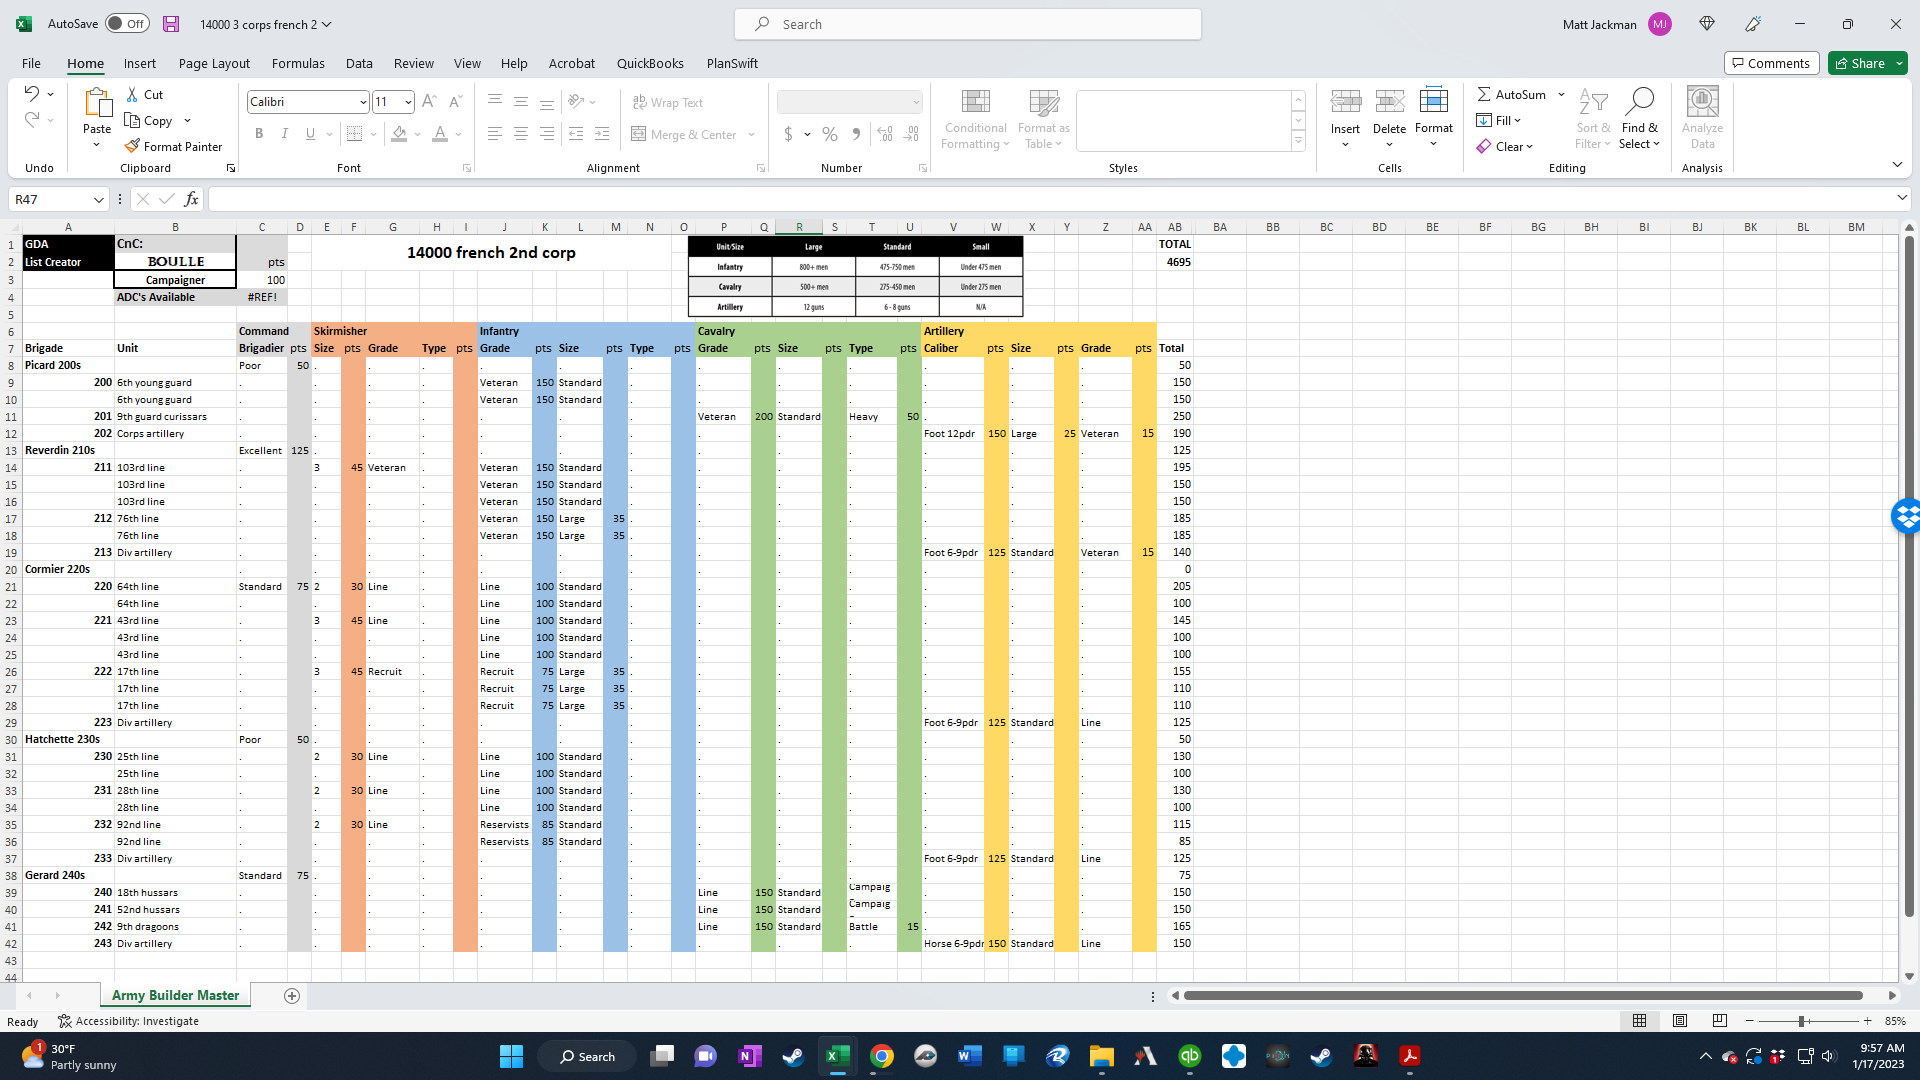
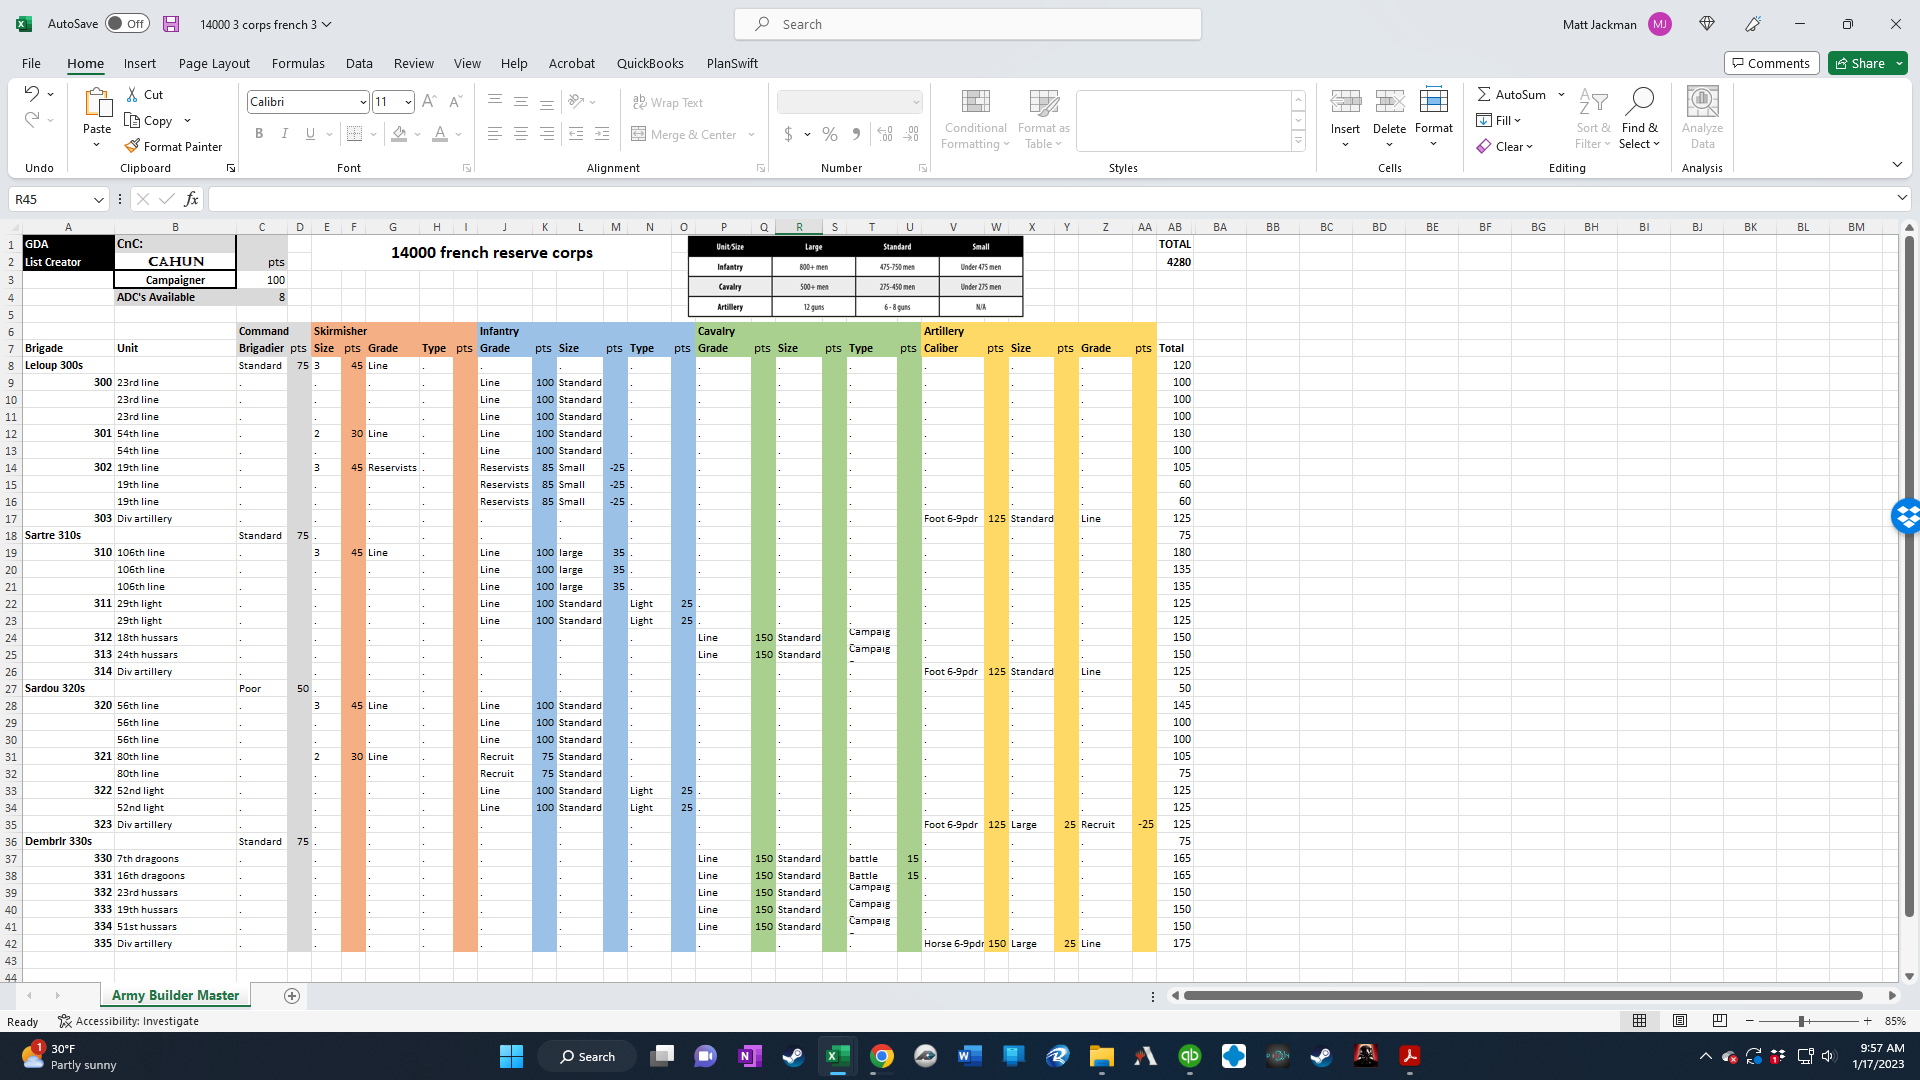
Below are the French Army Lists. I had to go with screenshots as I did not want to retype everything.
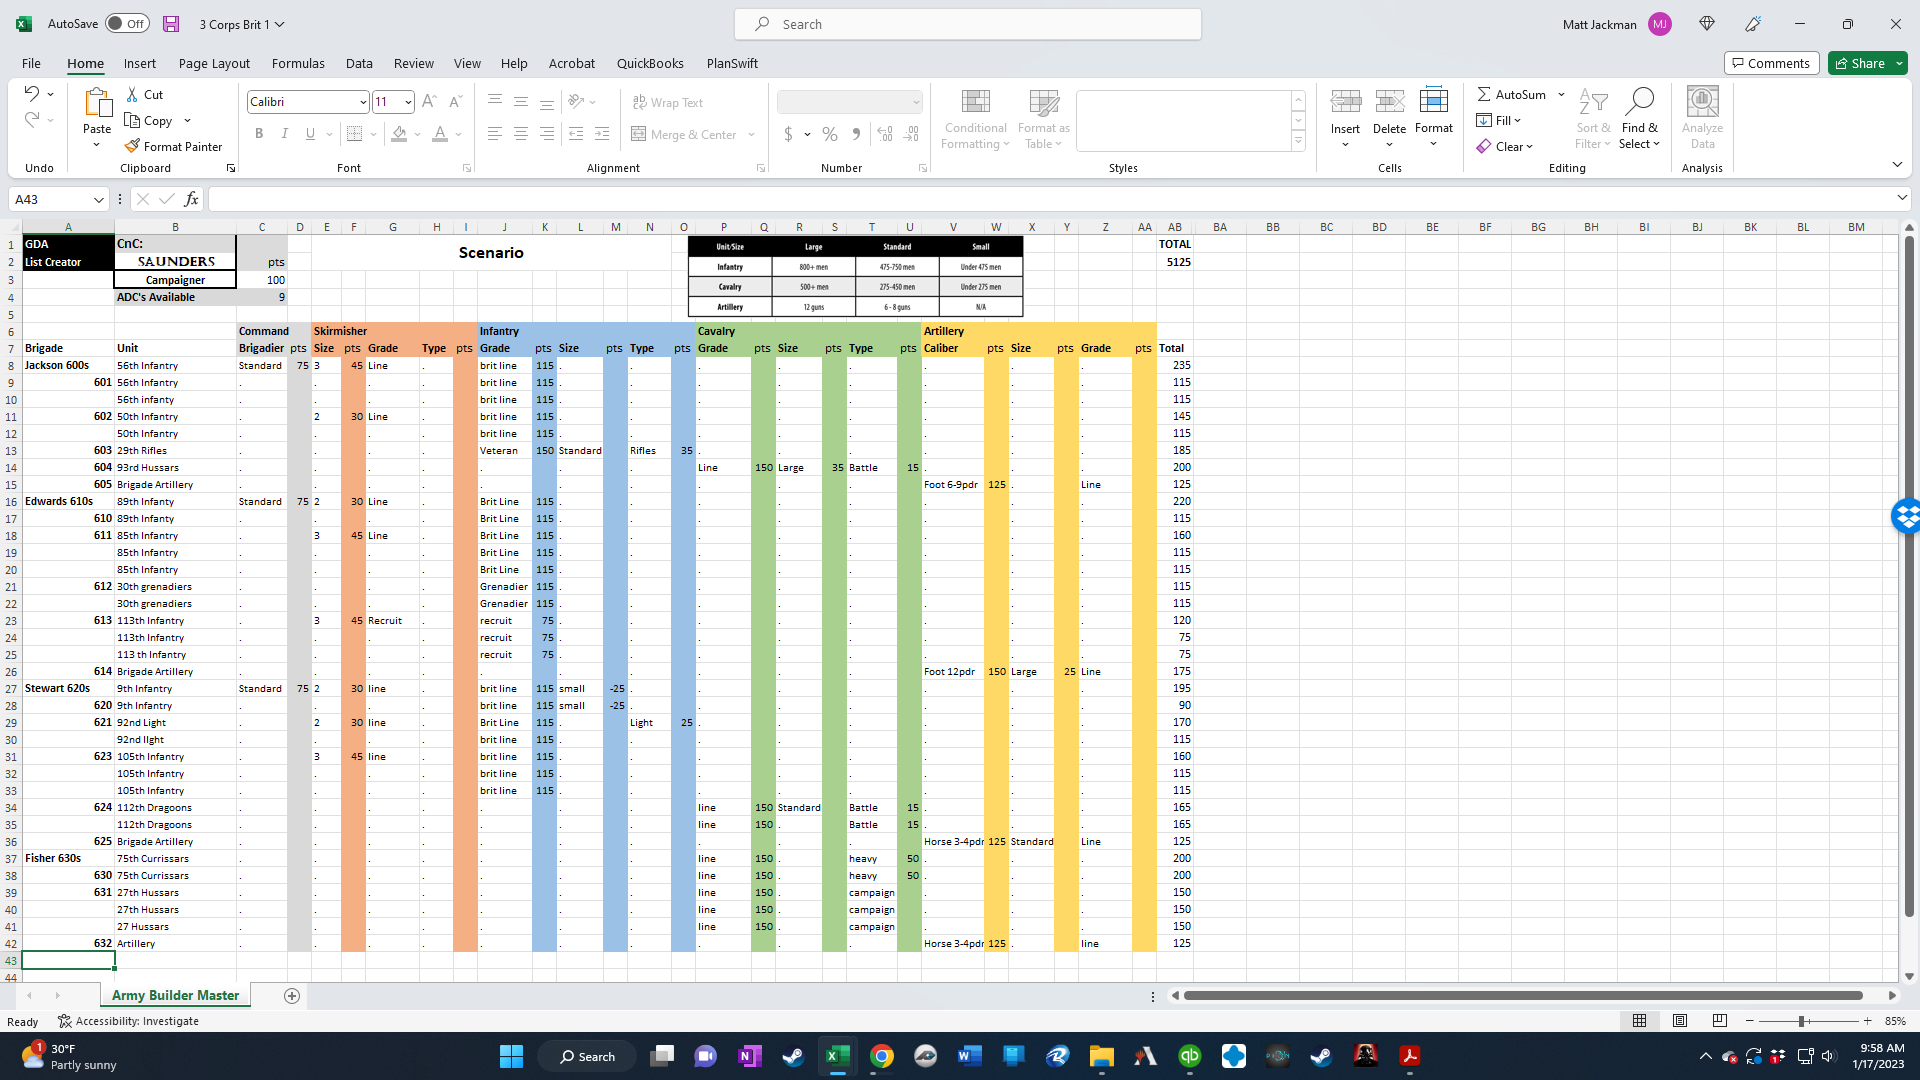
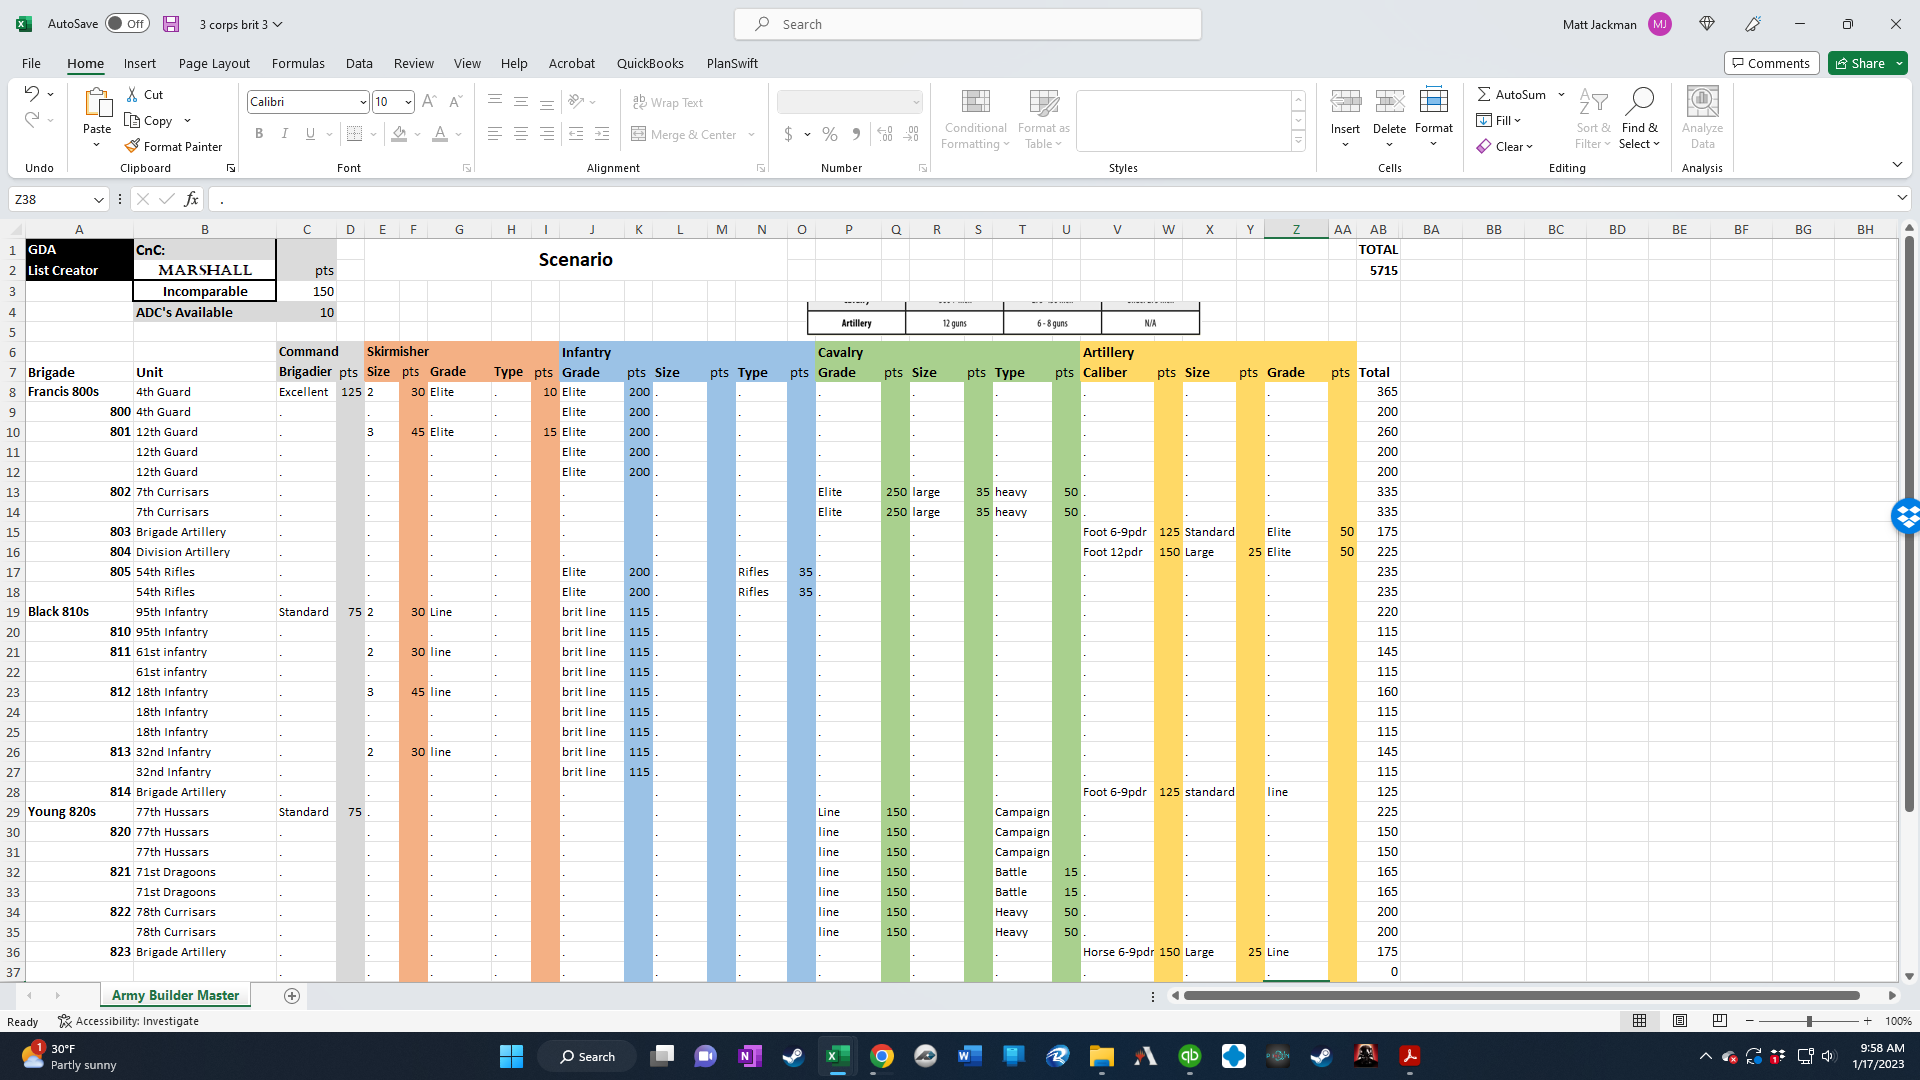
And the British Lists
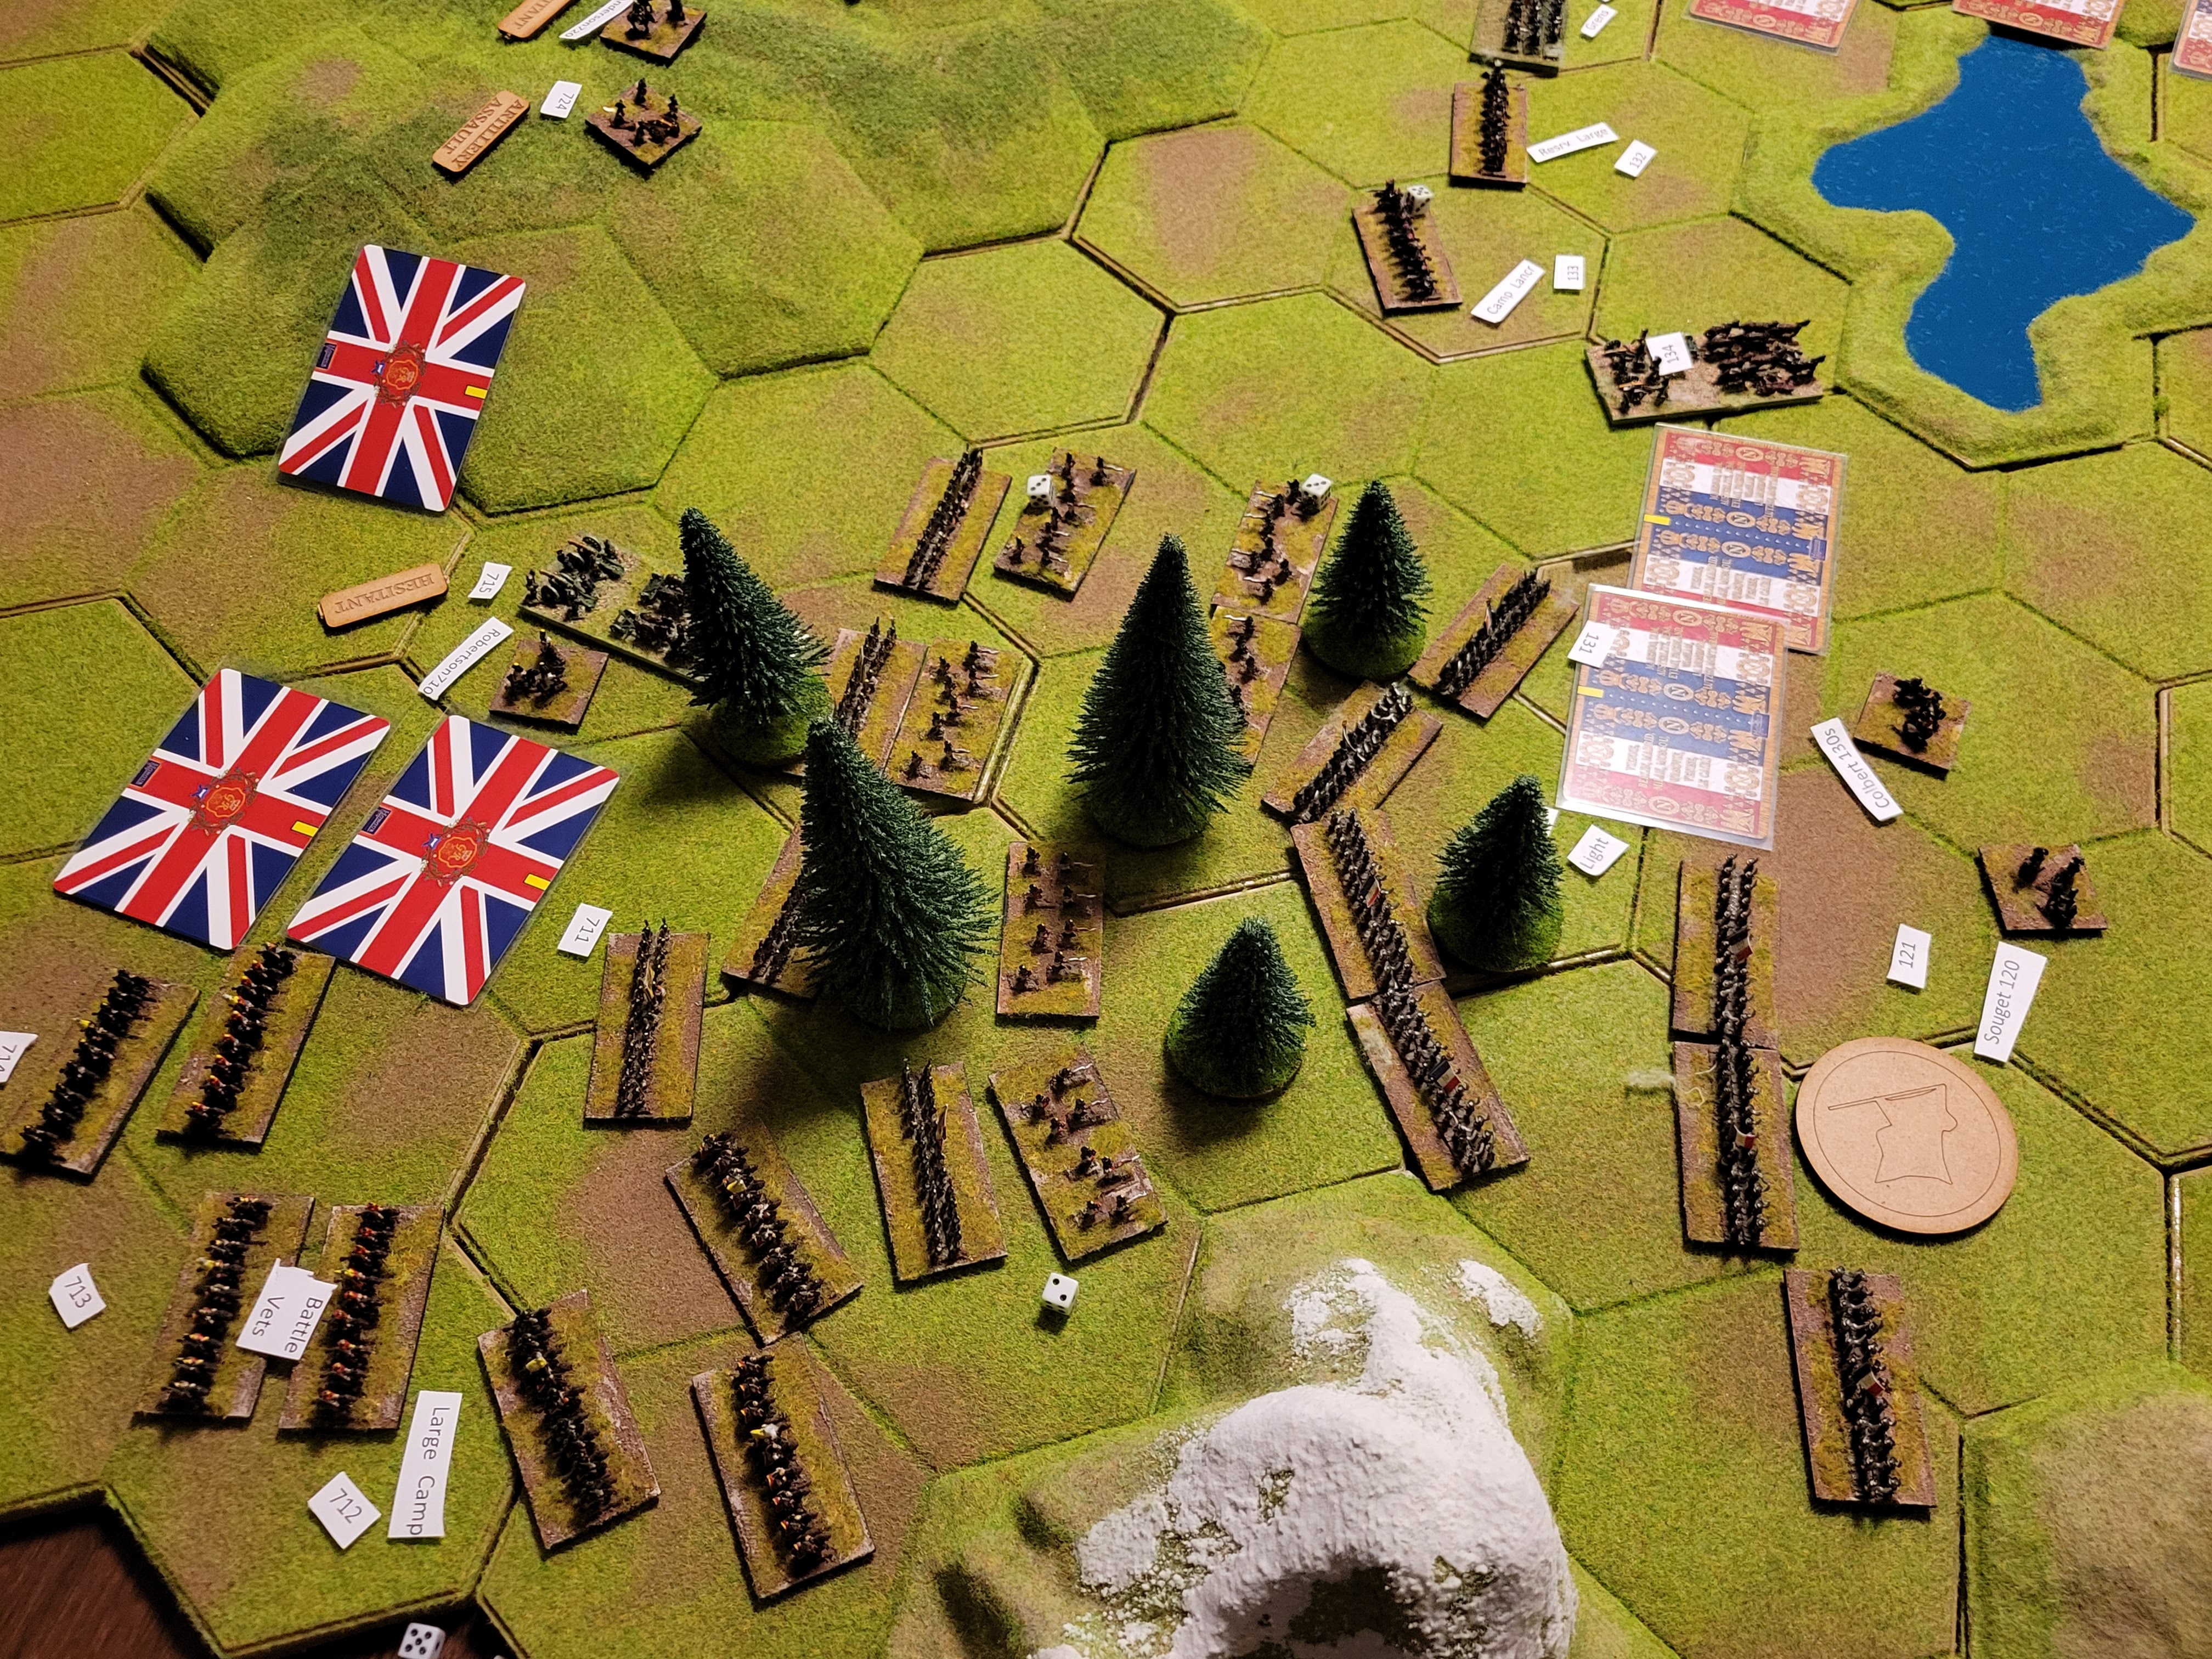
The initial deployment is below. I wanted the French to really push towards the flanks in a pincer style movement knowing the reserve Corps could begin to arrive turn 10. Below is the initial setup. I like using the hexes as it keeps me from having to measure every freaking attack and can just use the hexes instead.
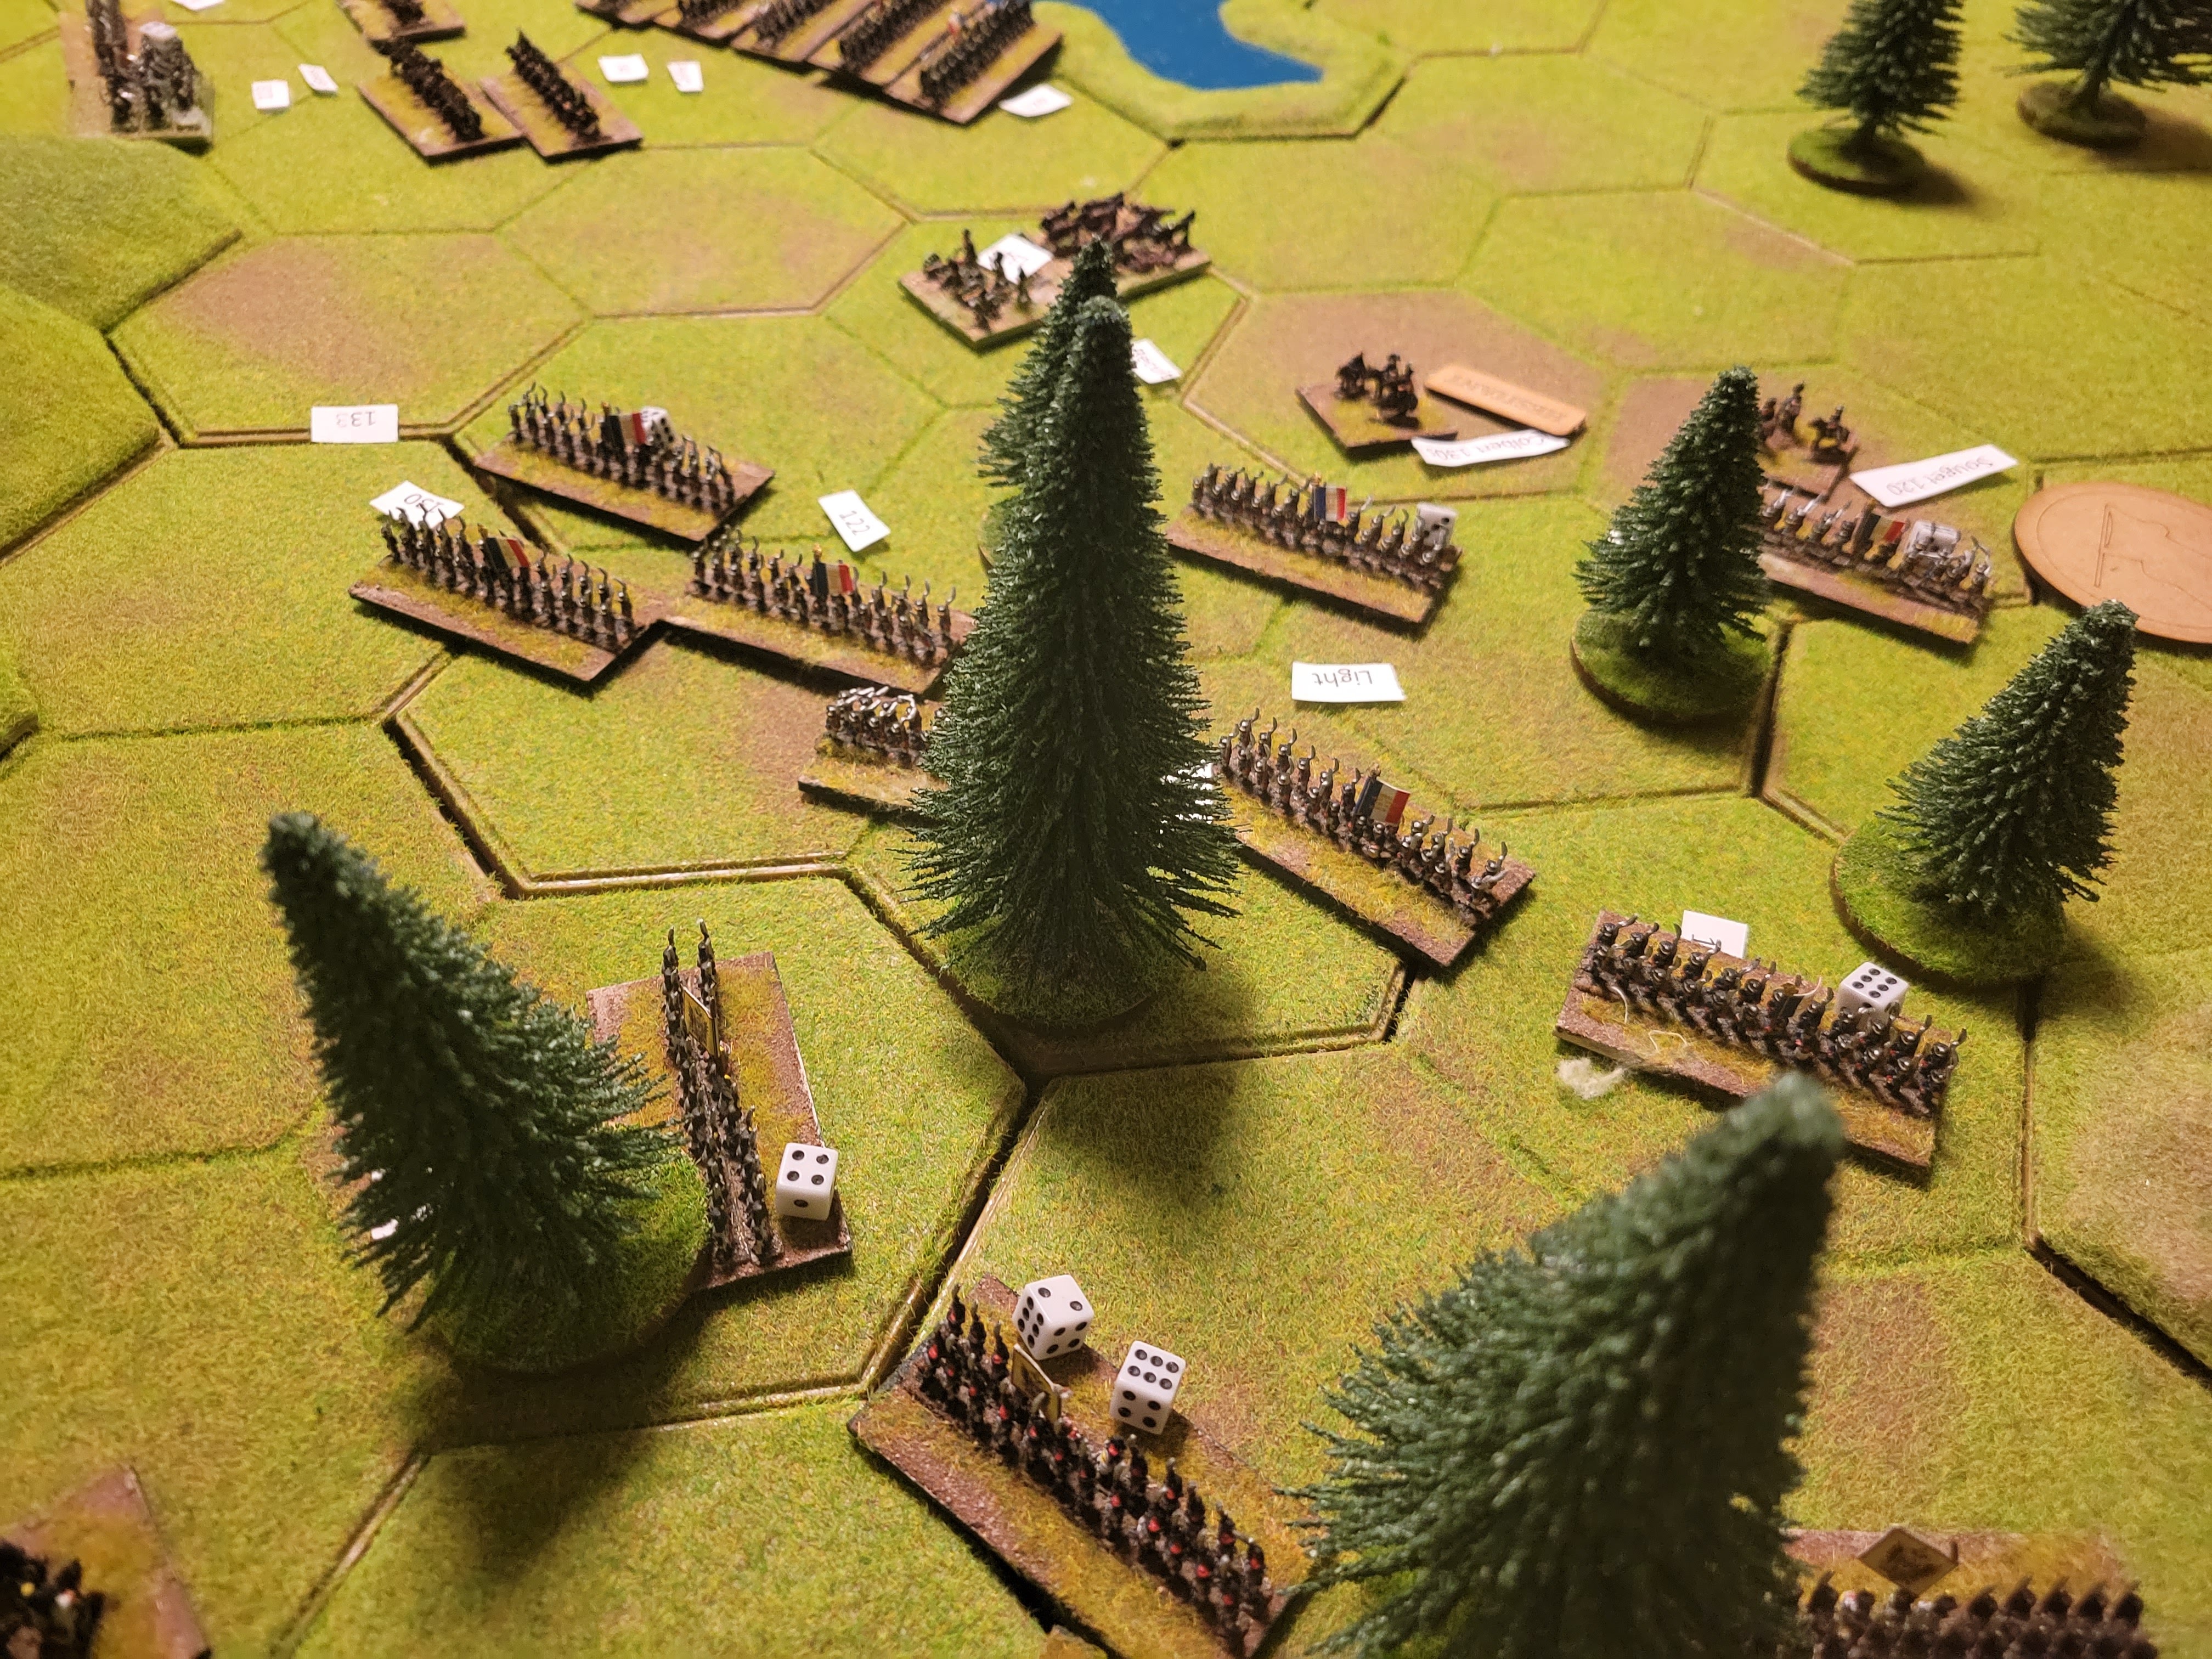
Turn 3 the action got heavy quickly. Fierce fighting on the flank near the mountains with skirmishers and artillery hammering away. While the far-flank British Cavalry ran into a large unit of French conscripts.
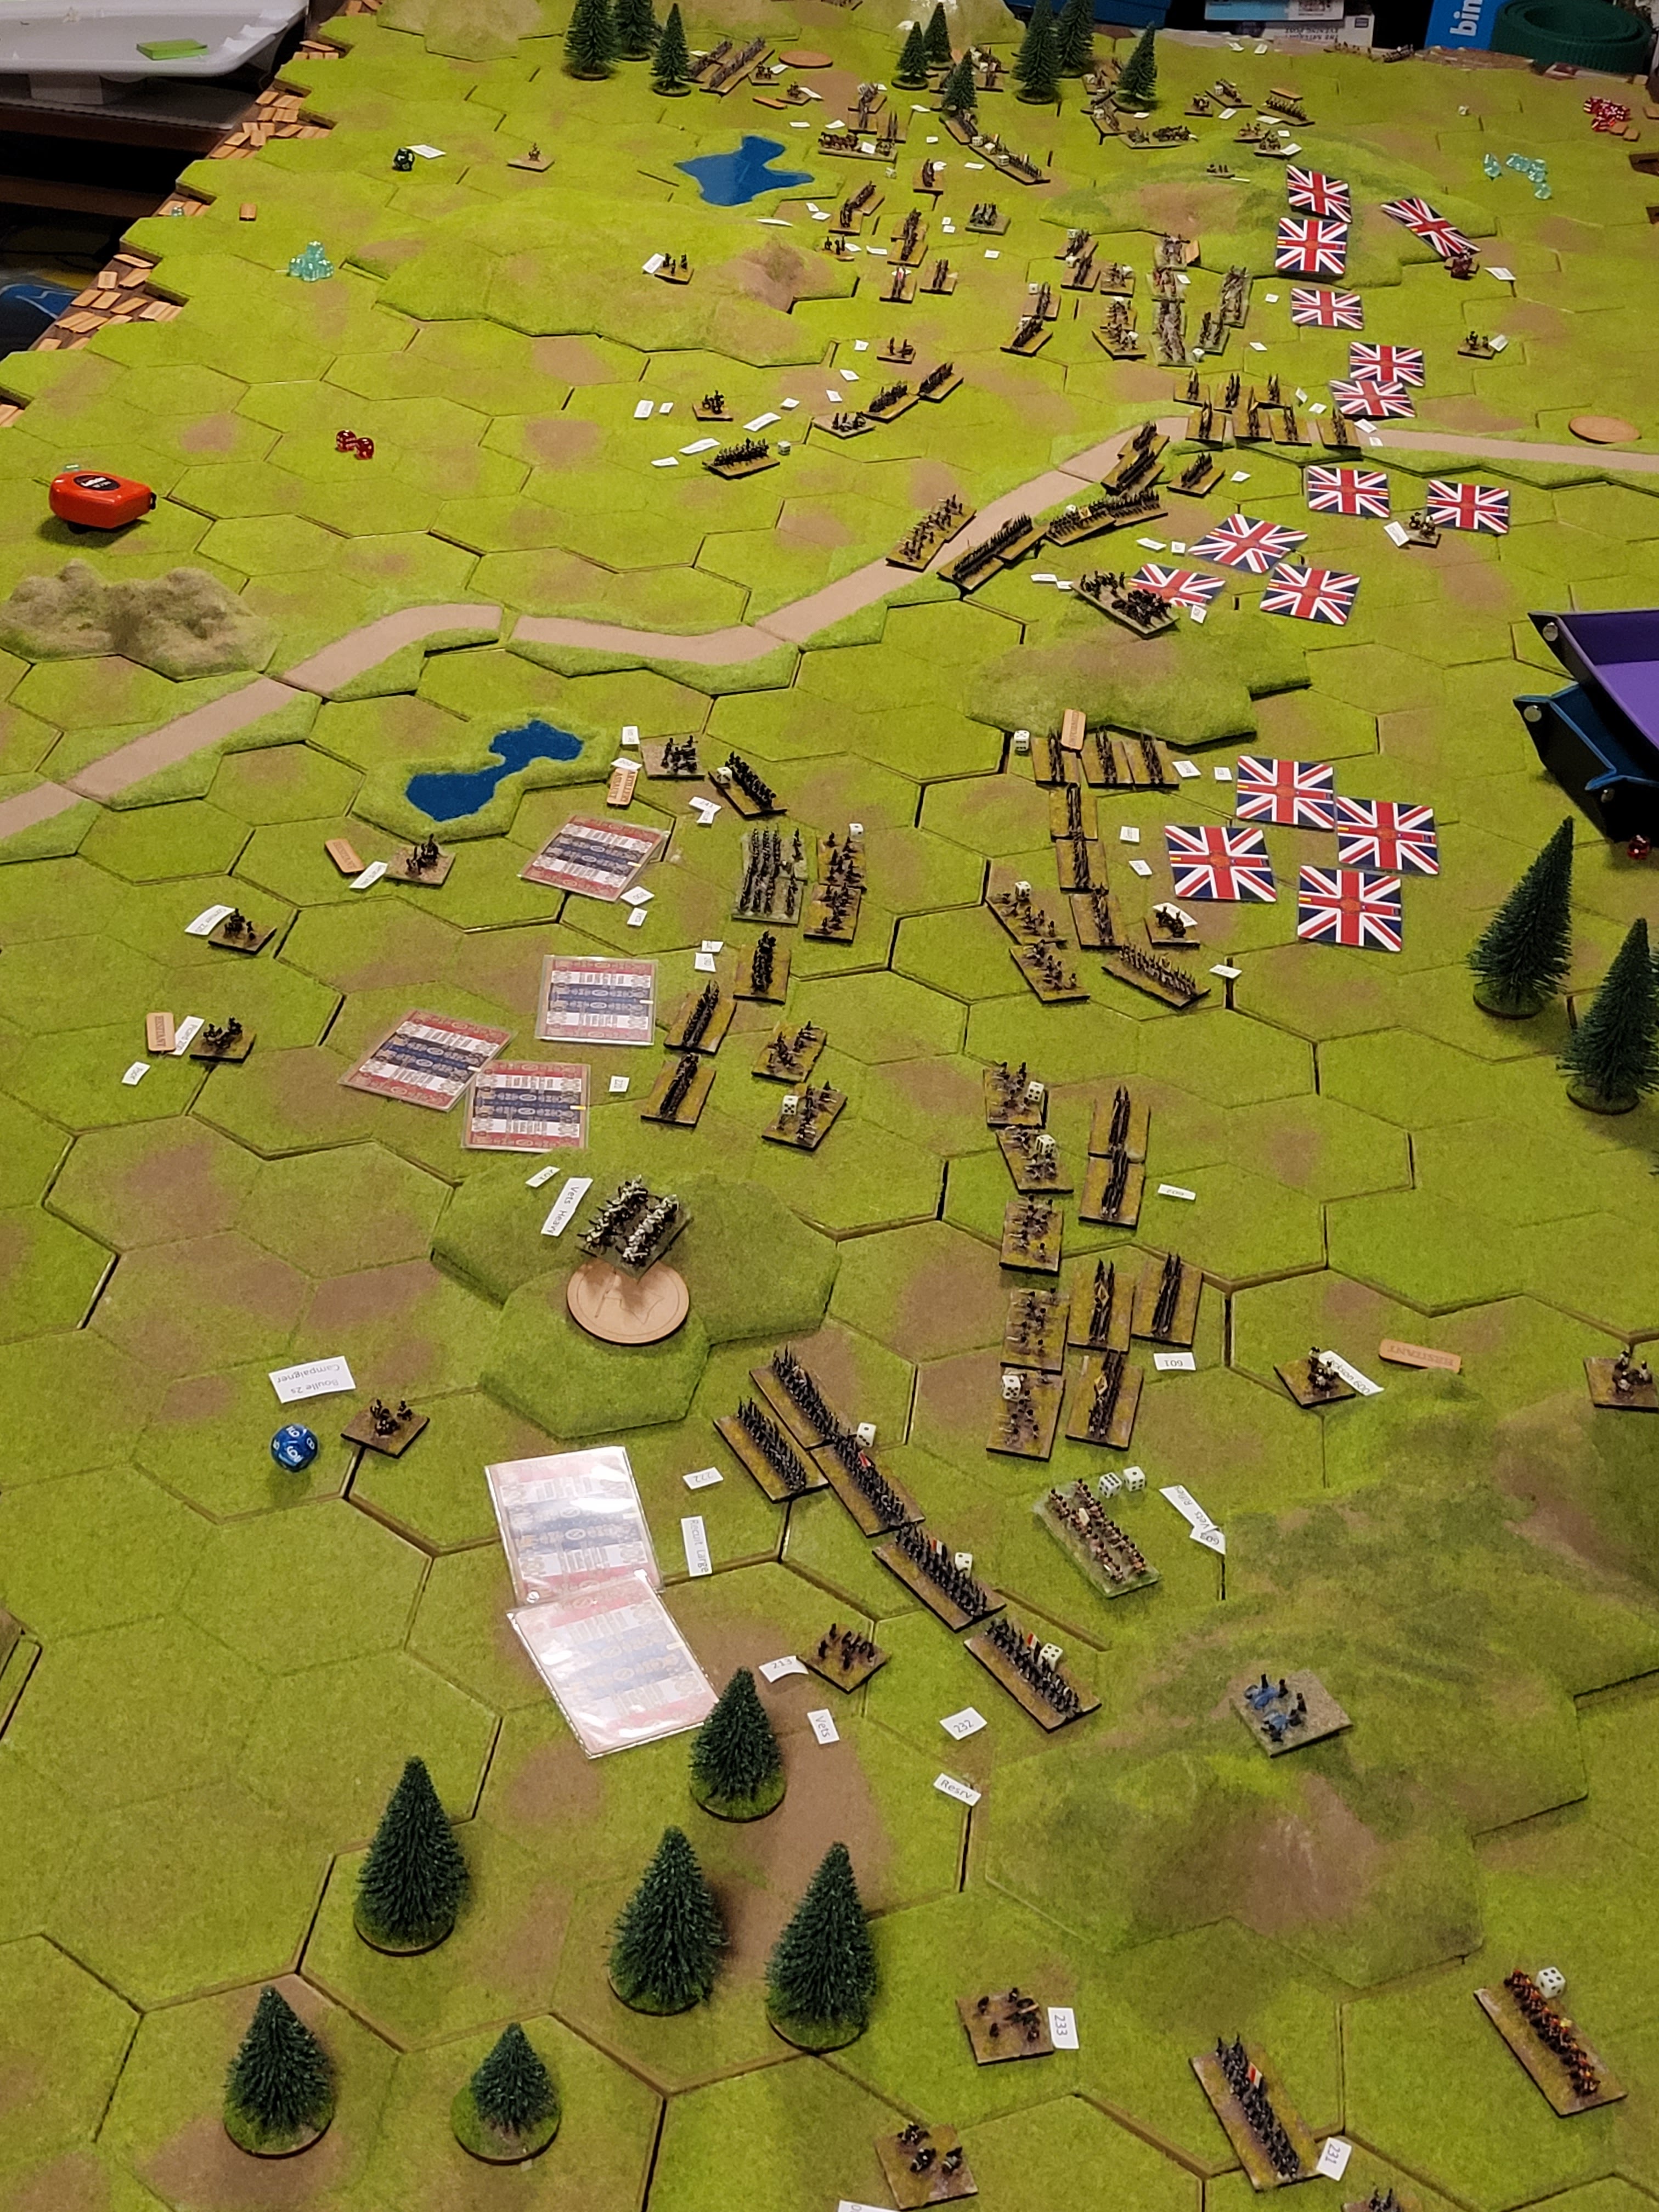
Turn 5 the game turned. British scouts revealed a huge weakness in the french formation, there was essentially no infantry in the center. They moved their largest units to divide the forces and try and break the flank near the mountain pass as this was the weakest and farthest from potential French reinforcements.
By turn 6 it was nerve-wracking as the French elite units were under heavy pressure and began an orderly withdrawal. It didn’t help that turn 3 the British seized the initiative and continued to hold it. The French on the bottom of the picture had eliminated most of the British Cavalry and were pushing hard to seize the entire flank and sector.
Turn 9 the Brits were pushing as many troops to the center as possible. Near the mountains to the top of the picture they were barely holding on and accepting those losses as this could be the end of the invasion. (I switched to a tripod here for more consistent images)
Turn 11. British troops fly up the center road preparing to cut off the French reserves. They are barely holding on to the flanks while their center continues to divide. the French diverted 5 battalions on the top flank towards the center at risk of losing the Mountain pass. The commanders to the bottom continue to fail in their rolls to advance giving the British some respite there.
Here is a close up of some fighting near the mountains. The British have heavy casualties and are on the brink.
Turn 13 the reserves have flown up the middle of the table and engaged in the center.
Turn 15, shit hit the fan. The British rolled 15, 11’s and 12’s to literally shatter the French’s bottom flank and center. I chose to call the game as this point. 12 French battalions left the field to only 1 British. An entire Corps was broken. I saw no way for the French to recover.
Overall Impressions
This was my 10thish time using the General D Armee system. Having a battle of this size the rules were semi cumbersome and I wouldn’t advise trying it yourself. I had a great time though and could feel the full actions. In the future, I will work on creating a ruleset for the use of dragons on the field. Based on the books His Magesties Dragon. Love the books, love Napoleonic wars, I think Dragons could be used in this system. Thanks for reading talk soon.