If you are a wargamer, you know about D-Day. We aren’t going to wargame the most famous invasion in world history. We will wargame a special operation, the assault on the Merville gun battery by the 9th British Parachute Battalion.
Wargame
Rules Bolt Action or Command Decision Players: 2 Models Needed: (bolt action) 1,000 points of British Infantry. No tanks or other vehicles are allowed, but they do get their free artillery observer. 650 points of Germans, again, no tanks, only 2 MMGs are permitted, no mortars. Table 4×4 Terrain, a German bunker with trenches surrounding it, barbed wire, and an antitank ditch
Objective: The Germans must hold the gun battery inside the bunker, while the British must capture and destroy it. The game should last 6 turns. After turn 6, roll a D6 on a 4+, and we play a 7th turn.
Set Up: The British forces should be randomly distributed using a dice. This signifies the scattered nature of the parachute drop. For each unit, roll a D6. On a 1, remove one model at random from that unit.
The German forces should be dug into the trenches and prepared for battle.
The terrain should have the bunker surrounded by trenches, barbed wire, and an antitank ditch, then open ground with small bits of scattered cover, such as a shed, a small hedge, some rocks, etc. The bunker should face one edge with a semicircle of trenches surrounding it.
If you are struggling as the British player, add more troops or subtract a few Germans. Historically, the British could never capture this battery, and the Germans occupied it until they withdrew from France.
On June 5th, 1967, Israeli air forces launched a surprise attack against Egyptian airfields. The initial attack resulted in 338 aircraft destroyed for Egypt, and 19 Israeli planes downed. They also led with an armoured assault against entrenched Egyptian armoured forces. One of the war’s most contested areas was the 11km long Jiradi defile, a narrow pass defended by the 112th infantry brigade.
Wargame:
Ruleset: Team Yankee or other modern game Players 2-4 Models Needed: 30-40 Israeli tanks and armoured vehicles, plus two fighter jets, 10-15 Egyptian tanks and tank killers, 10 anti-tank batteries, 20-30 infantry. Table 8×4 Terrain: Two ridges are crucial to this, as the Israeli forces race through
Objective,
The Israelis must reach the end of the pass, preferably at the long end of the table, and the Egyptians must destroy 60% of the Israeli forces.
Setup,
The Israeli forces should be lined up in a column, and the pass should be wide enough for four to five tanks to be lined up abreast. The Egyptian troops should be dug around the ridges with some scattered infantry and AT guns in the trench.
Special Rules
Air Strikes: At this point in the war, the Israelis had air superiority. They could call in airstrikes throughout the battle to destroy various Egyptian emplacements.
On June 4th, 1859, during the Second War of Italian Independence, Napoleon III of France crossed the Ticino River to force the Austrian army under Gyulay to retreat. The Austrians had 68,000 men available and established defensive positions around the town of Magenta, securing four bridges.
The French, noticing the Austrian weakness, built a pontoon bridge to the south on the river, outflanking the entrenched Austrians and forcing their retreat.
The Wargame
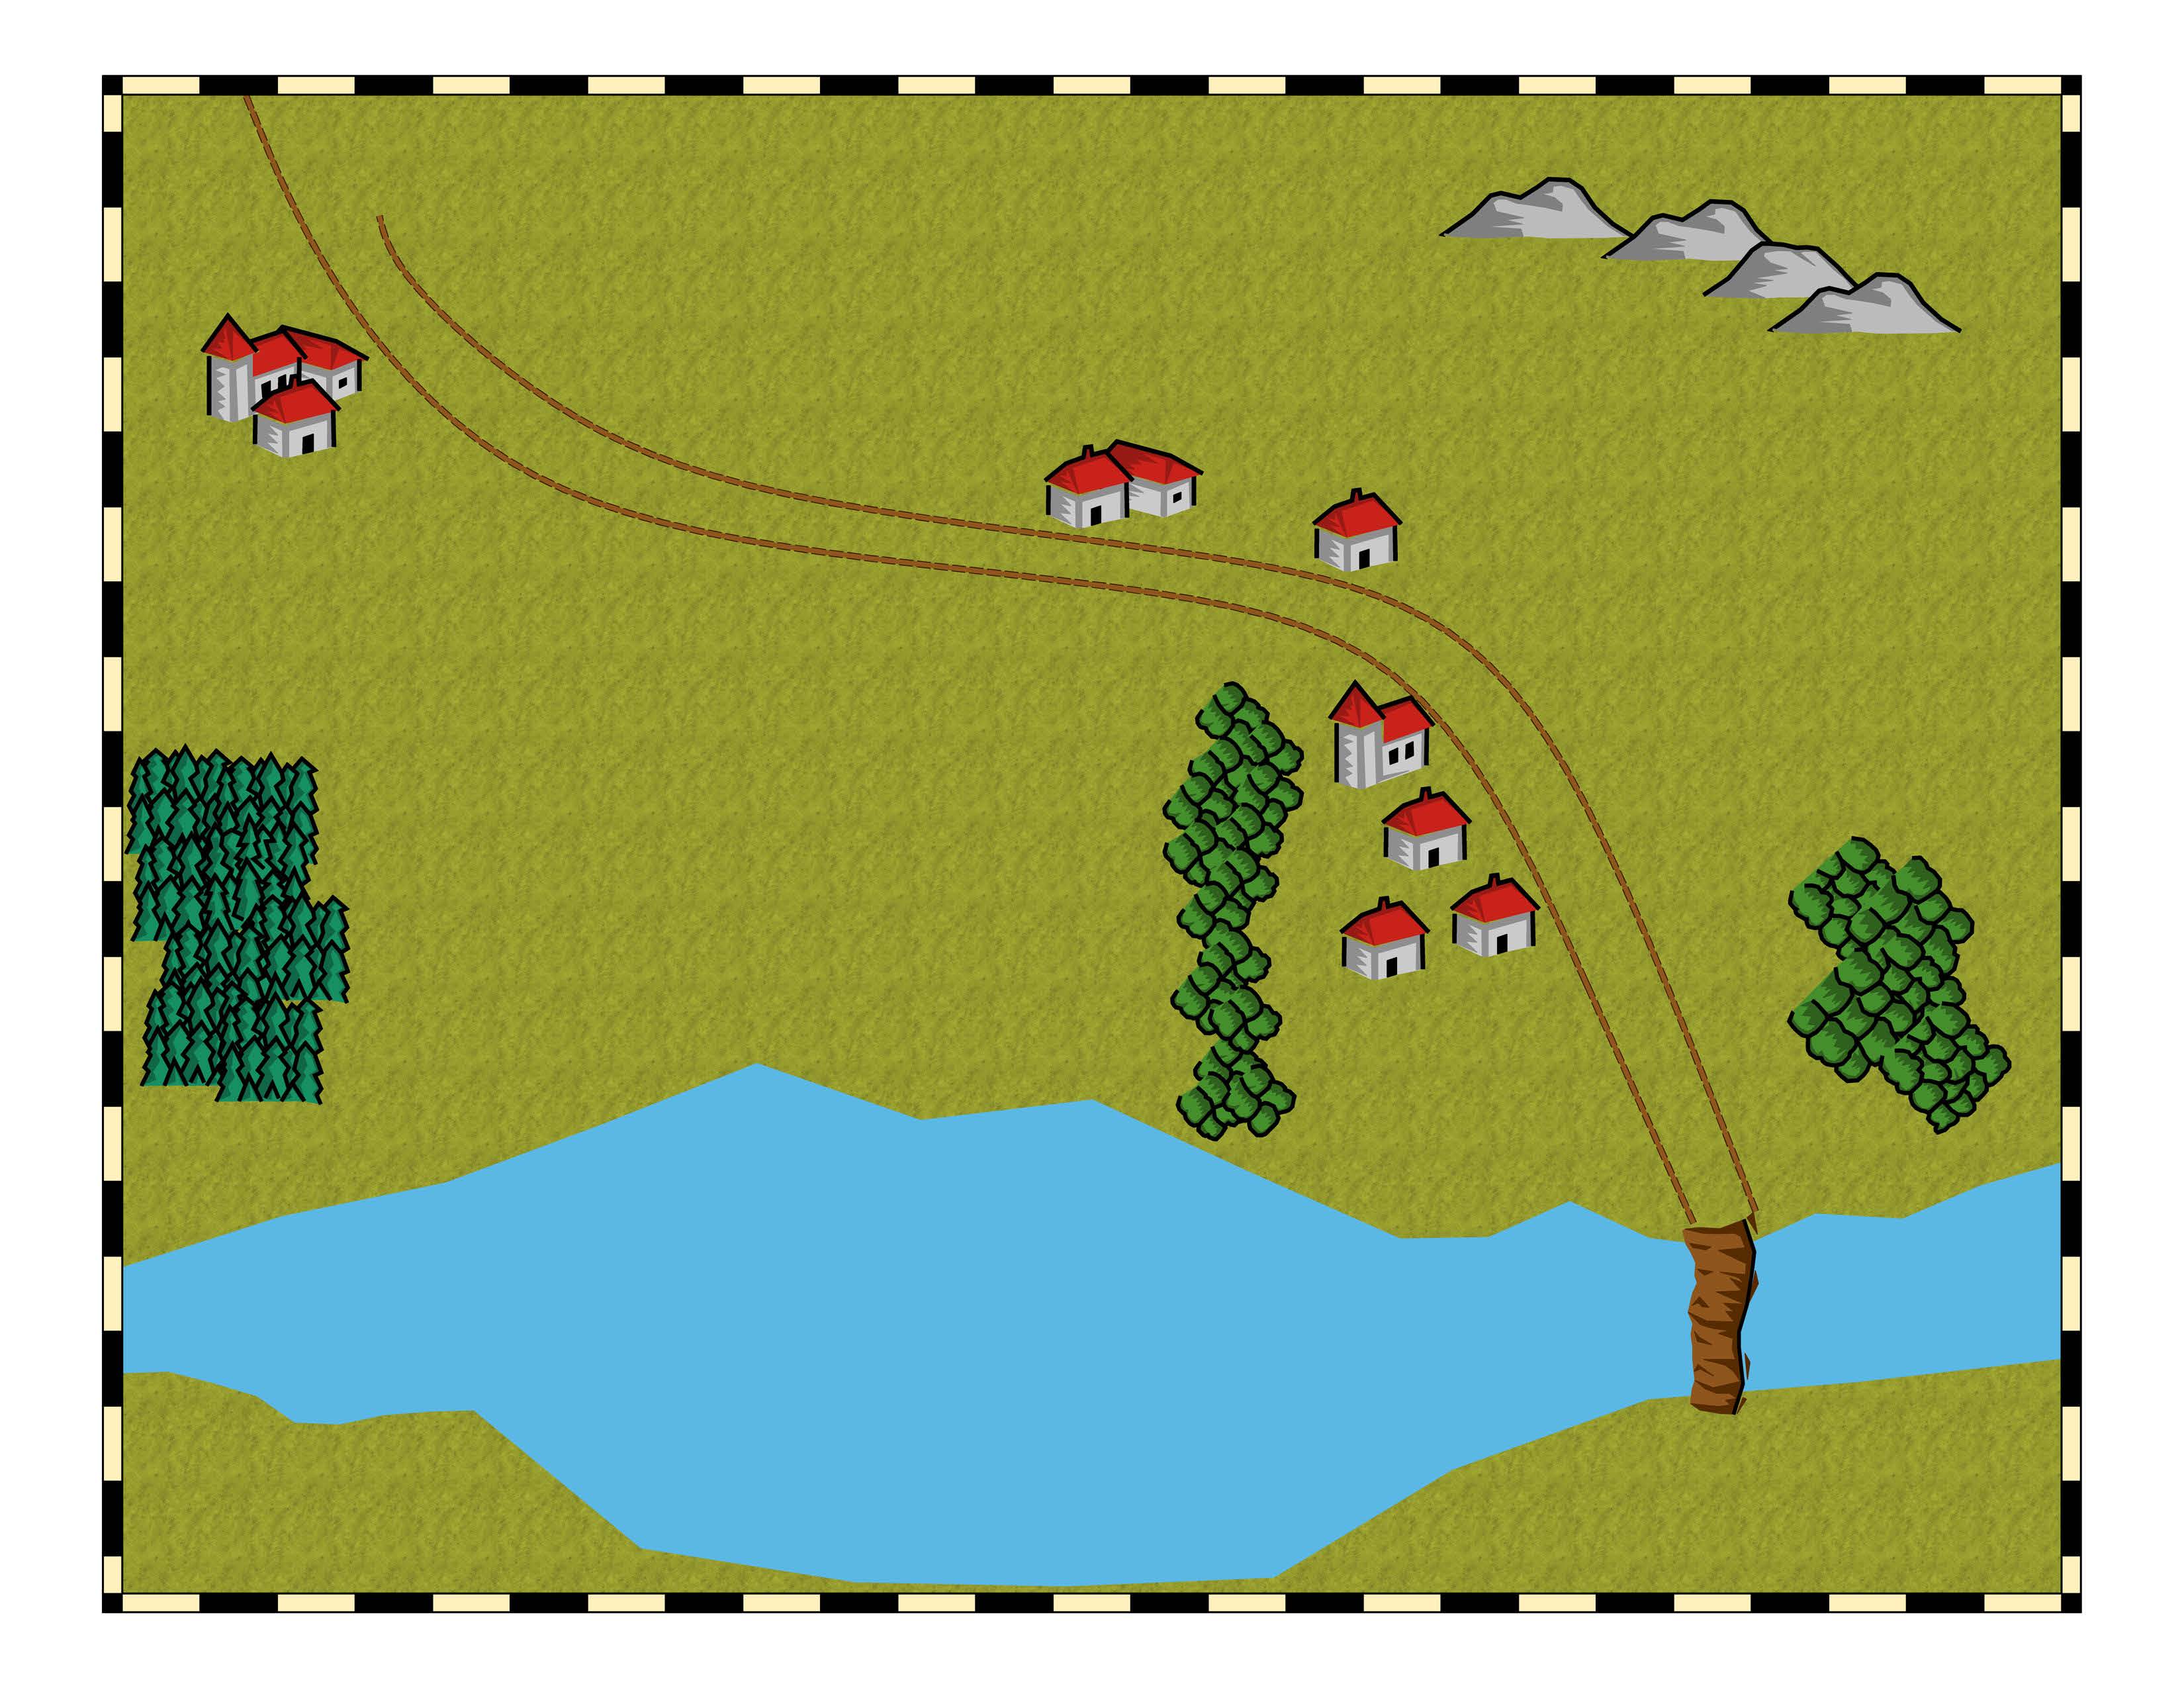
RuleSet Blackpower or Other similar Game Players 2 Austrians 12 Battalions, 2 Cavalry Squadrons, 2 Cannon Batteries, 2 Battalions Garrisoning the Town French 16 Battalions, plus 1 new battalion every other turn, 2 dragoon squadrons Set Up. See the map below. Table Size: 8×4
Deployment:
The Austrians were surprised by the maneuver and were not in an adequate position. Most troops should be stationed in the field to the south of the road in the center of the map between the two sets of trees. The French should have half their units across the bridge, with the rest crossing. It takes one turn to cross the water. Only two units at a time can cross. Additional French units should arrive every other round or turn (however, your rules describe both forces getting to act as one turn). So total if the French never lose a unit, there would be 16 battalions, 2 dragoon squadrons, and an additional 12 French battalions.
Objectives:
The Austrians are fighting a rearguard action to hopefully prevent the complete destruction of their army. By nightfall, they must keep the French from reaching the town on the top left of the map. The attack took place at 2:00, so the French have six hours to reach that point. This amounts to approximately 24 turns for most games. The French want to get the town and surround the Austrians. The French must have forced back the Austrians; if the Austrians are fighting to the city at nightfall, it is still an Austrian victory. Losses do not matter here.
Special Rules;
The Austrians can garrison any building with half a battalion. The building becomes fortified and difficult for the French to move past.
The fastest route of travel should be the road. The area around the road is heavily wooded.
On June 3rd, 1098, following an 8-month siege led by Raymond IV of Toulouse, modern-day Turkey’s Seljuk-held city of Antioch fell to the crusaders during the First Crusade. The city fell due to treachery from one of the guard captains.
While a full campaign with 10 battles to capture and Siege Antioch and defend it would be ideal, I think a simple wargame scenario depicting stealth would be more appropriate for this blog.
The guards’ goal is to catch the attackers, while the crusaders must successfully reach the gates and open them for the waiting forces.
Wargame
Ruleset Custom
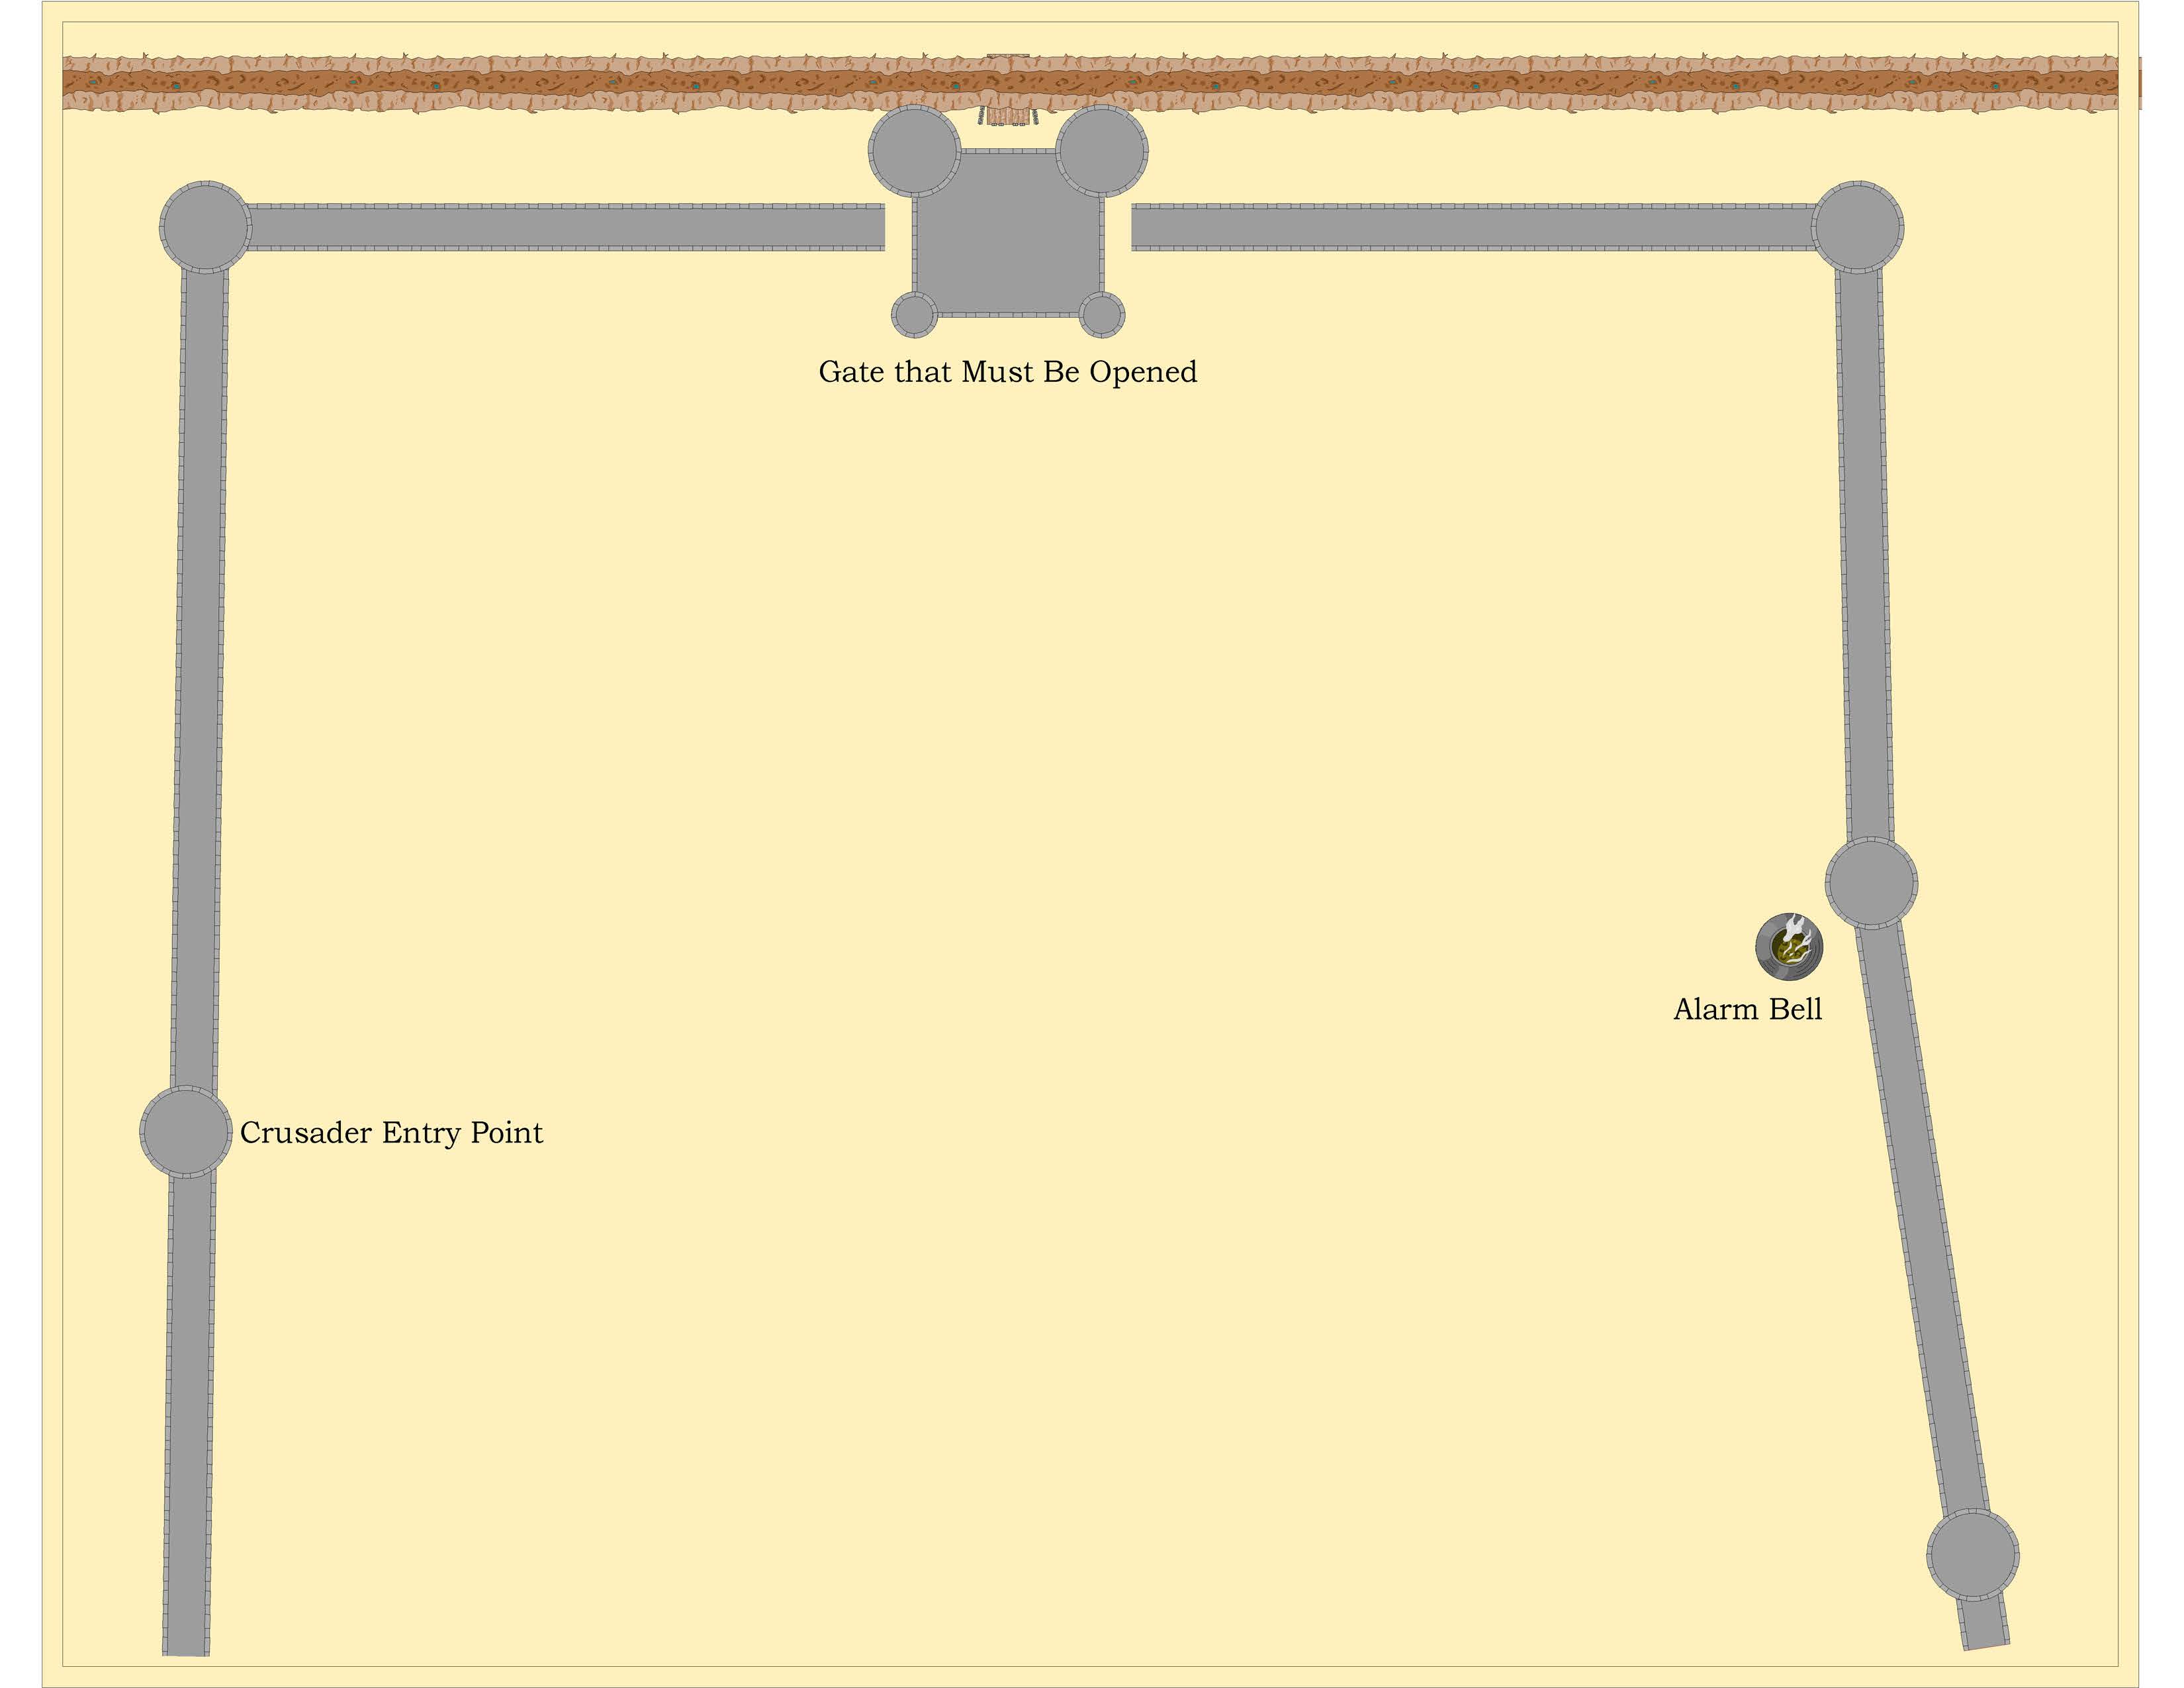
Number of Players 1 Number of Models 25 Play Area 4×4 Scenery Castle Walls and Towers, many small buildings within. The streets should feel crowded and cramped with many turns.
The four crusaders must navigate to the gate without being seen. The defenders should be set up in four patrols of five soldiers in various areas of the setup. I recommend doing a grid and setting up the patrols at random. The soldiers should be governed by a deck of cards; each time a card is drawn, it indicates something.
Red FaceCard Movement directly forward as much as possible Red Odd Card Turn Right next chance forward Red Even Card Turn Left next chance forward
Black Facecard Movement moves directly backward as much as possible Black Odd Card Turn right next chance backward Red Even Card turn left next chance backward
Thus, the patrol moves randomly through the area. In the event of an encounter with the opposing troops, each group moves towards the combat until they come in contact with the crusaders or the fighting ends.
If a patrol spots the crusaders (6″range) a card is flipped. A red card, the defenders’ attack, a black card, they flee towards the bell.
Combat is resolved simply. Two combatants each roll a D6; the crusaders get +2. The loser is eliminated. The engagement range is adjacent to the models. The crusaders can take crossbows. Lethal hits on 5s. The crusaders should be slightly faster than the defenders.
During the Franco-Dutch War. Dutch and French forces were converging on the city of Messina who was in revolt to its Spanish rulers. The Dutch were allied with the Spanish. The French did far more damage than the Dutch force; however, battered the Dutch were the French pulled off making the victory meaningless.
French
Commander Duke of Mortemart
24 Ships of the line 5 Frigates 25 Galleys 9 FireShips
Dutch-Spanish Force
Commander Jan den Haen, and Diege de Ibarra
14 Ships of the Line 13 Frigates 19 Galleys 4 Fireships
Wargame
RuleSet Black Seas 2-5 Players Models Needed: 100 Tablesize: 4×8 Terrain: Enough islands or rocks to create a bay.
Set-Up
The Spanish ships should be arrayed in line formation at the mouth of the bay. The Dutch ships should be arrayed in a similar fashion on the opposite side, facing the same direction.
The French should have their ships arrayed in a line approaching from the Spanish side. Frigates and galleys should be in the space between the two lines.
Objectives;
The French must inflict as much damage as possible on both fleets without losing a capital ship. The French must also evade the coastal batteries, which should have the firepower of a first-rate ship of the line.
The Spanish and Dutch forces need to use their screen to avoid losing any ships of the line. They do not need to inflict any damage. The fleet may flee at any time into the bay.
Additional Rules:
Fireships played a significant role in the battle, dealing most of the damage to the French.
Coastal batteries cannot be destroyed and should deal high damage.
The Battle of Jutland was the largest naval engagement of World War I and the last battleship-on-battleship engagement in history. Like most major naval engagements, it was indecisive. Both sides claimed victory. Germany sank more ships by 2:1 and killed more men by 3:1. The British were able to limit German access to the North Sea.
RuleSet Broadside Table Size 8×4 or larger. Number of Players 2-7 Models needed, 100 give or take.
Set-Up
I would advise using 1:1800 scale ships for this encounter. Most ships are available as 3d prints. This scenario should be played on a large table. If a large table is unavailable, reduce the range of various ships. Maybe the maximum range of a battleship is 6″ and the ideal range is 4″.
You do not need most of the destroyers and light cruisers. If you choose to use them, they should be kept in squadrons of 4 to 6 for scouting or anti-submarine activities. The core of the action is the dreadnoughts and battlecruisers.
The main crux of a game like Jutland is to balance the two forces, even with the numerical difference. At Jutland, the British were disorganized and out of formation, while the Germans were prepared for battle.
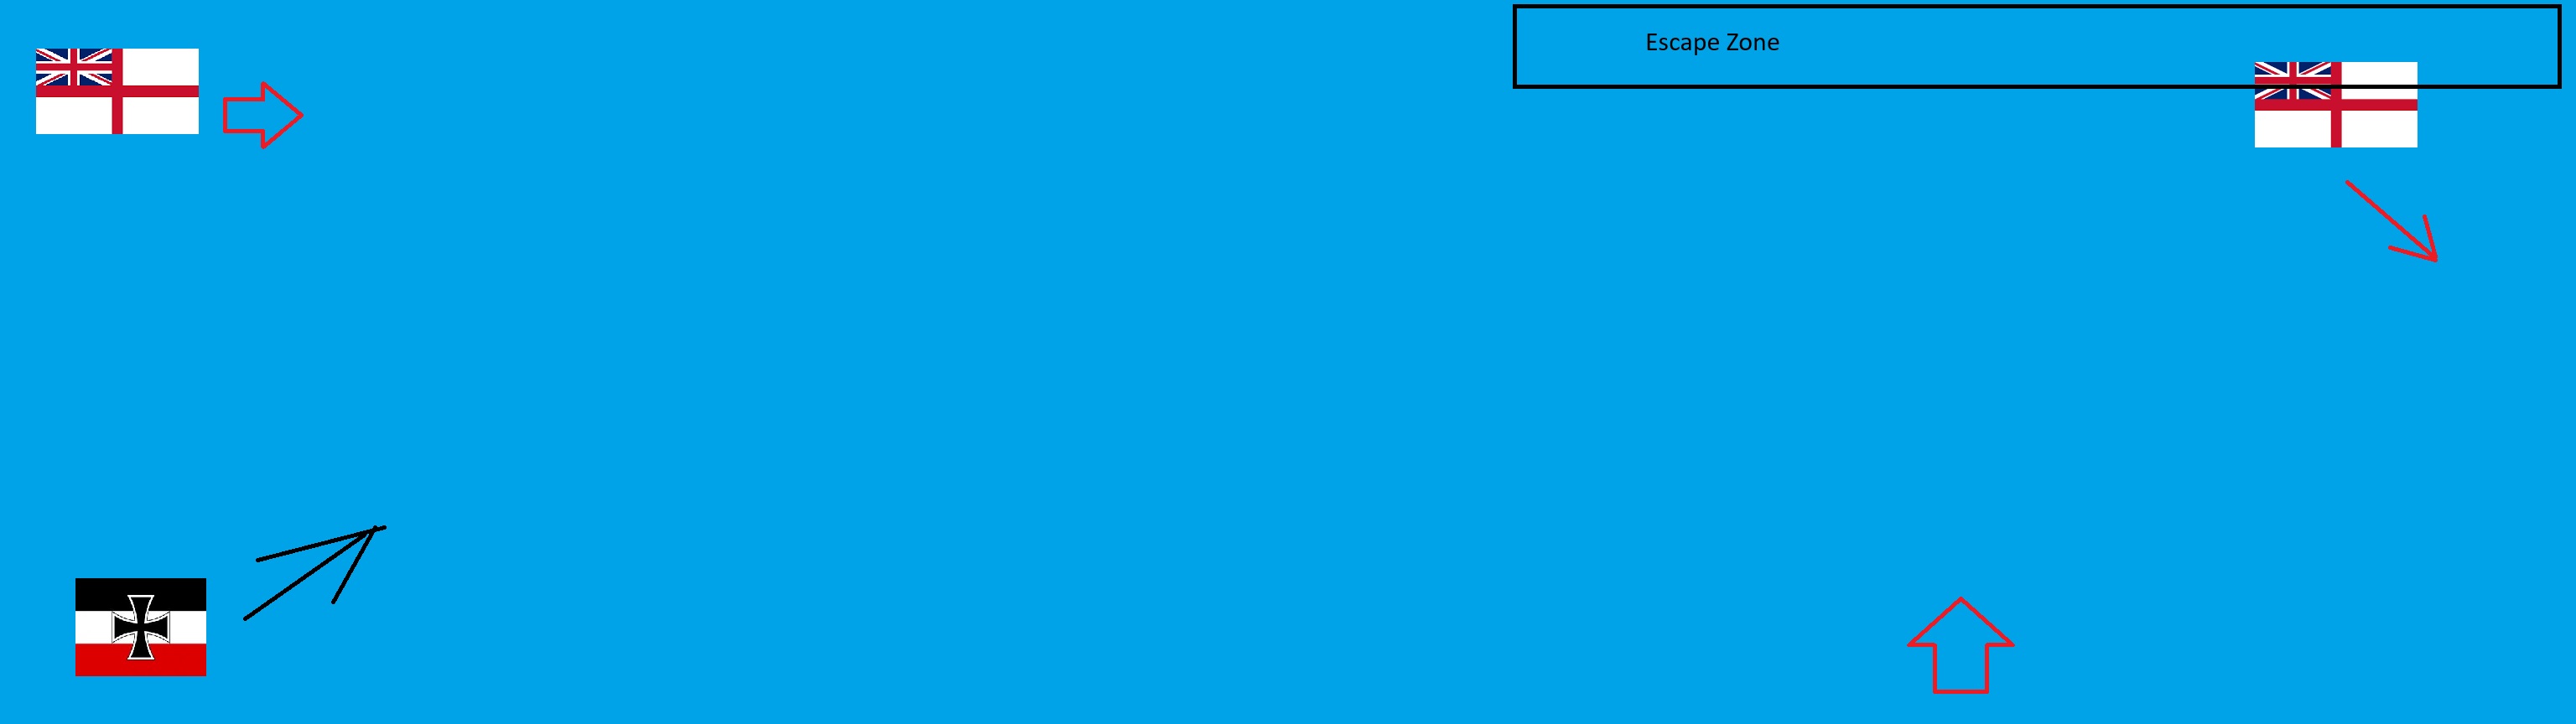
For the setup, the British should be divided into three squadrons of 8 dreadnoughts, and 2 armoured cruisers with support ships, similar to the actual engagement. If you have more players, the British should have up to five commanders while the Germans should stick with two. The Germans should also be broken up into three, eight-ship squadrons with three or four lighter ships each. However, these should enter much closer together in a more traditional Vanguard, Center, Rearguard scenario.
One British squadron should be about 10% away from each edge, with the Germans engaging from the bottom left. One British Squadron should be kept in reserve and begin entering the fray after an adequate number of turns. Depending on your system, it should be the middle of the game, so if a typical game is 20 turns, they should enter around turn 11.
The scenario’s challenge involves doing enough damage to the British squadron nearest the German fleet before the reserve squadrons can turn around and engage. The Germans must also escape the topmost table edge.
The British must quickly bring their forces to bear. Due to their spacing, the British should not allow their commanders to communicate with one another.
Victory;
The British will win if they inflict more damage on the Germans than the Germans inflict on them. The Germans will win if they inflict more damage or cause less damage, but every dreadnought and battlecruiser escapes.
Additional Rules The Germans had submarines in the area; they could place torpedo markers that forced British ships to change course. British scouts could eliminate these markers if needed.
Fog played a significant role in the battle, as visibility was limited. This can be gamed by having the British reserve commander be in a different room and only communicating with one-line telegrams.
Scout forces also engaged and caused minor damage. Based on the scouting results, a pre-battle scouting game could take place, with the sides getting better positioning.