June 16 1487 Battle of Stoke Field Wargame Scenario

On June 16, 1487, the House of Tudor and the House of York took to the field for the final major battle in the War of the Roses. The rebel Earl of Lincoln took the high ground with his 8,000 troops, essentially mercenaries. The more experienced Royalists, with 12,000 troops led by Henry VII, were ready to end the protracted, bloody conflict.

Many wargamers have recreated the battle of Stoke Field. A quick Google search offers two or three dozen just on the first page. We will provide an alternate battle situation where the Rebels are supported by Scottish rebels from the north. It is not inconceivable, as Scotland long wanted independence, and perhaps for their assistance in helping the Earl of Lincoln lift the crown, Scotland would be granted its sovereignty.

Order of Battle
Rebels House of York, Earl of Lincoln

I think we should keep the number of troops and the deployment the same. Instead of bringing 4,000 poorly armed Irish Kerns, let’s add 4,000 Scottish Pikes plus a commander.

1 Stand Knights As General 32
1 Sub General 32
1 Ally General 22
5 Retinue Billmen 35
20 Retinue Archers 140
20 Scottish Pikes 80
13 Northern Border Foot 39
4 French Crossbows 20

Royal House of Tudor, Henry VII
1 Knight as Royal General 35
2 Knights as Sub Generals 64
3 Stands Royal Body Guards 45
6 Stands as Men at Arms 60
10 Retinue Billmen 70
10 Retinue Archers 70
4 Javelines 32
6 Stands German Pikes 24

Wargame
Ruleset DBM, DBMM, or any other large-scale medieval ruleset
2 Players
Forces Needed are Listed Above
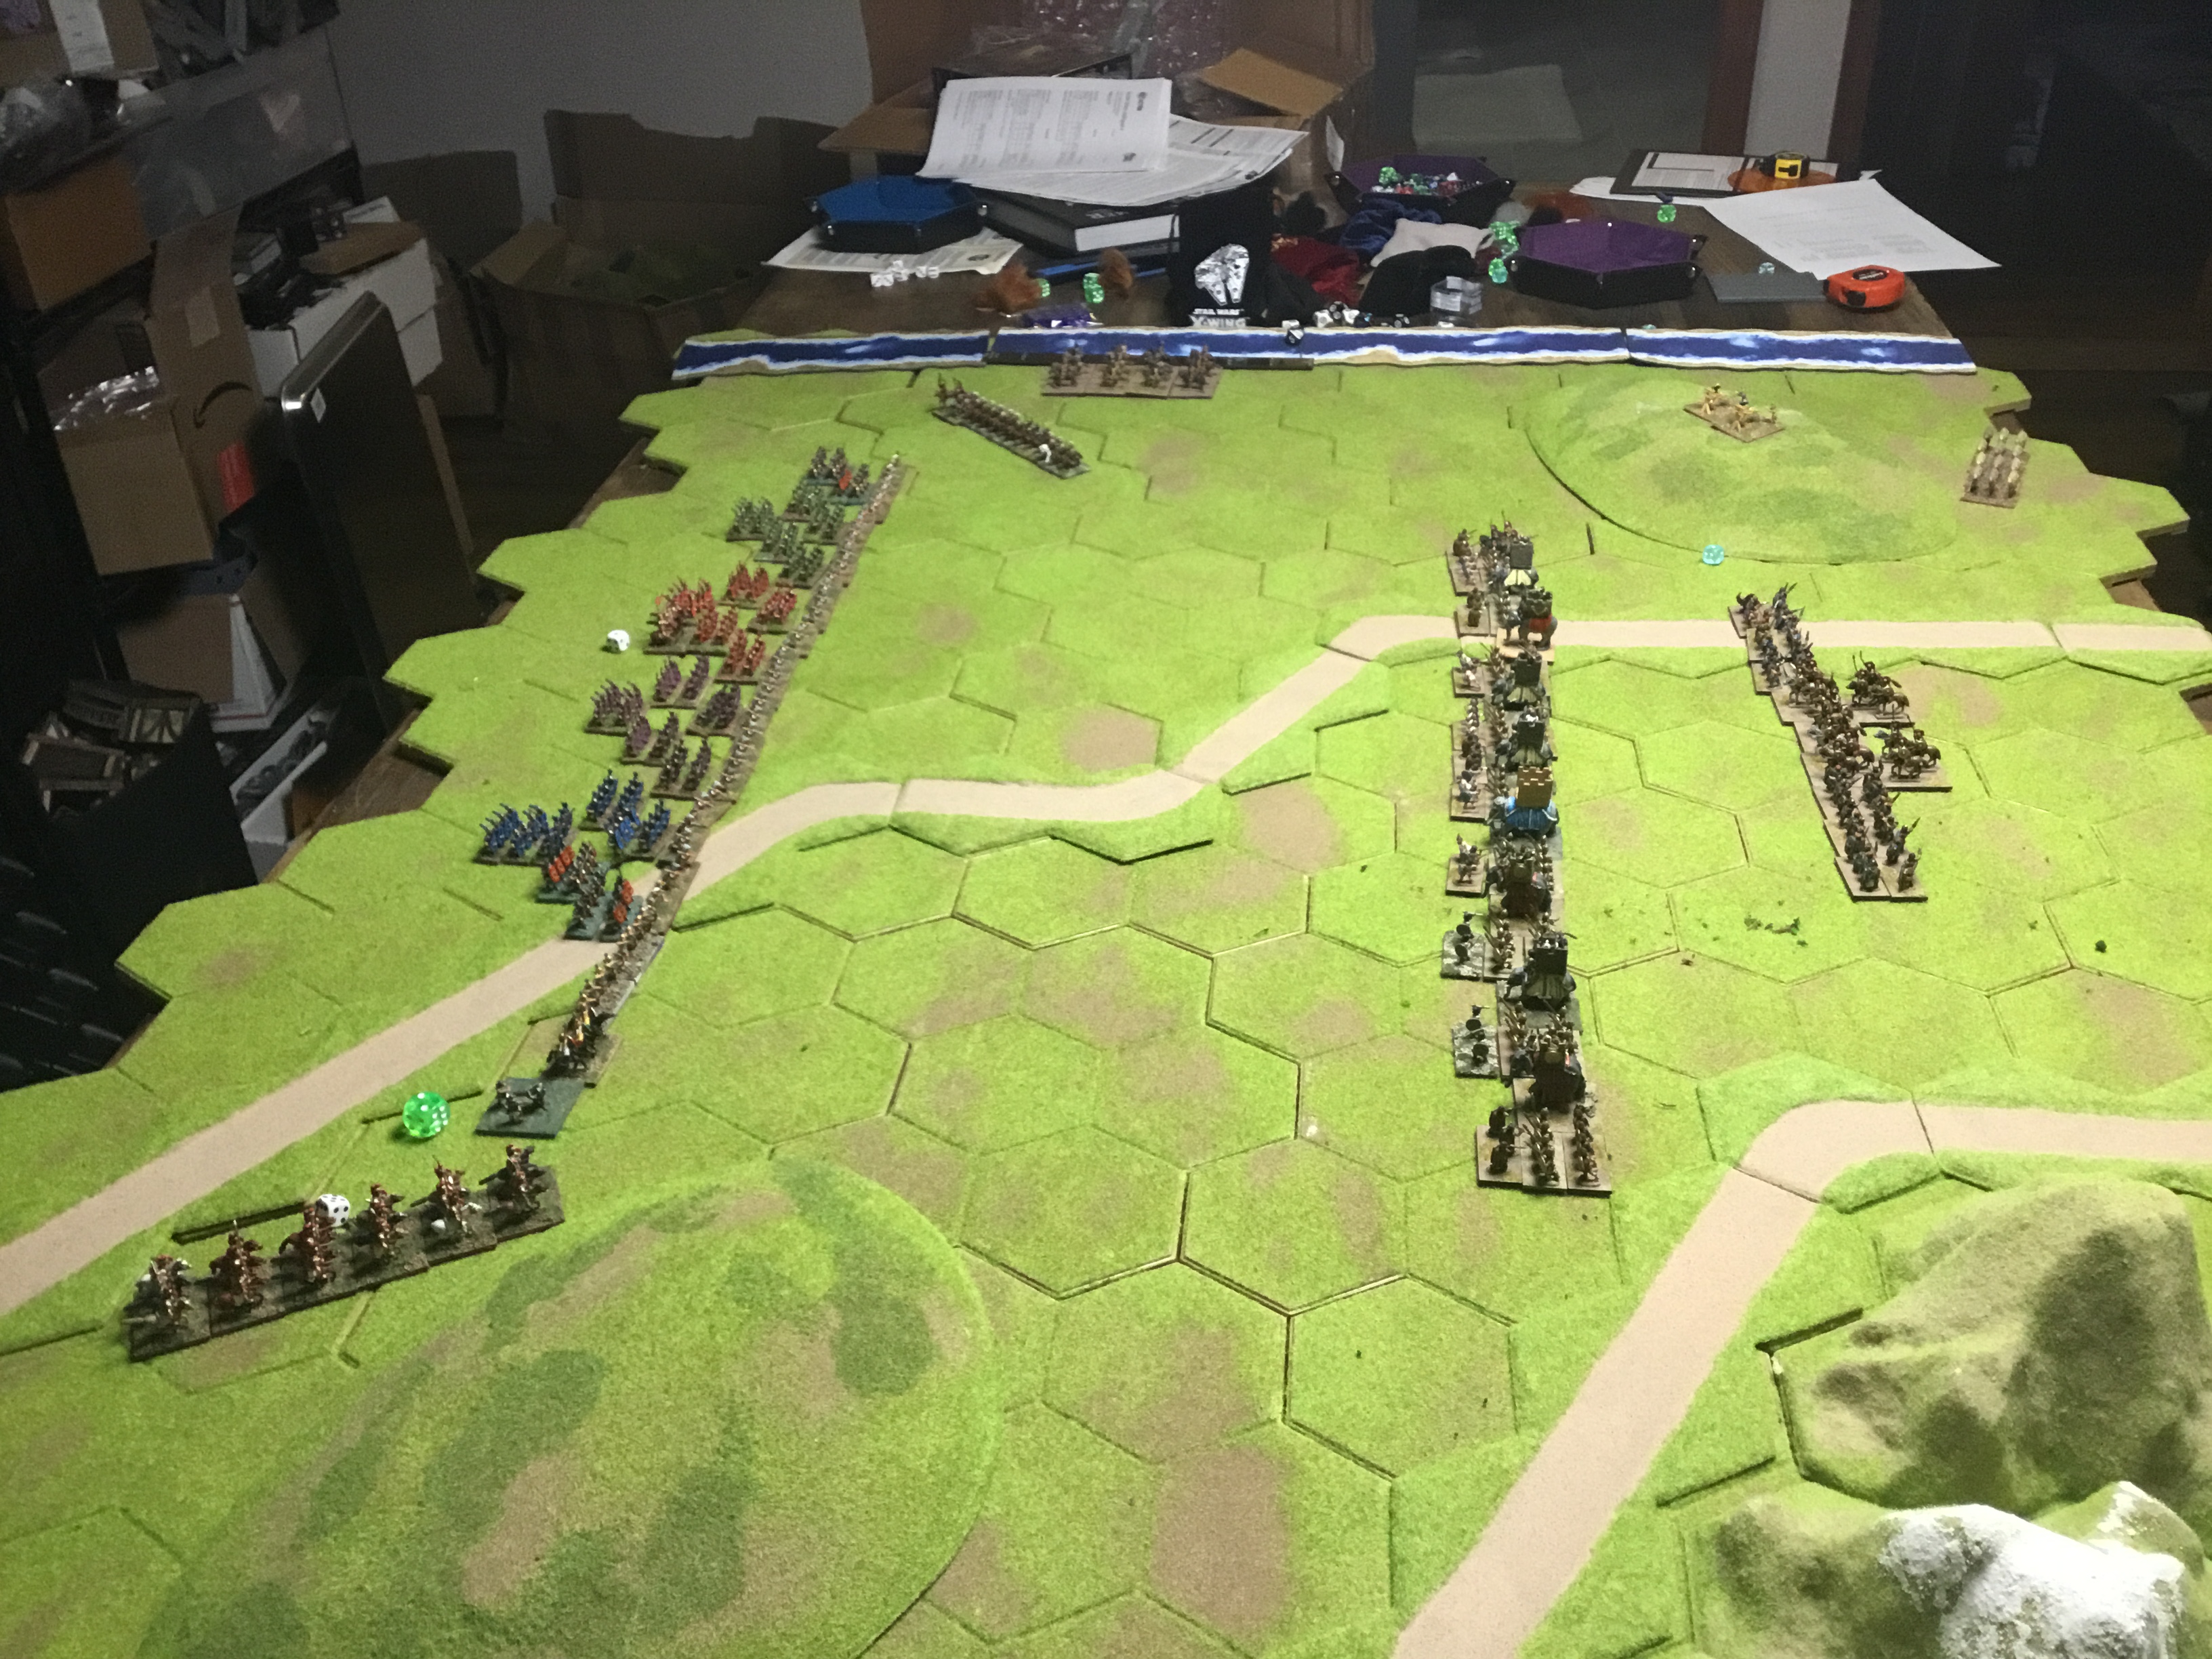
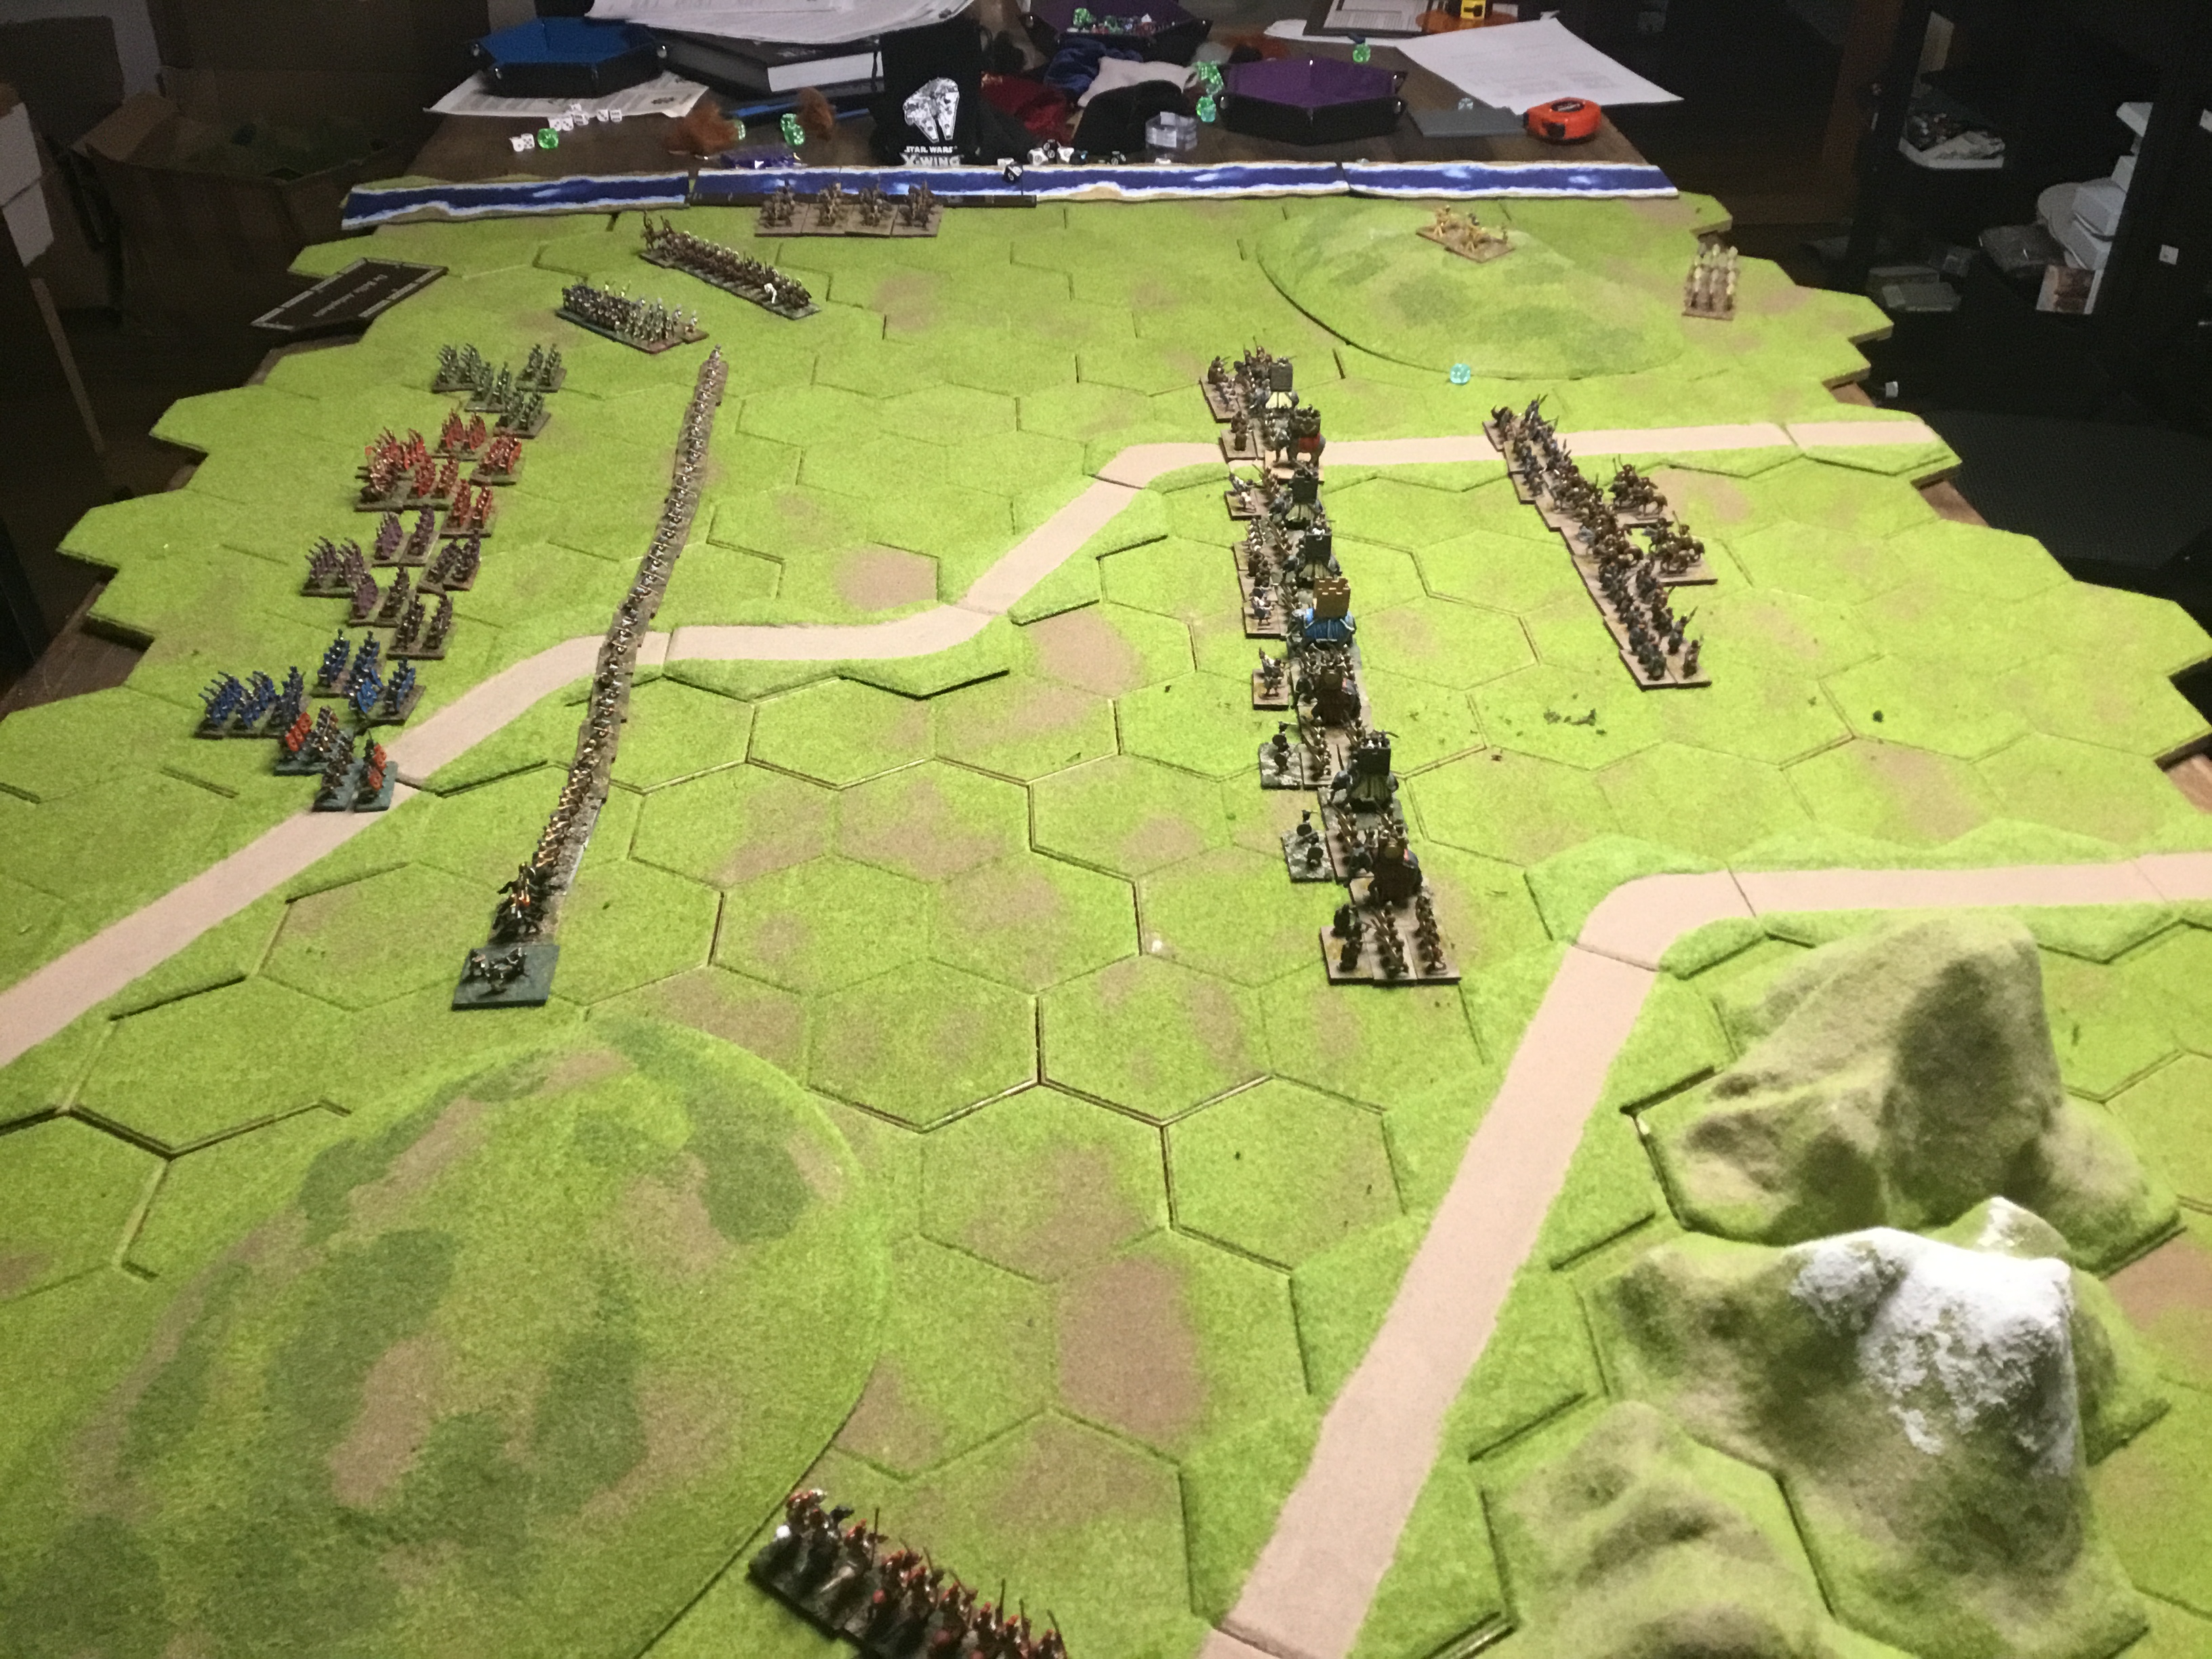
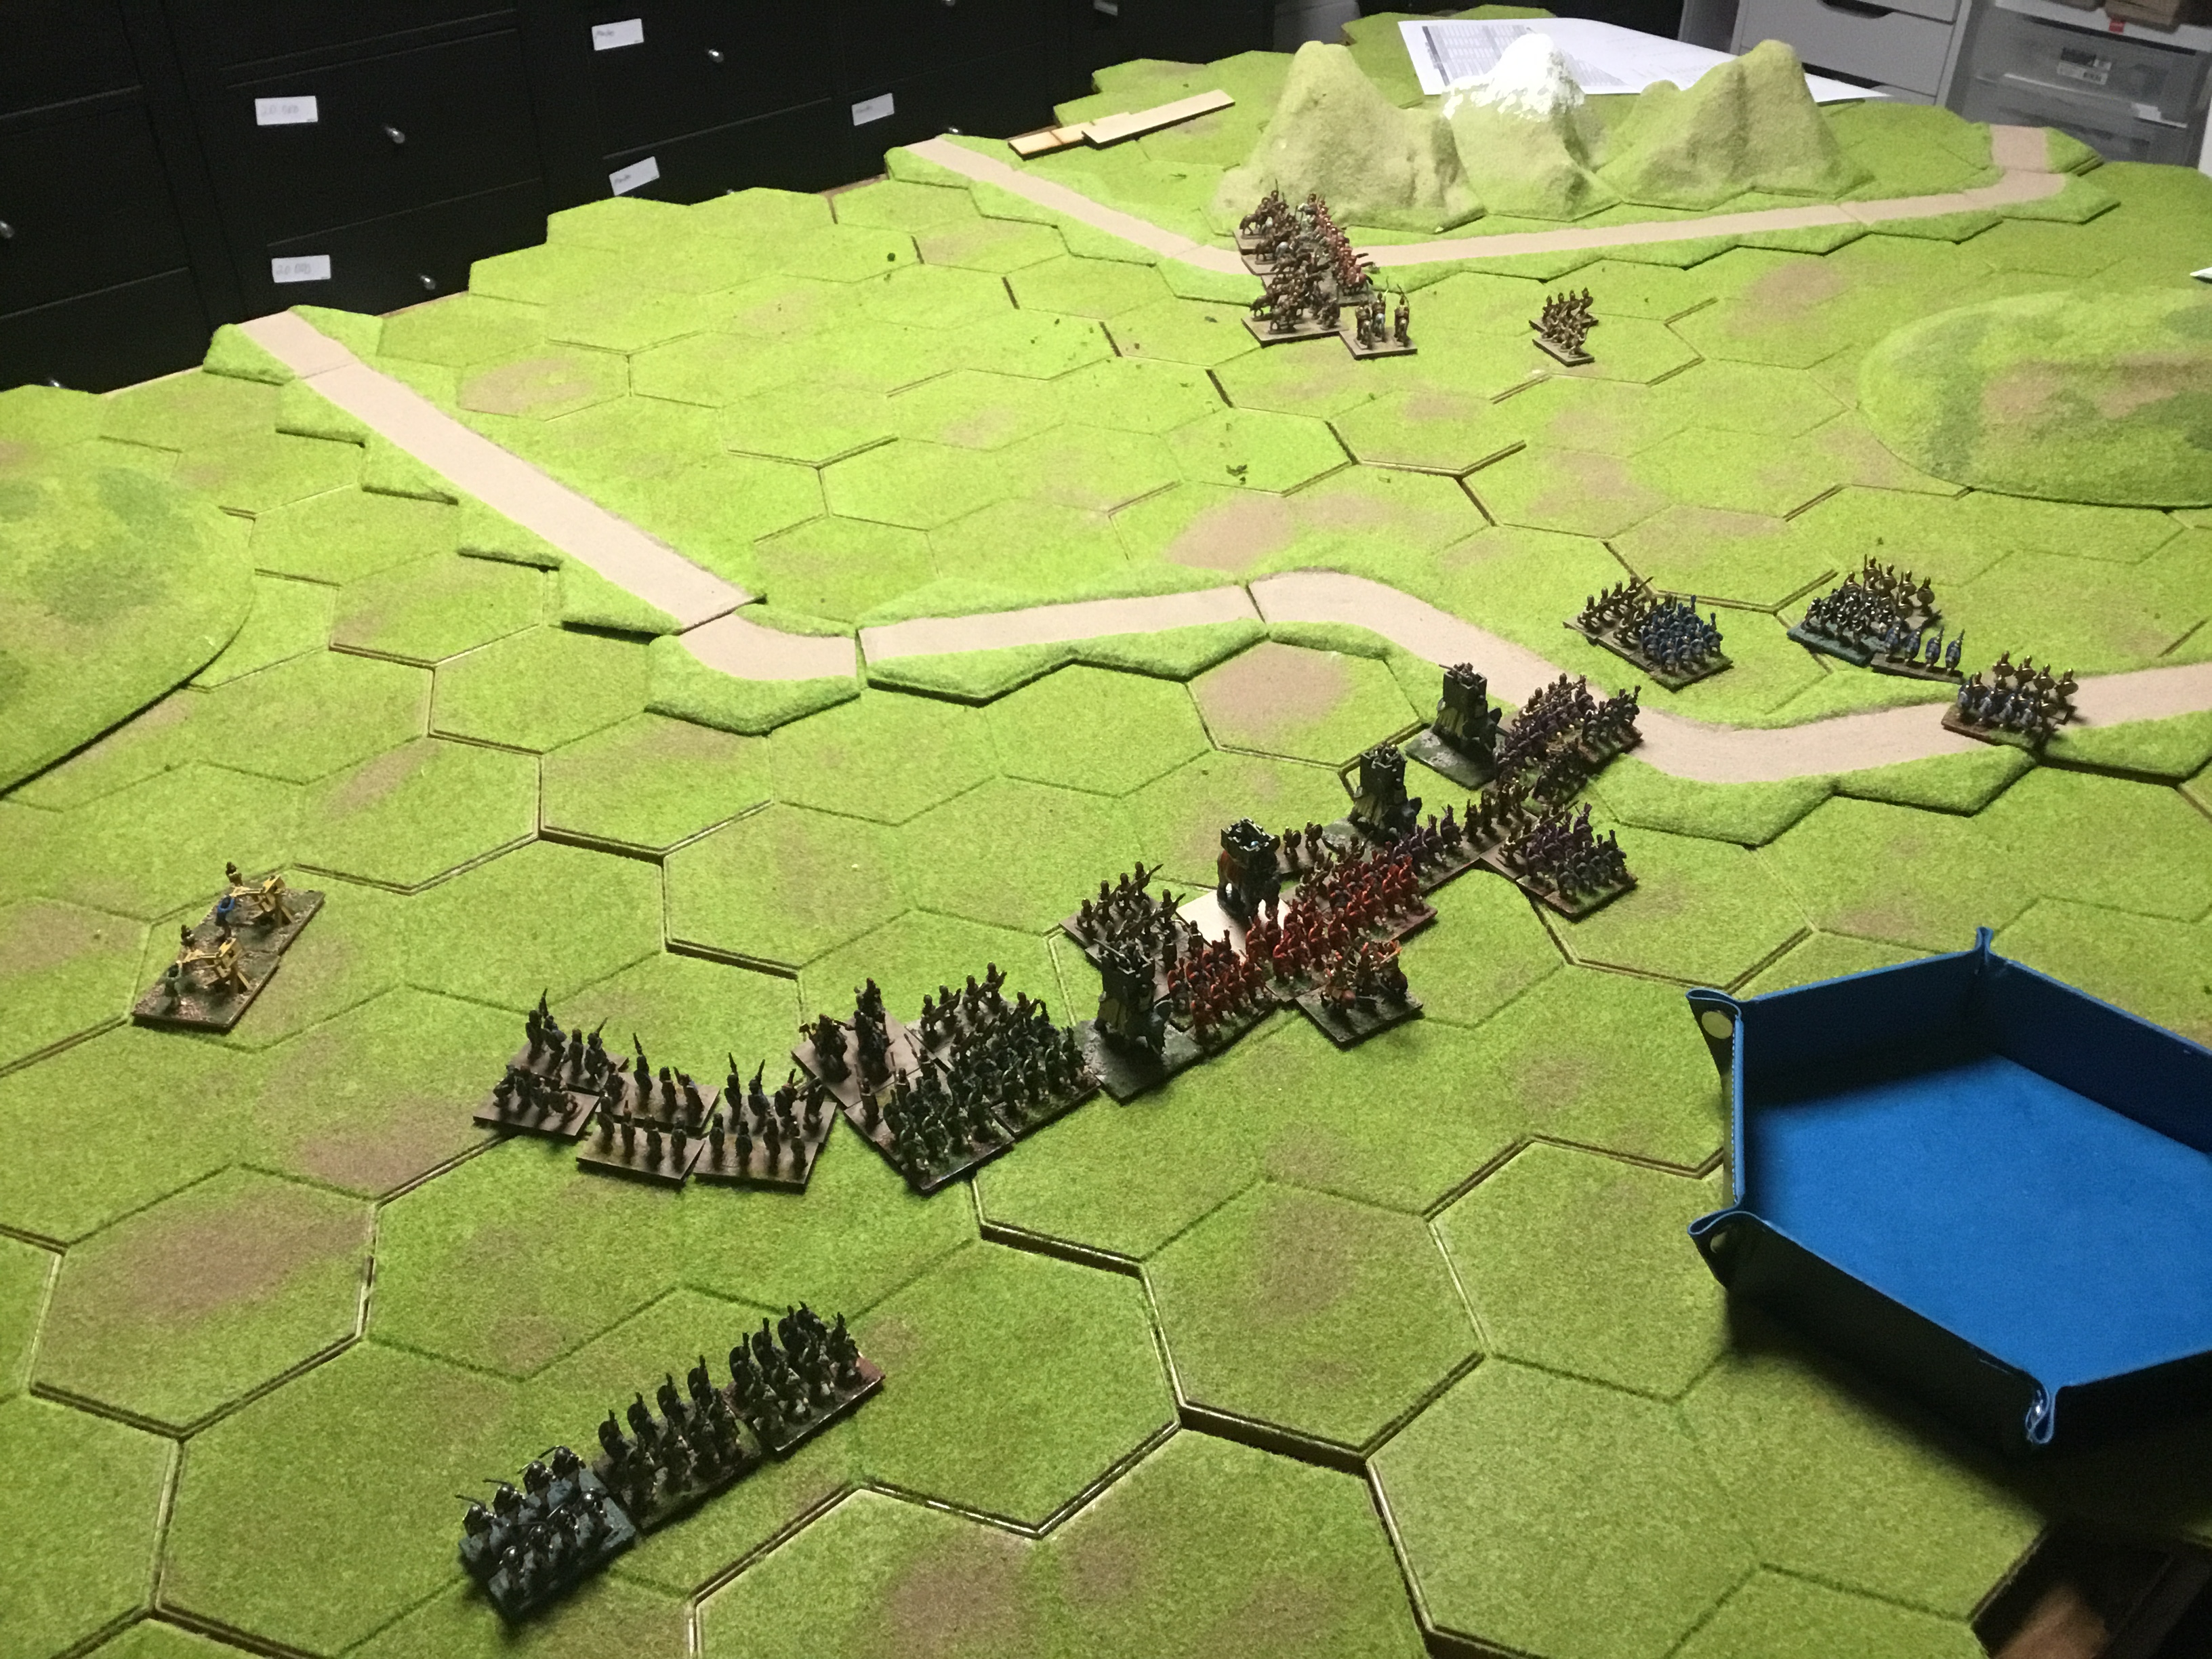
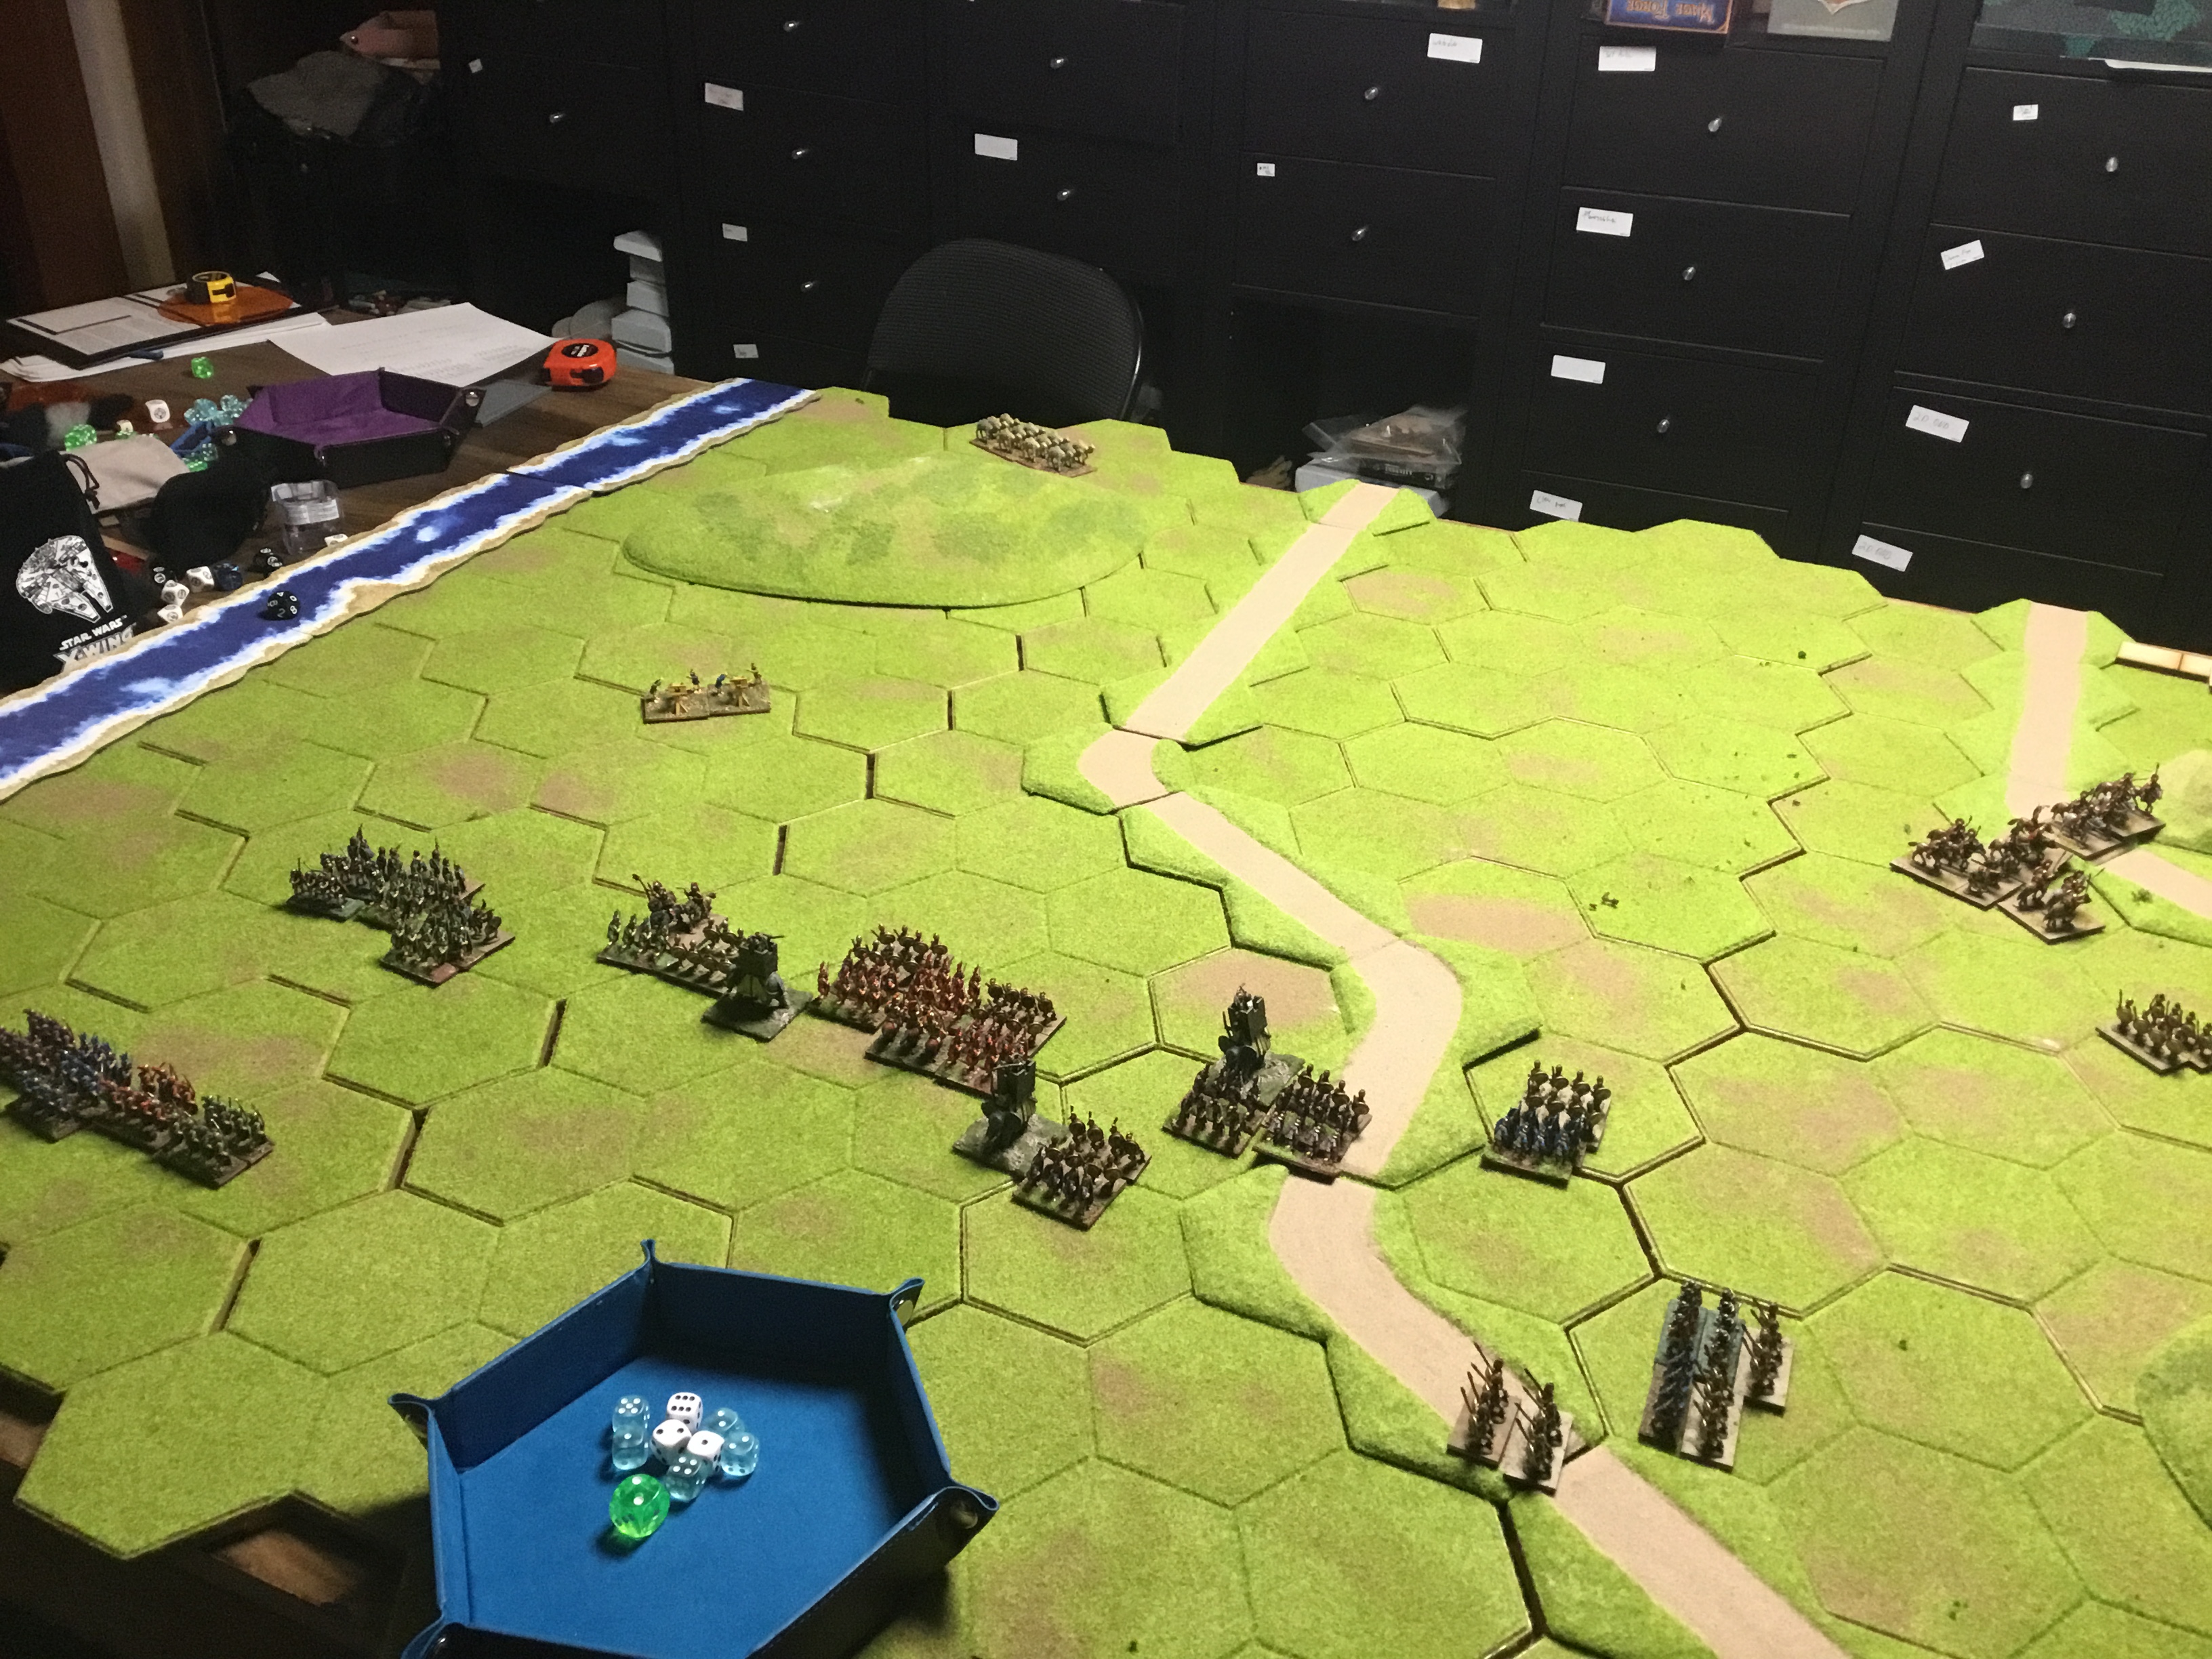
For terrain, a large grassy hill with enough room for the Yorkists to deploy on top.

Objecitves
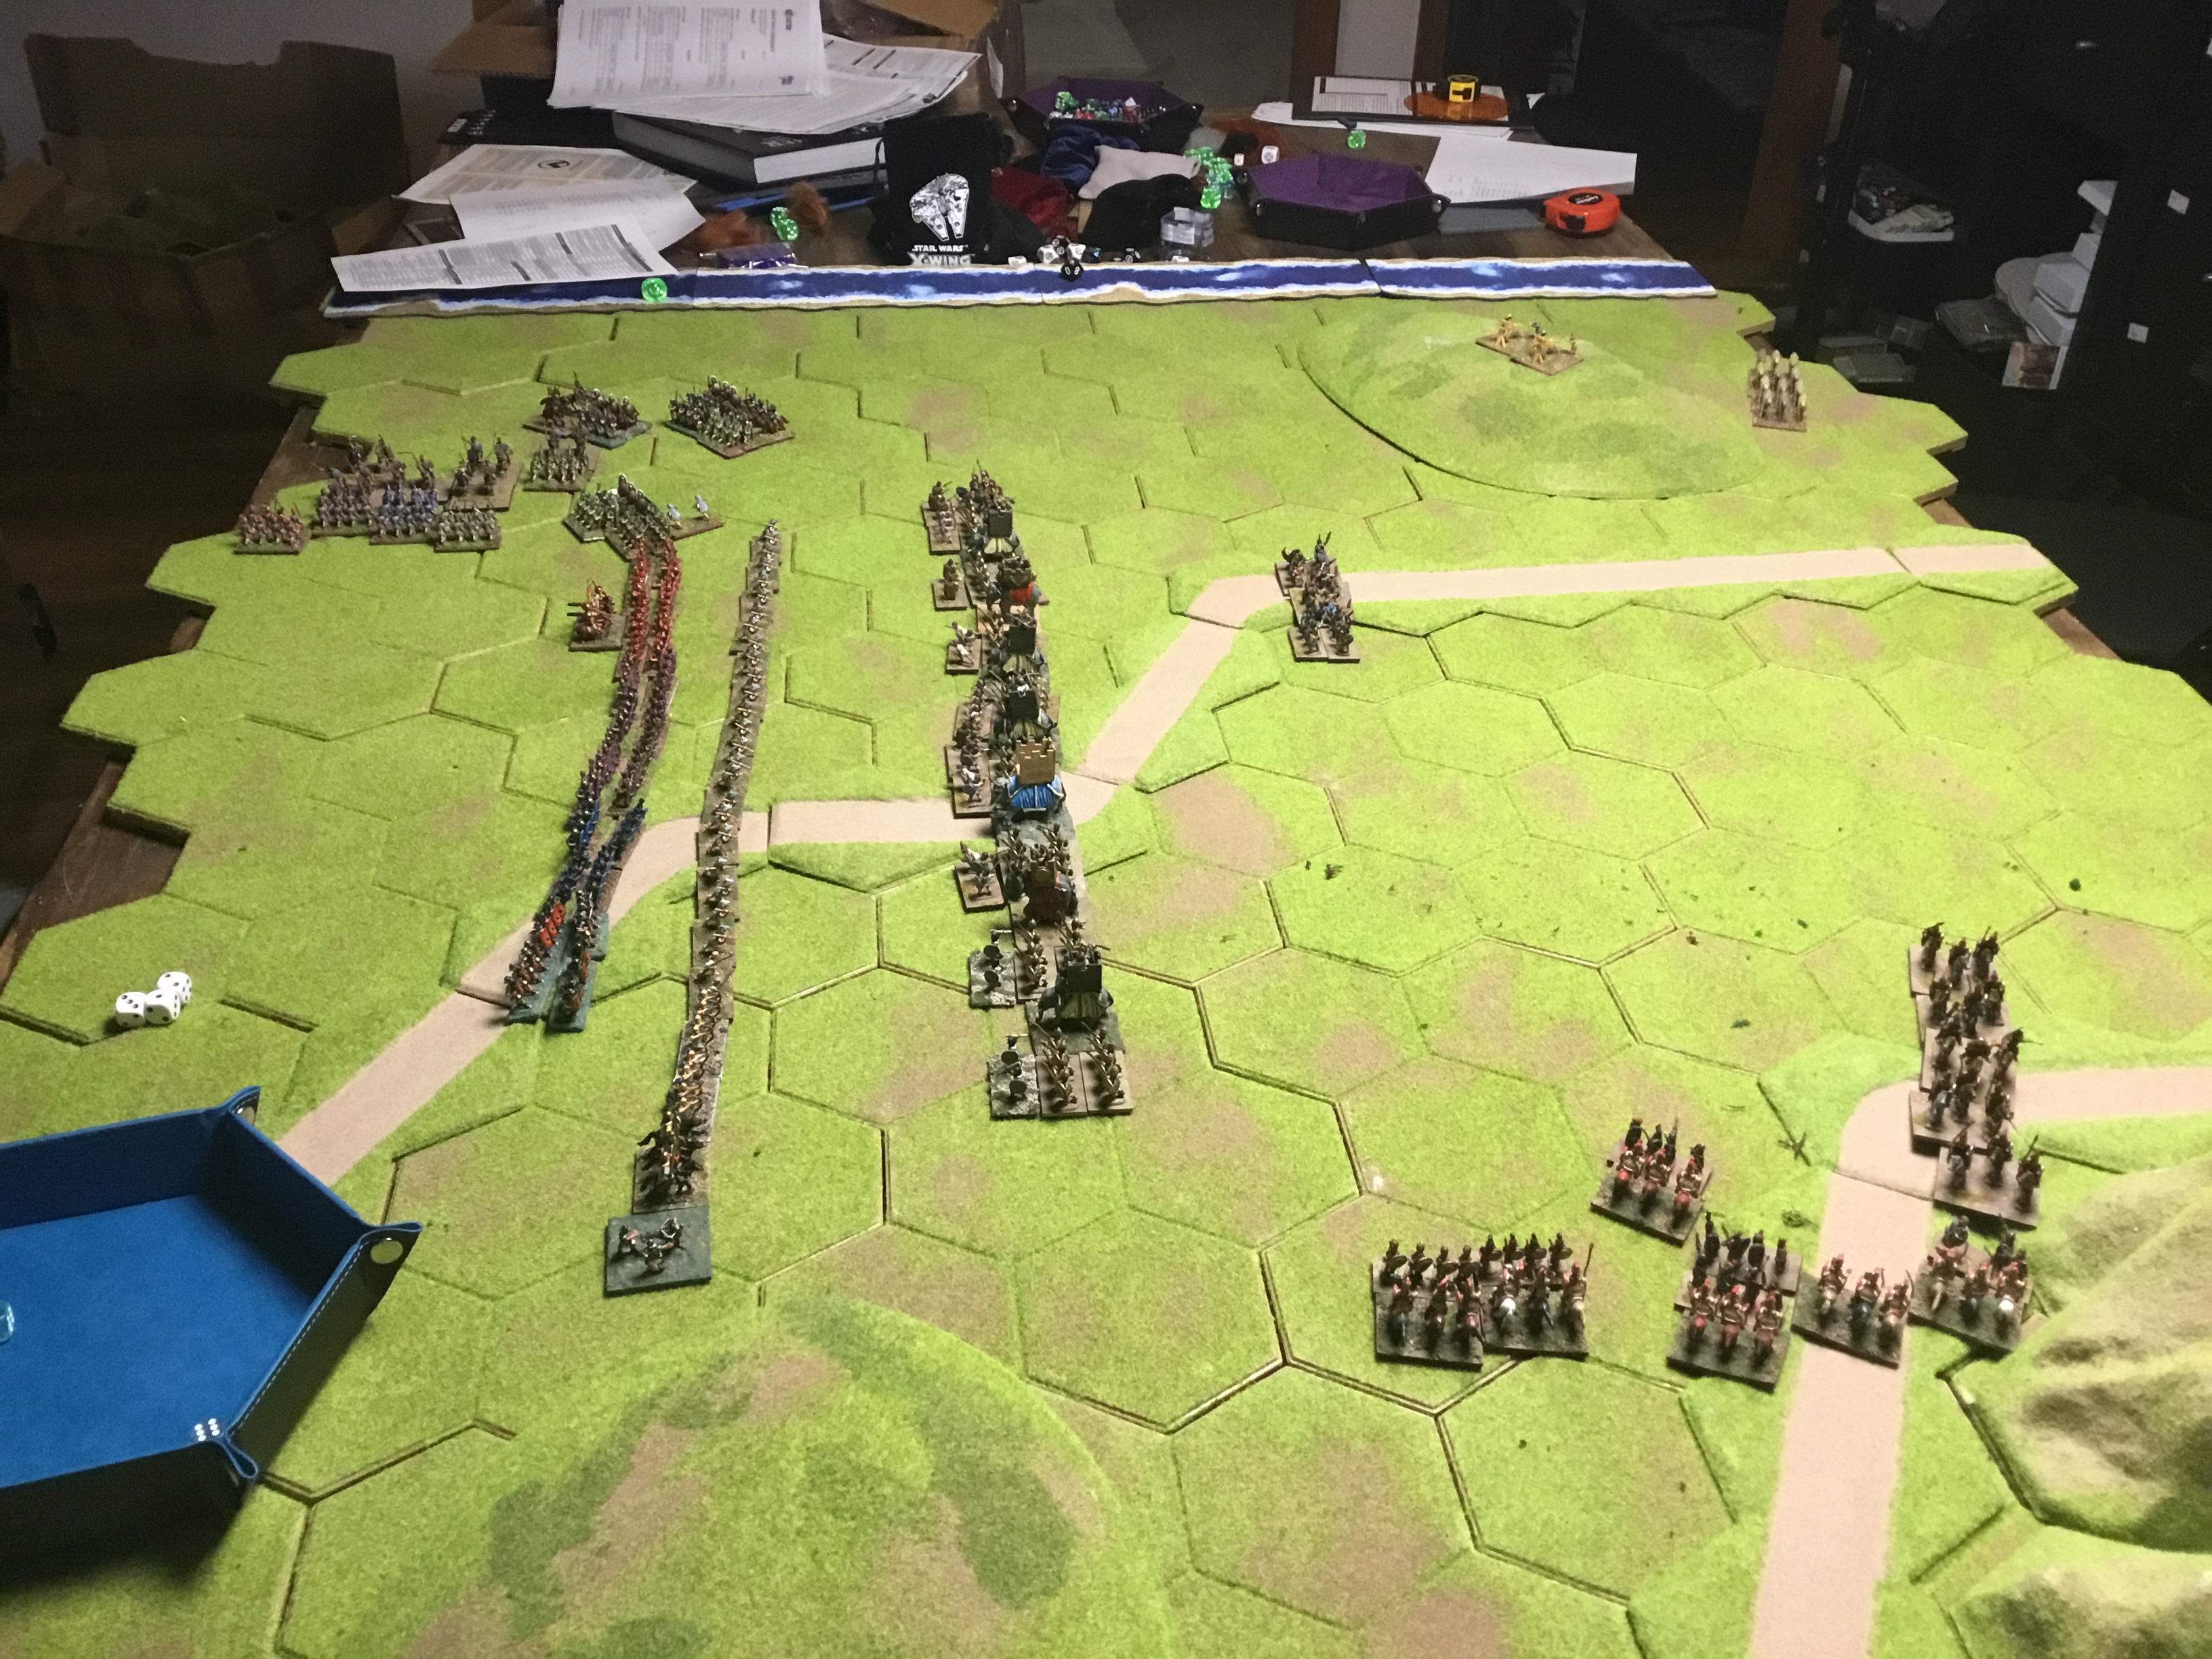
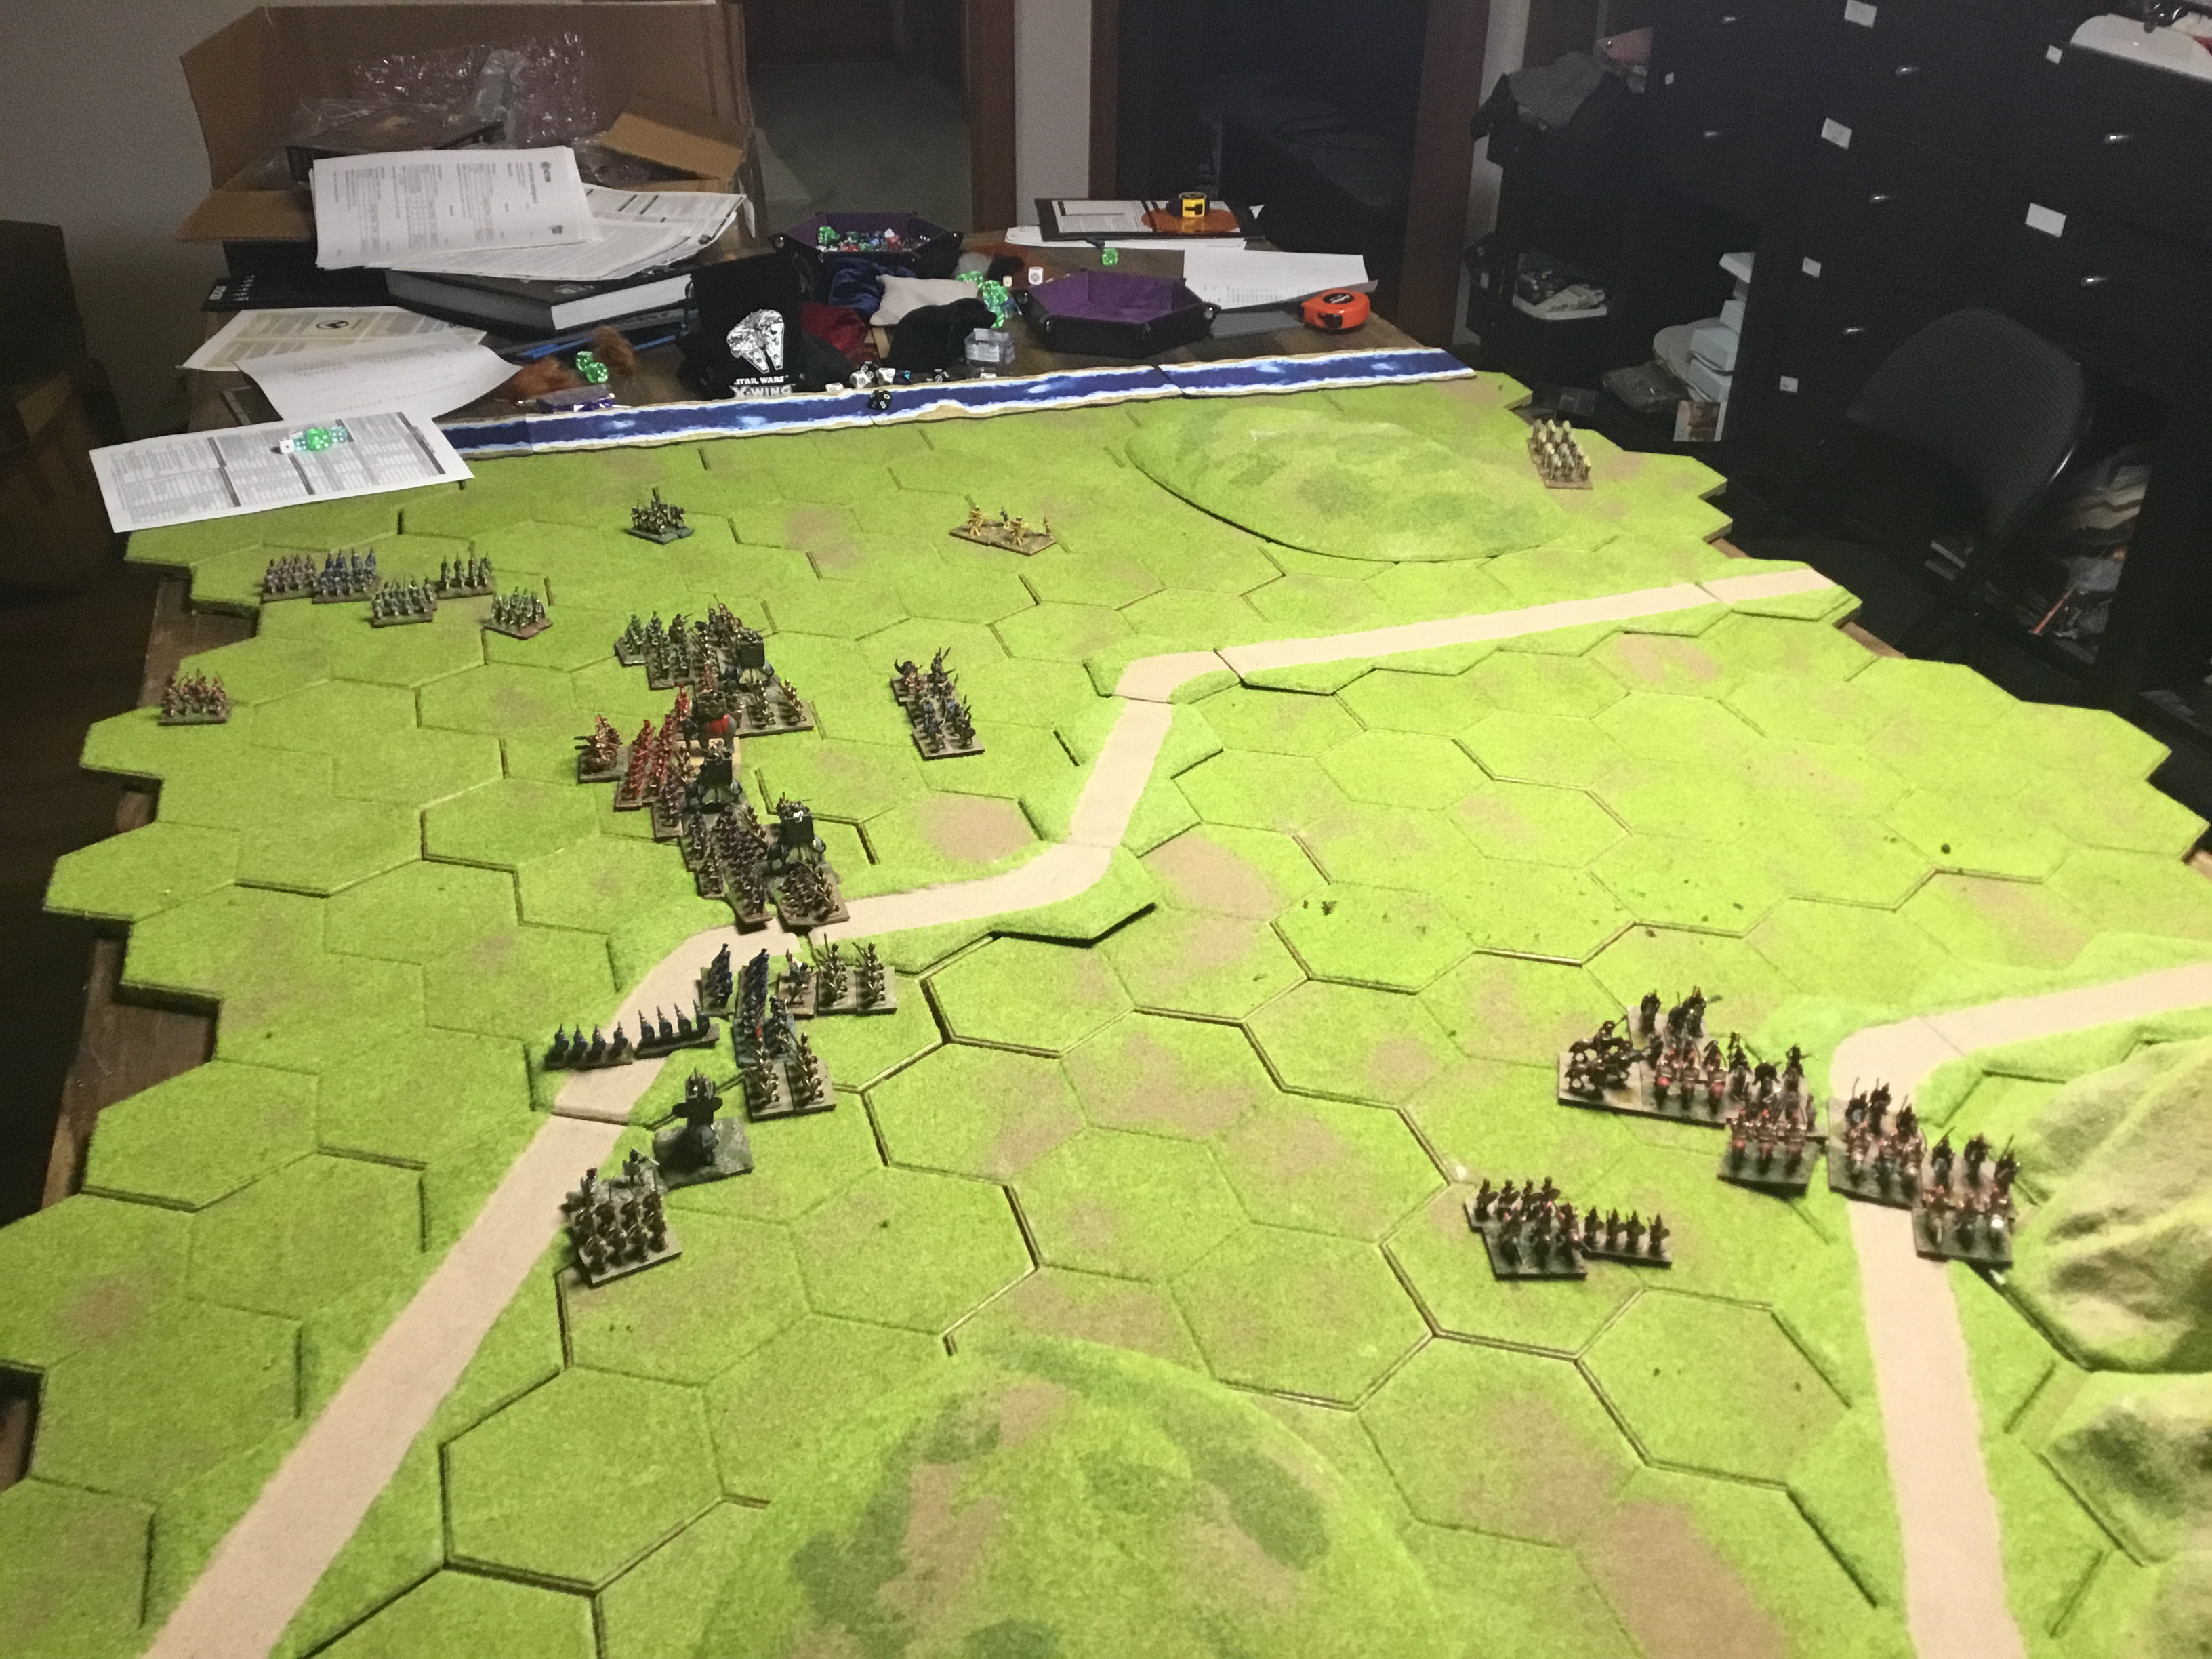
Each army must destroy the other.

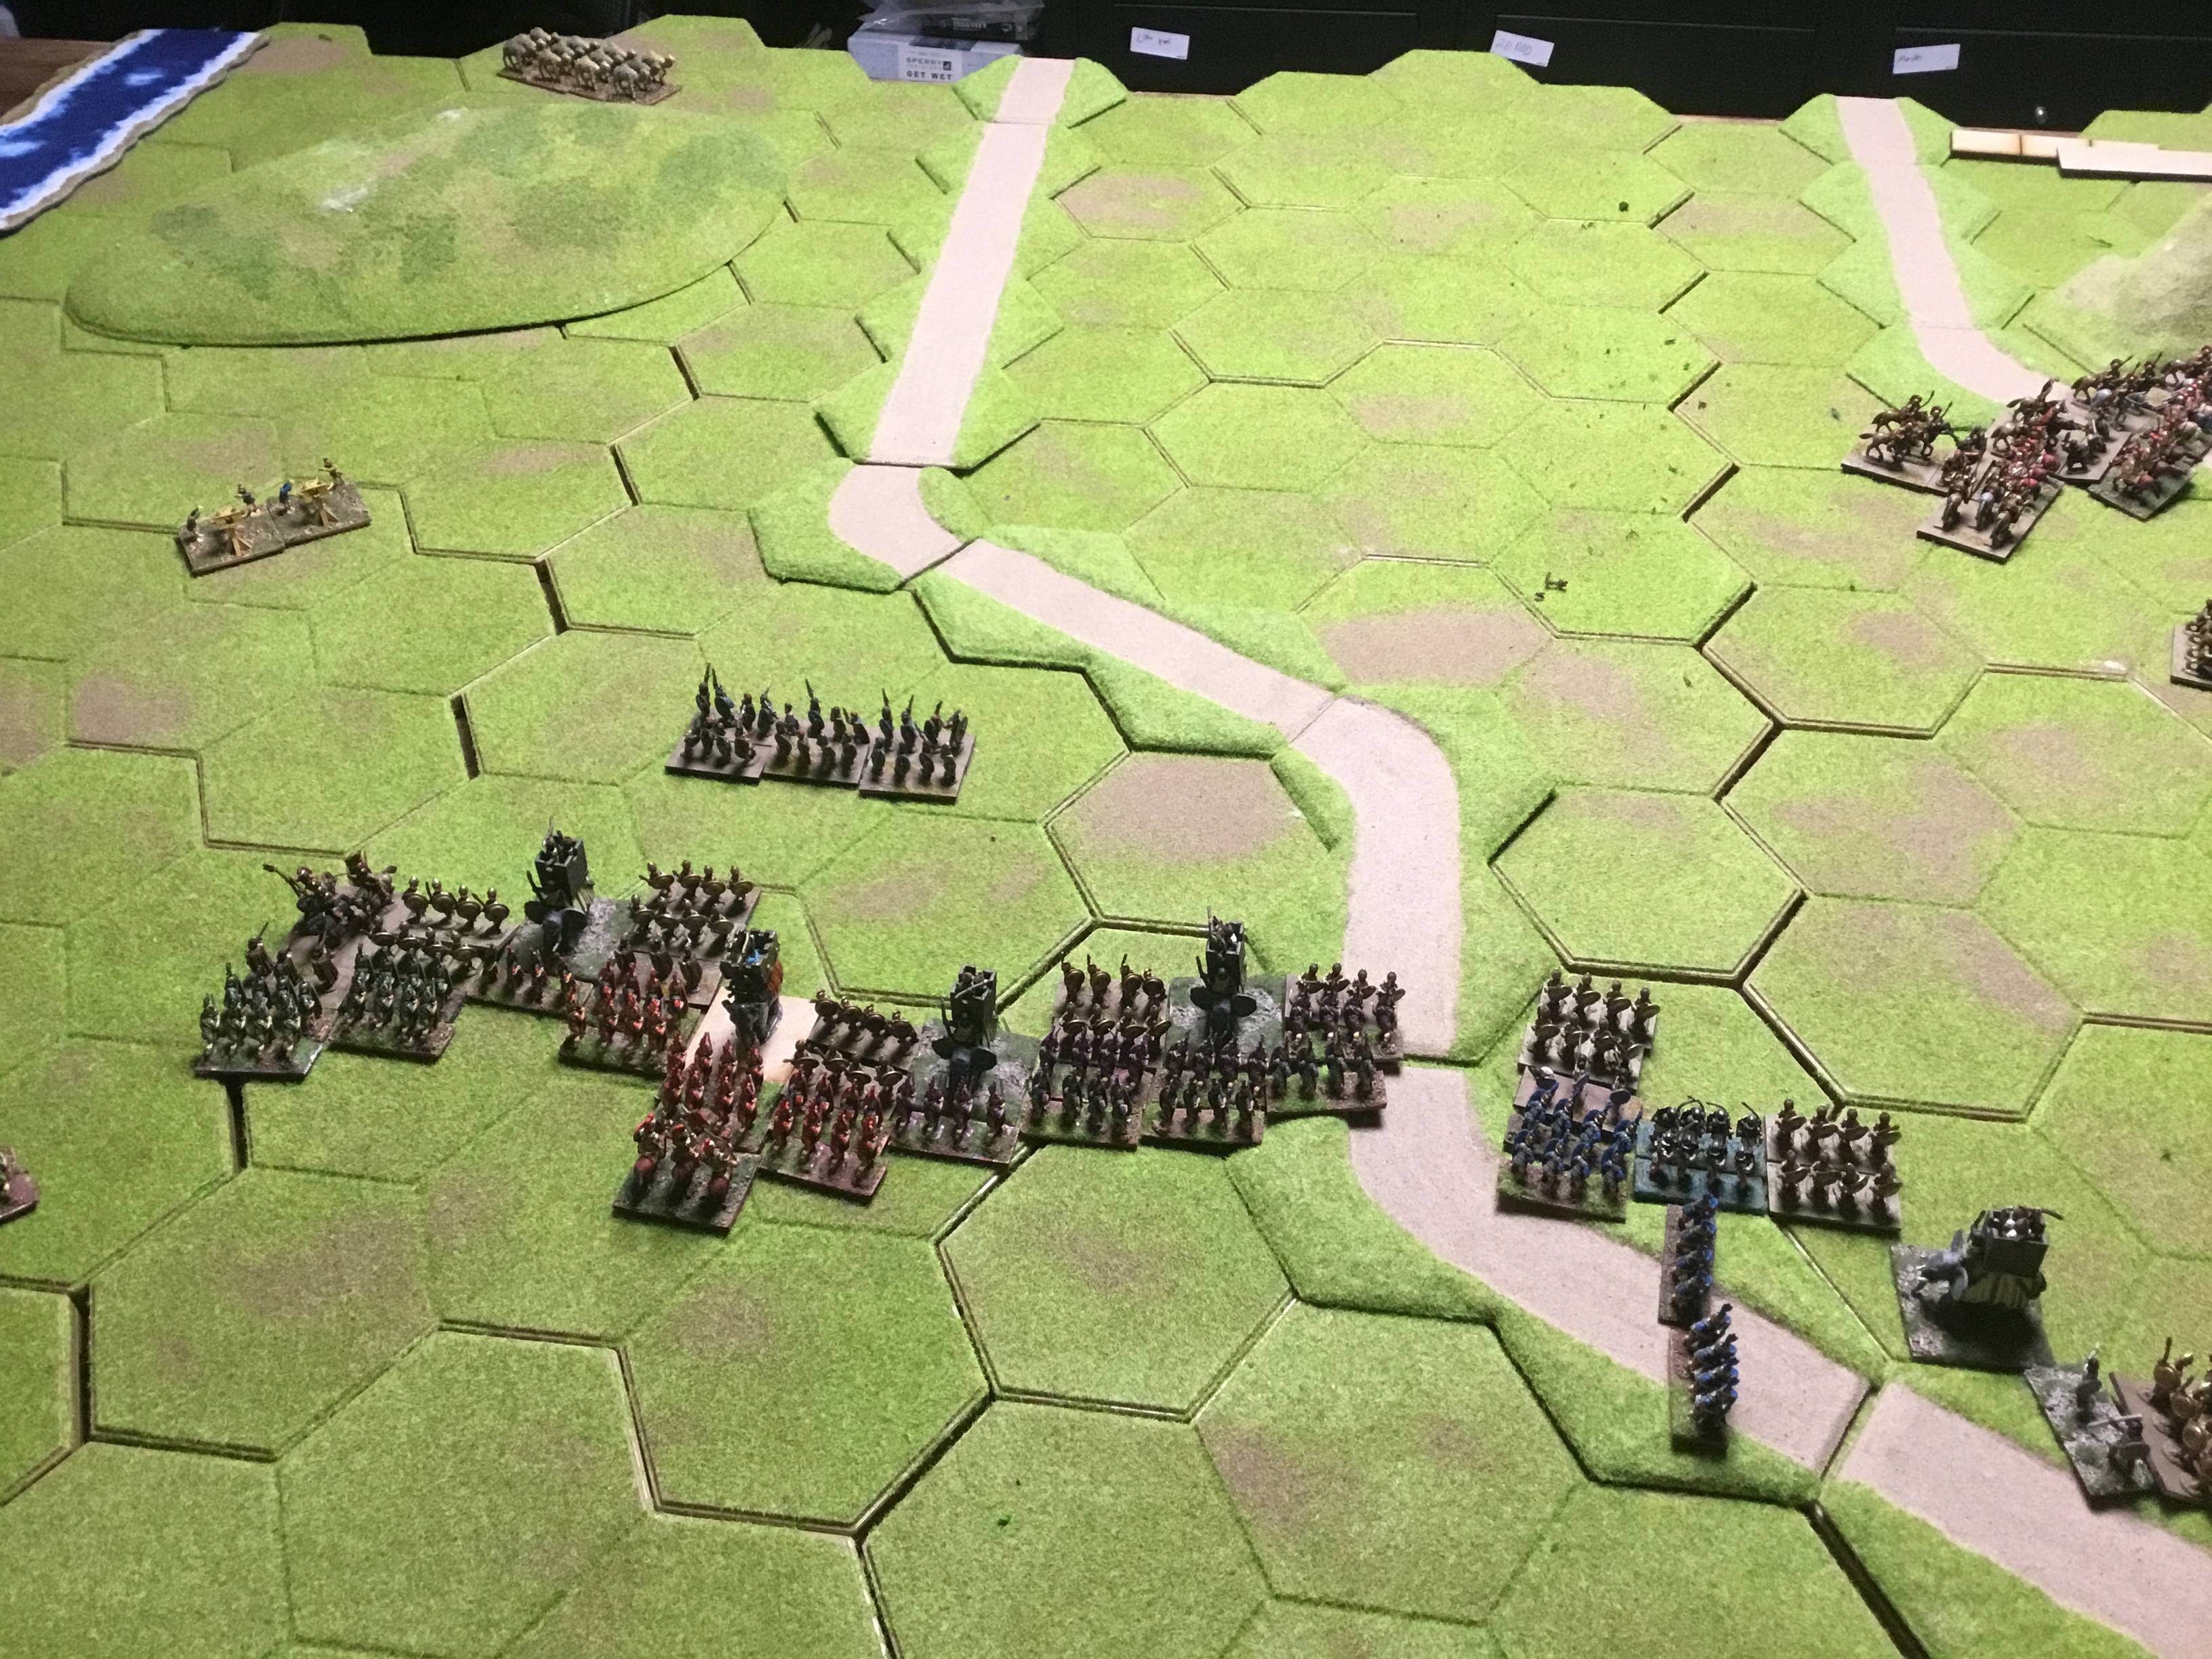
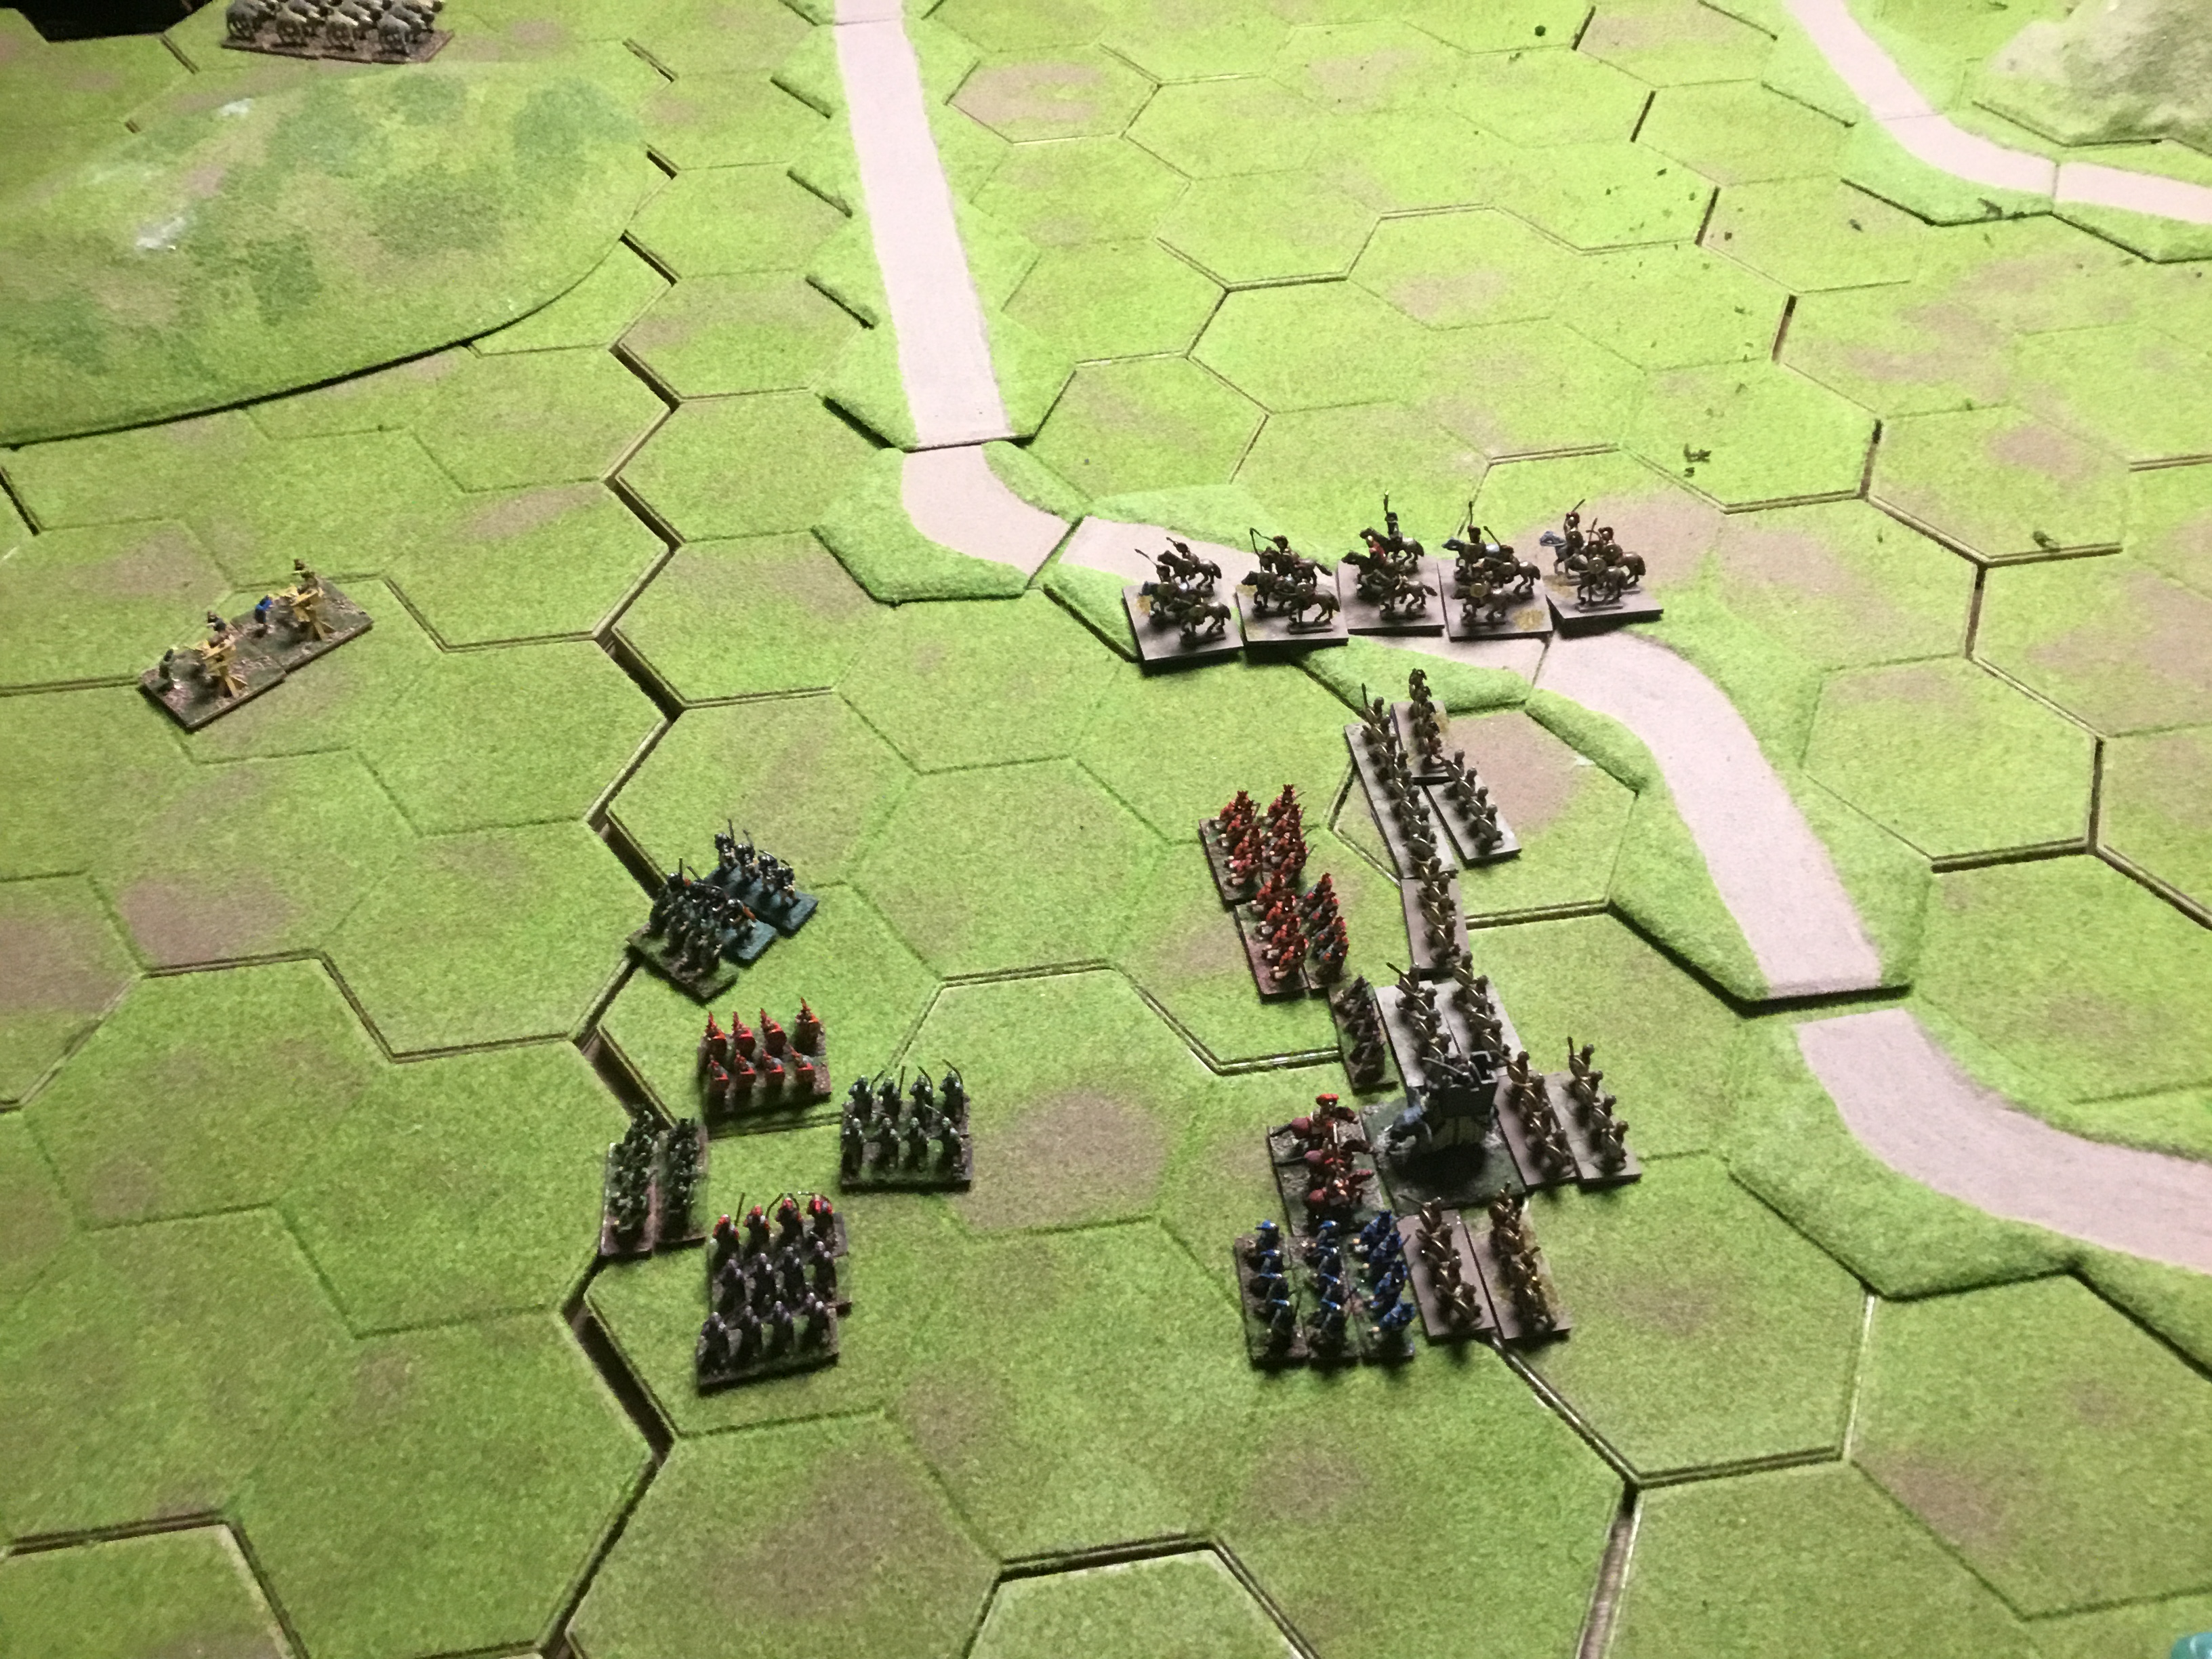
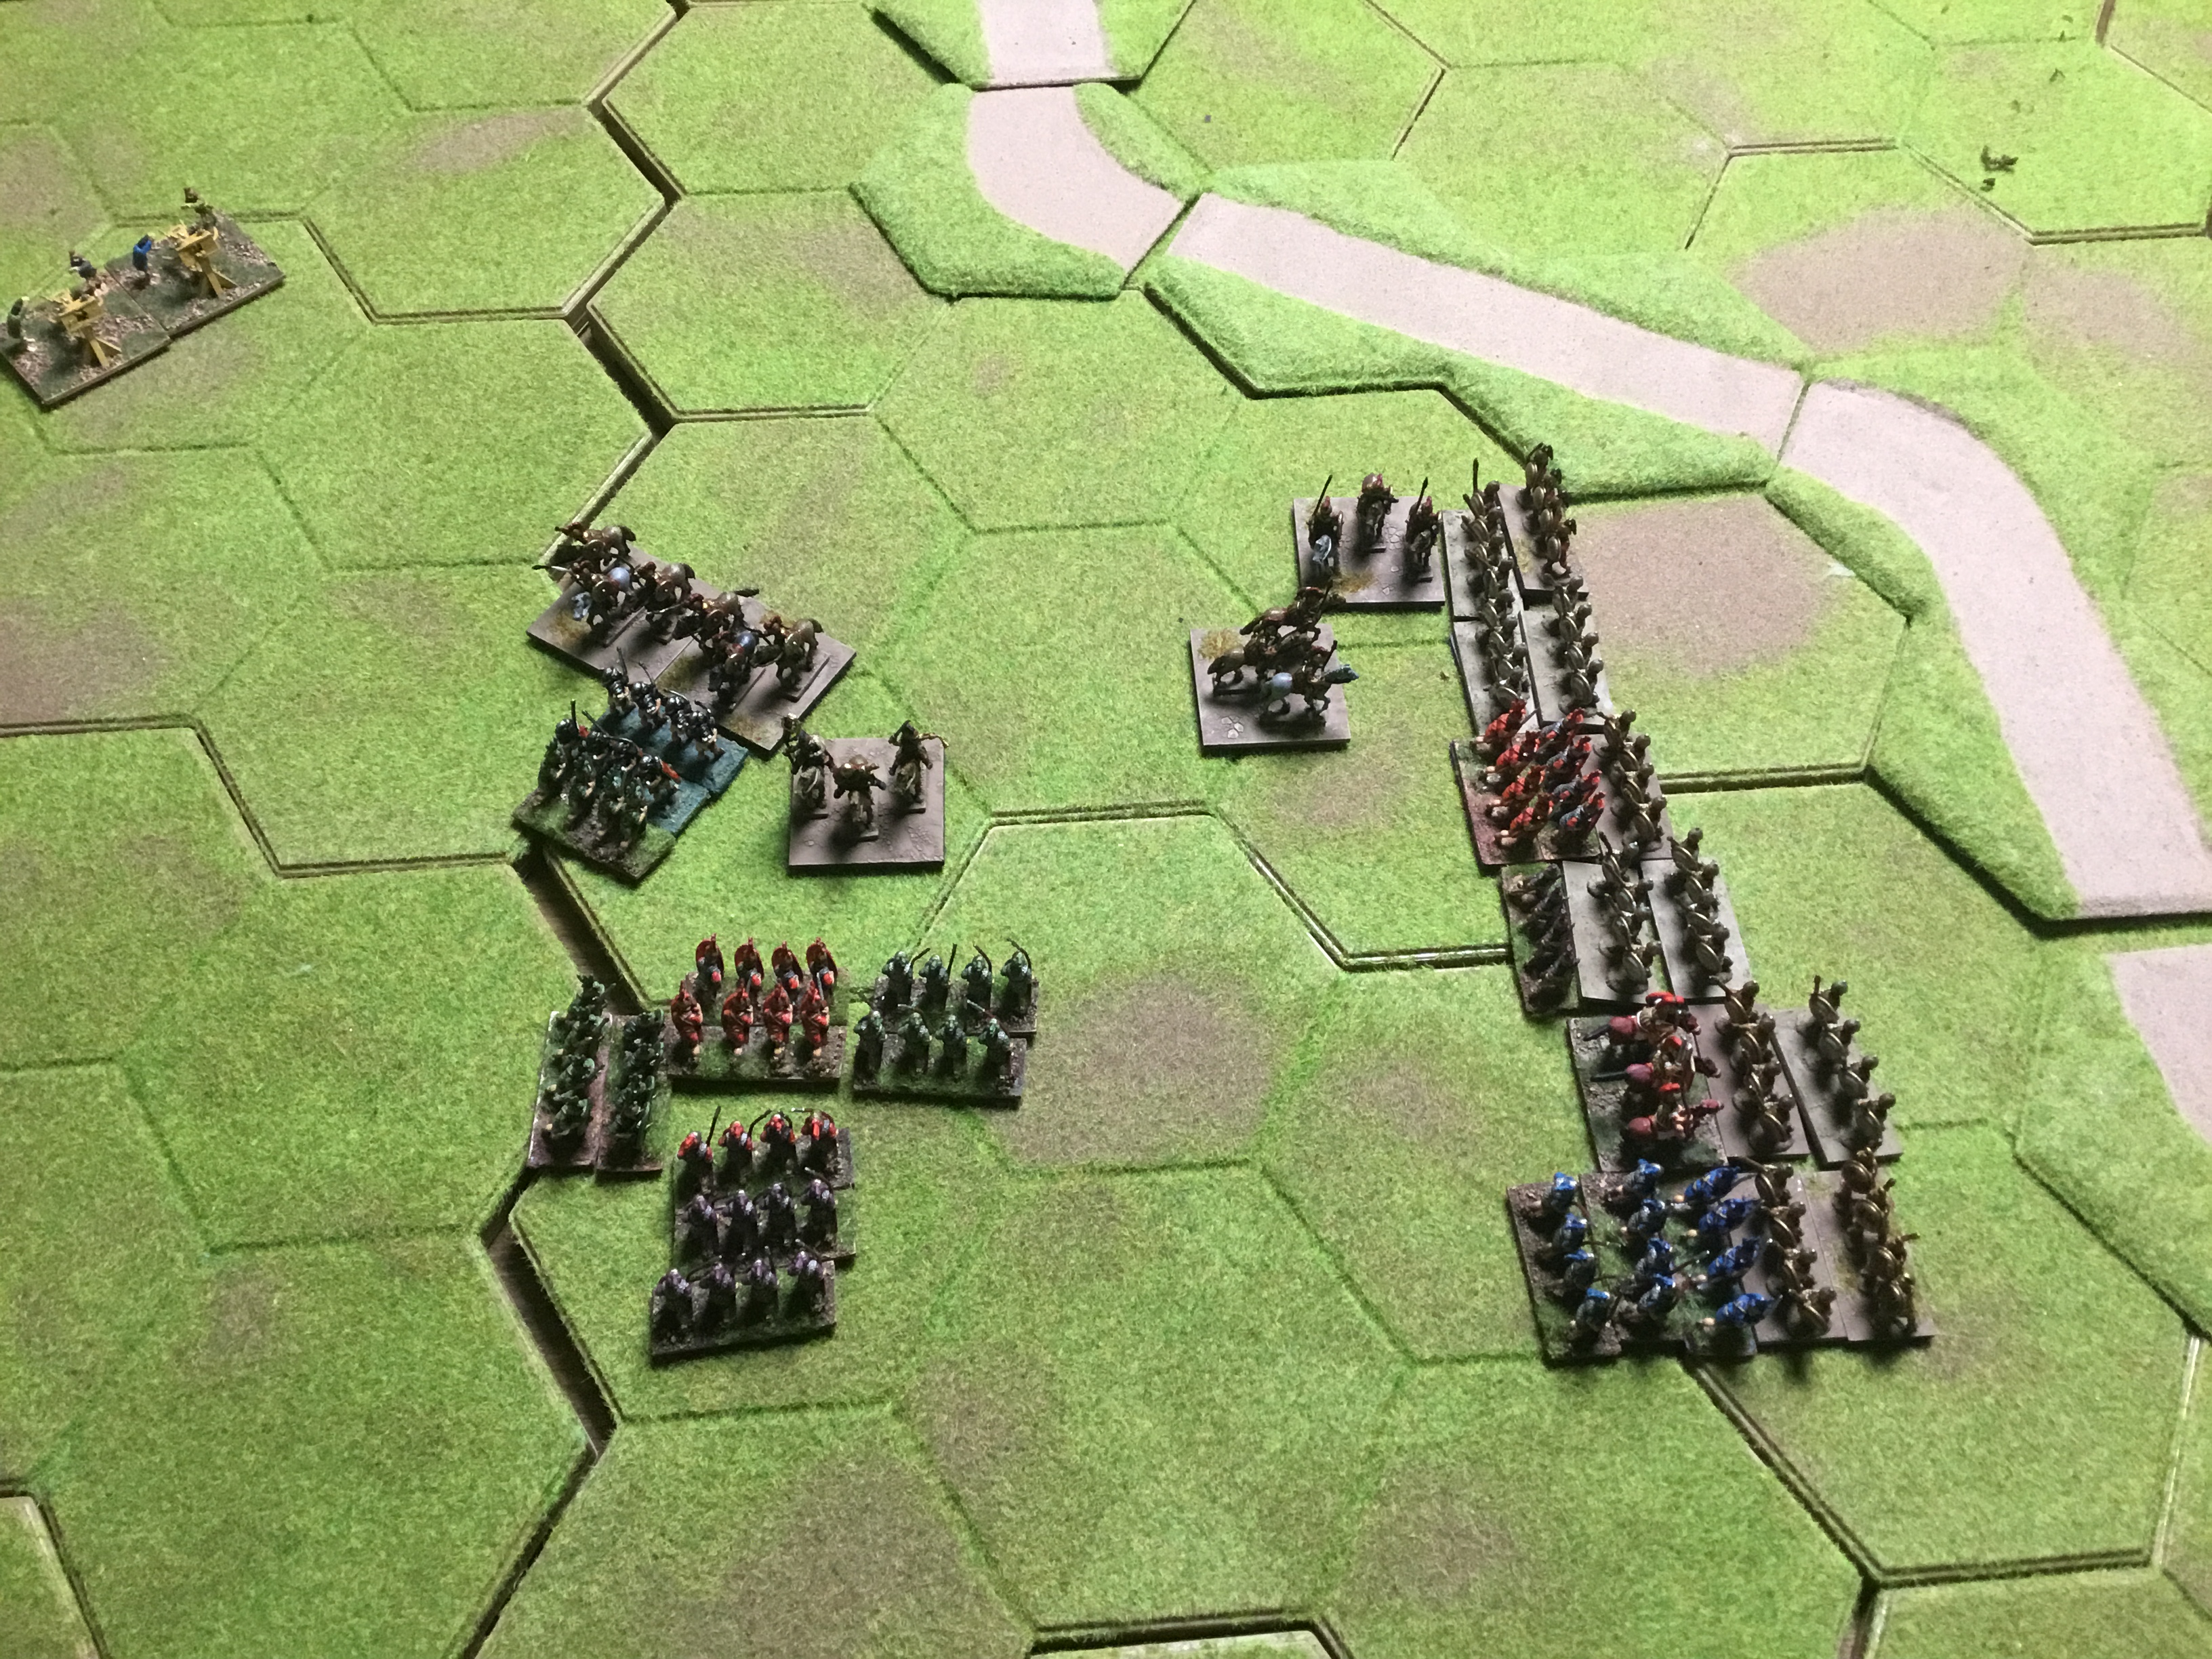
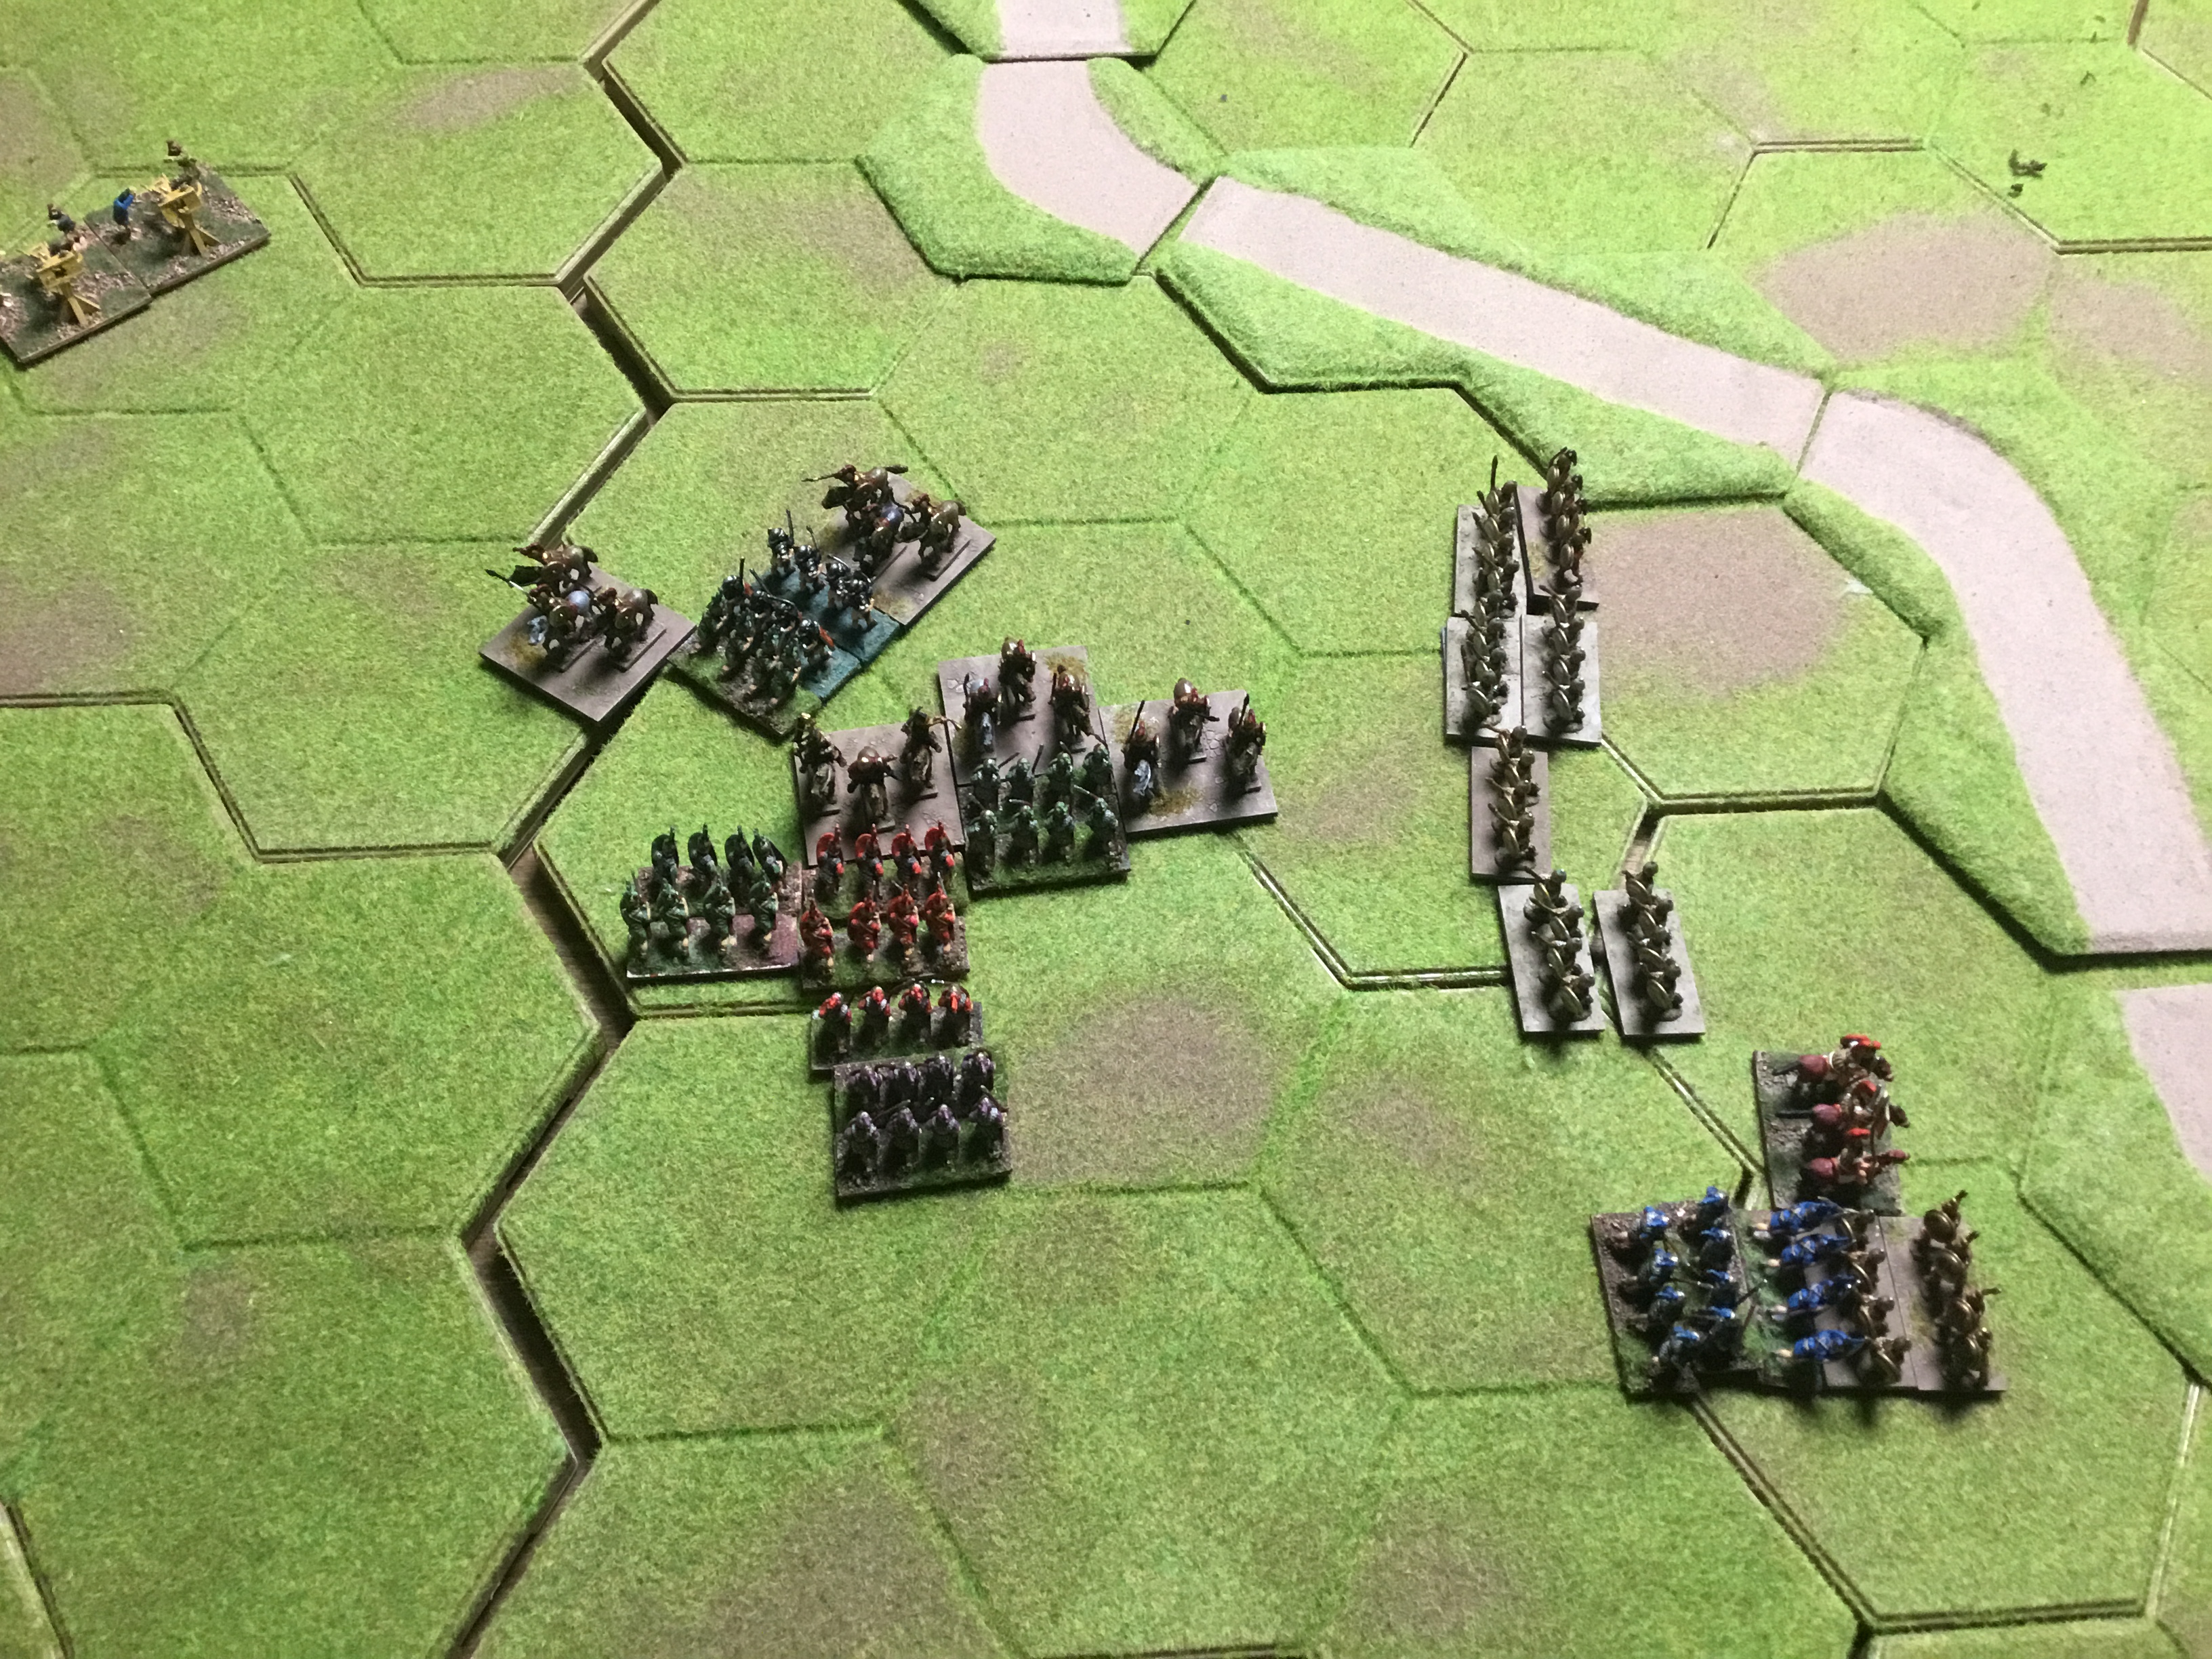
To set up, the Yorkists should take up a formation and position themselves at the top of a large hill, while the Tudors are at the bottom. The Tudors attack.

No Special Rules, unless you want to give the Tudors a Bombard or two.

June 15th 486 Battle of Soissons Wargame Scenario

On June 15th, 486, the Western Roman Empire was in its final stage of collapse. Syagrius of Rome was the son of Aegidius, who was preserving what was left of the Soisson region. The Franks utterly destroyed the tired Romans, who never again controlled any part of modern-day France.

This will be a straight-up engagement. Both sides had around 6,000 troops, and there are too few details to create a unique situation. This battle was wildly essential and led to the creation of the Frankish Empire, which still exists today.

Romans 6,000 soldiers commanded by Syagrius.

Franks 6,000 commanded by Clovis I Ragnachar.

Wargame
For use with DBMM, Hail Caesar, or any other large-format Dark Ages ruleset.
2 Players
6×4 Table

Army Lists for DBMM 400

Romans DBMM 2-83

C in C x1 Reg Kn 28
Sub General x1 Reg Kn 28
Equitates x4 RegCv 32
Legionarii x 8 Reg Bd 56
Auxilia Palatina x10 RegAx 50
Garrisson x6 RegAx 24
Foederati x21 Reg Ax 105
Foederati x7 RegKn 77

Franks DBMM 2-72

C in C x1 Irr Cv 17
Sub General x2 Irr Cv 34
Noble Cavalry x 10 Irr Cv 70
Foot Warriors x81 Irr Wbb 243
Skirmishers x8 Irr Ps 24
Archers x6 Irr Ps 12

No special rules, follow your standard historical wargame rules for this one.

June 12th 910 Battle of Lechfield Wargame

The first battle of Lechfeld on June 12th, 910, was pivotal during the early Hungarian invasion of Europe. The Hungarians were in their third year of invading the Kingdom of East Francia. HistroyMarche on Youtube has a very nice video and summary of the battle with preludes and after effects.

The battle turns out to be a very nice wargame. We start the game with the Francia army beginning to feel confident and the horse archers tired.

Ruleset DBMM
Table 6×4
Terrain Trees and Forests on the outskirts, the battle should be played lengthwise rather than widthwise.
Models Needed (see below)

Francia Louis the Child DMBB 3-53

15-17,000 men.
10,000 Spear Infantry
4,000 Archers
2,000 Cavalry

3 C in C 57pts
10 Milities Irr Kn 90 pts
72 Spearmen 216 pts
12 Archers Irr BW 36pts


Hungarians (Maygar) DBMM 3-30

No defined commander
8,000 Light Horse Archers

3 C and C or Sub Generals 57 pts
86 Bases of Irr Light Horse 344 pts

Set Up

The Francis army should be set up entirely on the field in a formation of the players’ choosing. The Hungarian army should have 50% of its army deployed near the Francia lines, with the remaining 50% hidden in the trees. The trees should gradually close in. The Hungarian player should select a point between 18″ and 12″ from his table edge, so that once the Francia player crosses that point, he can spring his ambush. Once the Francia player crosses that point, the other 50% of Hungarian forces will appear on either long table edge.

Objectives

The Francis army should do everything it can to win the battle before being ambushed. The Hungarian player must try to draw the Francis player in.

June 10th 1358 Battle of Mello Wargame

During the 100 Years’ War, French peasants attempted to rise up and remove the nobles in the Northeast of Paris. 4,000- 5,000 lightly armored peasants attacked noble houses and castles, stealing their wealth. The Nobles of the region responded in force. In real life, the French killed the peasant leader, and the lines broke nearly instantly. What if they hadn’t?

Wargame;
Game System DBMM
Players 2
Table Size 4×4
Models Needed Peasants 30 Elements of horde, 8 elements of archers 1 command (cavalry), for the nobles 10 elements men at arms 4 elements dismounted knights 2 commanders, and 4 elements crossbows.

Set-Up
The peasants should be at the top of a hill, with archers in front, infantry behind, and the cav unit acting as a reserve. They should be in a strong position.

The French should set lines and approach as necessary.

Objectives

Kill or break the opposing army.

DBMM 500 Pts Rome vs Carthage

To give me a break from the Bolt Action / Horus Heresy indoctrination. I put my collection of 15mm ancients to work and set up a game of DBMM.

Conclusions

I forget how balanced DBMM actually is. I am very new to the game and don’t have all the rules down. Especially having to teach myself. But the game was fun, over 3 hours tops, and hinged on critical moments. It gives me the feeling of an actual battle.

Pip allocation is a huge factor. Huge. A bad pip roll will ruin the engagement for you.

Carthage did win. It was a near thing, any given combat failure would have resulted in a different result.

I picked Rome 216-203 BC vs Carthage
After the roll, Carthage was the aggressor.

C and cRegCv (O)Hannibal reg cv15353
Sub generalRegLH (O)Reg LF22550
lybian spearmenRegSp(O)reg sp o18590
numidian calvIrrLH(O)irr lh o8432
merc javelinsRegPs(S)reg ps9327
libyan calvRegCv (O)Reg cv o4832
Bolt shootersRegArt(O)Reg art2816
CampsIrrBge(I)Irr beg144
span merc calvRegLH (O)reg cav o4832
span merc foot caetratiRegPs(S)reg ps248
span merc foot scutarriRegAx(S)reg ax12560
elephantsIrr El (I)81296
QtyPoints500
C and cRegCv(O)Reg cv12828
Sub generalRegCv(O)Reg cv12727
Ally generalRegCv(O)Reg cv11818
roman cavRegCv(O)reg cv5840
roman hastatiRegBd(O)reg bd367252
veletetesRegPs(S)reg ps18354
triariRegSp (S)reg sp9763
greek archersRegPs(O)reg ps2510
artyReg Aty (O)arty188

The Carthage Commands were;

Hannibal- Libyan Cavalry, Numidian Cav
Sub General 1- Spearmen, Elephants, Bolt Shooters, Mercenary Javelins
Sub General 2- Span Mercenary

Rome Commands
C and C- Hastati, Triari
Sub General- Cav and Arty
Ally General, Veletetes and Greek Archers

Set-Up

I played on a 6×4 board with a couple of hills and roads (randomly generated) and a river.

I put the Romans in the triple-axis formation with a skirmish screen. The Cavalry took the right flank.

Carthage was set up with a single skirmisher, two elements of spears, then an elephant the next block over. To their right flank were the cavalry and, in reserve, the Spanish mercenaries.

Bound 1

Carthage had an amazing Pip roll which allowed their forces to push up the field rapidly. The Roman dice were 1, 1 and 2. The cavalry immediately put the Romans under pressure. A deep analysis would reveal the battle was lost on this first bound.

Rome did what it could with their movement. They pushed forward the skirmish screen. Took advantage of the weak left flank on the Carthaginian side with an aggressive cavalry move.

Bound 2

Rome seized the initiative and maneuvered their triari to take on the Carthage Cavalry. Carthage had to use their largest dice to counter the Roman cavalry threat.

Bound 3

The two flanks become a mess. Spanish mercenaries take on the Roman cavalry hoping to delay long enough so the main force can break Roman lines. The Carthage Cavalry nears victory when the triari arrive.

Bound 4

I must have missed the picture… the lines have crashed together, the Carthaginians sweeping away the Roman skirmish screen.

Bound 5

The Spanish mercenaries are holding while the Carthaginian Cavalry attack failed miserably. The Roman lines are on the brink of collapse.

Bound 6

Both sides have lost commands, and the Roman Cavalry and Spanish Mercenaries continue their death grind. The Romans stabilized the line using the left over trari.

Bound 7

Technically, battle was over at this point, Carthage destroyed enough units to win. I kept playing because I was enjoying myself.

A few more images are below of the continuation. I will most likely play another game soon, Greece vs Persia, or maybe 100 years war. We shall see.